It is easy to enlarge a mosaic pattern or drawing even if you have no confidence in your ability to draw. All you need is a ruler and a pencil.
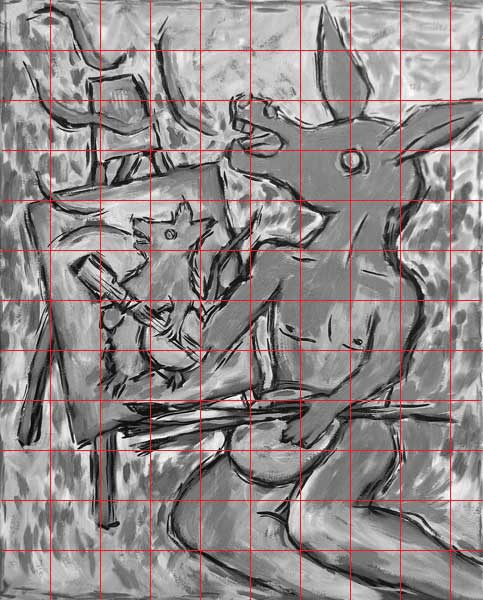
For an example, I will show how to enlarge a back and white copy of a painting of mine from years ago called “Singing Love Song to My Art.”
Verify Proportions
The larger surface should have the same proportions as your drawing. You can verify proportions by dividing the width w by the height h of your surface. If this ratio is the same as w / h for your pattern or drawing, then the two have the same proportion.
proportion = width w / height h
In our example, the pattern has a ratio of 0.805.
= 483 mm / 600 mm
= 0.805.
If your surface has extra space in one dimension, you can always center your pattern and have extra background space on either side.
Draw A Grid On Your Pattern
Use a ruler to draw a grid on your pattern or drawing. The number of grid lines and the spacing between them can be whatever you want, as long as they are spaced evenly, but I usually use about 10 or 12.
In my example, I want the grid to be 12 cells high, so that means 11 lines spaced at
600 mm/12 cell
or
50 mm/cell.
Note how the contents of each cell are very simple, just a line or two, something extremely easy to copy. There is no drawing required. Just a few simple lines and curves that anyone who can write should be able to copy. In fact, drawing the grid on the larger surface requires more thought than copying what is in each cell.
If your pattern still has too much detail in each cell of the grid, then you need to use a finer grid.Try a grid that is say 20 cells high.
Draw A Grid On The Larger Surface
The next step is to draw a grid on the larger surface that has the same number of lines as the grid drawn on the pattern. To do this, you need to calculate how far apart the lines need to be spaced. This is found by calculating a ratio for the pattern:
height of cell / height
= 50 / 600
= 0.0833
Let’s say you want to draw your pattern on a surface that is 215 inches high. How far apart should the lines be spaced going up the height of the surface? To find this, multiply the height of the surface by the ration you calculated for the pattern:
215 inches * 0.0833
= 17.92 inches
In our example, the width of our cells on the large surface should be the same because we used a square grid.
Note that a ruler is less useful for drawing the larger grid, but yard sticks and t-squares and larger straight edges can be used in the same way.
Copy Each Cell
Now you are ready to copy a few lines or curves from each cell. Anyone who can print their name in neat block letters should be able to do this. If each cell still has too much detail to be copied easily, consider using a finer grid that divides the pattern up into smaller cells.
JPEGs and Digital Photos
Note that you don’t have to start with paper copy of a pattern. You can use digital images as your pattern. In my example above, I used a digital photograph of my painting as the starting point. I created a black and white copy of it using Adobe Photoshop Elements and then drew my grid using Microsoft Paint. Instead of measuring the drawing with a ruler, I used its dimensions in pixels, and I turned on the ruler and grid feature of Microsoft Paint to know where to draw my lines. If you hold down the shift key as you draw in Microsoft Paint, the line will be perfectly straight.
Leave a Reply