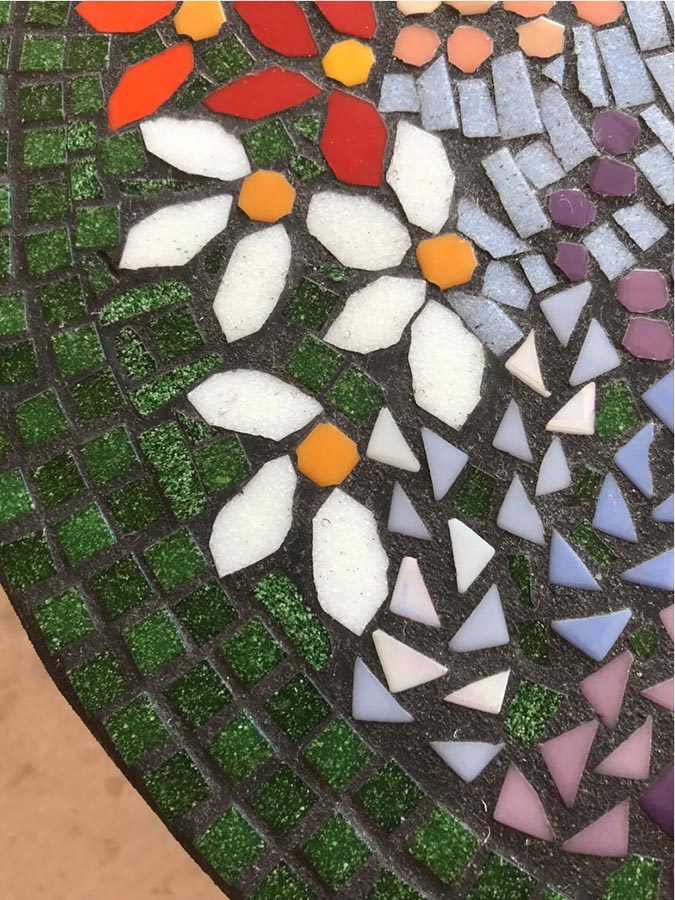
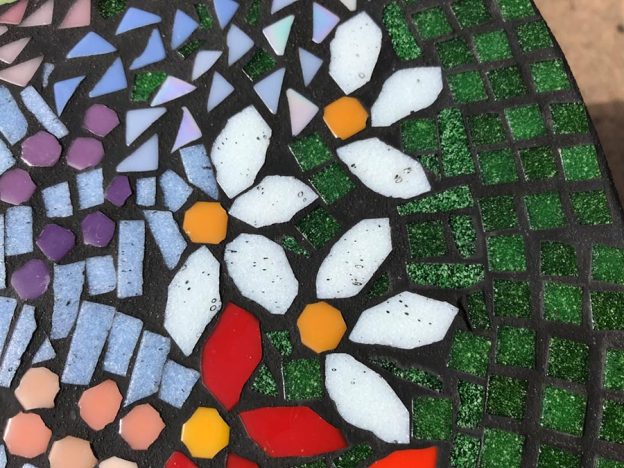
Vitreous glass tile has a lot fewer surface pits than it did a few decades ago, but it still has some, at least in most brands. Grout can sometimes lodge in these superficial pits if you don’t adequately sponge and haze the mosaic after grouting, and many novices find this problem particularly distressing.
The good news is that the problem can be fixed easily, and it can be avoided for the most part by correctly sponging and hazing the mosaic during the grouting process.
Avoiding The Problem
You do NOT need to find vitreous without pits to avoid the problem of pit staining.
Keep in mind that the same vitreous tile is used as an architectural covering for thousands of square feet at a time, and so common sense tells you that there has to be a way to get grout out of pits without a large amount of labor.
I feel the need to stress that point because I receive emails from beginning mosaic artists who are desperately searching for vitreous glass tile that is perfectly smooth without the occasional pit: You do NOT need to find perfectly smooth tile.
Rather than limit your selection by such an unnecessary constraint (and spending significantly more than you have to), I think it is better to learn basic techniques and how to work with common materials.
But, it takes a few mosaics before a person has a feel for how much rubbing can be done with a barely damp sponge before you strip the grout line and expose grains of bare sand.
Sometimes the AC or central heat or sun or wind dries things out and forces you to grout faster than you would like, and sometimes you are just too worn out after grouting and cleaning up from that to spend enough time rubbing the mosaic with a barely damp sponge. That is why there is a way to fix pit staining when it happens.
Fixing the Problem
Recently artist Julie Landberg emailed us about a problem with grout in the pits of her mosaic table top. The problem was particularly visible because the tile was white and a nice black charcoal grout had been used.
I recommended our usual method of using cotton swabs and vinegar to surgically clean the pits, and I explained how she needed to work quickly and rinse the mosaic thoroughly to avoid the possibility of damaging the grout line. Sometimes a single drop of vinegar will get on the grout line and “bleach” out a spot by eating up the pigmented grout and exposing the lighter colored sand.
Julie emailed me pictures of the cleaned up mosaic, and said that she also used baking soda in the cleaning process by dipping the vinegar swab in the baking soda before using it to scrub the pit.
The baking soda not only neutralizes some of the acetic acid in the vinegar (making it less aggressive) but it also acts as an abrasive. This makes it easier to clean the grout in the pits but less likely to damage the grout line unintentionally.

A Warning
If you drip vinegar on a chip of marble or a piece grout, you can hear the acetic acid dissolving the calcium carbonate and see the fizzing bubbles of gas escaping, That is how strong vinegar is, and you have to use it quickly to avoid damaging the grout lines in the mosaic. It will take out the good with the bad. Work quickly and rinse thoroughly.


Leave a Reply