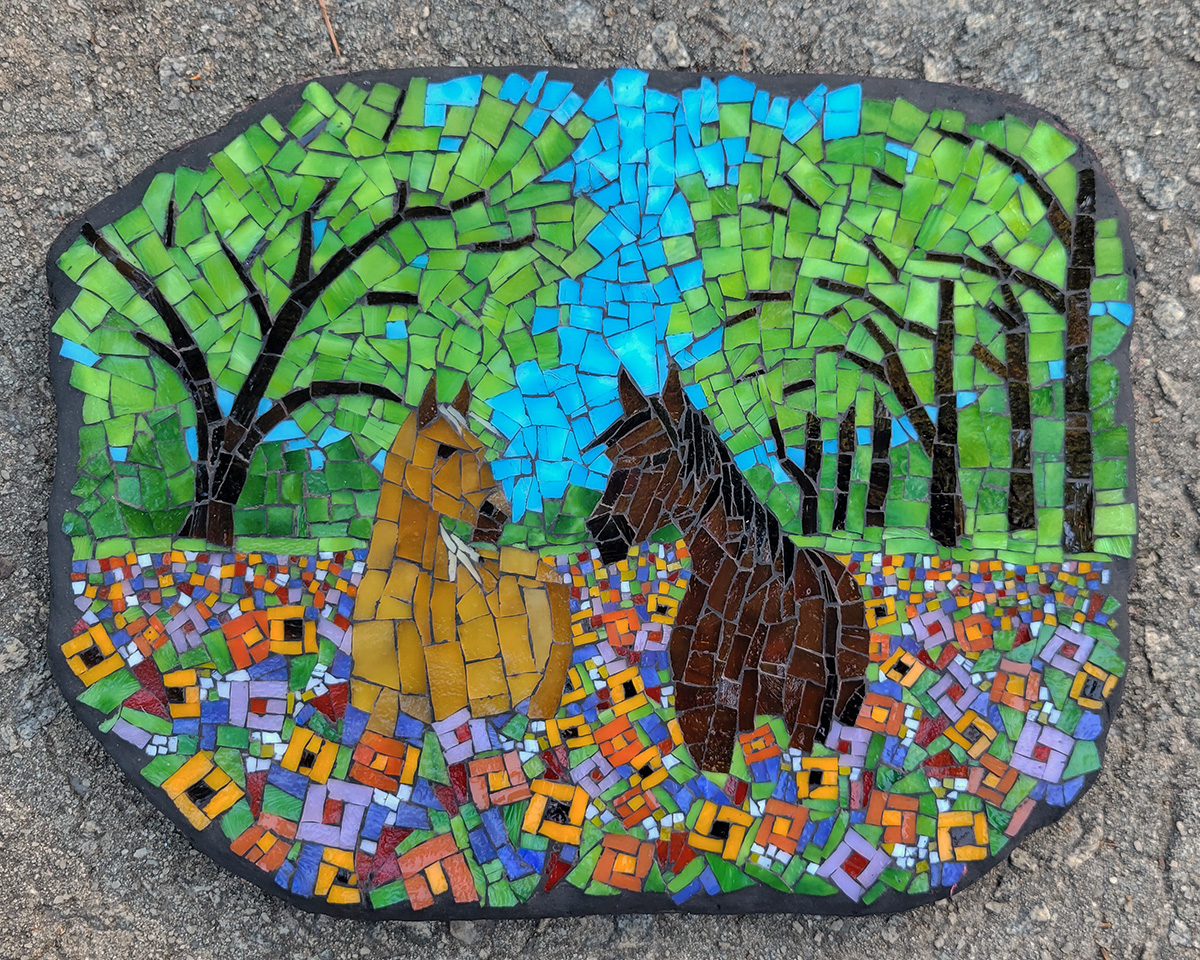
I finished my latest miniature mosaic: Horses in Wildflowers. It’s about 10 inches wide and mounted on a reinforced mortar stone, which is my backer of choice.
The grout is charcoal black in color, which is my go-to color for grout.
The grout is non-sanded because my grout gap is incidental and thin, the tiles being placed as closely together as possible. What grout gap there is comes from the irregularities of the shapes and edges, not from intentionally leaving a gap.
Color and Lighting
Diffuse sunlight is best for photographing artwork. The light is white light and includes the full visible spectrum, particularly blue light.
Most indoor light sources are “warm” in tone and deficient in blue light.
The following photo of the mosaic was made outdoors under indirect sunlight:
The following photo was made of the same mosaic indoors under residential light fixtures. Even though the light wasn’t particularly warm compared to most residential lighting, the colors in the photo are noticeably warm in tone:

Backer and Mounting
First I cut a paper template from an outline of the mosaic.
Then I cut two plies of 1/4-inch hardware cloth and two plies of 1/2-inch hardware cloth using a pair of sheet metal snips and the diagonal cutting pliers shown below:
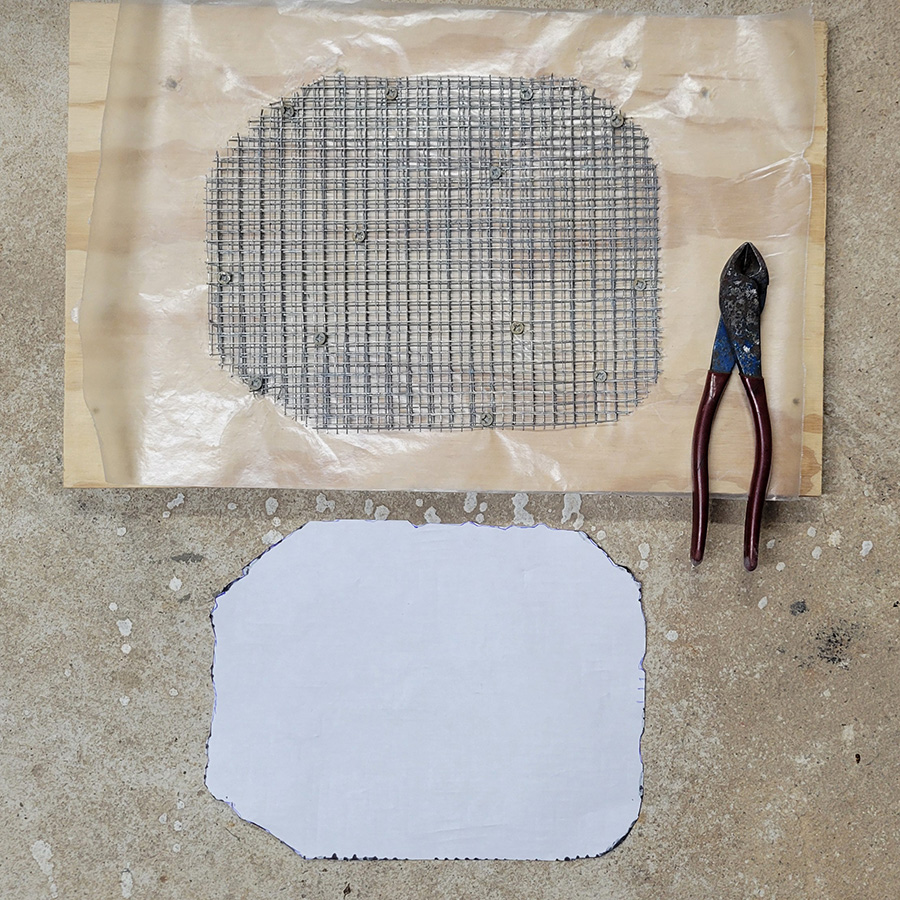
I placed the two 1/2-inch plies between the 1/4-inch plies and screwed it to a scrap piece of plywood covered with wax paper.
The screws hold the metal hardware cloth flat against the plywood so that the skeleton is thin and flat and ready for plastering with mortar:

After the mortar had hardened for 24 hours, and the screws were removed and the backer was lifted off the plywood.
A Diamond-Grit File was used to clean up the edges of the backer, and then a second round of mortar was used to fill the screw holes and any edge defects or voids.
The new mortar was allowed to cure for 24 hours, and the Diamond-Grit File was used once again to smooth and finish the backer.
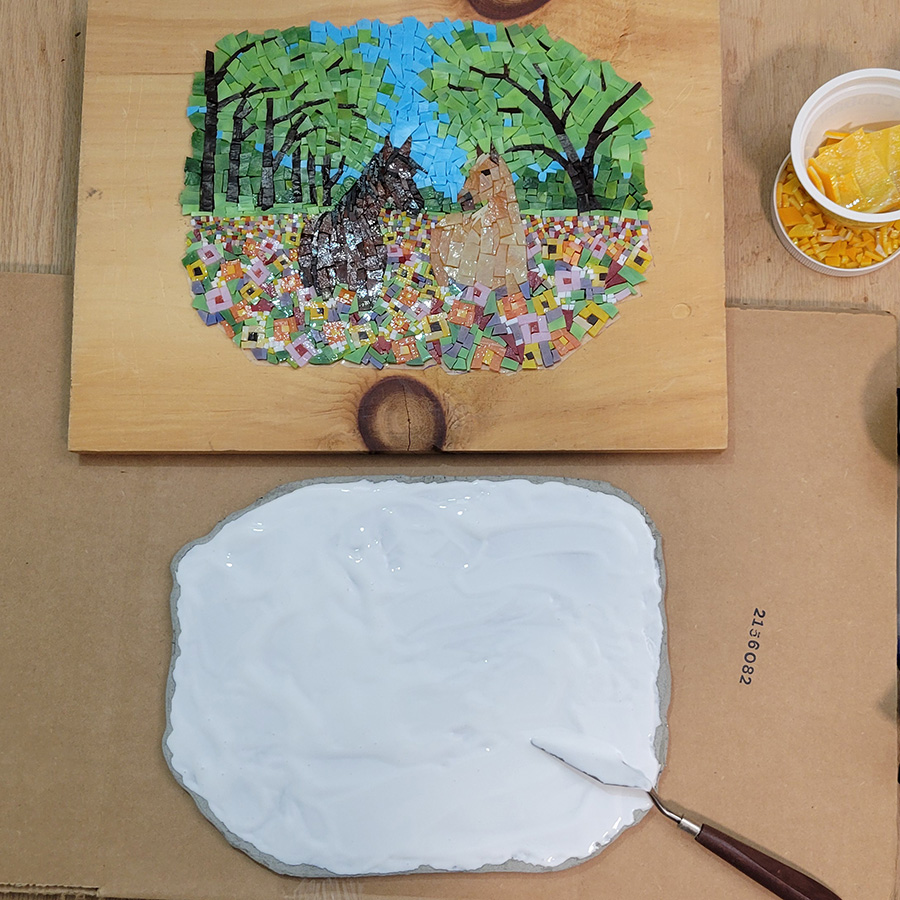
Mounting was done using Weldbond Adhesive, which was spread on the backer and allowed to get tacky by working it for five minutes or so with a palette knife.
The mosaic was face down on Mosaic Mounting Tape as shown in the image above.
The glue-covered backer was lowered onto the face-down mosaic.
Leave a Reply