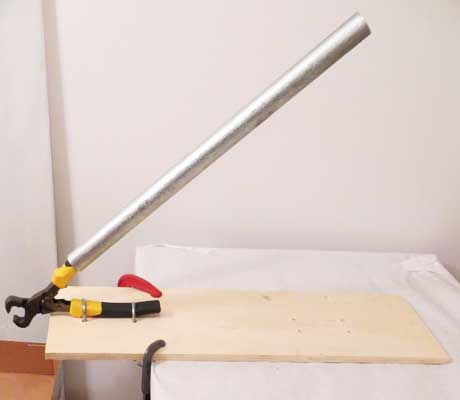
How To Mount A Mosaic Tile Nipper For Easier Cutting
It is easy to mount a mosaic nipper to a scrap piece of plywood and extend the handle with a short piece of conduit or pipe. Extending the handle in this way provides mechanical advantage to the nipper so that much less downward force on the extended handle is required to cut a hard piece of stone or porcelain.
In this example, I mounted a Compound Nipper, which is the recommended hand tool for cutting hard mosaic materials, although a regular Tile Nipper could have been used. A mosaic glass cutter should be substituted for glass tile. A materials list for building this assembly is at the bottom of the page.
1.5-Inch U-bolts
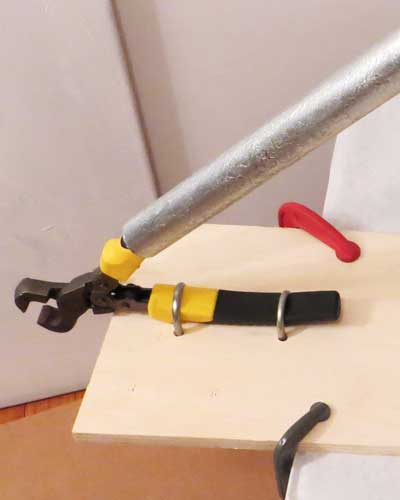
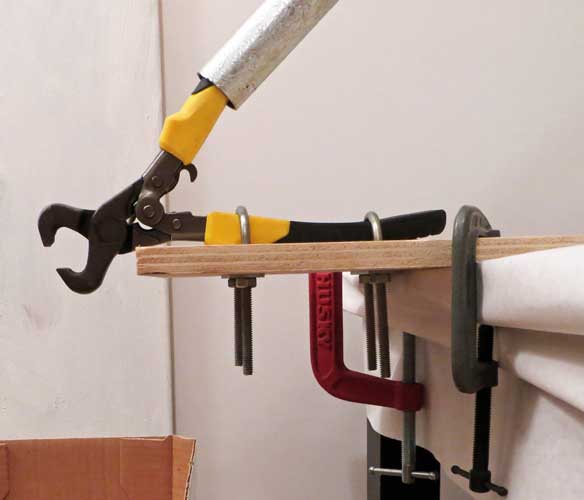
Mounted Compound Nipper is secured to plywood board with 1.5-inch U-bolts. If your nipper has thinner handles, you may be able to use smaller U-bolts. If needed, everything from pencils to Popsicle sticks can be inserted parallel to the handle in the U-bolts if needed to help snug up the fit.
1-Inch Conduit or Pipe
Handle of Mounted Compound Nipper is extended with 1-inch conduit that is just slipped over the handle. I used an 18-inch piece of conduit. Conduit is better than pipe because it is lighter and cuts easier, but re-purpose whatever you have on hand. If the pipe or conduit you have is larger than 1 inch in diameter, you can wrap the handle of your nipper with electrical tape to bulk it up before pressing the conduit over it.
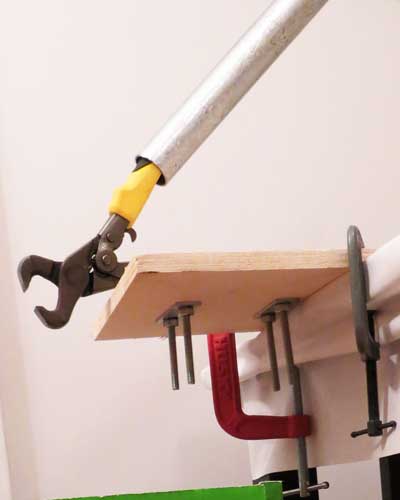
C-Clamps
The U-bolts can be much shorter, but I used what I had in my workshop. The C-clamps secure the plywood to the shop table.
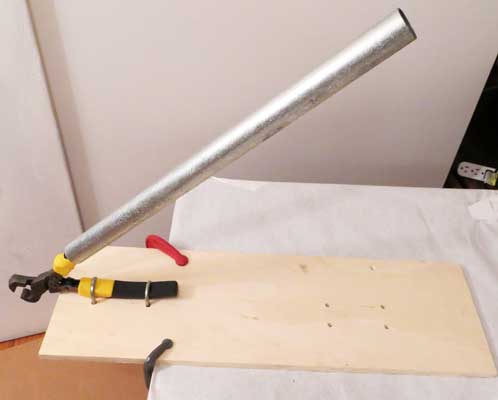
Scrap Plywood
The piece of scrap plywood selected for the base should be roughly as long as the handle (18 inches) and strong enough to withstand the force of the cutting.
Use Caution Around Jaws
CAUTION. The jaws of the nipper have sufficient strength to crush fingers or nearly anything else you are careless to get between them.Collection Pan
Collection Pan
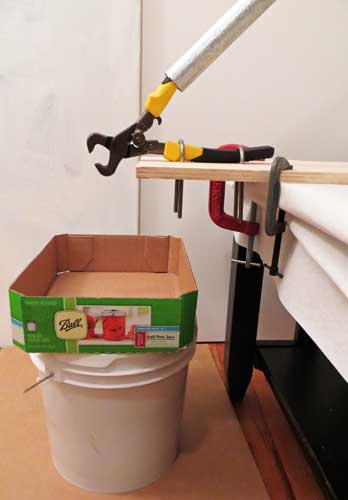
A box or tote is placed under the jaws of the mounted nipper as a “collection pan” to catch small shards, dust and usable pieces. It is best to raise the collection pan to just under the jaws, even higher than what we show in this photo.
List of Materials
You can mount your own mosaic tile nipper using these materials:
1x mosaic nipper
1x scrap plywood 1/2 inch or thicker, roughly 18 inches by roughly 6+ inches
2x U-bolts 1.5 inches wide
2x C-clamps (optional)
1x conduit or pipe, roughly 18 inches long, inner diameter larger than handle
1x roll of electrical tape (if you need to pad your handle to get pipe to be snug)
1x cardboard box or plastic pan to collect usable materials and cutting waste
Easier Cutting
It is easier to cut up 4 or 5 tiles and pick the piece that works best than it is to try to trim a piece down to size. The rejected pieces can be used elsewhere in the mosaic.
I made this am so grateful for the great instructions! One thing I missed at the first trip to the store was a drill bit the same diameter of the ends of the u-bolt (d’oh!) Otherwise, putting this together was perfect. Thank you!!!!!
Have you come up with any ideas for wheeled glass cutters for arthritic hands? I thought I had seen a diy hack a few years back but haven’t found it again. My hands are killing me, but I love mosaics too much to stop!
My brother-in-law made me one of these years ago. We always trim the slightly-round edges off of our tiles before we break them into smaller pieces. This definitely was a hand-saver!
Leave a Reply