Tag: fun project
-
Skeleton’s Rib: How to Mosaic Easily
What does a skeleton’s rib teach us about how to make mosaic more easily? It teaches us only one lesson, but that lesson is probably the biggest tip I have for how to make mosaics more easily and with less tedium and frustration.
-
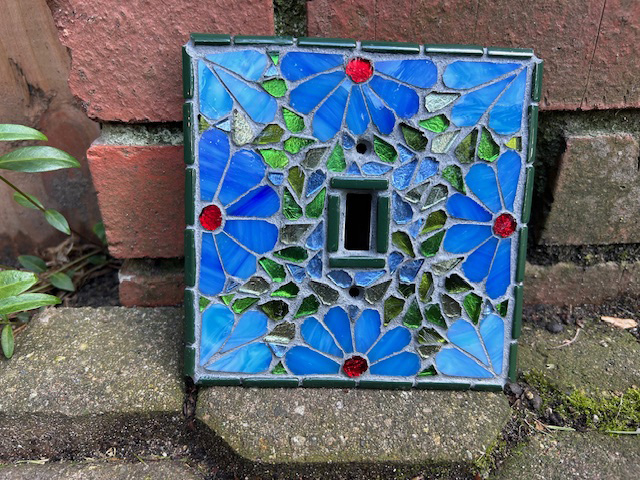
Small Mosaiced Objects: Decorative and Utilitarian
Artist Donna Stern has made some small mosaic sculptures that demonstrate the range of possibilities the medium has beyond murals and coverings for larger surfaces. Some of Donna’s recent mosaics are utilitarian (switch covers) while others are strictly decorative (mixed-media fish sculptures), but they are all small and very well done.
-
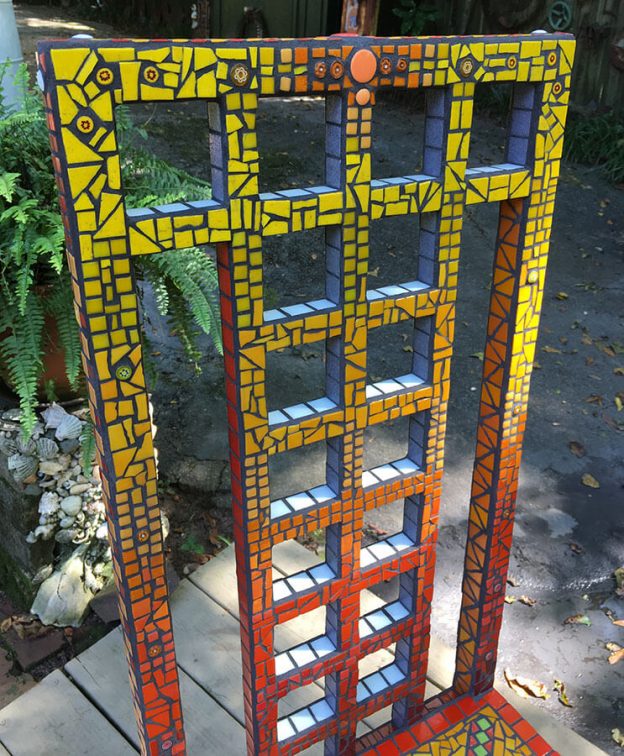
Mosaic Furniture Pique Assiette Alternative
Mosaic furniture can be made from glass mosaic tile more easily and more affordably than it can be made from pieces cut from antique china and other patterned dinnerware. It’s also much more colorful! The choices available range from bright rainbow colors to soft pastels to different color families, earth tones, black and white. You…
-
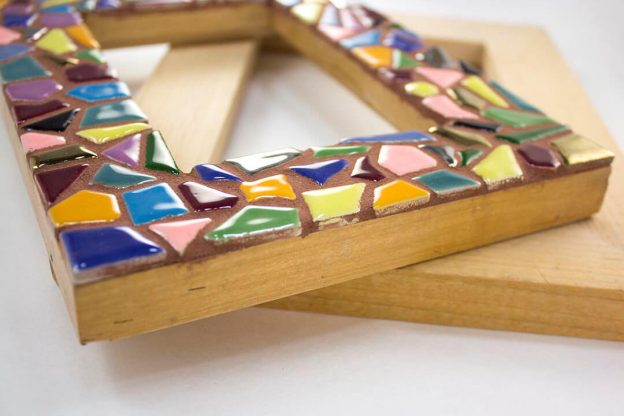
Mosaic Picture Frame
Angela made a mosaic picture frame using our irregular glazed ceramic tile and left the sides of the frame uncovered. She also nested the angular shapes to created an abstract pattern without cutting any of the tiles to make them fit. The unfinished side edges of Angela’s mosaic look particularly neat because the sides of the…
-

Using Ceramic Figurines In Mosaic Art
Why break up ceramic figurines to use the pieces in mosaic artwork when you can use the whole figurine? Artist Laurie Gilson emailed me some photos of her recent work, and they are great examples of how you can use ceramic figurines in your mosaics and still use standard elements such as tile arranged in rows.
-
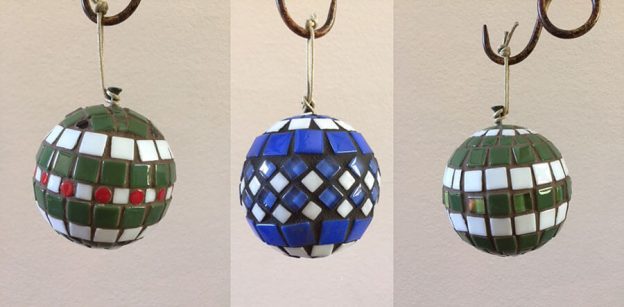
How To Efficiently Make Mosaic Christmas Ornaments
Artist Phyllis Kempter emailed me some photos of the ornaments she made using our kits for 3-inch spherical mosaic Christmas ornaments and our 12mm recycled glass tile (plus a few other sizes of tile), and her ornaments caught my eye for two reasons: First, she used green in the patterns for her ornaments, which is good to do…
-
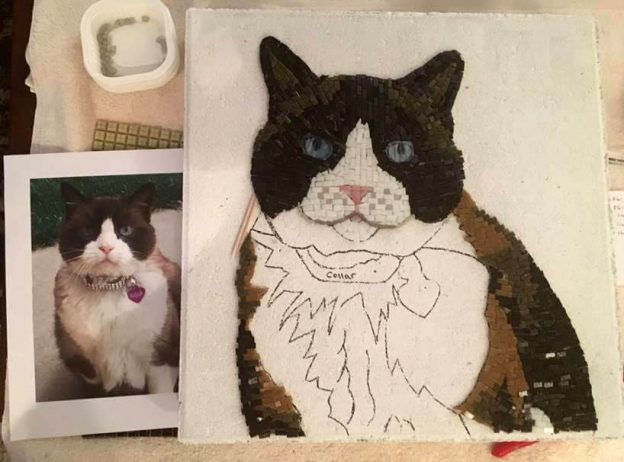
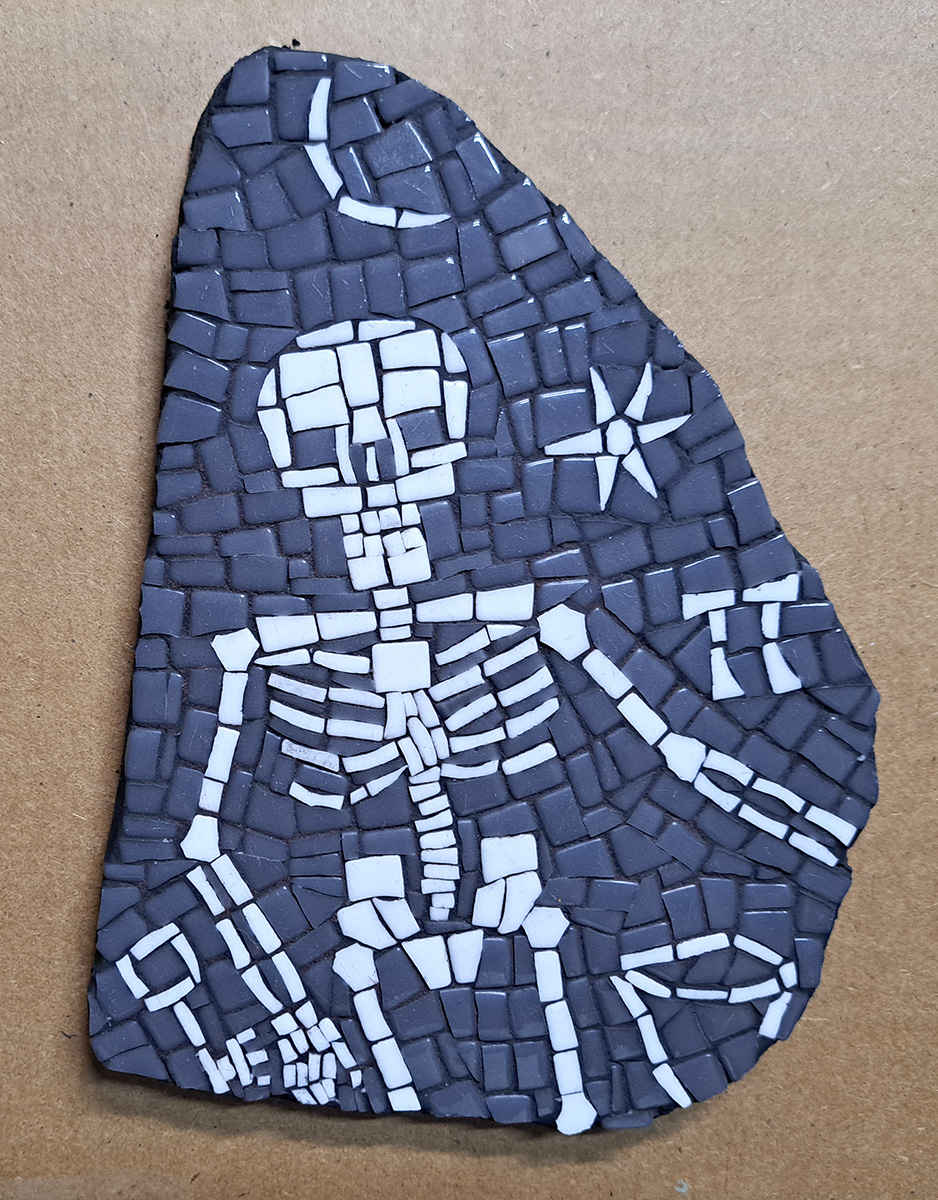
Pet Memorial Mosaics
Recently April Costigan sent us some pictures of pet memorial mosaics made on stepping stones and some portraits of pets still living, and they are great examples of what you could make for your loved one. April’s mosaics also show a natural progression in skill, and so they are worth showing to a wider audience.
-

Protected: Mosaic Art Supply Organizational Chart
There is no excerpt because this is a protected post.
-
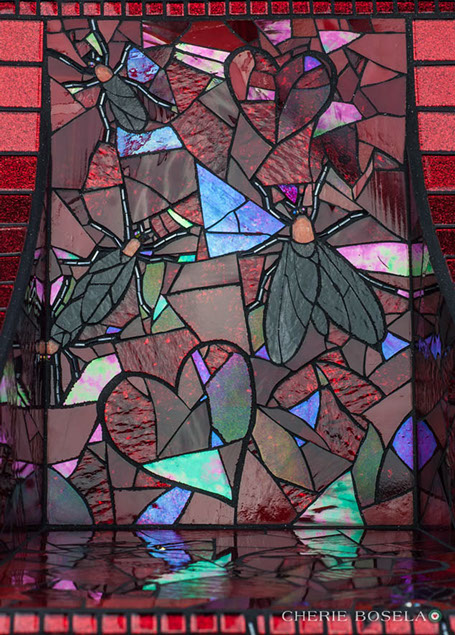
Must-See Mosaic Sculpture By Cherie Bosela
Artist Cherie Bosela has some mixed-media mosaic sculpture that you really should see, especially if you are considering making some of your own. Cherie’s body of work is incredible, and it includes bas relief mosaics (flat panel with raised elements) and figurative sculpture encrusted with glass beads and found objects such as seashells. I absolutely…
-
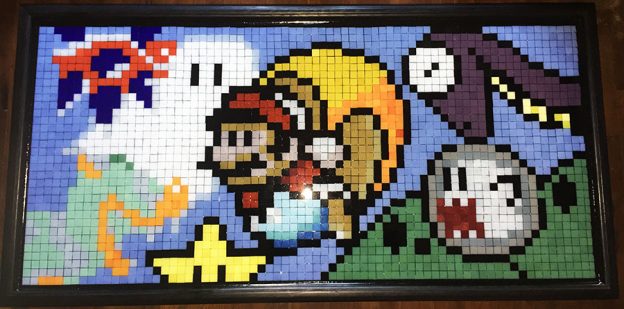
Mario Gamer Mosaic Art
Artist Jason Oakley made this great pixellated mosaic of Mario and some of the other characters in the Mario games. I like how the gridded pattern of tiles looks exactly like low-resolution pixels such as used in vintage video games. Mario Gamer Mosaic Art second view by Jason Oakley.
-
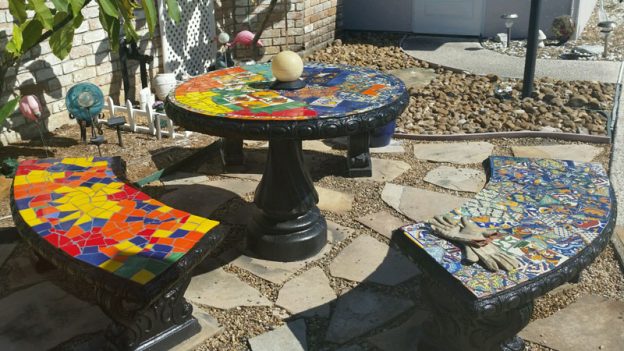
Glass or Ceramic Tile for Mosaic Patio Table?
Ceramic tile can be used for outdoor mosaic patio tables provided you live someplace warm year round, but otherwise glass tile should be used because it is impervious to moisture and freeze damage. There are other reasons to use glass tile explained later in this article. Concrete Patio Table Set Artist Naomi Haas recently completed a…
-
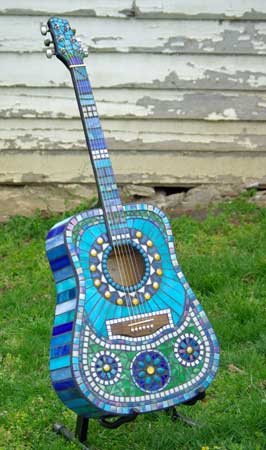
Mosaic Guitar
Artist MC Holt-Evans of Nashville recently made a mosaic sculpture very much in keeping with spirit of The Music City, and her mosaic guitar is worth taking a look at, especially if you are considering making a mosaic on an improvised base such as a musical instrument or a piece of furniture. The instructions below…