Tag: outdoor mosaic
-
Mosaic Mural Surface Preparation
The best way to mount an outdoor mosaic mural is to use thinset mortar and mount it directly to a brick, stone, or concrete wall. You can make mosaic murals on foam-core backer board and mount these backers onto wooden fences with screws, but that is less than ideal for several reasons, and the weight…
-
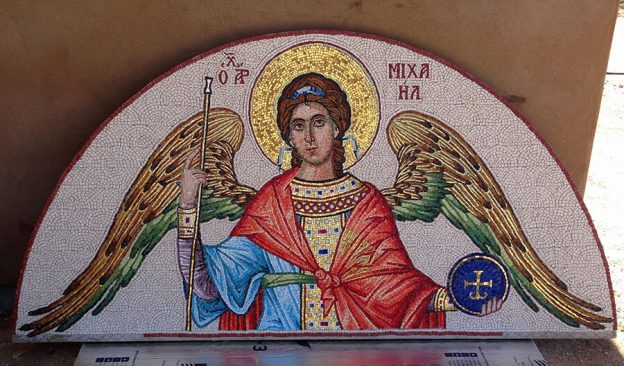
Mosaic Saints, Angels, and Icons
Historically, mosaic icons were made with traditional materials like smalti, marble, and gold leaf glass. Those traditional mosaic materials might be preferred if you are trying to make a reproduction that looks historically accurate, but they are more expensive and more difficult to work with. Do You Need Smalti? If you have any latitude in…
-
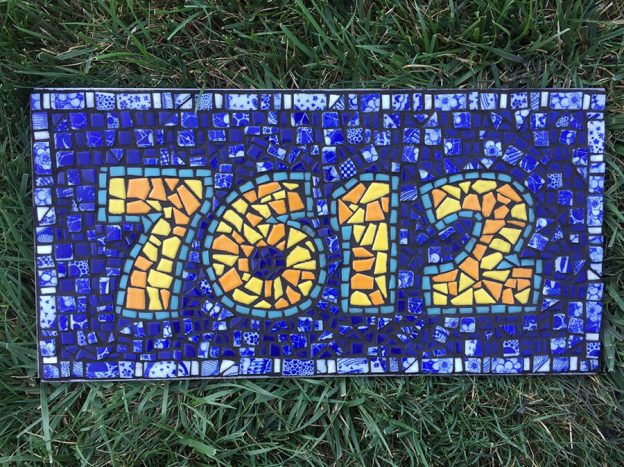
Mosaic Letters and Numerals
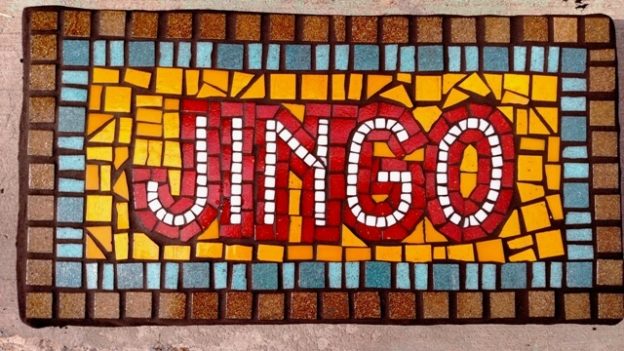
You can make mosaic street numbers and signs using a grid, but mosaics made from irregular shapes of non-gridded tesserae are more interesting, especially if you use concentric andamento for the background surrounding the figures. Sara Sommers emailed us some pictures of her mosaic street number plaque, and it is made from cut pieces of…
-
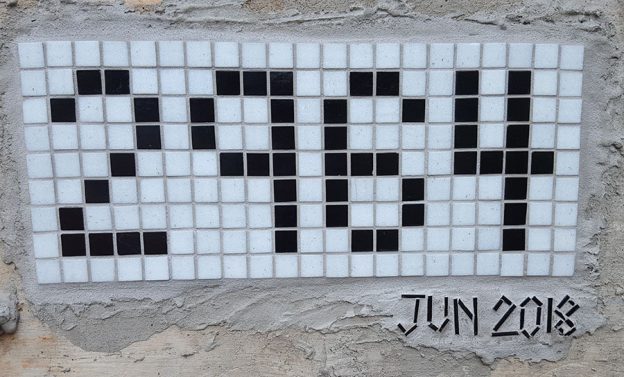
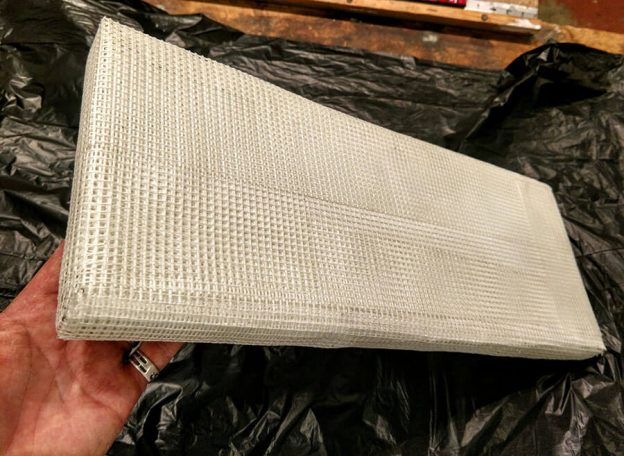
Mosaic Street Number
Natalija decided to test some materials and methods by putting our street number on the loading dock of the warehouse. Her method was to lay 3/4-inch vitreous tile in a mounting grid, but she put them in upside down and laid a sheet of fiberglass mesh on them and used one drop of silicone adhesive…
-
Making Foam-Core Mosaic Backers For Outdoor Projects
Artist Jill Gatwood uses the following method to make water-resistant foam-core mosaic backers for exterior mosaics, such as the Pet Memorial Name Plaques she does for clients who need something that is lighter weight and easier to ship than stone or solid concrete. The method wraps the foam in three or four successive layers of…
-
Pet Memorial Name Plaques
For people wanting to make a portrait of their furry friend, I wrote an article on pet memorial mosaics using April Costigan’s work as illustrations of what is possible in terms of capturing likeness. The problem is that for many people, the task of rendering a realistic portrait of their pet is beyond their current…
-
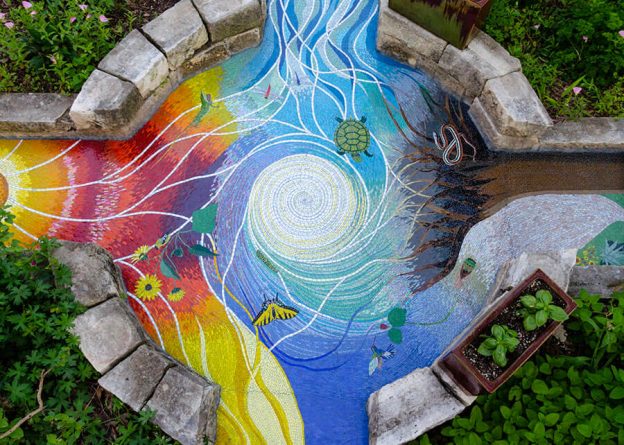
Four Elements Garden Mosaic
“Amateur” artist Tobin recently completed his Four Elements garden mosaic, and it is amazing for several reasons, the least of which is the fact that it was created over a span of six years with the artist getting up at 5 am to spend 45 minutes on it before leaving for his day job in corporate…
-
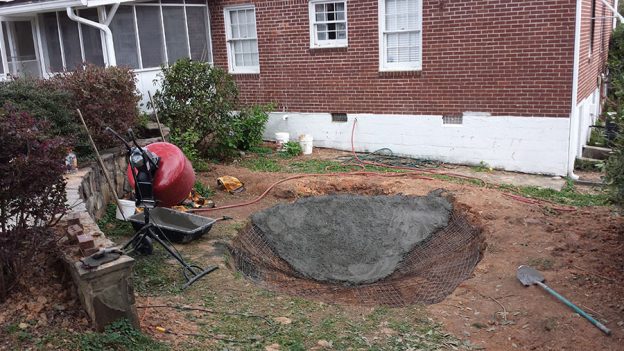
Impulse Art Projects: A Case Study In Sculptured Concrete
It’s EXTREMELY important to allow yourself to do creative projects on impulse without overthinking it. The reason is simple: research tends to kill the creative urge, at least for most people. Research can become an end in itself and go on to long and kill enthusiasm or the window of opportunity is lost. Research can…
-
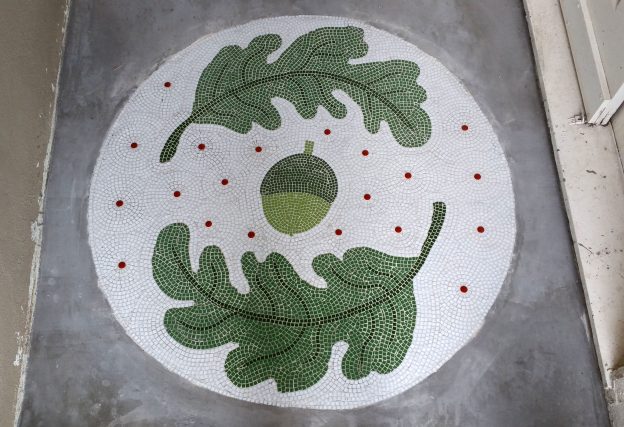
Porch and Entranceway Mosaics
Ana Bonnin emailed us some pictures of her recent entranceway mosaic, and I wanted to share these with our readers. Ana’s pictures also made me remember that I needed to summarize what I know about best practices for making porch mosaics last longer. Ana’s mosaic is the family emblem that she and her husband designed to…
-
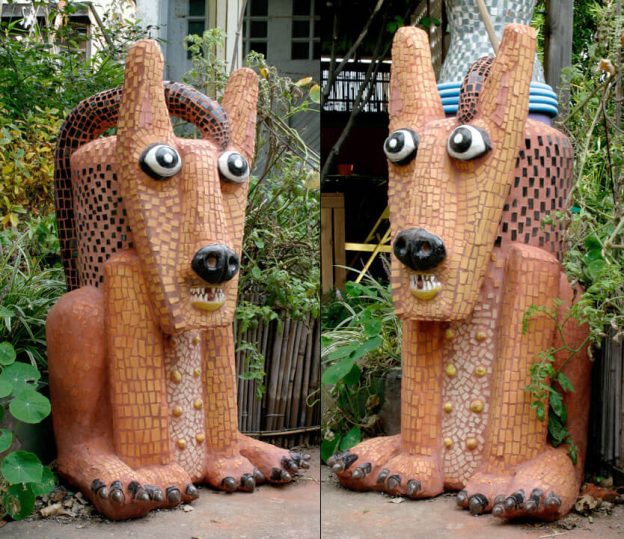
Mosaic Lawn Sculptures
Artist Marilyn Keating has some mosaic lawn sculptures of animals that are very much worth seeing, especially if you are considering making some yourself. Rather than trying to make her animals as naturalistic as possible, Marilyn wisely chose to make her animals stylized and whimsical, almost like three-dimensional cartoons come to life. I used the…
-

Materials and Methods for Outdoor Mosaic Tables
Artist Risa Puno recently completed her interactive mosaic sculpture Common Ground for Rufus King Park in Jamaica Queens, NYC, and the project is a great example for discussing materials and methods for mosaic table tops. No Plywood Backers Outdoors Plywood is never an acceptable backer for outdoor mosaic table tops. Humidity in outdoor air can…
-
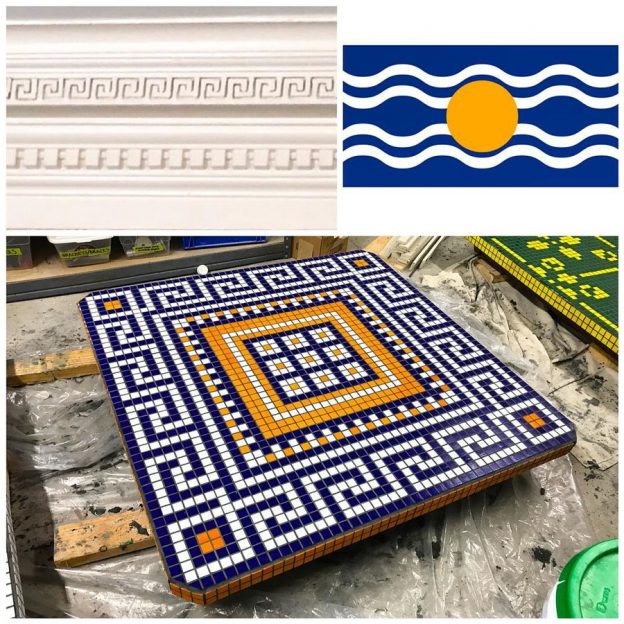
Abstract Geometric Mosaic Table Tops
Inspiring mosaic table tops with abstract geometric patterns were recently created by artist Risa Puno as part of her public art project Common Ground, an interactive sculpture designed to bring people closer together physically. The concept of Risa’s sculpture plays on the metaphor of multiculturalism as mosaic, but instead of the folk or children’s artwork…