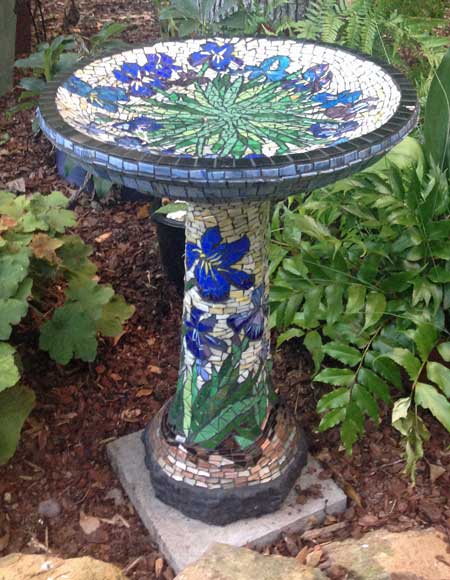
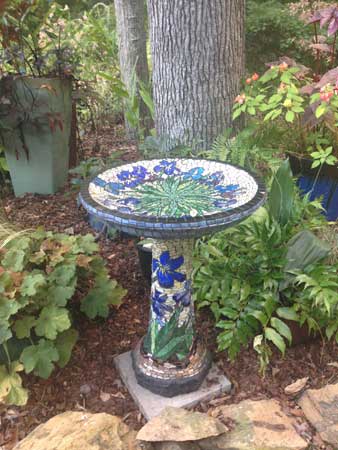
Artist Lyn Richards sent me some pictures of the mosaic bird bath she made this past summer, and it is worth showing off. The floral design and the colors used in the mosaic were inspired by Van Gogh’s painting “Irises.”

Material List for a Mosaic Birdbath
Concrete Base
To make a mosaic bird bath such as this, you could use a ready-made concrete bird bath from a lawn and garden center, or you could make an original concrete sculpture if you are looking for something with a less conventional shape. Lyn used a ready-made concrete bird bath that came in two sections: a base column and a bowl.
Thinset Mortar and Tools
Thinset mortar should be used instead of adhesive for attaching the tile. A complete list of tools and materials for mixing thinset and for applying it is given in my instructions for using thinset mortar with glass tile. (Note the instructions were written for doing extremely detailed work, so I might make thinset seem much more difficult to use than it really is.) I have also written a page for how to keep your hands clean when using thinset.
Glass Mosaic Tile
Glass mosaic tile in non-porous and so water can’t get inside it and freeze and crack it all to pieces. This makes glass superior to stone and ceramic tile when used outdoors. You can use any of the glass we sell. Lyn’s mosaic was made from different brands of 3/4 inch vitreous glass tile, metallic glass tile. iridescent glass, and stained glass.
To find out how much tile you need, you can divide your shape into component surfaces and use our mosaic tile estimator. What do I mean by component surfaces? For estimation purposes, Lyn’s bath can be thought of as cylinder topped by a disk. The surface area of the cylinder is A = D*Pi*H, where D is the diameter, and Pi is 3.14, and H is the height. The surface area of the disk is A = Pi/4*D*D. Note that this time D is the diameter of the bowl and not the pedestal base. Remember to multiply the surface area of the disk by a factor of 2 because there is a top and a bottom.
As always, remember to inflate your estimate by 5 to 10% to account for cutting scrap and to provide a cushion for error in your estimates. I have always found that it is much better to have tile left over than it is to not have enough. Suppliers sell out from time to time, and the next manufacturer batch might not match what you already have, or at least match exactly. Also, leftover tile serves as inspiration and material for future projects.
Finding and Transferring Patterns
Lyn used Van Gogh’s painting “Irises” for her pattern. She drew the outline of the shapes (blades and petals) onto the concrete using a pencil, and then she went over that drawing with a black Sharpie marker when she was sure she had her lines correct. This is recommended: Don’t use the marker until I work out my lines by trial and error using a pencil. If your pencil drawing gets to be a mess and you need to start over, you can “erase” it by wet sanding it and wiping it off with a rag.

Choice of Colors and Visual Interest
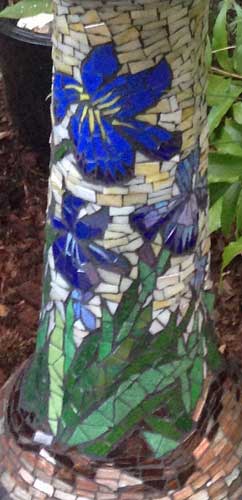
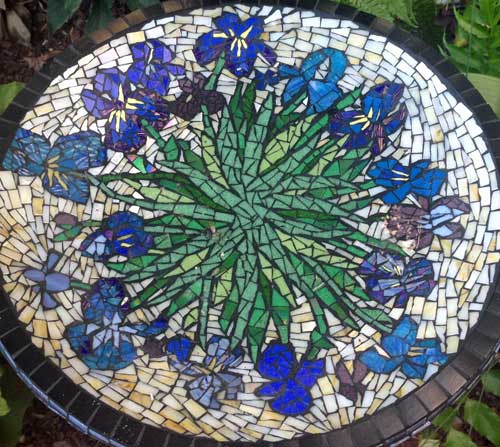
Note how Lyn used multiple shades and hues of green to make the blades of the iris leaves instead of using just one type of green. This creates shade and depth and visual interest and makes all the difference in the world. Monochromatic color fields are boring, and they take just as long to tile as a more interesting mix of colors. Note the solitary pea green blade of new growth and how it stands out from the other leaves, which are a mix of darker and bluer greens. Similarly, the petals of the irises are made from multiple cyan blues and ultramarine blues instead of one color, and this makes them more lifelike and more visually appealing.
Andamento and Visual Interest
The background of a mosaic is an opportunity to add visual interest to the scene and should never be “bricked” up like the tiled wall of a shower. Andamento is the visual flow of a mosaic created by arranging the tile in rows, and it can make the background of your mosaic as visually interesting as the figures in the foreground.

Observe how Lyn used multiple related hues for the background instead of one color. Also note there is not a single whole tile mixed in with all these cut pieces. Why not? A uniform square would stick out like a sore thumb among all the irregular pieces.
Cutting and Attaching the Tiles
Thinset is concrete that hardens over time. I can usually get three hours out of a batch, and I often work in sections, usually completing about 1 or 2 square feet per session, depending on how detailed my work is. Lyn found it useful to have her tile cut up in advance of a session, but you can always make incidental cuts as needed while you are attaching tile. Again, my thinset instructions explain the details of how to handle and use the mortar to attach tiles. Tip: partially crushed liquor boxes make great cradles for holding heavy pieces of stone and concrete while you tile them.
Removing Sharp Edges
A marble file or a rubbing stone can by used before the tile is mounted to remove any sharp edges. After the tile is mounted, it is a little more difficult to remove sharp edges, but gently rubbing the surface of your mosaic with a rubbing stone can help a lot.
Grouting
Before grouting, you should clean off any excess thinset from the face of the tiles. Scraping this off will also make any loose tiles fall off so that you can reattach them before grouting. You should wait a day or two before grouting to let the thinset harden. Black grout is best for making your colors stand out. Lyn used a combination of black, gray, and brown grouts, and she blended these to get the exact color she wanted. A few days after your grout hardens, you should buff all the grout haze off and seal the finished mosaic with multiple applications of a silicone-based tile and grout sealer, such as available at any building material store.


Leave a Reply