Fireplace Mosaic by Elinor Willis, detail top, grouted, 1280 x 960 pixels

Inspiring Fireplace Surround Mosaic

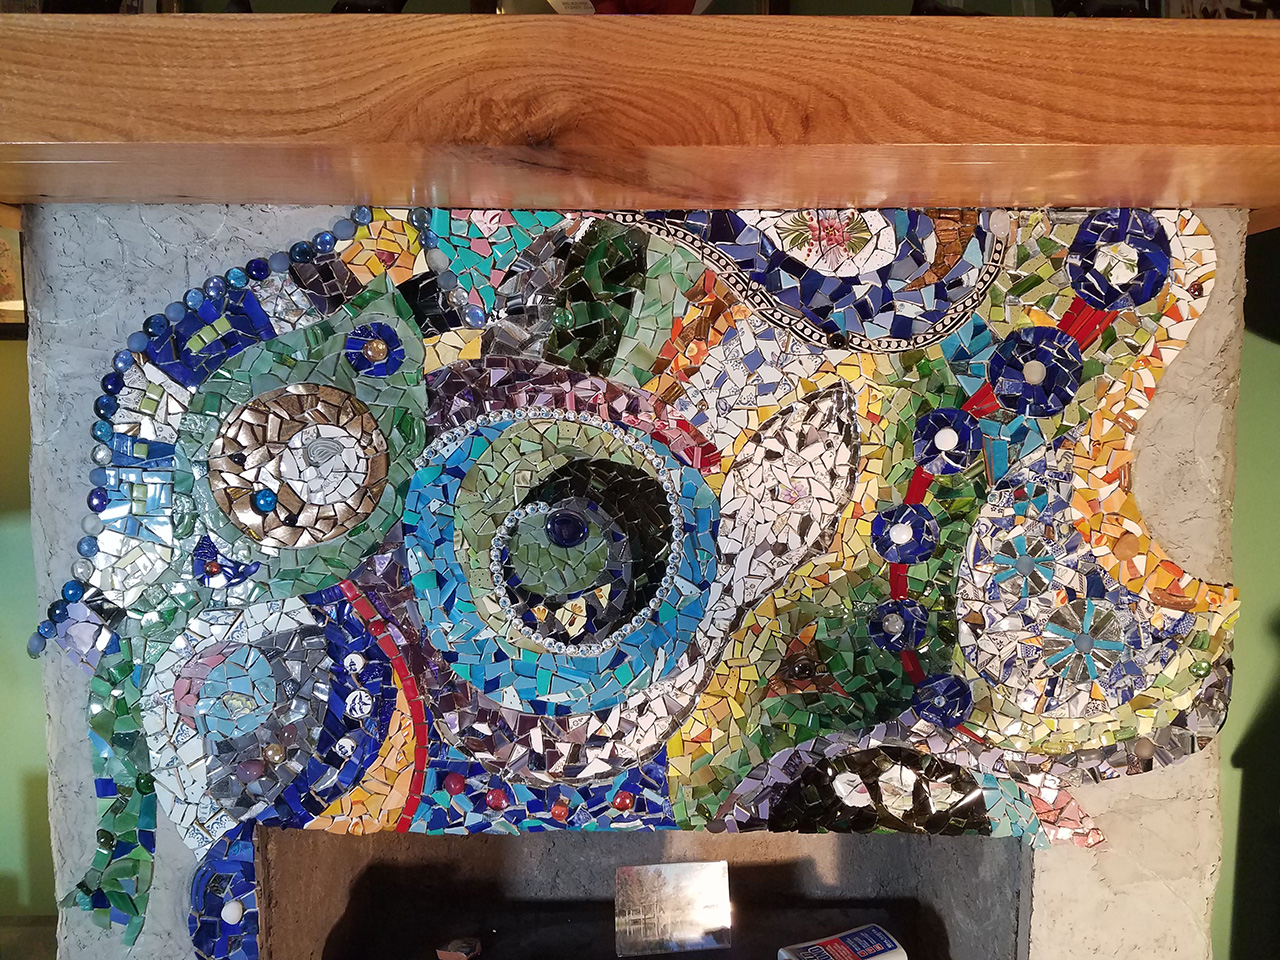
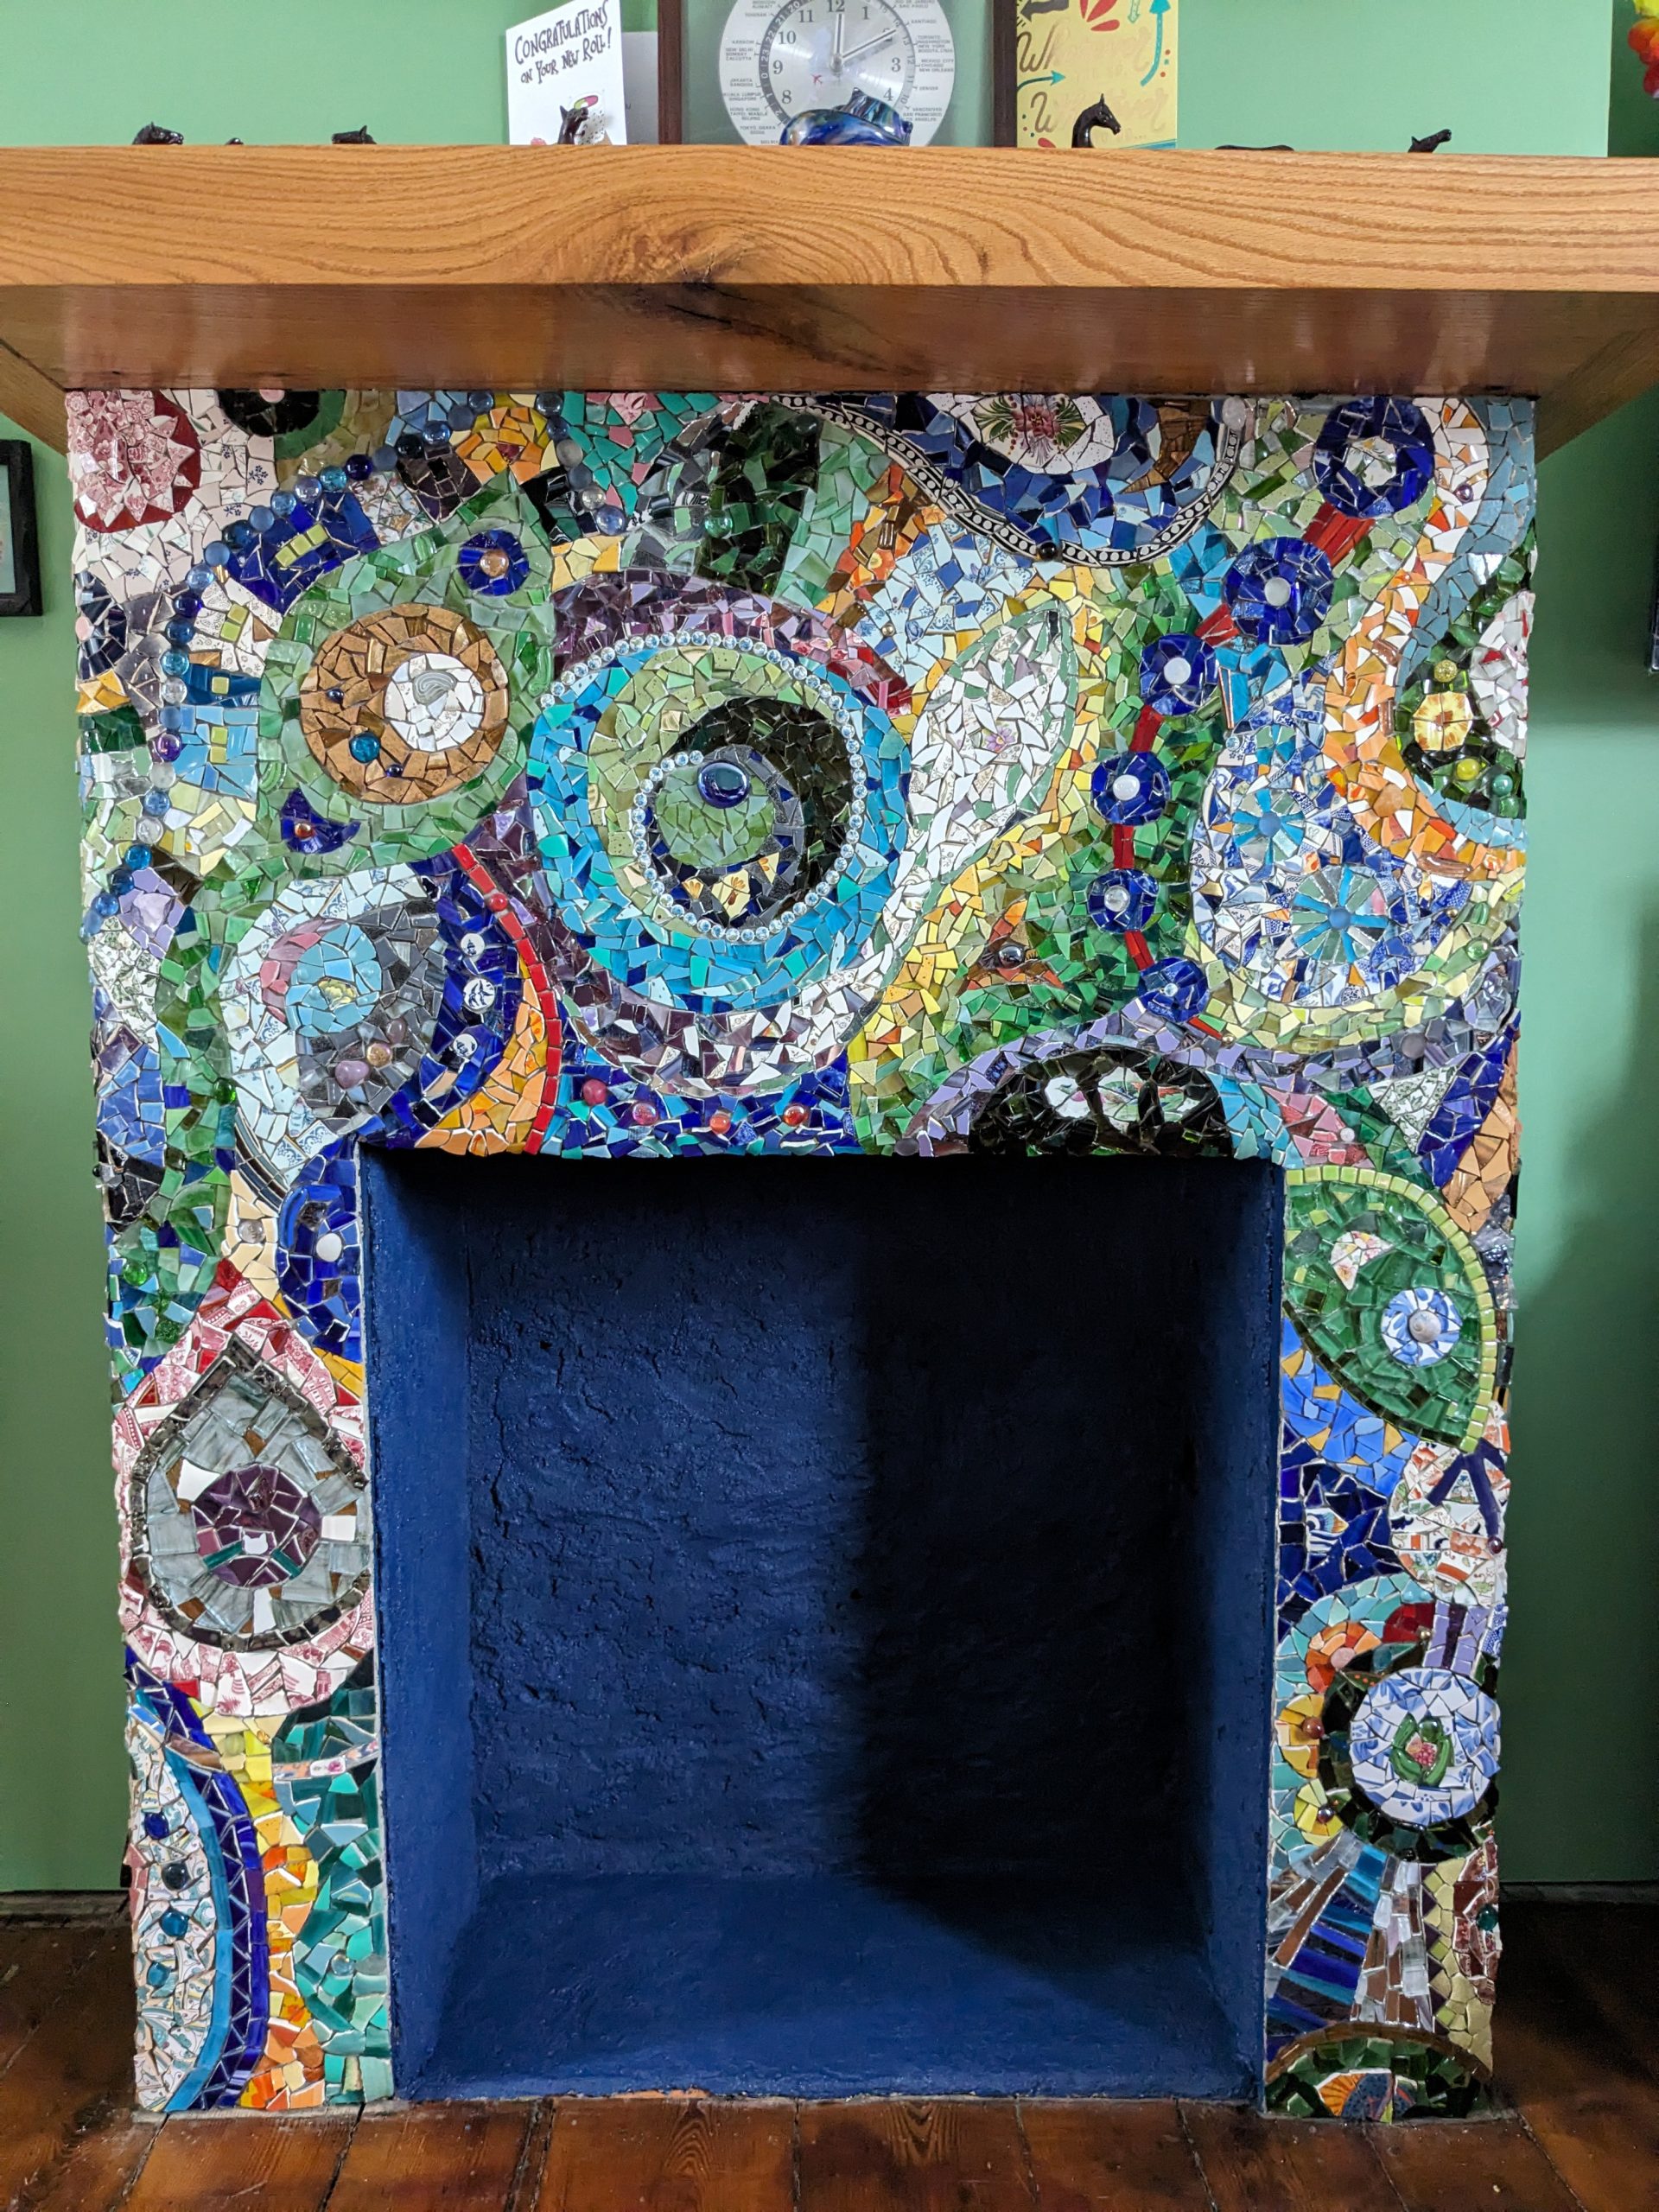
Artist Elinor Willis has recently completed a mixed-media mosaic fireplace surround, and it is wonderful.

She also did a great job of photo-documenting the progress of her mosaic, which she made using the direct method of gluing one tile at a time directly to the backer.

Materials and Methods

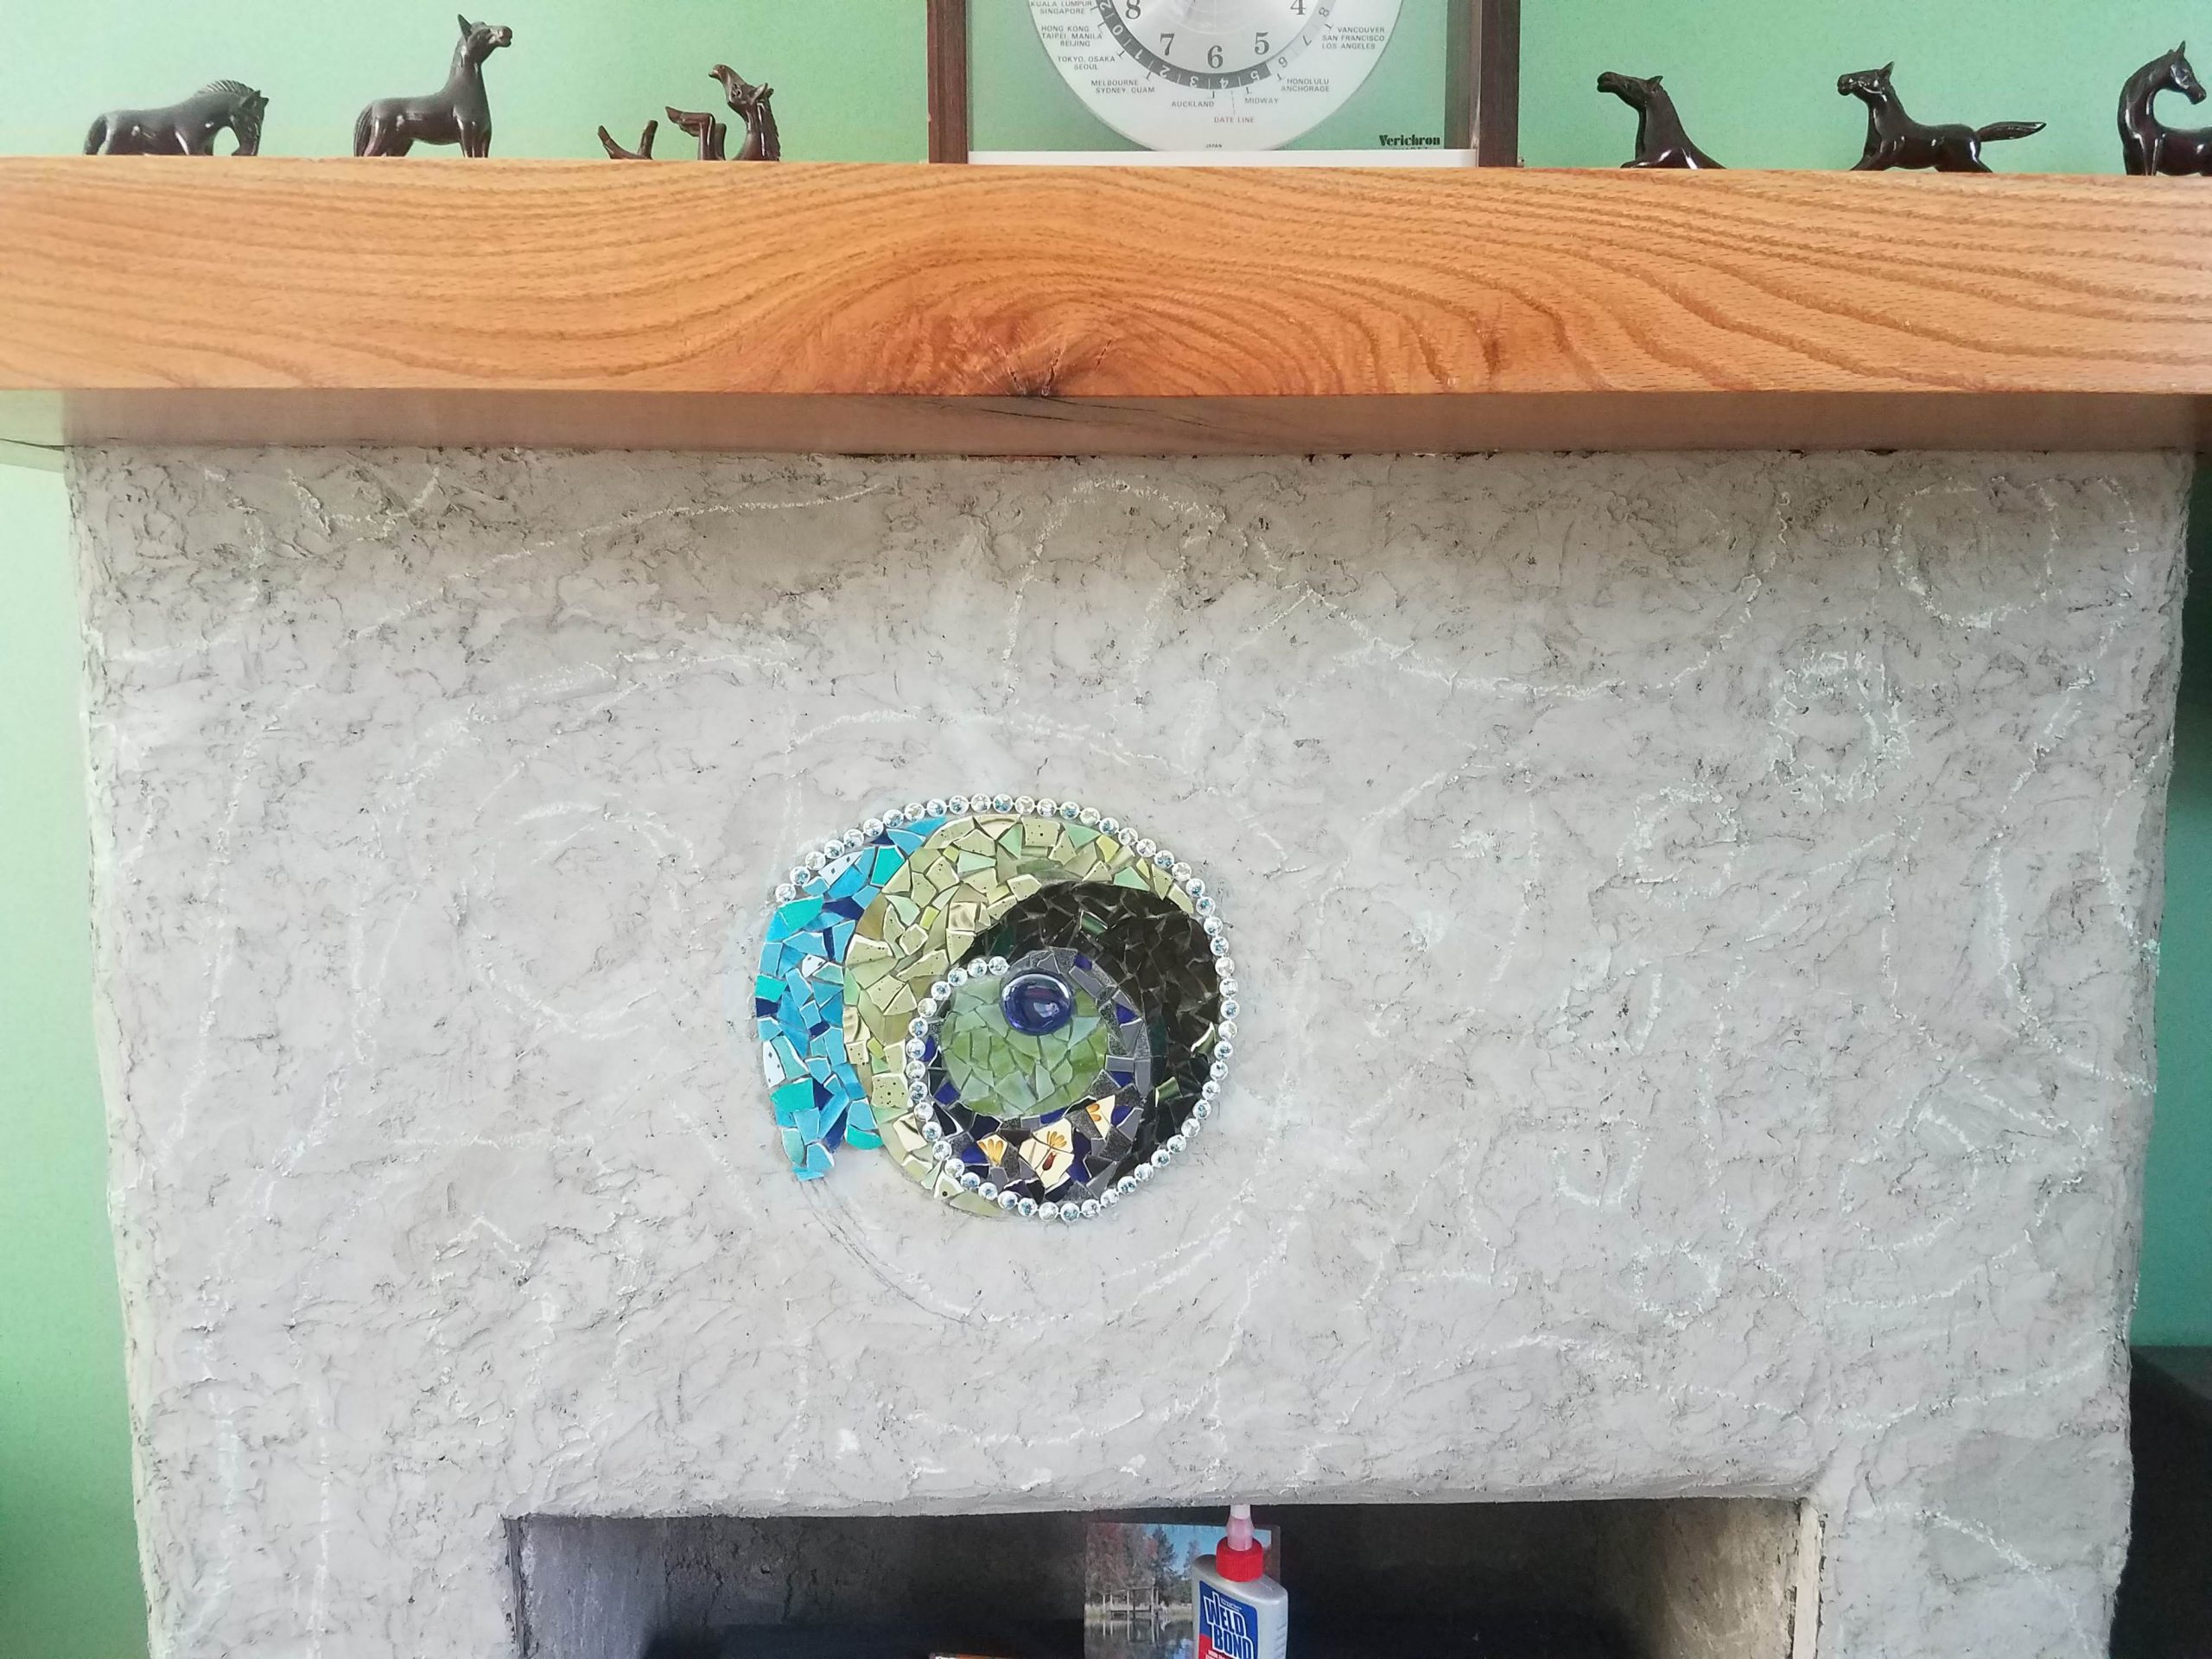
Mixed-Media mosaics made from broken dinnerware and other findings are spectacular in appearance, but they require more work than mosaics made from tile of all the same thickness.

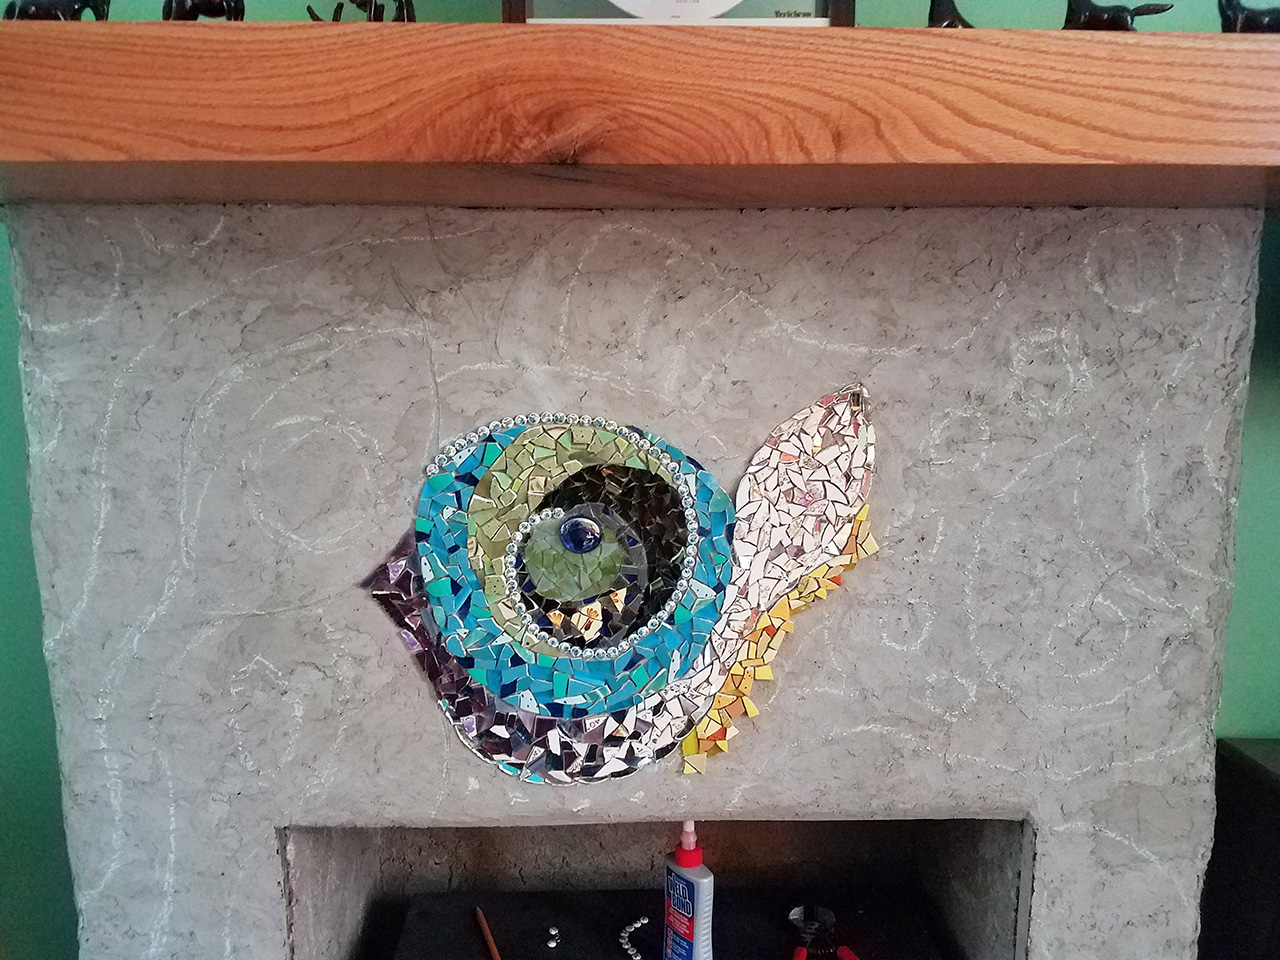
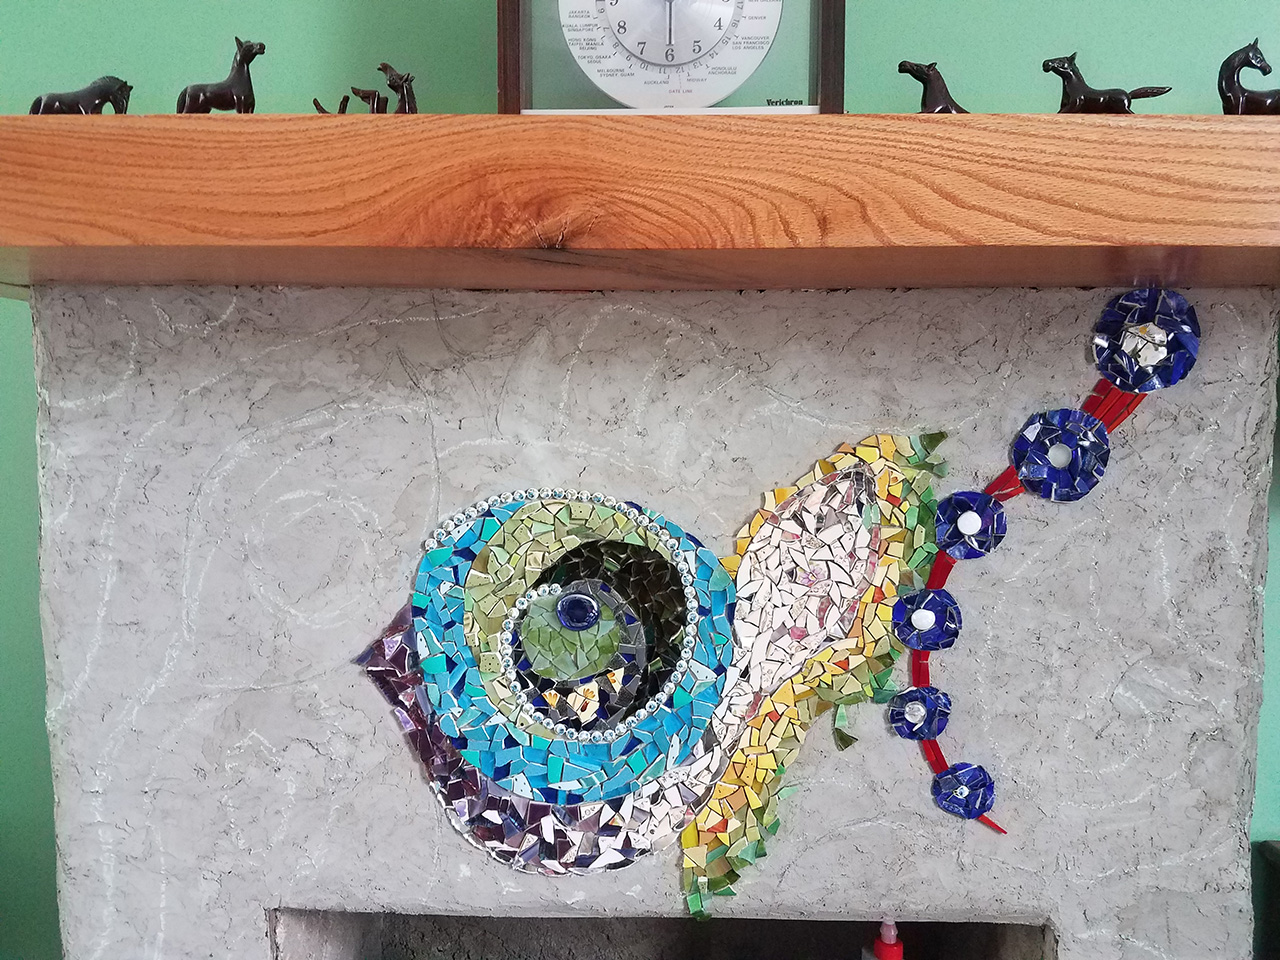
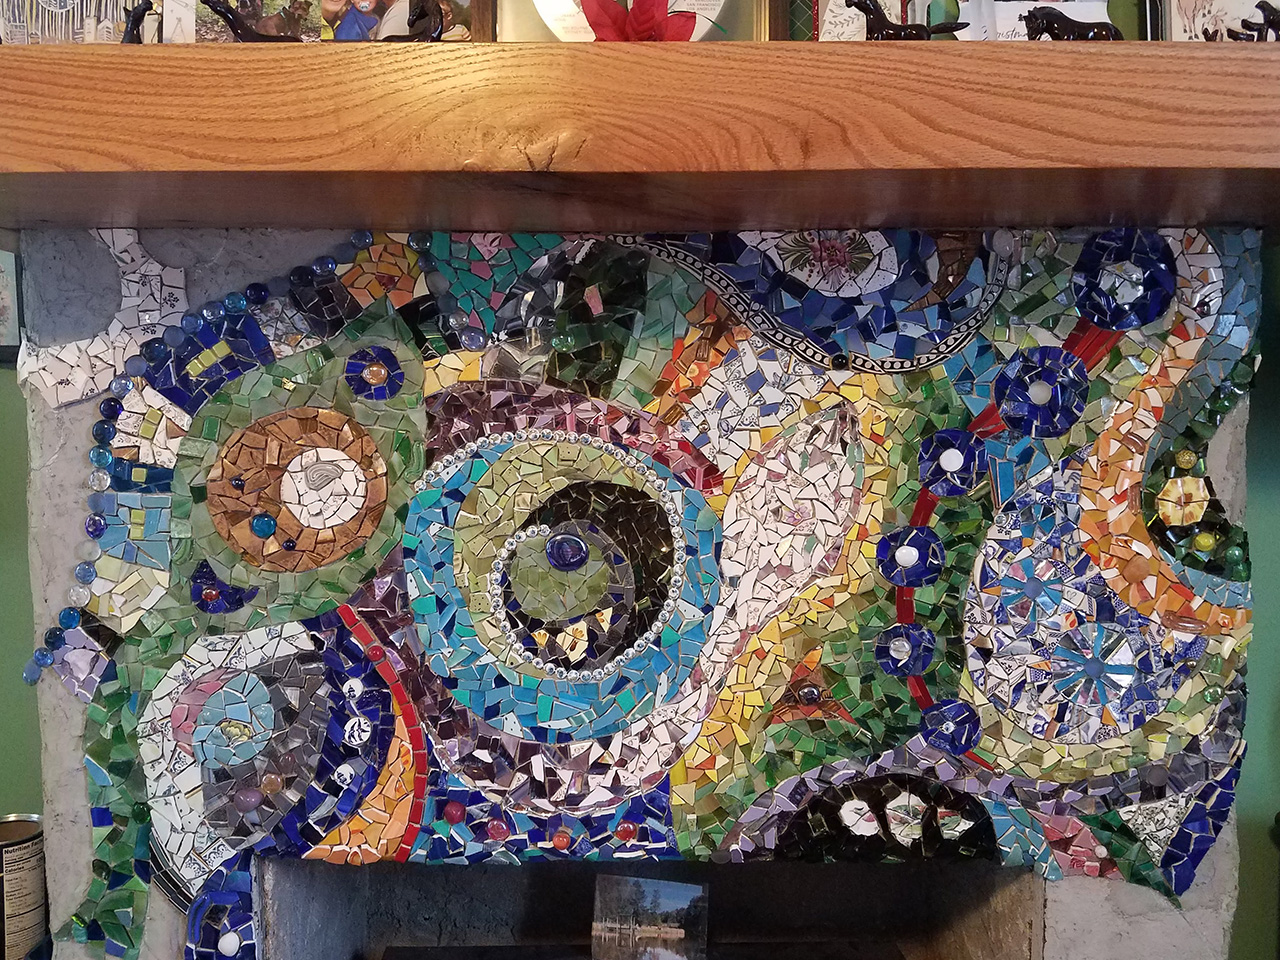
The in-progress photo below shows the mosaic fully mounted but not yet grouted. Note the differences in tesserae thickness, with some pieces sticking out above surrounding pieces:
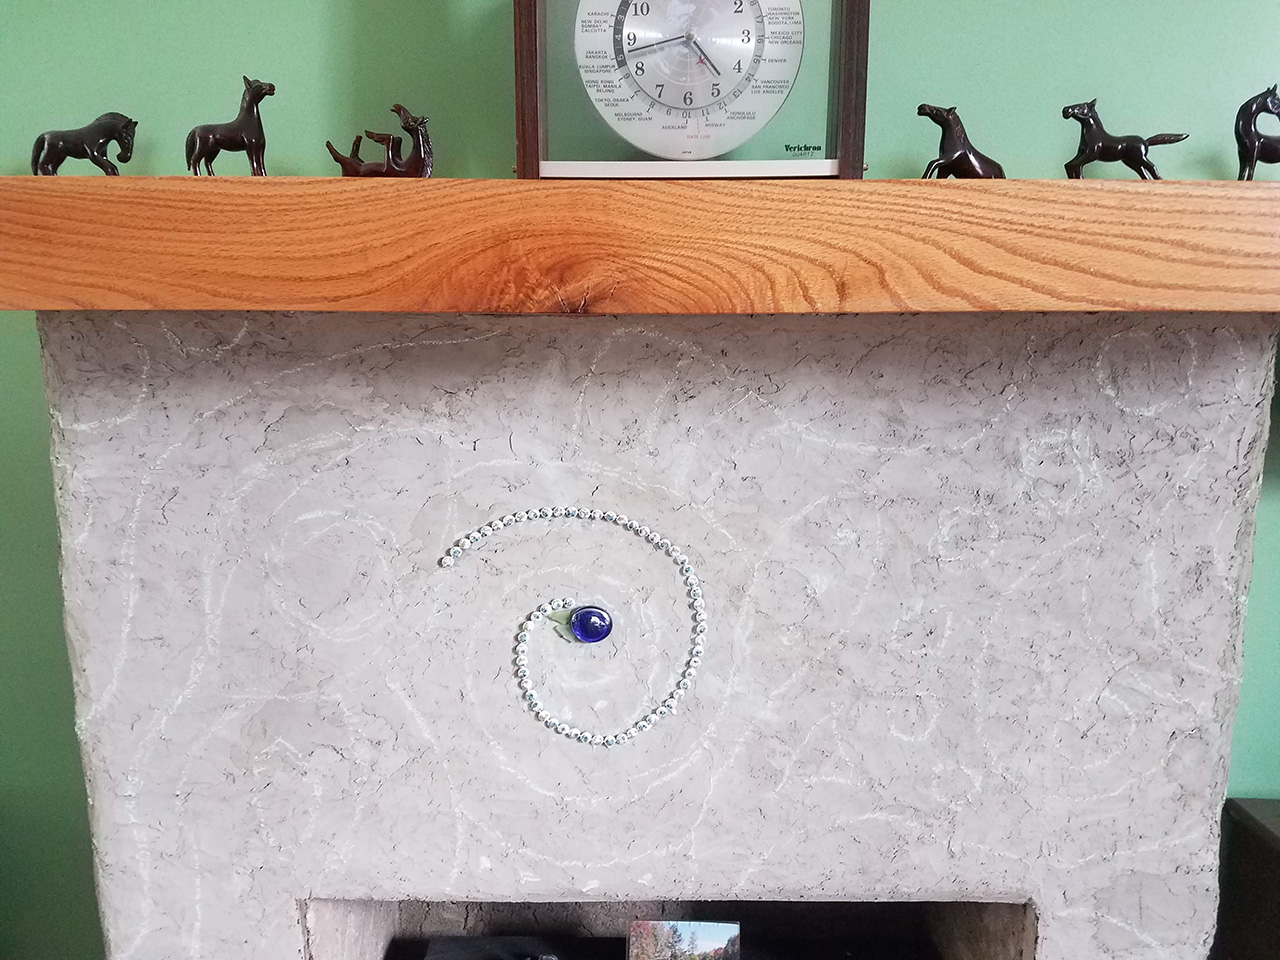
Fireplace Mosaic by Elinor Willis, detail, ungrouted

Mounting

Mounting a mosaic is the process of attaching the mosaic to the backer. Normally the mosaic is laid up in advance on a temporary surface and mounted all at once.

Since Elinor used mixed materials of differing thickness for tesserae, it wasn’t practical for her to lay up the design on Mosaic Mounting Tape, which is the type of indirect method I normally use.

Instead, Elinor glued each tile one at a time to her backer, which was vertical.

Elinor used Weldbond Adhesive for this work.

TIP: If an artist notices that the glue isn’t tacky enough to hold tiles to a vertical backer without slipping, the artist can make the glue thicker by drying it out some, either by spreading back and forth on the backer or by stirring in a cup for a while before spreading.

For an outdoor mosaic, artists should use a modified thinset mortar to attach the tiles, such as the Versabond brand we use.

Grouting

A mosaic made from tile of different thicknesses requires more work to grout.

Instead of scraping away the excess grout quickly using a straight-edged piece of plastic or wood, the artist must use a gloved hand to carefully clean out all the low places.
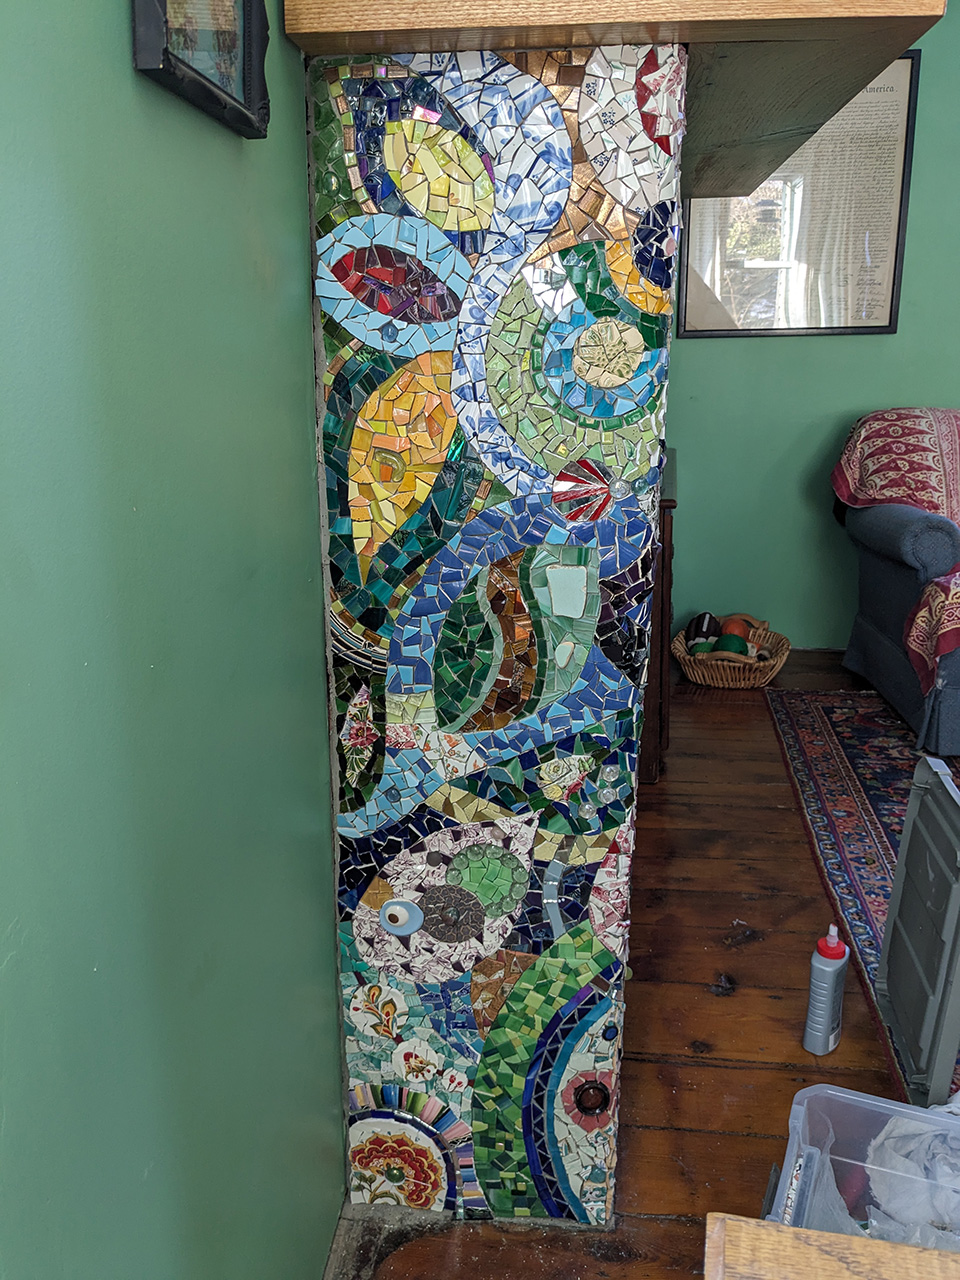
In-Progress Photos

Fireplace Mosaic by Elinor Willis, in progress, stage 1
Fireplace Mosaic by Elinor Willis, in progress, stage 2
Fireplace Mosaic by Elinor Willis, in progress, stage 3
Fireplace Mosaic by Elinor Willis, in progress, stage 4
Fireplace Mosaic by Elinor Willis, in progress, stage 5
Fireplace Mosaic by Elinor Willis, in progress, stage 6
Fireplace Mosaic by Elinor Willis, in progress, stage 7
Fireplace Mosaic by Elinor Willis, in progress, stage 8
Fireplace Mosaic by Elinor Willis, in progress, stage 9
Fireplace Mosaic by Elinor Willis, in progress, stage 10
Fireplace Mosaic by Elinor Willis, in progress, stage 11
Fireplace Mosaic by Elinor Willis, side panel
Fireplace Mosaic by Elinor Willis, ungrouted

Grout Color

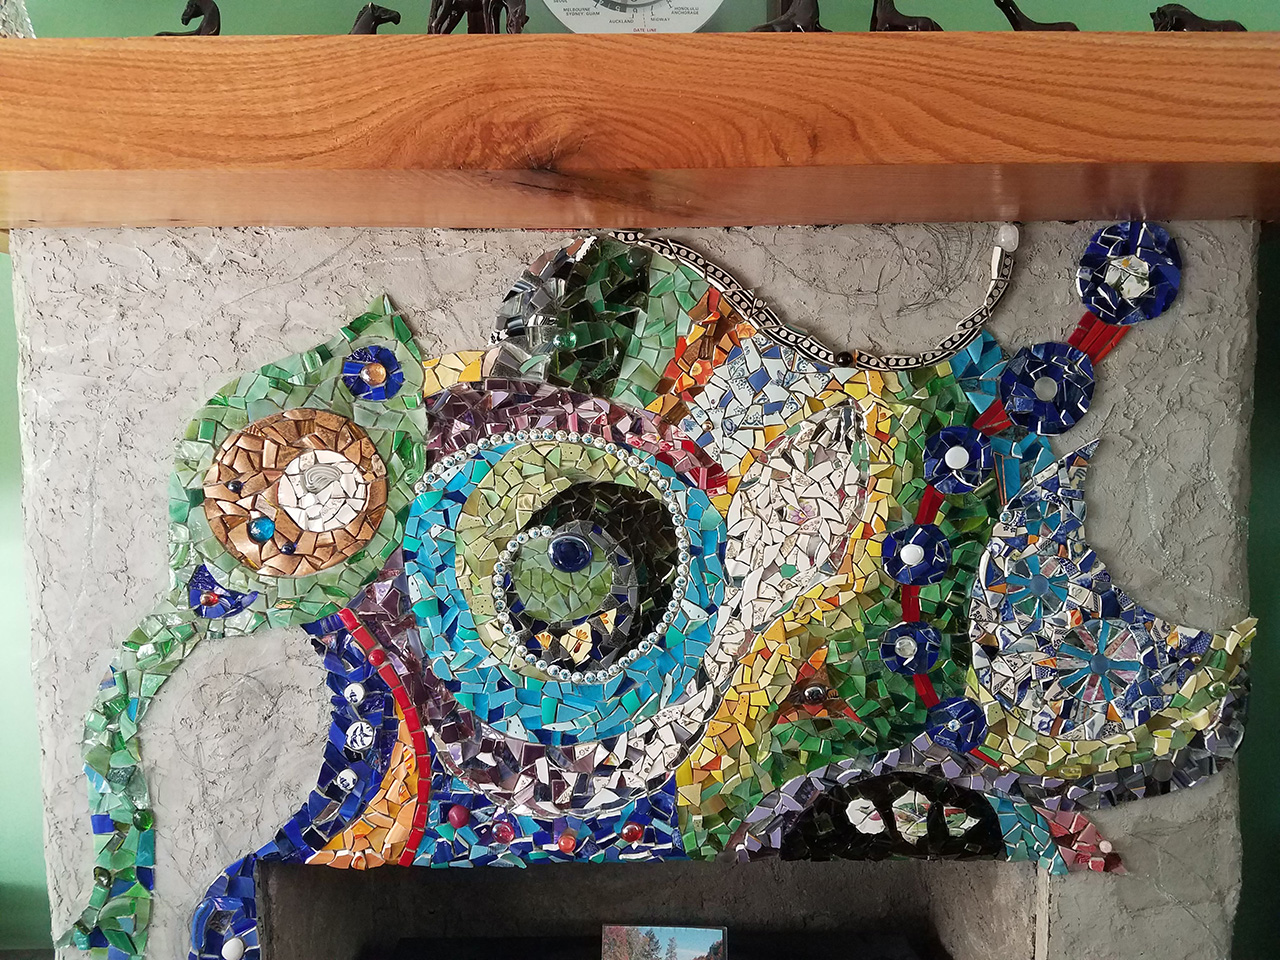
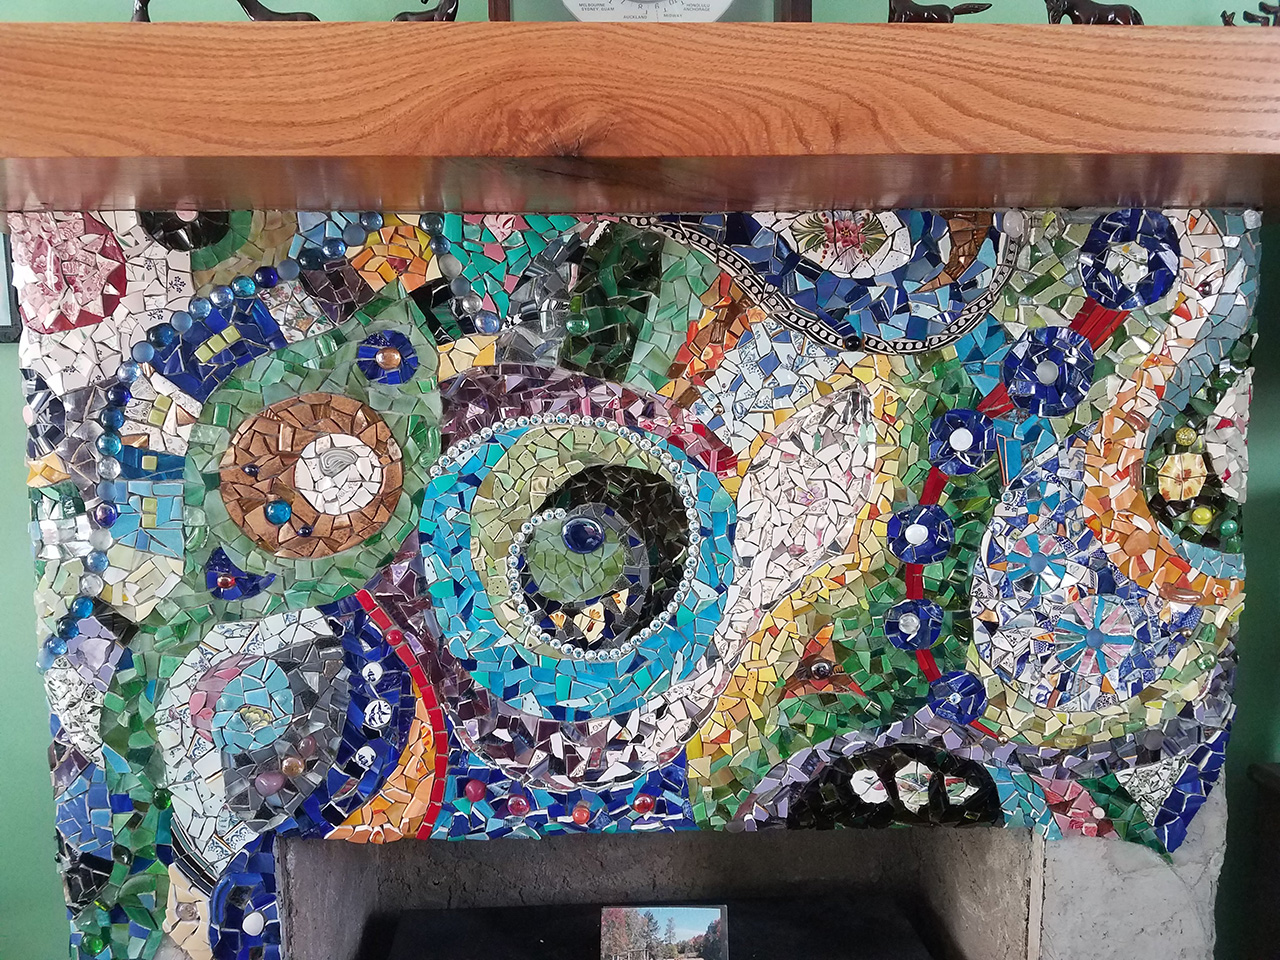
Elinor emailed us for advice on the grout color, and we recommended black grout as usual. Notice in the photo below how well the black grout makes the individual tiles stand out:

Fireplace Mosaic by Elinor Willis, grouted

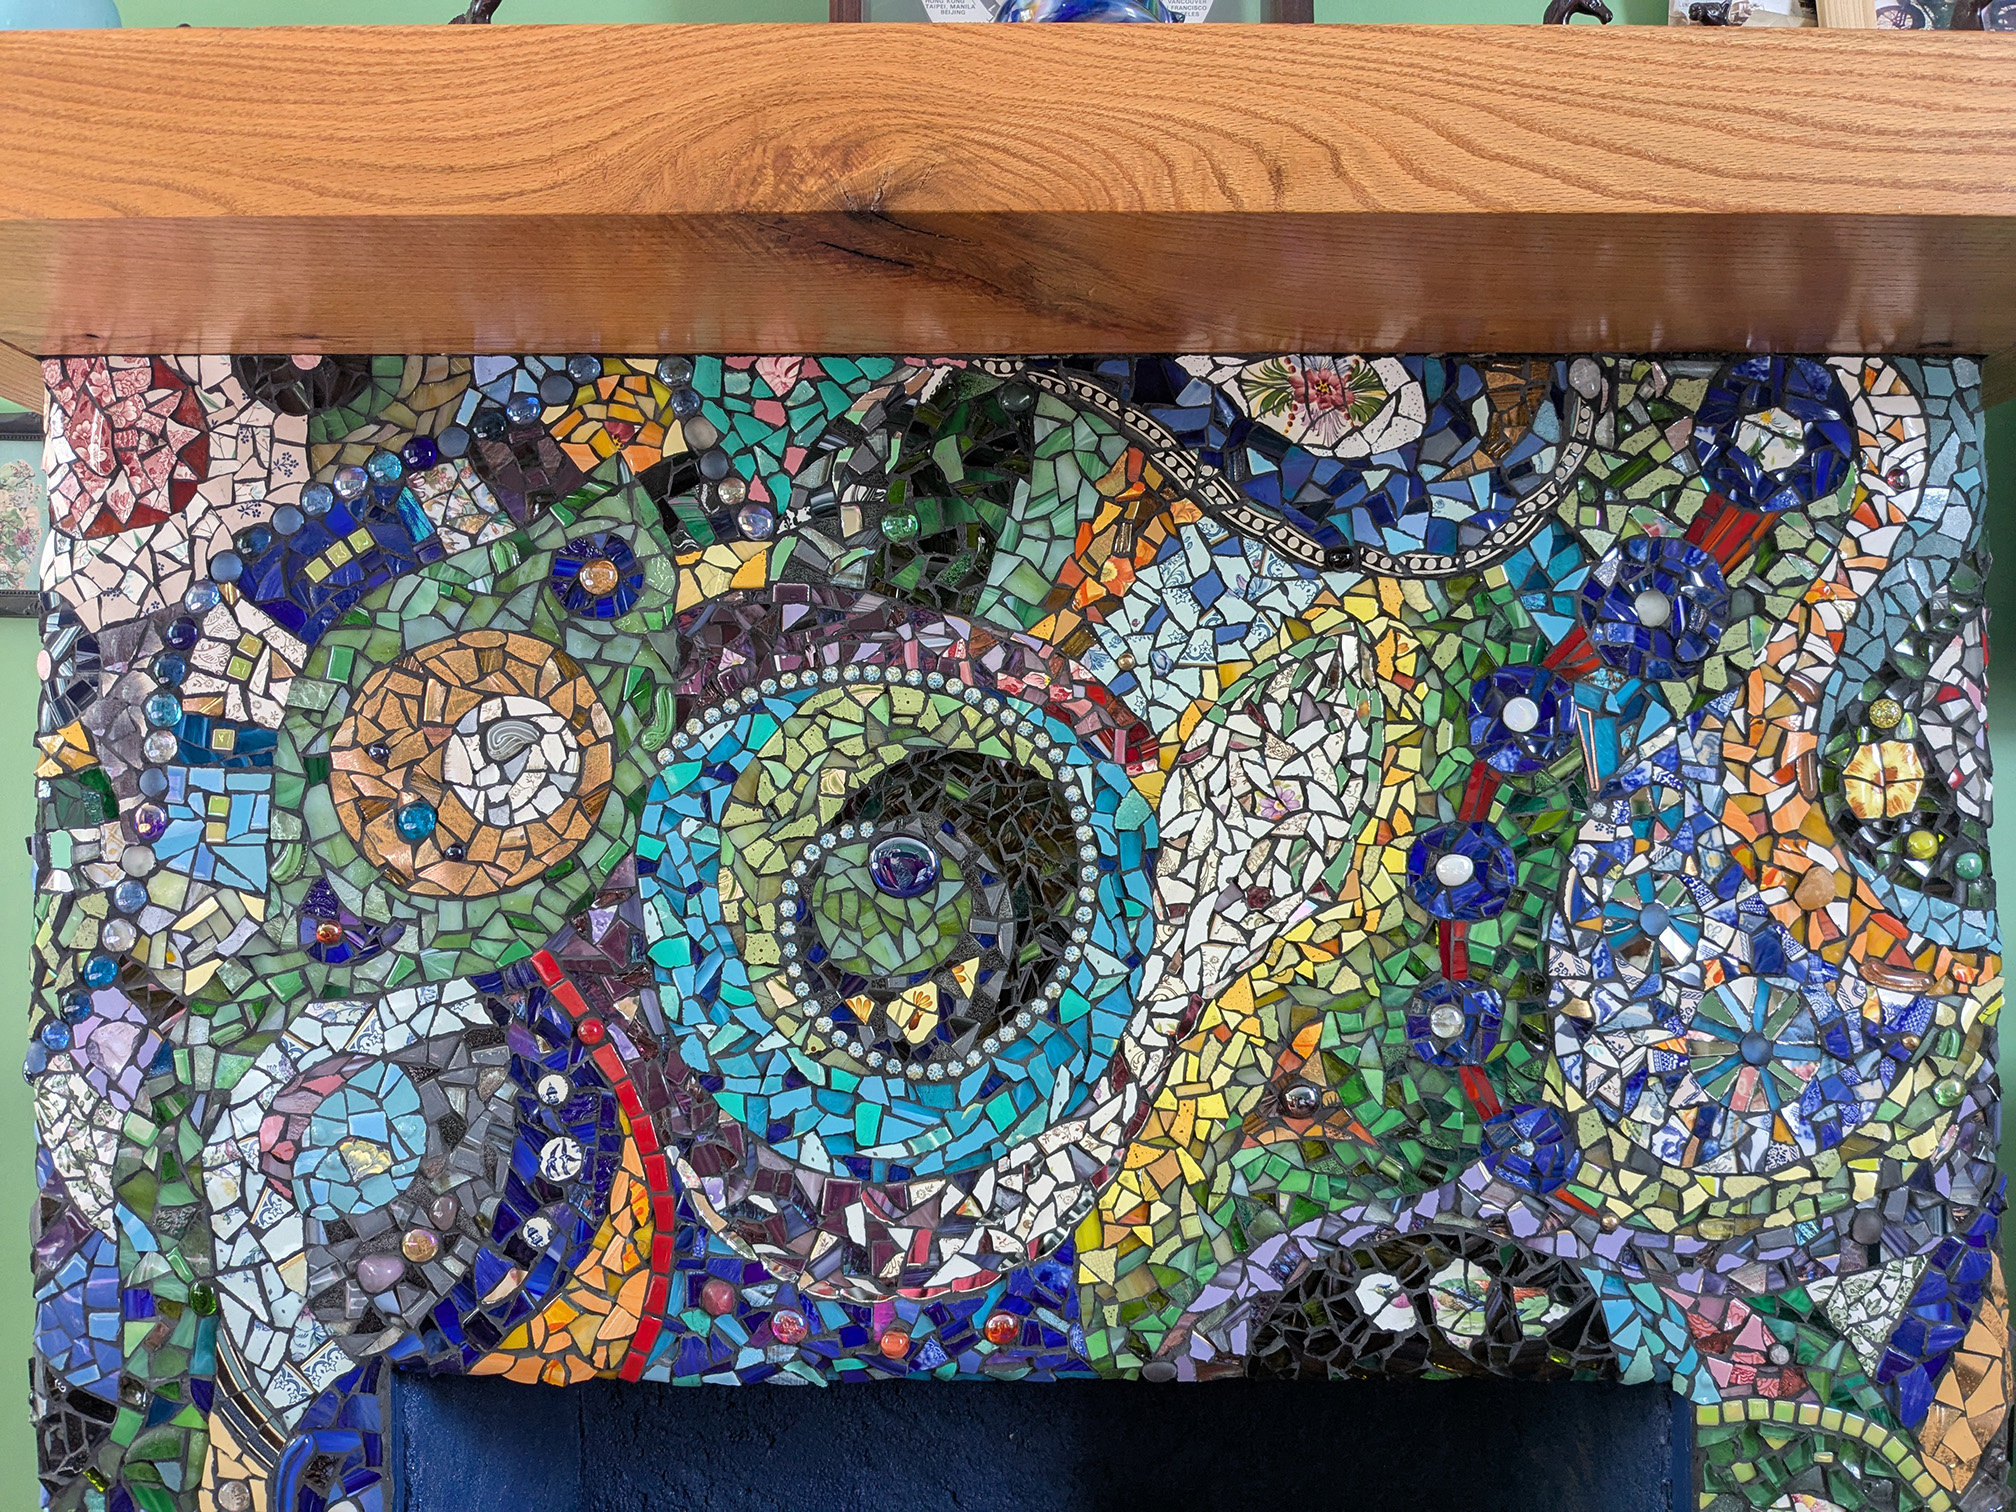
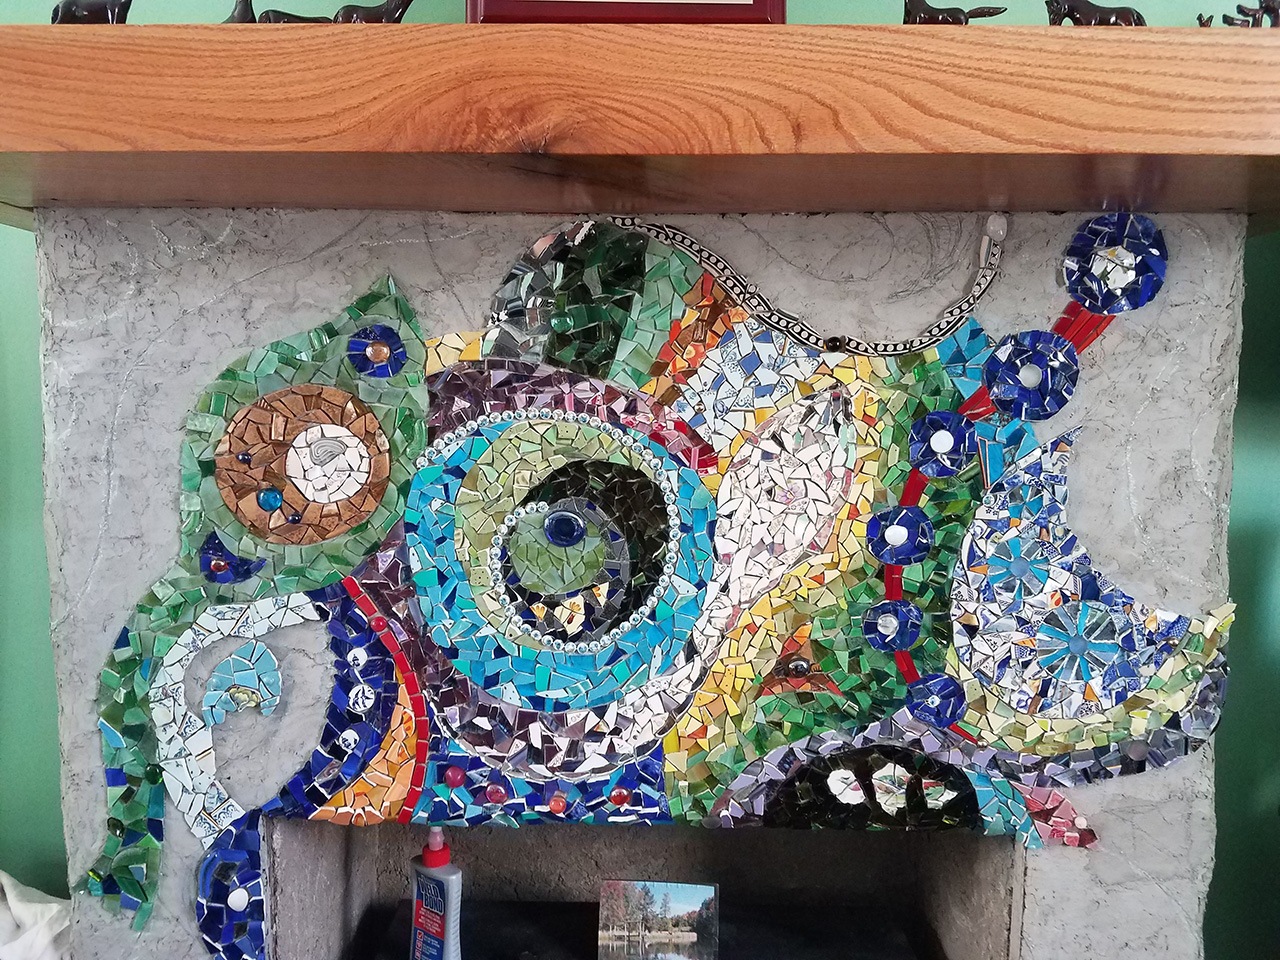
If light-colored grout had been used, the pieces white dinnerware would have been much less distinguishable as individual pieces:
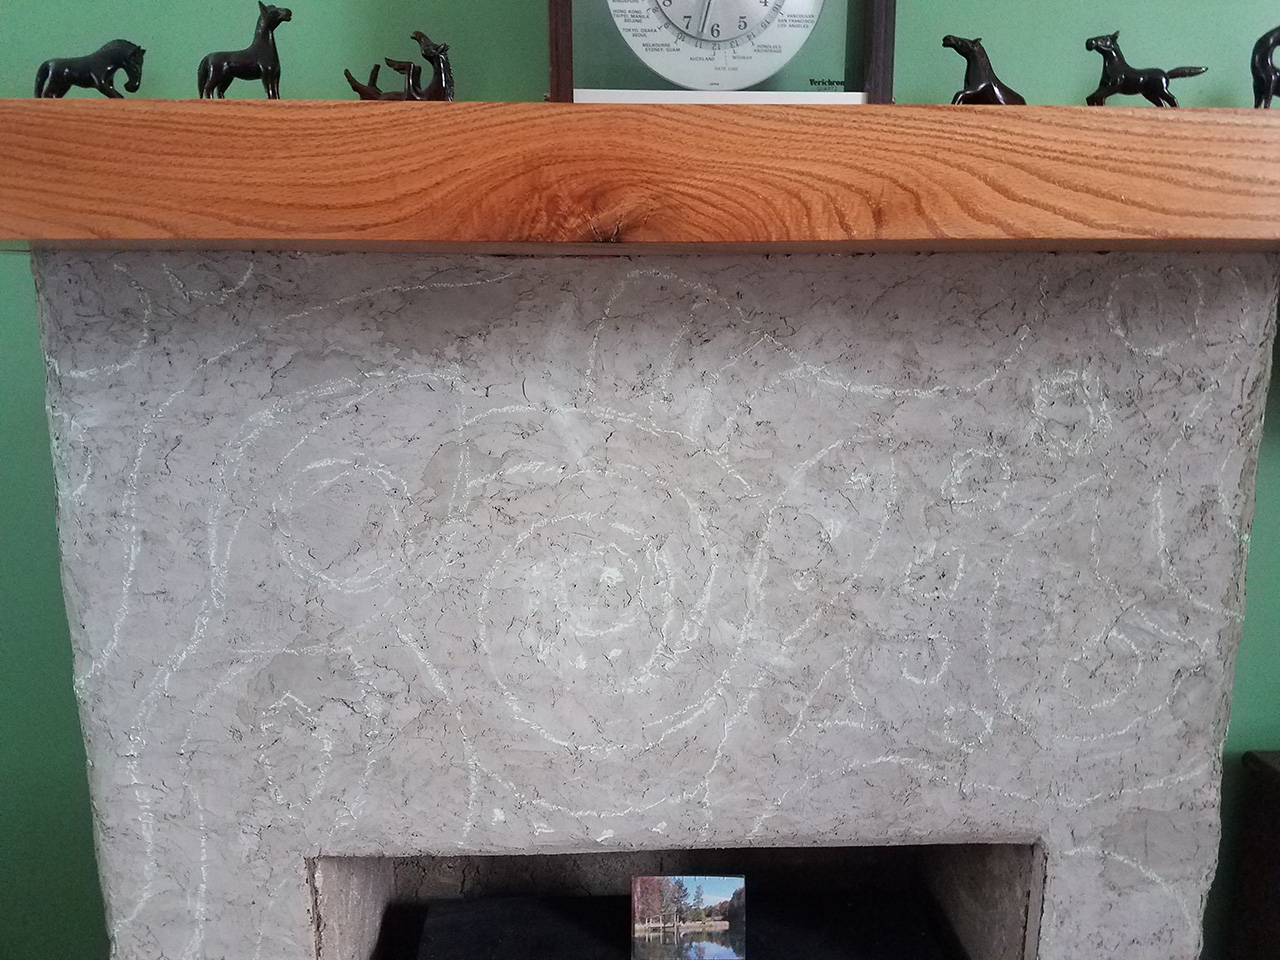
Fireplace Mosaic by Elinor Willis, detail top, grouted, 1280 x 960 pixels

Surface Prep

Elinor was lucky with her fireplace because the brick tiles were already falling off the backer, and the remaining tiles were easily pried from the backer.

Fireplace before Mosaic by Elinor Willis

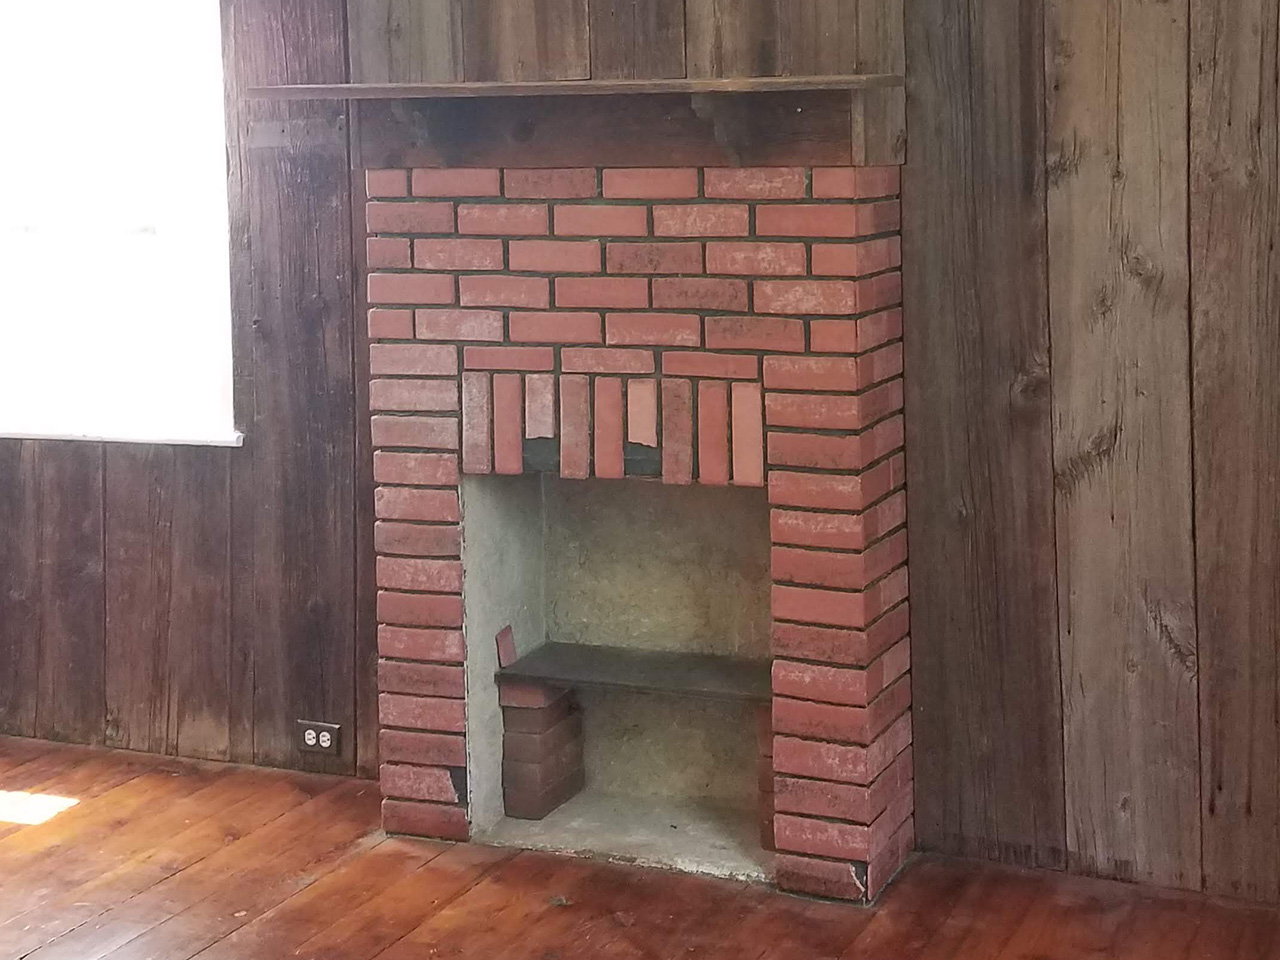
If the fireplace you want to mosaic is made from real brick or stone, you can prepare a smooth surface for mosaicing by plastering the surface with thinset mortar, such as Versabond brand.

The mortar used for this purpose needs to be a true portland-cement product such as Versabond and not something that is mostly adhesive or some sort of glorified mastic.


Posted

in

,

by

Tags:

Comments

5 responses to “Inspiring Fireplace Surround Mosaic”

  1. Joan Hooks Avatar
    Joan Hooks

    What about the heat of the fireplace…Will that effect the tile work?

    1. Joe Moorman Avatar
      Joe Moorman

      The fireplace surround doesn’t get very hot, and white PVA (poly-vinyl acetate) adhesives such as Weldbond are heat resistant. Of course this is different from the high-temperature environment of the firebox itself, which requires refactory mortars and bricks.

  2. Janie Avatar
    Janie

    Oh my goodness, this is splendid on so many levels—totally up my alley art-wise. I so appreciate the progress pictures and tips. Thanks so much for posting this—so inspiring!

  3. Morgan Halford Avatar
    Morgan Halford

    Wow! What a great job! Fantastic work!!

  4. steve Avatar
    steve

    beautiful psychedelic with karma.

Leave a Reply

Your email address will not be published. Required fields are marked *

This site uses Akismet to reduce spam. Learn how your comment data is processed.