Clear contact paper can be used to temporarily mount a design of mosaic tile, but it really isn’t sticky enough to be as useful as it should be, and it is better to use the clear mosaic mounting tapes (films) that are specifically designed for that purpose. I have used clear contact paper for small mosaics (less than 1 square foot), but even with something that small and simple, there were problems with tiles falling off and moving around when the sheet was pressed into the mortar. Mosaic mounting tapes have strong but removable adhesives. They are available in 3″ widths, 6″ widths and 12″ widths, but you can always overlap narrow tape to temporarily mount a mosaic of any width.
TIP: Save money and buy the 3″ width and just overlap it slightly to get whatever width you need. Remember, the pro-grade tape only comes in rolls 108-feet long. Sure, you can buy shorter rolls elsewhere but it isn’t the same tape. How much money did you save if the tile moves on the tape while you are mounting it in mortar and you screw up the mosaic?
Note that clear contact paper is still used in the method explained below, but it only serves to keep the tiles from moving around while you apply the clear mounting tape.
Instructions for Using Clear Mosaic Mounting Tape
1. Tape or tack your paper mosaic pattern to your work table.
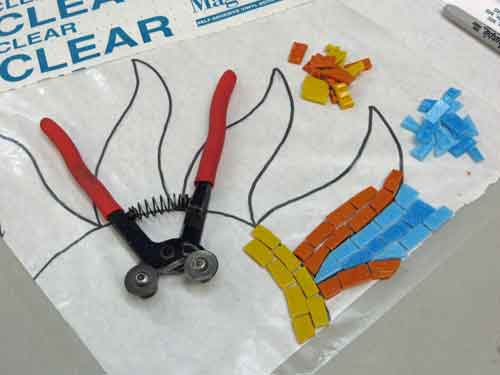
2. Tape or tack clear contact paper upside down on top your paper mosaic pattern with the sticky side facing up.
3. Position your tile on the pattern, sticking the bottoms of the tile to the sticky contact paper.
4. After all of your tile is in place, cover the top of the mosaic with clear mosaic mounting tape.
5. If your mosaic is larger than a square foot or two, then use a box cutter to cut the mosaic into manageable sections.
Note that sections you cut in step 5 do not have to be squares. Unless you are shipping the sheets to a client for installation by a contractor, there is no need try get them into roughly even squares. Instead, it makes more sense to divide the mosaic in places that make it easiest to line the sheets up when they are permanently mounted in mortar or adhesive.
Advantages of This Method
Using clear mounting tape has several advantages, and they are each significant:
- It allows you to work with the tile and the mosaic in progress FACE UP.
- The temporarily mounted mosaic is still visible through the clear mounting tape, which can be very important for lining up the sheets when you press them into thinset. A perfectly executed mosaic can be permanently flawed if an installer leaves a slightly extra wide gap between sheets.
- There is no mounting mesh involved, and thus the tile can be pressed directly into thinset mortar for maximum life outdoors and in wet locations. Mesh requires an adhesive be used to attach it to the tile, and that is a point of vulnerability, and Achilles heal that moisture could penetrate and delaminate over time.
“Expensive” Mounting Tape Is Actually Cheap
You don’t have to buy the 12-inch wide roll of mosaic mounting tape. It also comes in 3-inch wide rolls, which can be used in 4 strips side by side.
Even if you think you need the 12-inch width, it’s still cheaper than mounting paper if you think you might have trouble installing sheets with a consistent grout gap between sheets.
If you are having a contractor install mosaic you have made on commission, clear mounting tape is preferred because many tiling contractors have little to no experience with face-mounted mosaic or sheets in general.
They have manly worked with large architectural tiles set apart using spacers. For this reason, they are prone to making inconsistent grout gaps between sheets.
If you use opaque mosaic mounting paper, then the problem will not be discovered until the mortar has hardened and permanently set.
Professional Installers
If you hire a contractor to install a mural you or your group has laid up on mosaic mounting tape or mounting paper, make sure the installer has installed that type of mosaic. Many installers have limited experience with face-mounted mosaic and have only worked with large flooring tile, subway tile, or mesh-mounted sheets.
Leave a Reply