Recent blog articles have required that I use Adobe’s Photoshop software to correct the foreshortening and skewed angles in the original photographs sent in by the artists.
You can avoid foreshortening and skewed angles when photographing your artwork using the tips I have at the end of my post about frames for mosaic art.
However, you might not be able to avoid photographing your artwork at an odd angle if your artwork is immovable or if you want to capture an iridescent shimmer, which depends on the angle of the viewpoint.
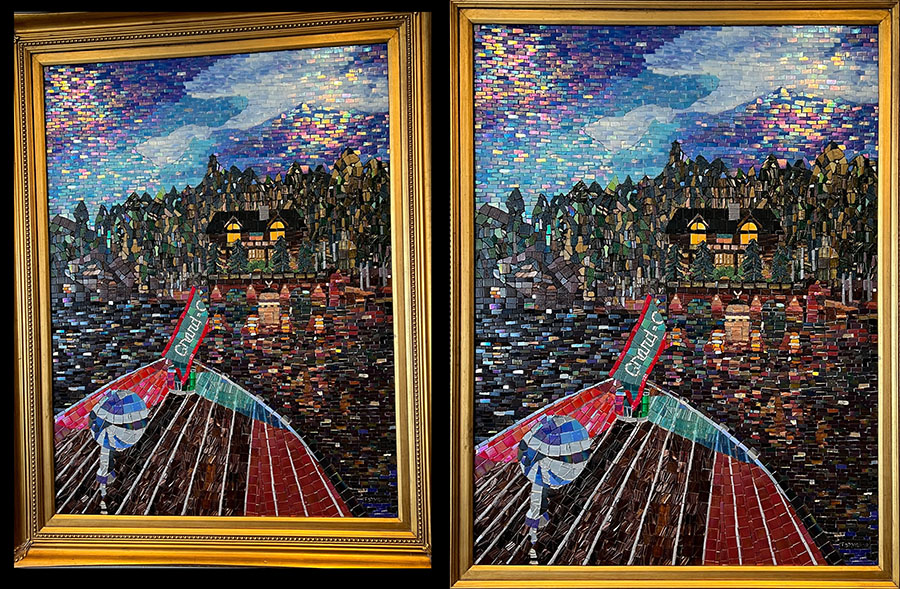
That latter issue was the problem when artist Terry Broderick made photographs of his recent Grand Lake Cabin mosaic.
I was planning to write a post about using Photoshop to correct foreshortening, but Natalija beat me to it when she documented what she did to correct Terry’s photo.
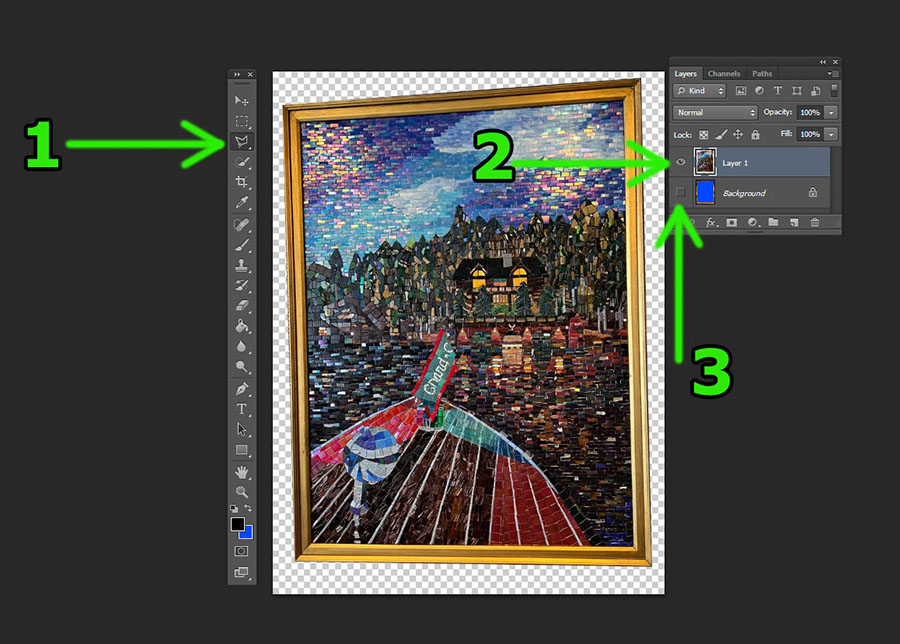
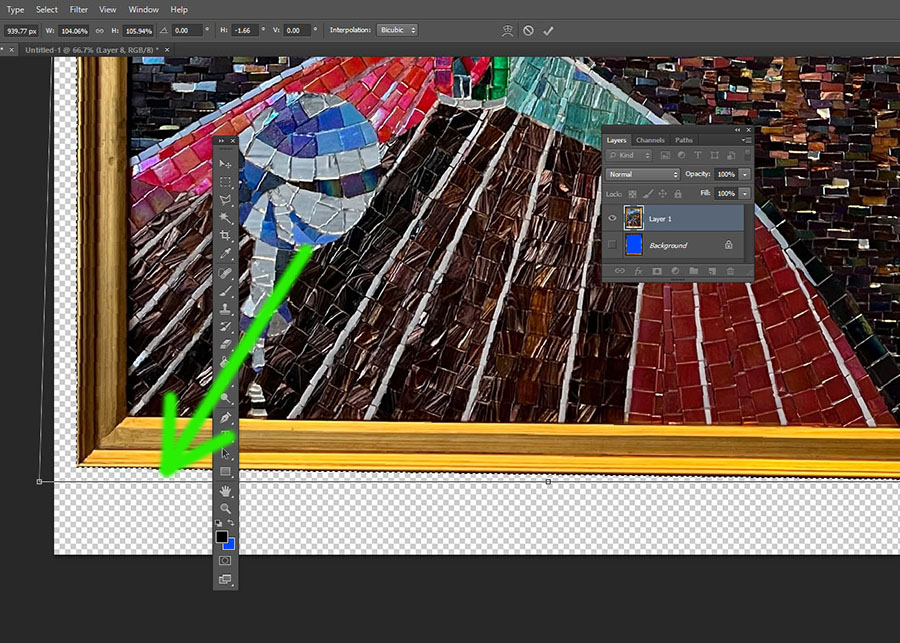
Step 1. Use Polygonal Lasso Tool
Use the Polygonal Lasso Tool to draw 4 lines around the frame of the mosaic.
In this case, Natalija drew the polygon inside the frame to ensure she had an equal portion of frame all the way around the whole mosaic.
This was necessary because the original photo crops out part of the frame.
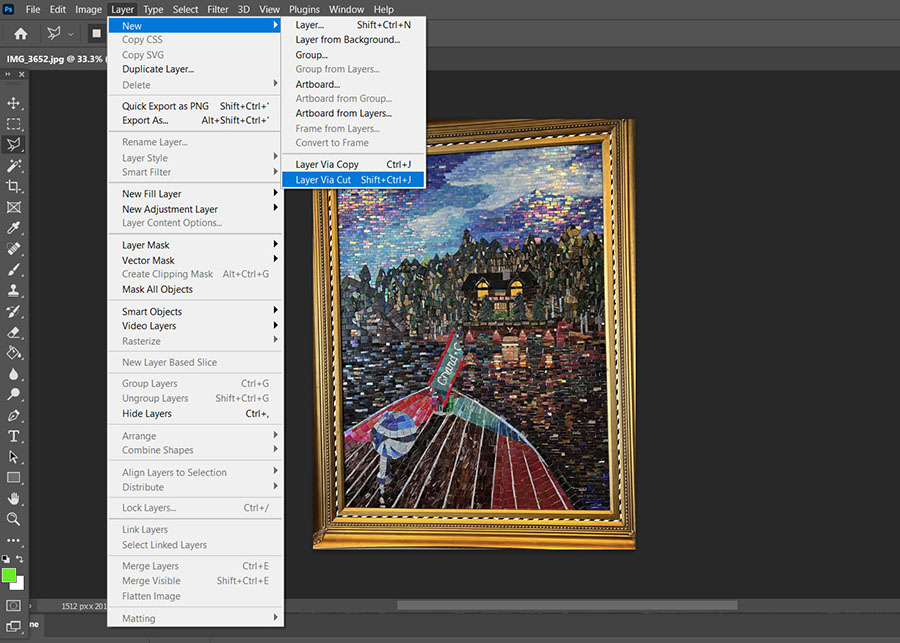
Step 2. Cut to New Layer
Once you have a polygon drawn around the mosaic, we need to cut it out and put it on a new layer.
Go to the menu and select:
Layer –> New –> Layer Via Cut (Shift + Ctrl + J)
Step 3. Hide the Original
Hide the original background layer by clicking on the eye icon in the Layers window to turn off its visibility.
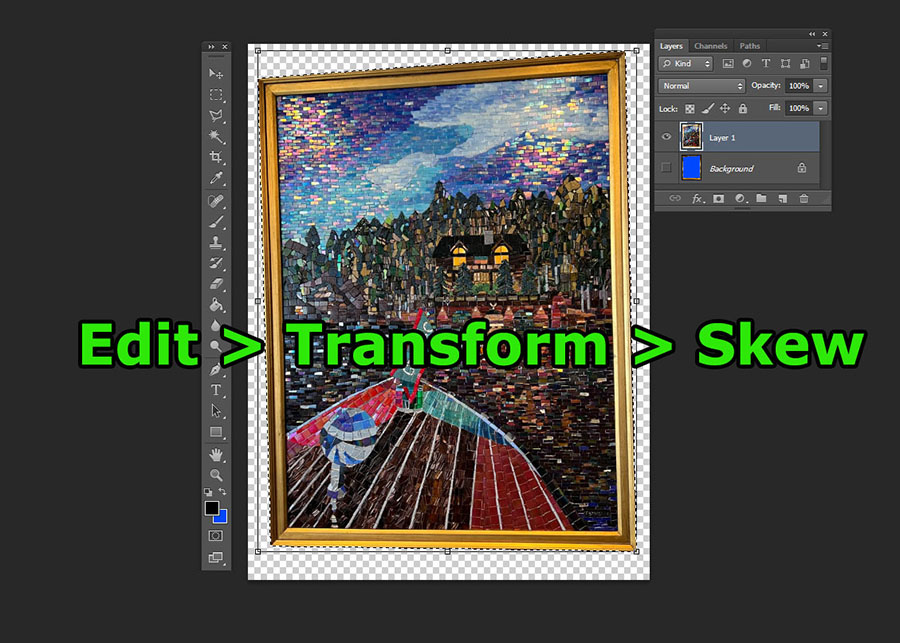
Step 4. Use Skew
Go to the menu and select:
Edit –> Transform –> Skew
Drag the corners INWARDS to get them lined up and square:
- It helps to zoom in (Ctrl + +)
- On a very skewed image like this one it may take a couple minutes to get the adjustment
- Take your time on it
- Use the checkered grid photoshop background as a guide
Once the mosaic is roughly rectangular you can apply the changes by hitting [enter] or selecting another tool (like the arrow tool).
If it asks if you want to apply the transform, click yes to confirm.
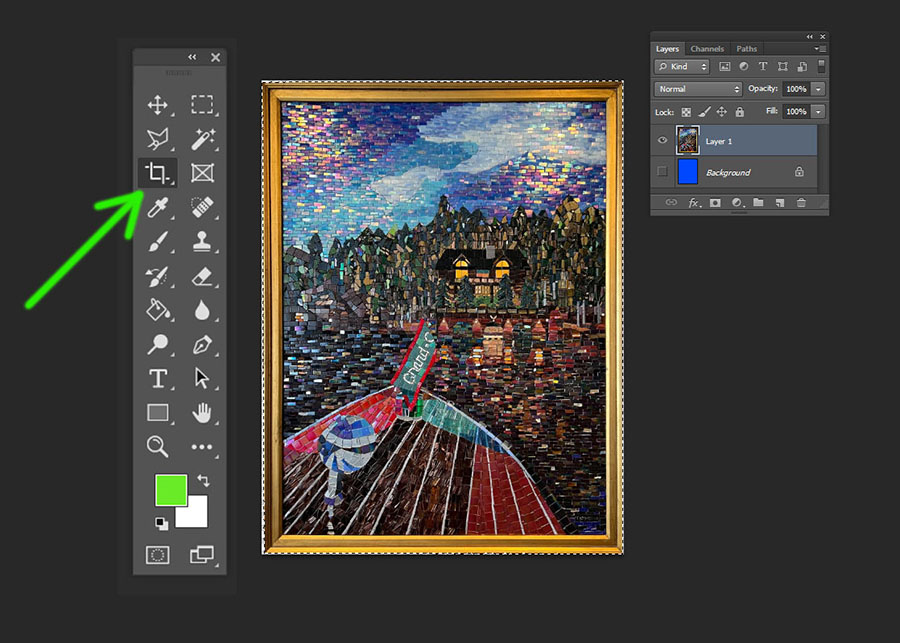
Step 5. Crop
Then you need to crop out all the excess background. You can select the Crop Tool icon or go to the menu and select:
Image –> Crop
You will probably notice that not all the sides of the roughly rectangular mosaic aren’t perfect straight when you attempt to crop all the way to its edges.
If so, don’t crop all the excess background out, and use the Skew feature gain.
Step 6. Use Skew Again.
Select the whole mosaic using (Ctrl A).
Repeat the skew process, except now you’re dragging the corners of the photo towards the corner boundaries of the Photoshop image:
- There may be minor distortion towards the middle of each edge, that’s normal, just do your best on this part
- Once you like how it looks you’re done!
The Mosaic
Terry Broderick is very focused on depicting reflections on water at night using iridescent tiles, and it shows in this mosaic.
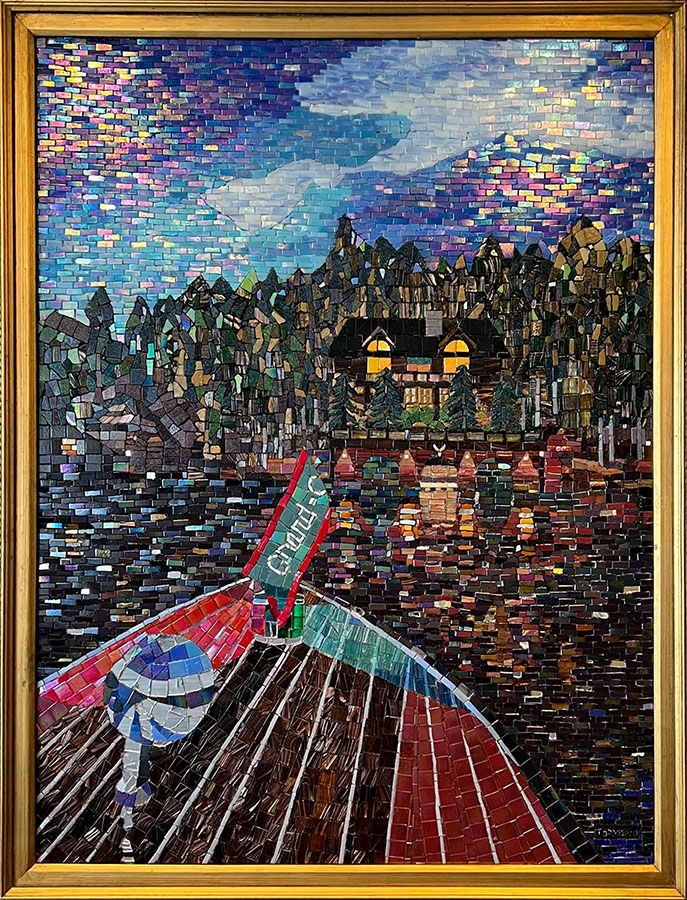
The typical approach when painting a landscape with sky over water in the foreground is to depict a daytime scene so that the water and sky are both luminescent and contrast any land or trees on the horizon.
If it is a nighttime scene, then the scene is selected for lighting where the body of water is as distinguishable as the sky, often by reflecting the sky itself.
That easy convention isn’t applicable when the scene being depicted is a cabin on the shores of a dark forested lake.
True to form, Terry was more concerned with depicting the actual reflections on the dark water than “correcting” the composition to something more iconic/cliche/easy.
Of course, a sky that was reflecting the colors of the blue sky might have made the composition more recognizable at a glance, but the real sense of being on the water at night would have been lost.
This mosaic was made for people who ride the boat to the cabin.
Terry says that the nose of the boat in the foreground is a replica of a 1955 Chris Craft and belongs to the owner of the log cabin.
Leave a Reply