stained glass shards in buckets

How to Make a Stepping Stone with Scrap Glass

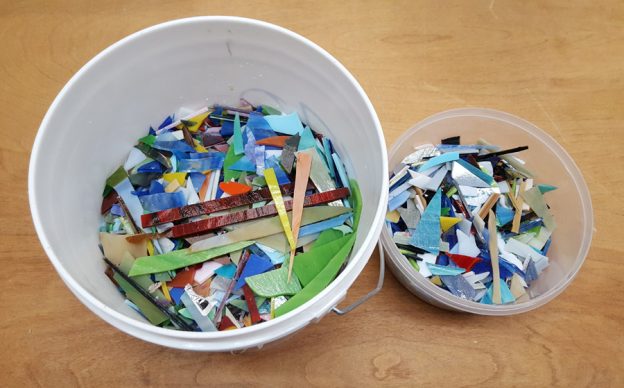
If you work with stained glass over time you can end up with buckets full of scrap. When the pieces start getting too small and irregular, or if there’s just too much of it, you can used them in a stepping stone. This tutorial demonstrates how to make a stepping stone with an abstract pattern. You can also use tiles instead of stained glass scraps.

sharp glass needs to be trimmed before use in a stepping stone.
For safety sharp shards need to be trimmed and smoothed before use in a stepping stone.

Step 1. Remove Sharp Edges and Points

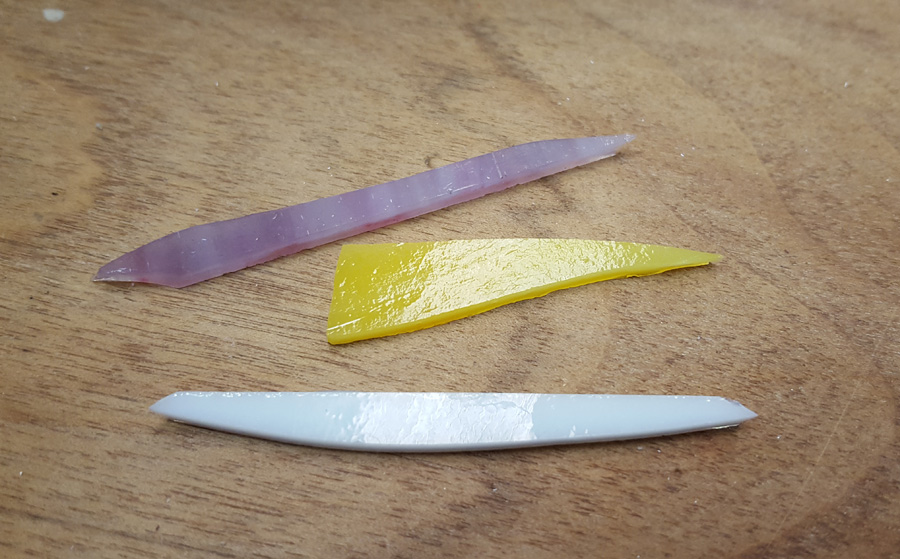
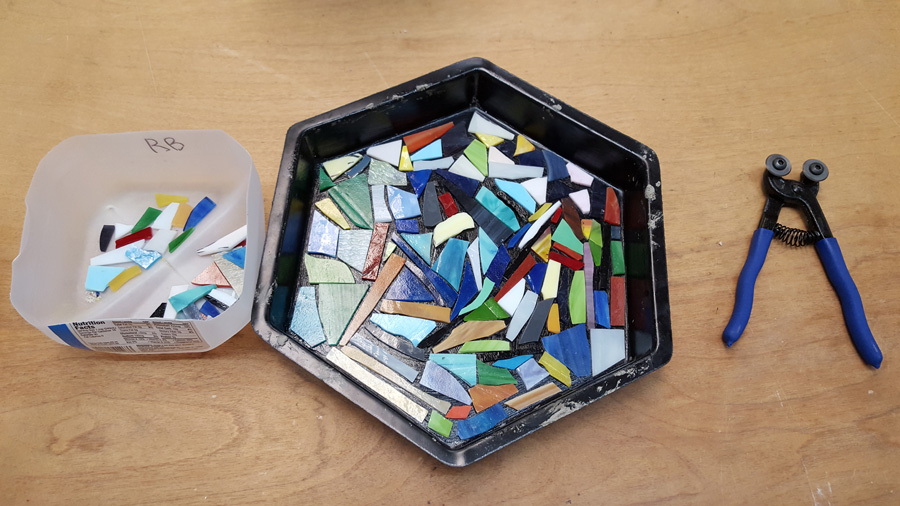
Stained glass shards are sharp and dangerous by nature; you don’t want to get hurt by walking on a sharp shard. Therefore it is necessary to trim the sharp corners off of any scrap glass you want to use in the stepping stone.

quickly trim sharp edges with mosaic glass cutter.
Our mosaic glass cutter can be used to quickly trim the sharp corners off of sharp shards.

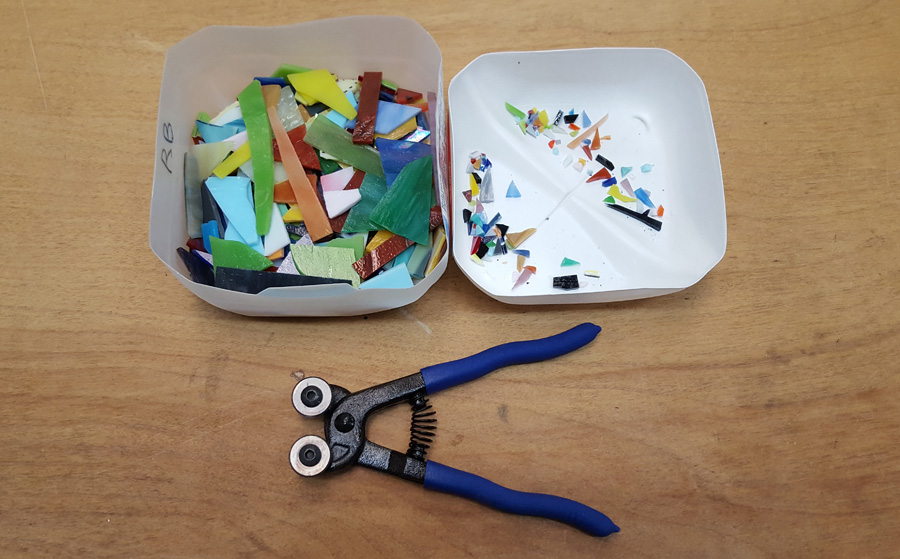
The mosaic glass cutter we sell is ideal for quickly trimming glass shards. It took just a few minutes to clip all the sharp corners off of this tray’s worth of scrap glass. The edges can still be quite sharp, especially when the material being cut is stained glass. A marble file is recommended for smoothing the edges of pieces going into a stepping stone.

use petroleum jelly as a mold release.
You can use any brand of petroleum jelly as a mold release. Alternatively you can use contact paper.

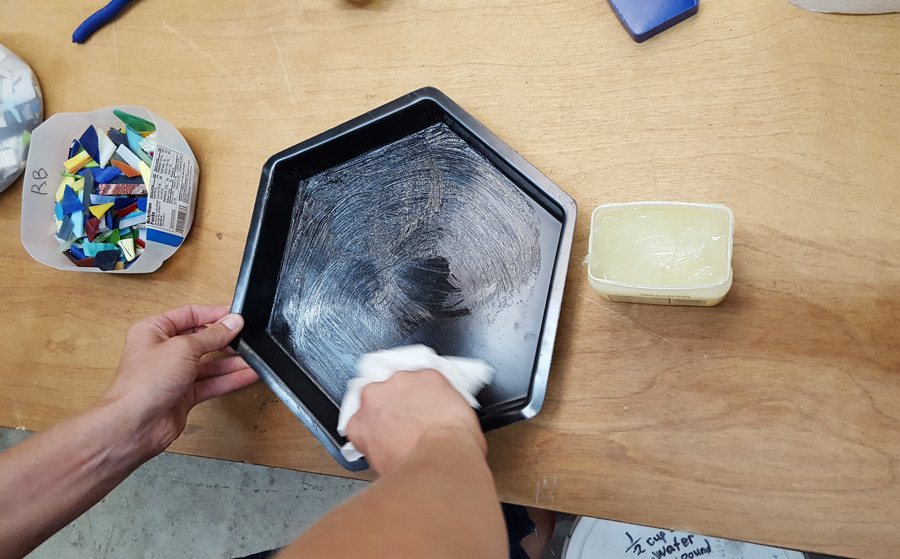
Step 2. Prepare the Mold with Petroleum Jelly

Once you’ve got your glass ready, prepare the mold. The inside of this mold has been wiped with petroleum jelly. If you want to use contact paper to hold the design in place you can put that at the bottom of the mold instead of the petroleum jelly, but you’ll still need to wipe the sides of the mold.

tiles laid down inside the mold
Abstract patterns can be laid down straight onto the bottom of the mold, but if you have an actual design it might be easier to use contact paper instead of petroleum jelly.

Step 3. Position the Tile

This example uses a random assortment of glass pieces, but you can obviously choose to make an actual design. Again, if you have a particular pattern use contact paper in the bottom of the mold. In either case, make sure everything stays about a quarter inch away from the edges.

thinset can be used for the stone
Make the stone out of ordinary thinset.

Step 4. Pour in Thinset or Concrete

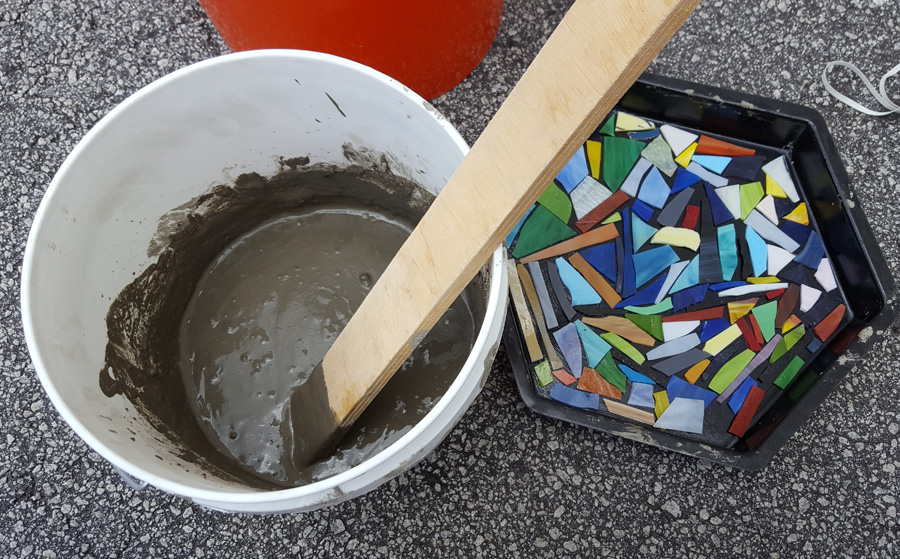
This stone uses a blend of thinset and pea gravel. The thinset is tougher than ordinary concrete and will adhere more strongly to the glass.

The thinset was mixed with a little extra water in order to make it less sticky. When you pour the thinset into the mold on top of the design it can accidentally push the tiles around. Using a more liquid mixture lets it flow around the tiles or glass instead of just pushing them around as its poured. But this isn’t as much of a problem if you use contact paper.

add pea gravel next
Once the initial layer is down mix the rest with pea gravel to complete the stone.

Once you have the first layer of thinset down pour on a layer of pea gravel. Then mix some more pea gravel into the remaining thinset in the bucket. Pea gravel is nice because it strengthens the stepping stone and reduces the amount of thinset required. Fill the mold with the rest of the thinset-pea gravel mixture.

completed stone inside a mold, it needs to dry over night
Cover the stone with plastic if it is in a dry place such as a heated home. If the thinset or concrete dries out artificially, it will be crumbly or not as strong as it should be. Hardening is a process of bonding water not drying out.

The mold is full. At this point you should wait at least 24 hours for the curing process to make the stone hard.

stone pulled out of the mold needs to be cleaned
The stone now needs to be cleaned up.

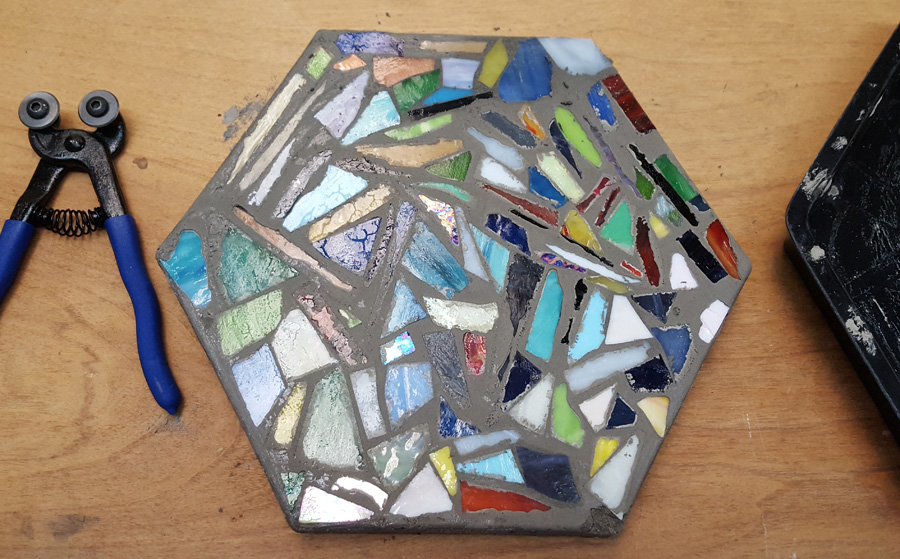
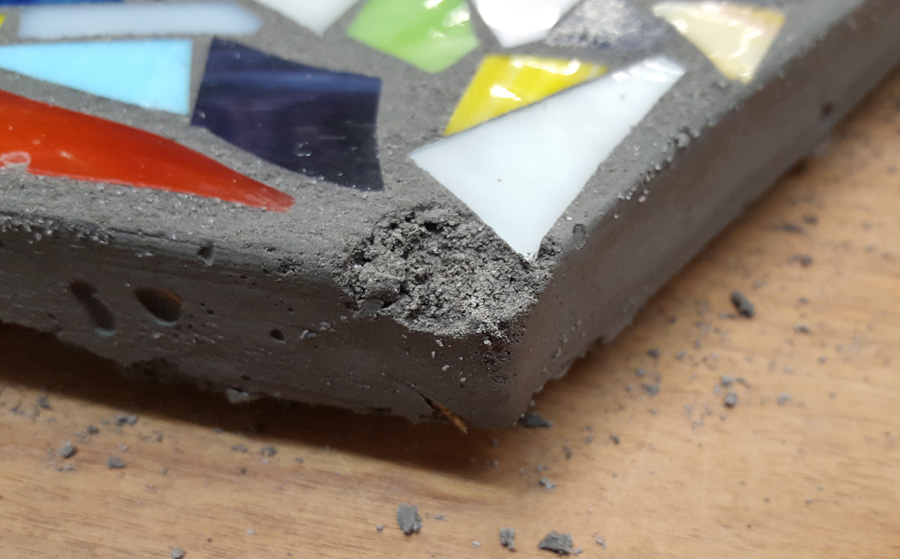
After 24 hours you can remove the stone from the mold. This one was mostly hard, but a corner got chipped. Also, you can see a couple of problems. In a couple places the edges of glass pieces are exposed along the edge of the hexagon, and the lines between the tile in some spots flowed on top of the tiles.

clean the surface with rags or paper towel
Scour the surface with paper towel or rags. Clean the thinset off the surface of the tiles.

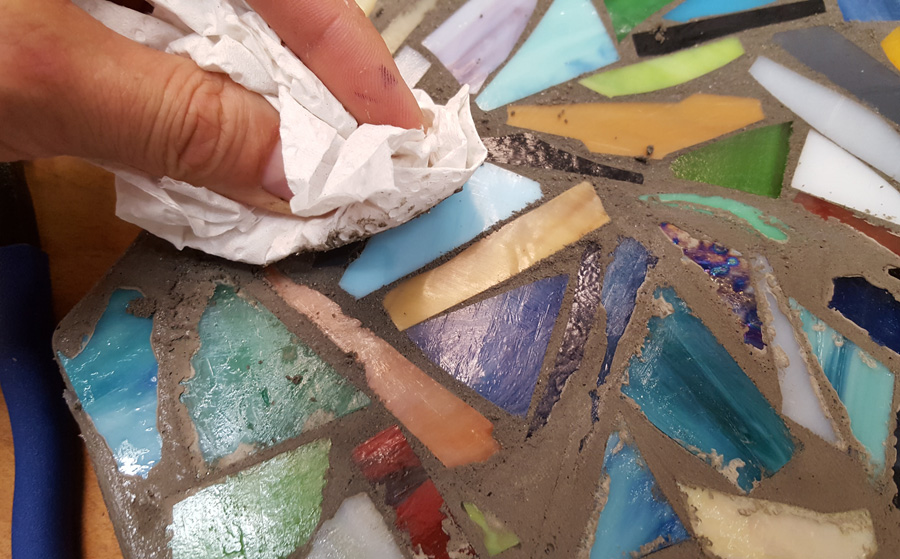
Start by cleaning the lines between tiles. Paper towel was used here, but you can use old rags or whatever is at hand. The material was still a little weak at this point, and in general thinset left on top of a tile isn’t in a strong position and it can be knocked out of the way by rubbing.

broken corners can be mended with thinset
Broken corners can be mended with thinset.

Once the lines were cleaned up the broken corner needed to be fixed. Mix a small amount of thinset and applied it to the corner. Leaving the stone to harden for 2 or 3 days instead of just 1 day before pulling it out of the mold would probably have kept the corner from chipping, but that would also have given the the lines between the glass pieces time to harden as well. The thinset wants to creep under the surface of the glass pieces when it's still liquid inside the mold.

smearing thinset onto broken corner
Smudge some thinset on to bulk up the corner and allow it to dry.

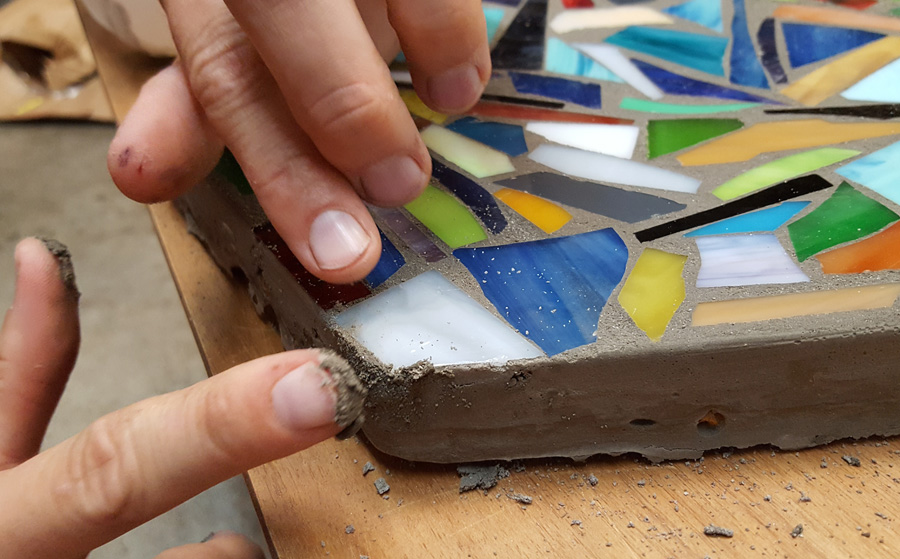
Use your fingers to smear thinset into the broken corner and then try to shape it as best you can to match the other corners.

EDITOR’S NOTE: THINSET, GROUT, AND OTHER CONCRETE PRODUCTS ARE MILDLY CAUSTIC AND RUBBER GLOVES ARE RECOMMENDED FOR HANDLING IT. Nevertheless, wet concrete isn’t nearly as irritating as bleach or ammonia or any number of household cleaners, and that is why you can routinely see workers touching it with their bare hands. It will dry your skin out and leave it dry and cracked and chapped though, so gloves are recommended.

sharp edge exposed
Sharp edges may be present along some of the edges.

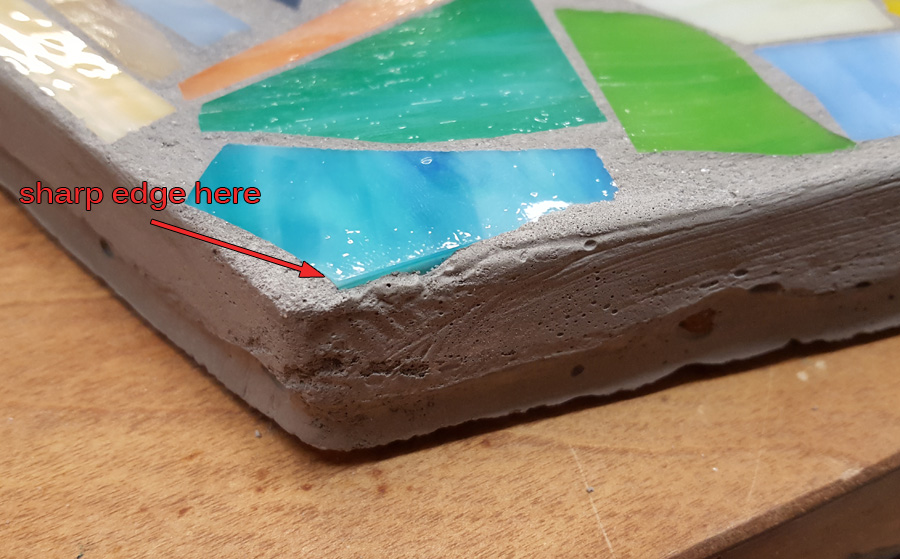
The final problem remaining was the exposed sharp edges. You can see in the above photo that this piece of glass is too close to the edge of the hexagon and it has a sharp edge exposed. This can be a safety hazard so we need to correct it.

filing a sharp edge with ceramic and marble file
File it down using a ceramic and marble file.

Use a rounded ceramic and marble file to smooth down the edge. You can also use the other file we sell, but the rounded one is probably easier for this purpose because it has a finer grit. Wear safety glasses when filing glass in this fashion, and be gentle with the file. You just need to round the edge enough that it isn’t sharp.

smoothed edge
The edge is now smoothed and safe to walk on.

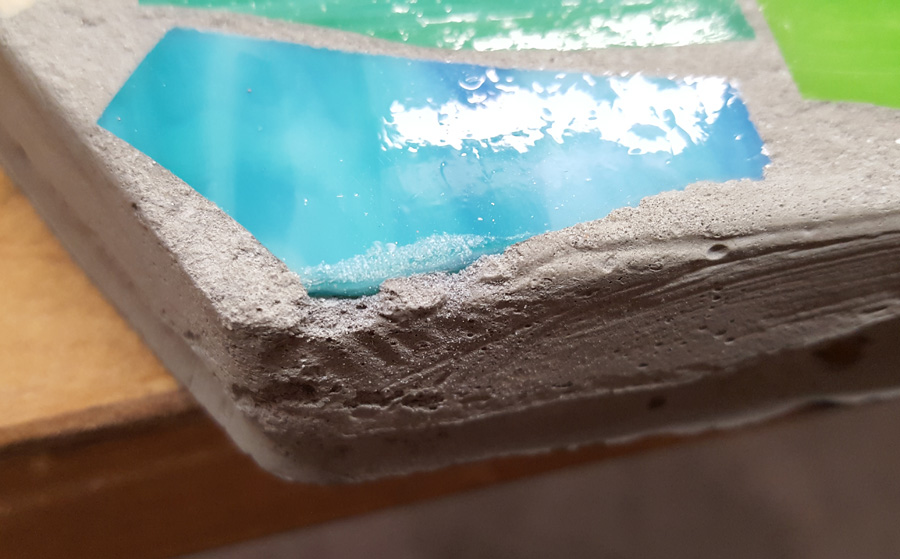
This edge is safe now.

seal stepping stone
Seal the stepping stone to protect it from water.

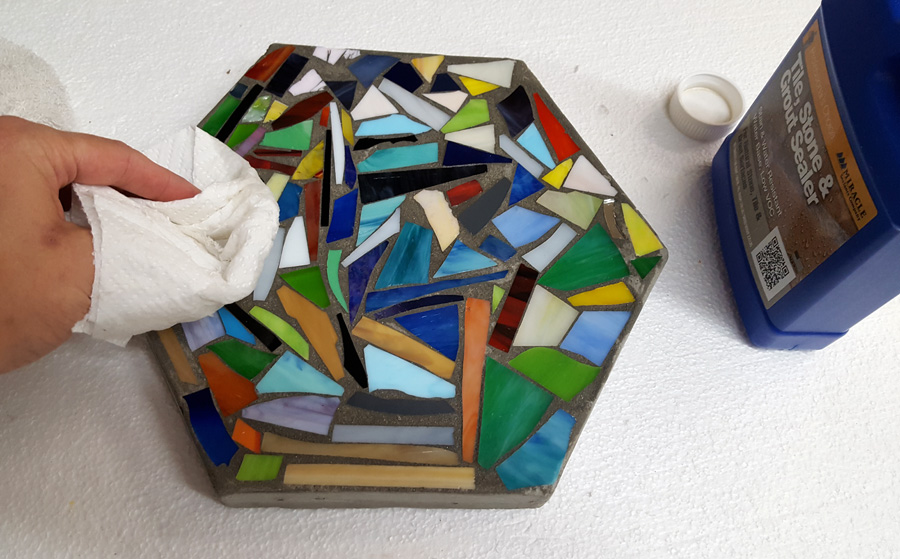
Because the corner was repaired with thinset extra wait time was needed before sealing the stepping stone. One day should be fine, but to ensure the whole stone is completely cured it is good to allot 3 or 4 days for curing, which is what was done for this one.

The sealer used in this tutorial was found on the shelf at a big box home improvement store. It’s just a wipe-on/wipe-off silicon-based pore sealer and not some sort of coating. (We recommend traditional tile and grout sealers not coatings.) This particular brand didn’t leave any weird residue, but even if it had, the glass is non-porous, and the residue could have been wiped off.

completed stepping stone
The stepping stone is complete.

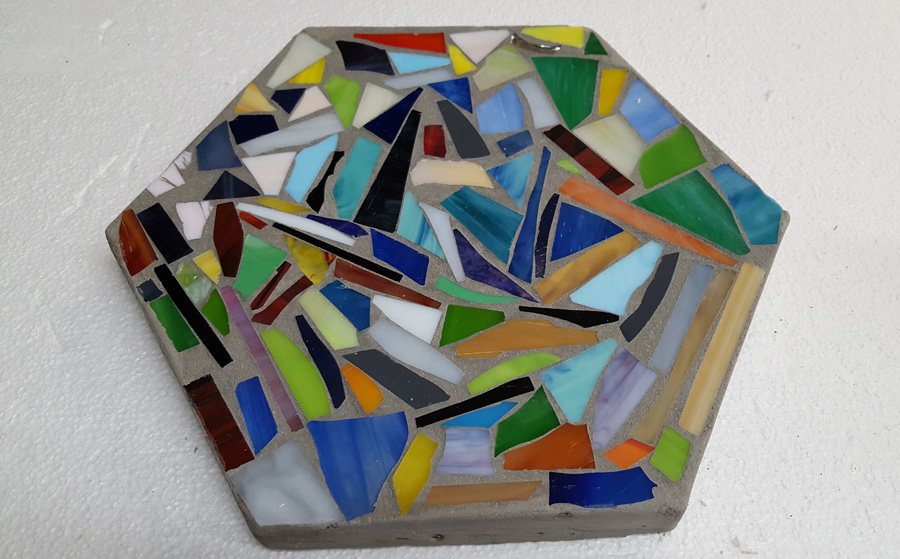
A day later, with the sealer dry, this stone was done! Now all it needs is a home out in the garden.

Comments

11 responses to “How to Make a Stepping Stone with Scrap Glass”

  1. Jen Rees Avatar
    Jen Rees

    Beautiful stepping stone and a project im goi g to try, thanks.
    I would also like to use up pieces of glass to mosaic an outdoor concrete table. Please can you offer any advice on how to do this? It’s a rough concrete finish so not even.
    I hope to hear from you,
    With kind regards
    Jen

    1. Joe Moorman Avatar
      Joe Moorman

      Hi Jen,

      I would scrub the table with a stiff wire brush such as a welding brush, and then I would smooth it with thinset mortar and allow that to harden for 3 days. Here is an article I wrote about outdoor mosaic tables.

      Thanks!

  2. Pam M. Avatar

    I do stained glass mosaics and I tumble all my small left over glass in a rock tumbler with some soap shavings. The glass comes out sparkling clean and all the sharp edges are gone~! Glass is ready to use in stepping stones or other projects.

    1. Joe Moorman Avatar
      Joe Moorman

      Thanks Pam!

  3. Sharrie Wing Avatar
    Sharrie Wing

    Hello can I use scraps from stained glass with glass I used for fusing. I guess they have different Coefficient numbers. Or COE. I’m guessing it shouldn’t matter but would like your advice.
    Do you also sell scrap because I don’t do much stained glass anymore.

    1. Joe Moorman Avatar
      Joe Moorman

      Hi Sharrie,
      I wouldn’t count on them to have the same COE, and COE isn’t the only factor in determining compatibility for fusing.
      I wish I could be of more help.

  4. Victoria emerick Avatar
    Victoria emerick

    Thank you for all the information. I am very new to mosaics and I was a bit eager to try my hand at it. I made a few step stones using broken Mexican tile and broken dishes. I now realize that I made a bad choice of materials, but am wondering if I can salvage the stones. I am wondering if there is anything I can “seal” the stones with that will protect the porous tile outside, and possibly help with the issue of uneven sizes creating height differences. I imagine something like a thick epoxy coating, but I don’t know if such a thing exists.

  5. Susan Avatar
    Susan

    Thank you very much for these very detailed instructions! I’m certain I’ll have the confidence to try this project w/the many pieces of glass scrap I’ve accumulated! 😀

  6. Susan Maasch Avatar
    Susan Maasch

    a friend made us a stained glass stepping stone. i don’t know if it was sealed. the stone was out in all kinds if weather, and now the glass pieces are completely separating from the stone. is there any kind of cement that we could use to salvage this project? we have the cast majority of pieces; many have fractured, but we could put it back together like a puzzle. we also need to seal it once the restoration is finished. what should we use? thank you!

  7. Pauline Leatherman Avatar
    Pauline Leatherman

    Hello! New to this, so just want to make sure: I put the contact paper in the mold, sticky side up, place the stones, and then pour the thinset over everything? Doesn’t the thinset bond the contact paper to everything, or do you peel it off after it sets? Sorry so confused!

    1. Joe Moorman Avatar
      Joe Moorman

      Hi Pauline,

      That technique is used for CONCRETE in the mold not thinset mortar. That method isn’t the best of detailed work, and I don’t like it.

      I recommend you buy a concrete stepping stone and attach tiles to it using thinset mortar.

      You can lay up your design face down on contact paper and then place a thinset-covered stepping stone on top of that.

      I hope this helps!

Leave a Reply to Susan Cancel reply

Your email address will not be published. Required fields are marked *

This site uses Akismet to reduce spam. Learn how your comment data is processed.