
Making a series of smaller works instead of one large work is the best way to improve your art.
The reason is obvious: instead of investing all your time in executing the larger image, which might already be flawed or compromised long before it is completed, you get several opportunities to get it right.
In addition to getting several more chances, you also have the benefit of looking at your previous attempt and seeing what you did wrong and would like to try differently on the next work.
That is why most of the teachers and artists who recommend “a series of smalls” also recommend that the smalls be the same composition or at least variations on the same composition or theme.
Even if your small works are different compositions, you still spend a higher percentage of your studio time making and evaluating decisions (actively learning) compared to making one large work, where the decisions are made once and most of the time is spent on execution.
This shift of focus from execution to decision making via “a series of smalls” is critical in learning the medium of mosaic because mosaic takes so much more time and effort than painting or drawing, especially when the work is large. Tiles and mortar are heavy.
Small vs Too Small
Large mosaics have intrinsic disadvantages (too much area to cover in tile) but small mosaics can also be problematic, especially if you attempt to use pieces that are too small to be manipulated easily.
Go small, but don’t go so small that the work is tedious.
Deciding Best Scale
How do you decide what scale to use and how large your mosaic should be?
- Look at the smallest detail in the image you wish to create.
- Try arranging a few pieces of tile to create that detail in a size that is as small as possible yet isn’t difficult to use.
- Measure the size of the tile version of the detail you made in step #2.
example:
width of the tile version of the detail = 3.5 inches - Measure the size of the detail in the image you are copying. Also measure the size of the entire image. Calculate the RATIO = entire/detail.
example:
width detail = 1 inch
width entire = 10 inches
RATIO = 10/1 = 10 - The size of the mosaic backer for this project will be the RATIO in step #3 times the size of the detail created in tile.
example:
width backer = 10 x 3.5 inches = 35 inches
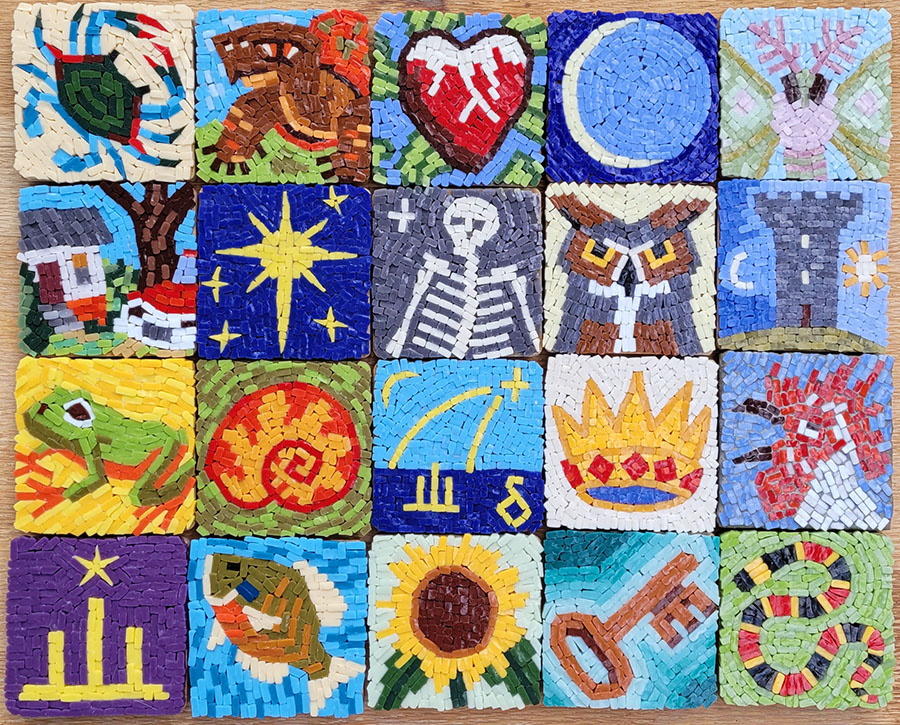
My Problematic Examples
WARNING: THESE MOSAICS ARE NOT AN APPROPRIATE SCALE FOR MOST PEOPLE.
They are also executed too tightly with minimal grout gap. This scale and style of mosaic would be too tedious for most people.
The mosaics I have featured in this article were made by me on our 4-inch Bamboo Coaster Bases using Morjo Recycled Glass Tile in 8mm and 12mm.
Most people prefer using a 10 inch or 12 inch backer board and not cutting the tile as small.
I often make mosaics in a tightly-fitted way because I spent lots of time working in shops on fabrication and engineering tasks,
BUT I prefer to look at a looser style where the grout gap comes incidentally from tiles that are imperfectly shaped or positioned and yet no wide grout gap is left anywhere.
For me, that looser style if done well can produce the exuberance and energy of an impressionistic painting.
The Hazards of Large
Many first-time mosaic artists select a large ambitious mural or backsplash as their first project, and some of these artists are burnt out by the time they complete it.
Other novices fall into this trap by agreeing to a large architectural project for a friend after making a few small mosaics without considering the differences in scale and the effect that size has on working conditions and methods.
That being said, beginners have installed some large mosaics, and done so easily and efficiently by researching the basic methods in advance and getting some help with the labor.
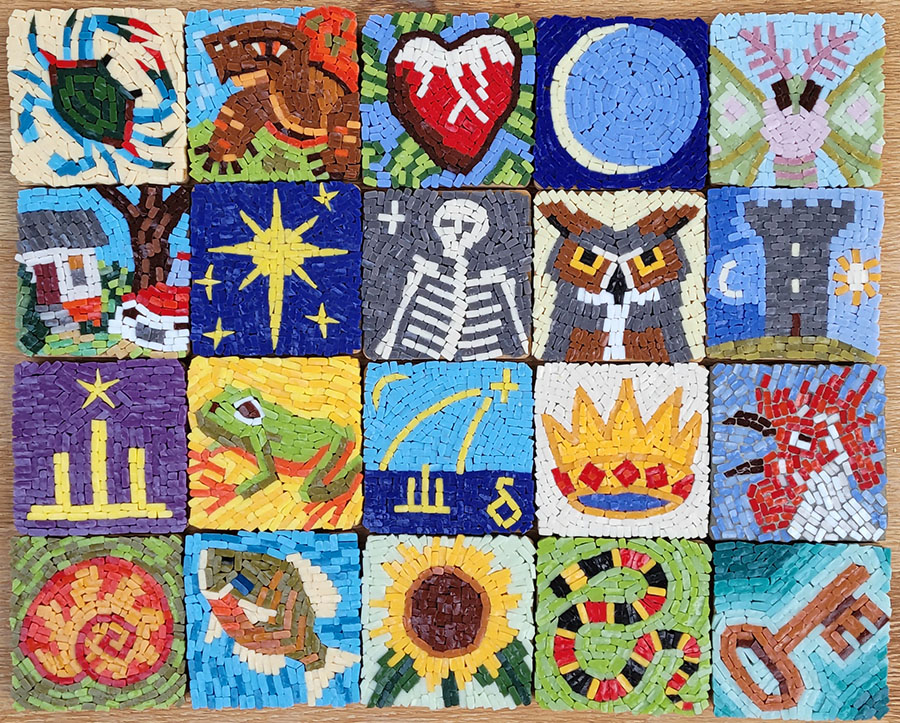
Smalls as Modules
Another advantage of making a series of smalls is that you can use them as components in larger works. You can even rearrange them and replace them and use them in a trial-and-error mode to come up with a larger design or concept or theme.
I am using my icons in this way. I will make more of them than I will use in the project I have in mind. I will use only the ones that make the best combination.
Leave a Reply