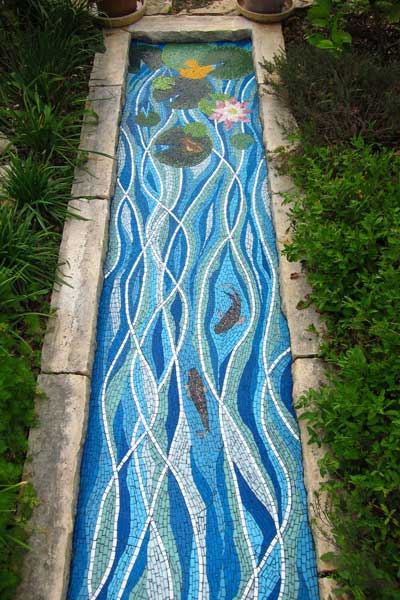
One of our customers Tobin is making an 80 square foot garden courtyard mosaic, the theme being the four elements (water, fire, wind, and earth) with a panel devoted to each element.
Recently Tobin emailed us some pictures of his work in progress, and I think they are worth showing online and not just because they are strong visually. They are also good how-to illustrations for a double-reverse method of laying up mosaic designs. On top of that, they illustrate a very important concept in making art in general, one that is essential.
Tobin says he cobbled his method together from different things he saw on our website and in books plus some trial and error and some lessons learned while installing a 12 foot by 4 foot shower mosaic.
In technical terms, what Tobin is doing could be described as an improvised double-reverse method that uses contact paper and clear packing tape instead of lime putty or clay to temporarily hold the tiles.
Here is what Tobin is doing:
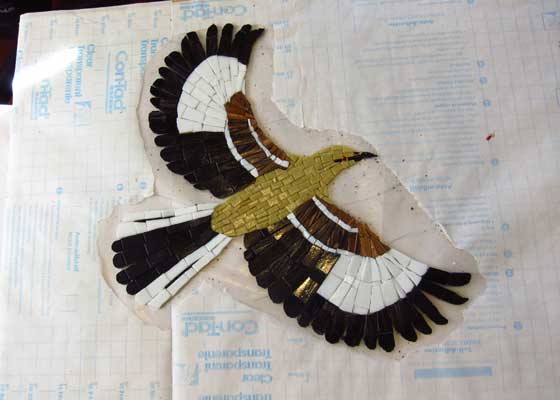
Semi-translucent contact paper is taped down over the sketch of the mosaic design on a worktable. The contact paper is sticky side up, and the stickiness keeps the tile from moving around as they are placed into position along the outlines of the drawing.
Once the mosaic design is completely laid out on the sticky contact paper. A layer of clear packing tape is stuck down on the face of the mosaic. The clear packing tape is stickier than the contact paper, so the design lifts right off the contact paper when needed. Before removing the contact paper, Tobin cuts the mosaic into workable sections using a box cutter/utility knife.
Then Tobin does something different from what I would do at this point in the process. At this point, I would remove the contact paper and press the sheet into the thinset mortar I have spread on my surface. After the mortar hardens for 48 hours, I peel off the clear packing tape and grout my mosaic.
Instead, Tobin transfers his design yet again by gluing it to a sheet of fiberglass mesh using Weldbond Glue, which is a white PVA adhesive. The reason Tobin is doing the extra step with the mesh is because he is making the individual figures in a convenient and portable way that allows him to focus on the details and then arranging the figures on the mesh to create a final design.
That sort of collage approach to building up the design from individually rendered figures is a good way to make complicated designs and larger pieces more manageable.
I often do something similar when I draw up scenes on paper. Without intending to do so, I end up cutting out the figures from the the original drawing and arranging them on a new piece of paper because I didn’t like something in the original drawing (maybe one of the figures was too large or oriented at the wrong angle). Then I lay a new piece of paper on top of this collage and trace enough to make a complete drawing. The meta point is this: there are ways to work around your limitations in skill or specialized materials or even time.
I will write more about Tobin’s Mosaic and how his method illustrates an essential concept in making art in my next post.
Leave a Reply