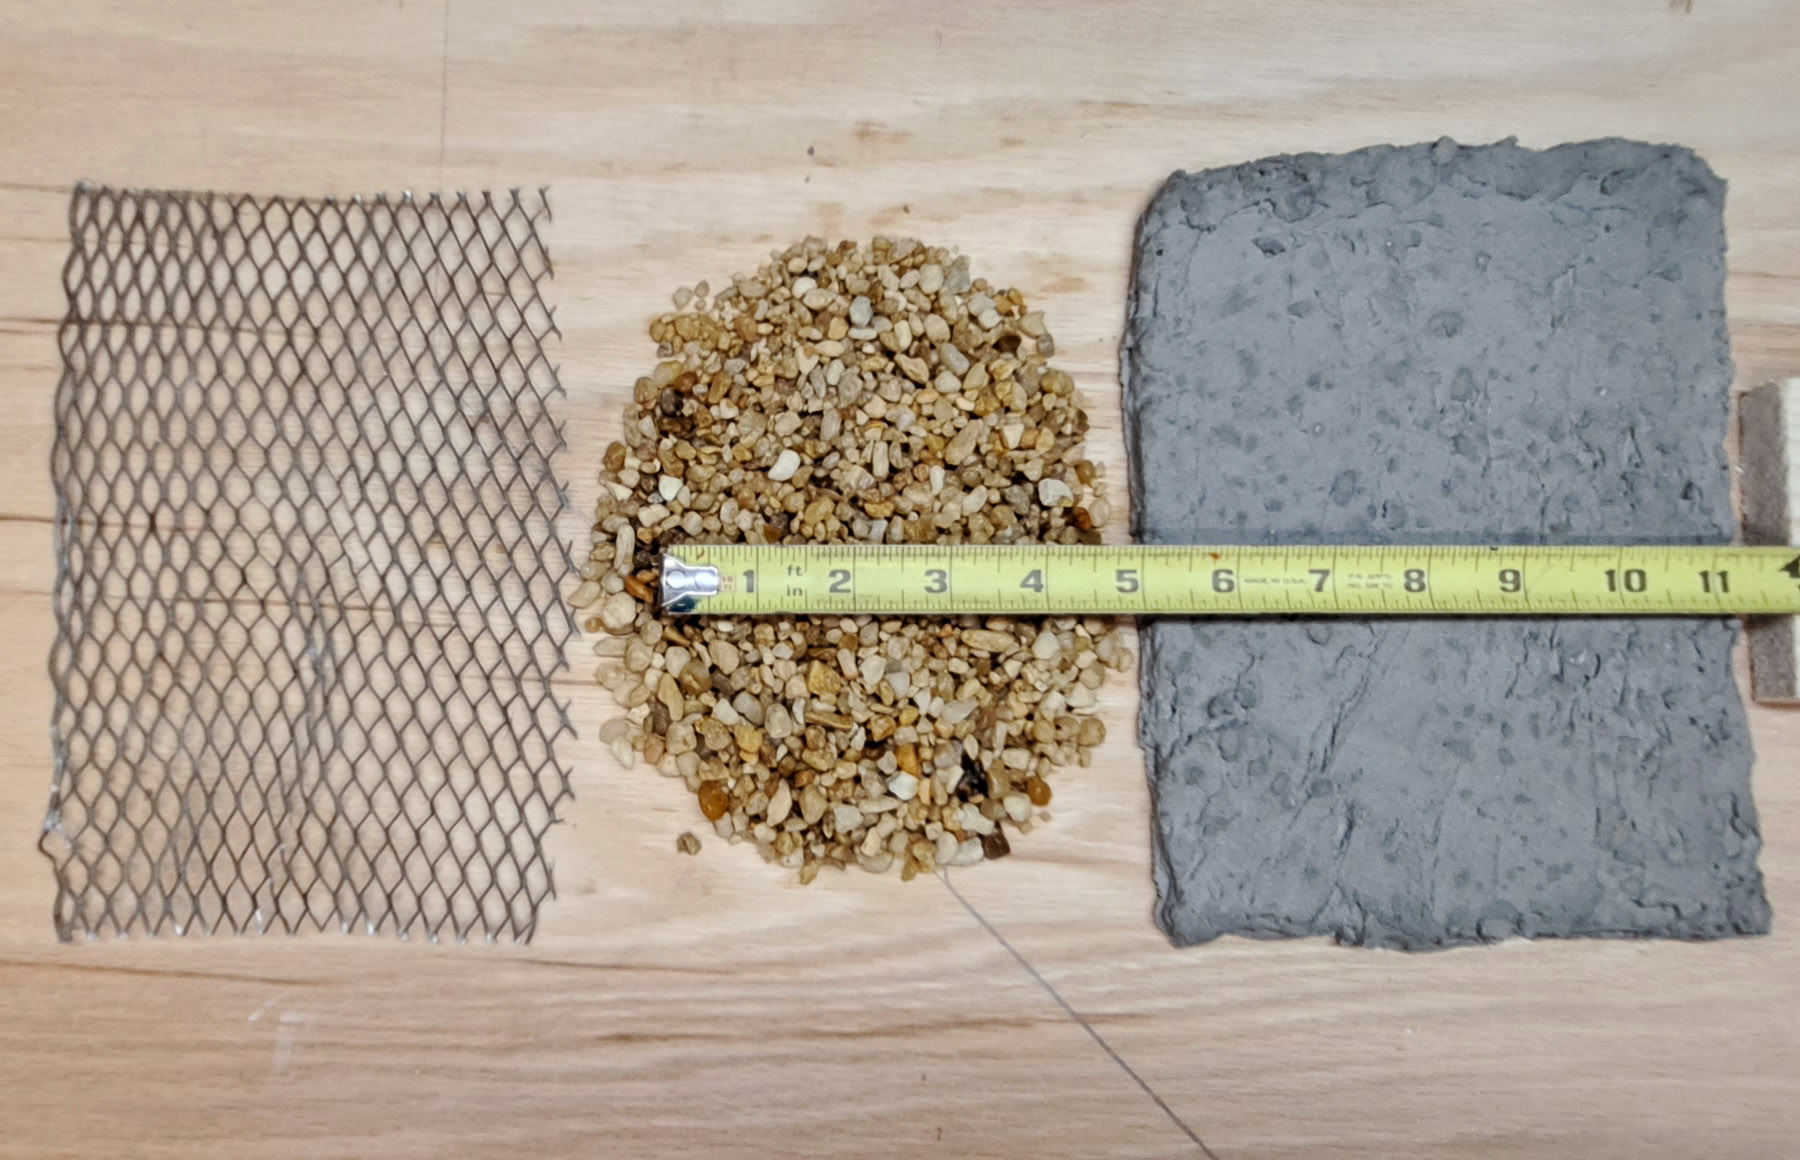
The thinnest, toughest, most water-resistant backer I have been able to make is steel lath plastered with a “concrete” made from Versabond brand thinset mortar (or the equivalent Mapei product) and unsealed aquarium gravel.
Regular pea gravel is too large for the lath, and so aquarium gravel is used instead.
The aquarium gravel must be real gravel, such as the quartz and chert gravel shown here and not sealed with polyurethane or some other coating:
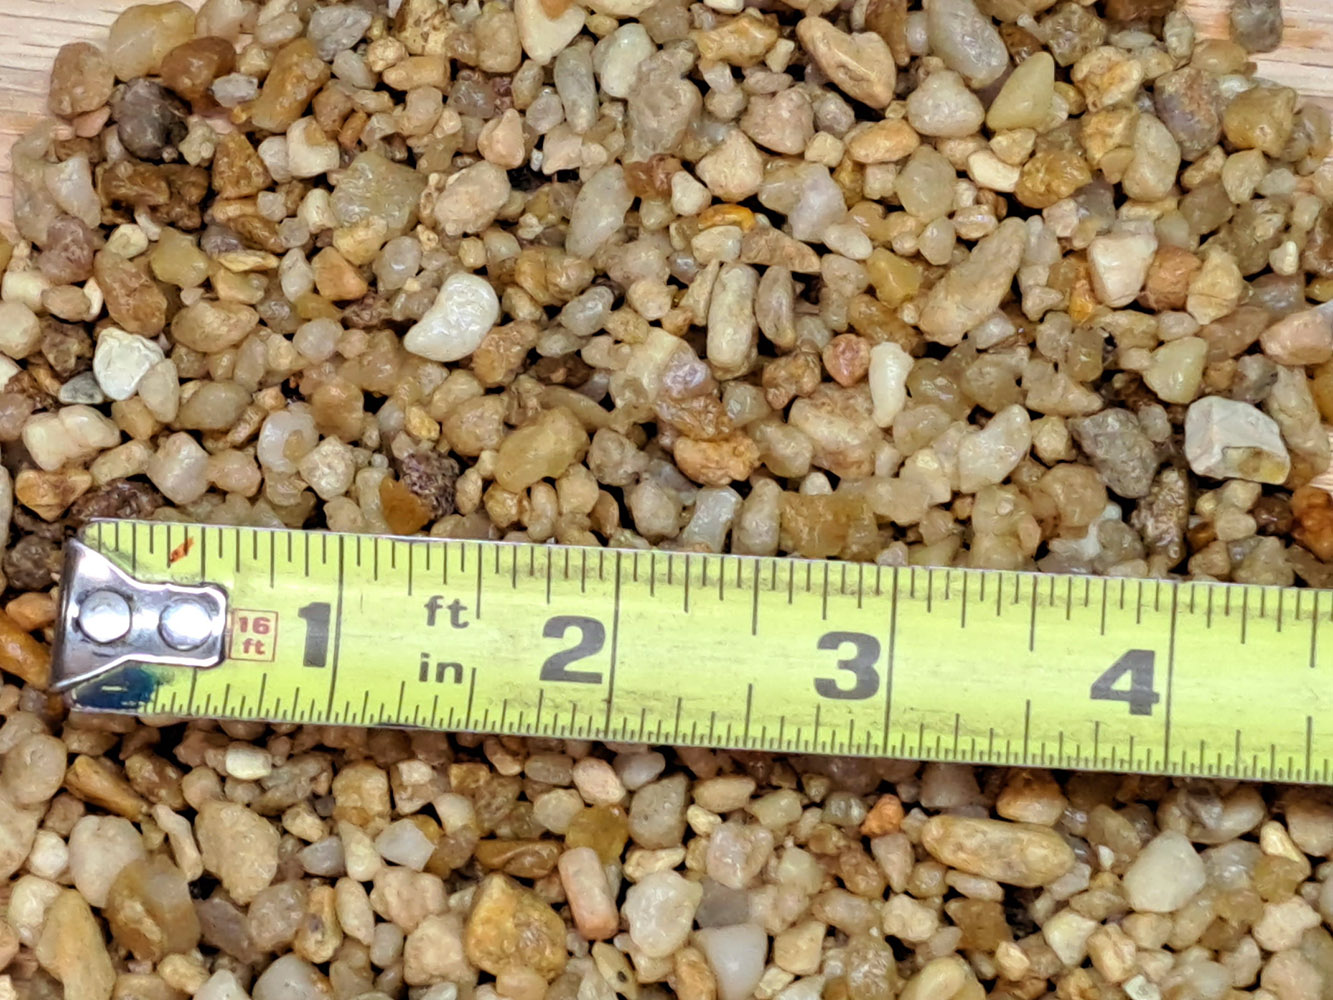
TIP: You can tell when gravel has been coated with something because it will look wet even when it is dry.
Of course, you will need to rinse the gravel and remove any traces of silt and sand before you mix it with thinset mortar.
Mixing the Concrete
The “concrete” I make is a mixture in these proportions by weight:
- Versabond brand thinset mortar: 4
- water: 1
- gravel: 2 to 3
That means I need 1/4 pound of water for ever pound of thinset, and about 1/2 to 3/4 pound of gravel.
I don’t weigh anything out. I estimate things, and I add the water by misting with a spray bottle.
The goal is to not create any dust during the mixing process.
TIP: Spray the work area down with water before handling dry grout and thinset so that the air is filled with humidity. This causes dust to precipitate out of the air faster.
Scoop the dry thinset slowly and carefully. Never pour it.
Stir in the water slowly without slinging dry material about. Mist occasionally as needed, but a little goes a long way. The water from misting adds up.
The goal is to create a consistency like stiff dough. Don’t add too much water.
I am very good at not creating any dust, but I still mix all dry powders outside, and I wear an N95 dust mask while I mix.
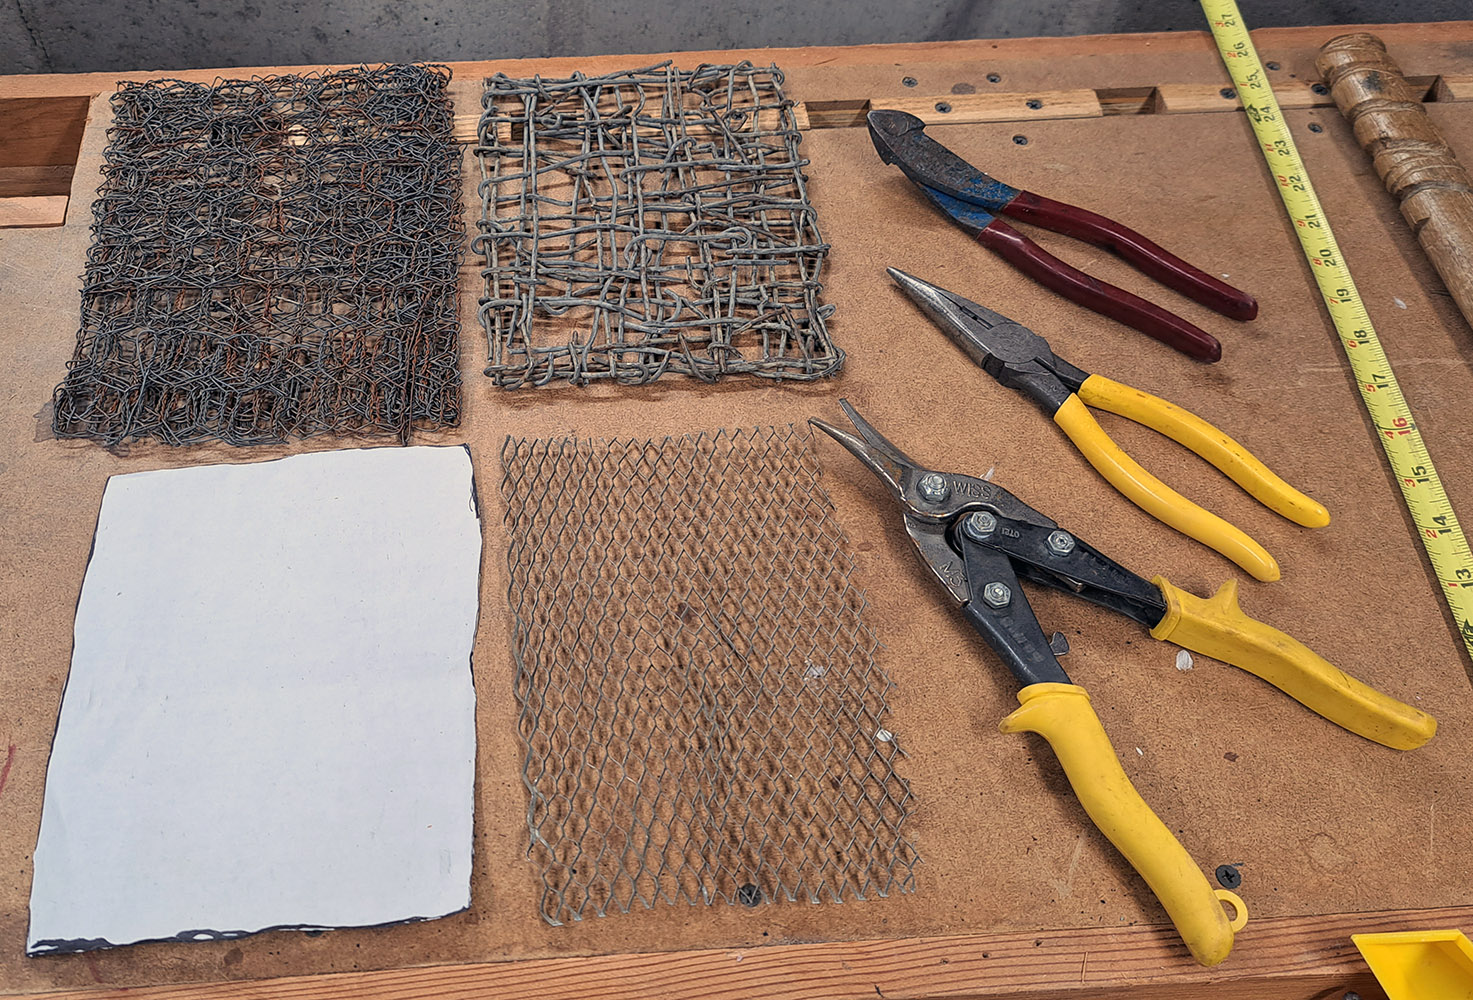
Steel Lath
The steel lath is in the bottom center of the photo above, and the tin snips used to cut it are to the right.
The two wire creations in the top of the photo were early experiments that would produce a much thicker backer than desired.
I traced the outline of my mosaic on paper, and then I cut out this template and used it to cut the steel lath to the size and shape I needed.
Forming the Backer
The backer is formed by laying the lath on a piece of flexible plastic, something like a piece of construction plastic or an old plastic shower-curtain liner.
Then the concrete is spread onto the lath with a putty knife or trowel and pressed down into the gaps. This actually requires some work, and it is necessary to spread the material back and forth while pressing down in order to get the gravel into the lath.
The side edges of the backer are formed in a similar way by spreading the material back and forth to fill the edge of the lath and then shaping the edge with a final pass of the putty knife.
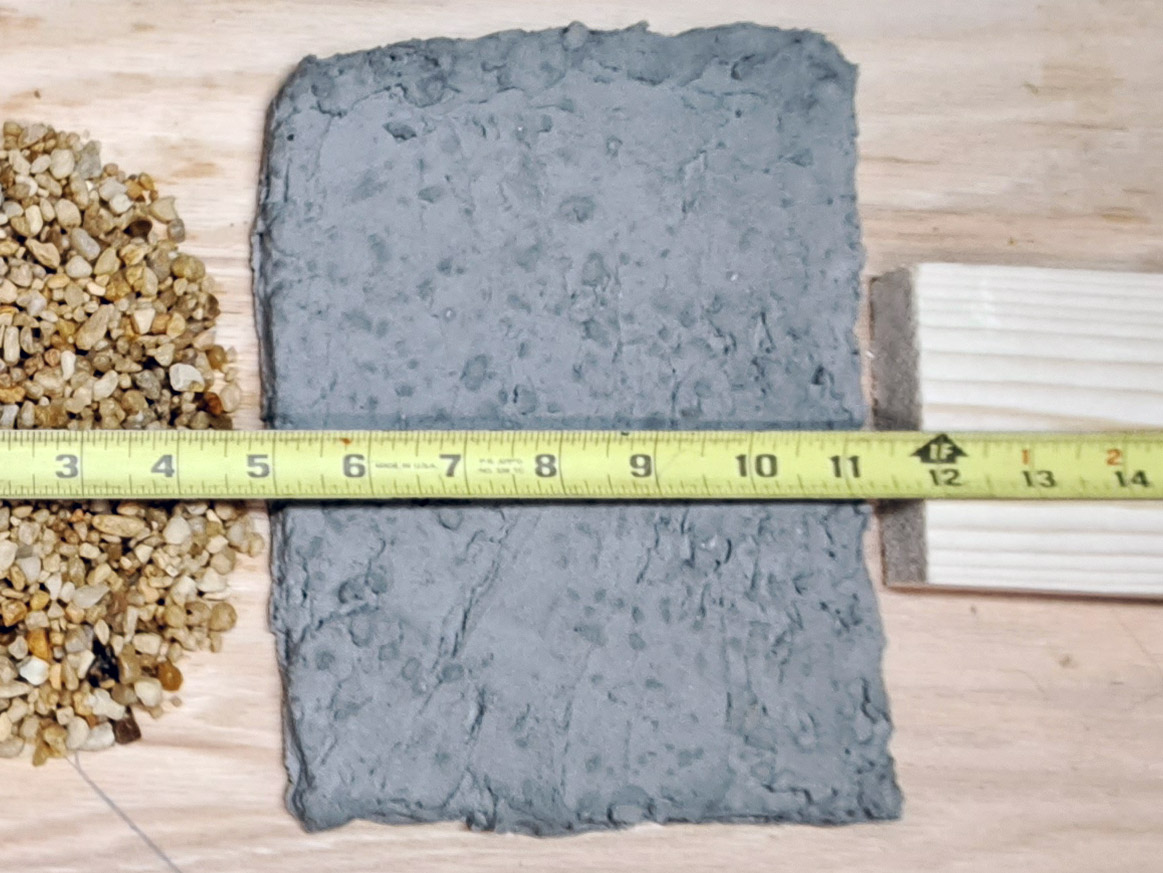
After the first 8 hours of curing time, I carefully flip the backer off the plastic sheet and leave it bottom up so that any excess moisture can dry.
The photo below shows the side of the backer that wasn’t resting on the plastic. This rough side isn’t where the mosaics will be mounted. The mosaic is mounted on the smooth side that was laying on the plastic.
Flagstones
Why make backers like these? Why not use pieces of flagstone?
I prefer mosaics on made on irregular flagstones, but I don’t like tying the mosaic to so much weight for so little toughness (resistance to breaking by impact).
Here I am speaking of mosaics that that will moved or hung or put on an easel or otherwise handled, anything that could cause the mosaic to fall over or be dropped.
If the mosaic is to be installed in one outdoor location and not intended to be moved, then I don’t mind going heavy. I will use a thicker flagstone or stick two flagstones together like a mortar sandwich or use mortar to plaster wire fencing to the back of a flagstone of regular thickness
Also, if the mosaic is very small, I can recommend a piece of flagstone because the thickness is large relative to its area.
Leave a Reply