Mosaic Versus Pattern

Using Contact Paper to Transfer A Mosaic Design

Choice of Pattern

This method for transferring a mosaic design with contact paper works whether you are improvising on a quickly sketched cartoon or carefully following a detailed pattern for each piece of tile.

This method reverses the mosaic from left to right in a mirror effect because the tile is laid upside down onto the sticky pattern and then a backer board spread with glue is placed on top of the upside down tiles. If you have NUMBERS or LETTERS in your pattern, remember to reverse them in your pattern by turning the pattern over and tracing it from the other side in marker and using that as your pattern.

Mosaic Versus Pattern
The ungrouted mosaic beside the pattern that was used to lay it up. The sketch was from memories of an ancient Roman mosaic I saw in a book years ago with legs more like that of a scarab and antennae more like that of a moth. To me, these features made the Roman bee look more like the archetype of all insects than the familiar fat honey bee and called attention to the fact that honey comes from insects.

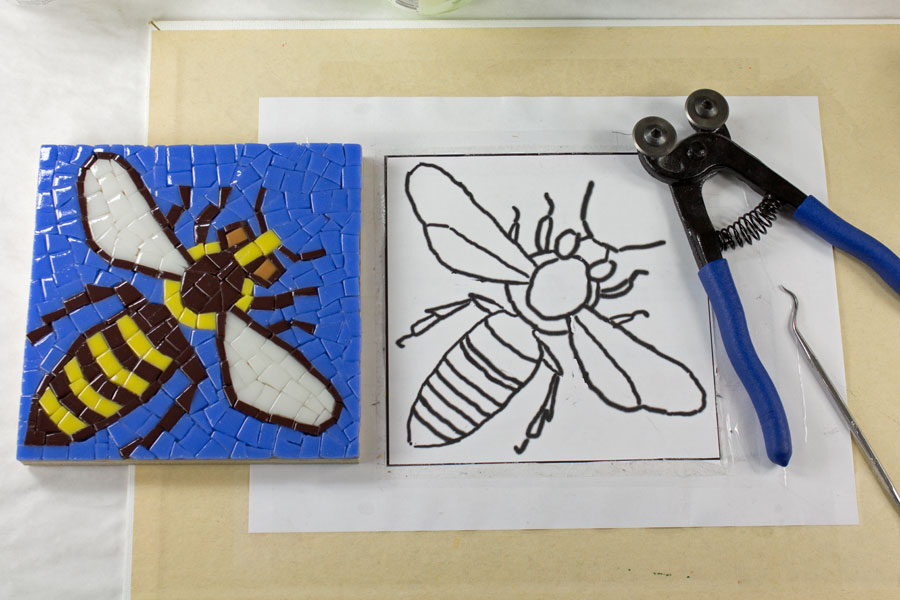
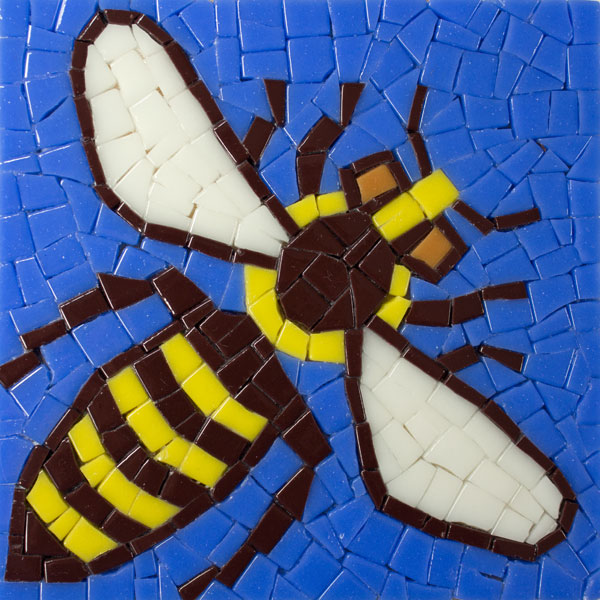
The pattern above was a quick sketch and not followed rigorously. Instead, I improvised details based on how I could cut the tile.

The Free Mosaic Patterns available at our tile and supplies store are drawn in terms of pieces that can be cut from 1/2-inch recycled glass tile and show each piece in the mosaic.

Tape Contact Paper Over Pattern

Contact Paper Taped Over Mosaic Pattern
The first step is to tape the pattern down on a work surface. Then the contact paper is taped over the pattern, but it is taped UPSIDE DOWN with the sticky side up. Cut the contact paper 1 inch larger than the border of the pattern.

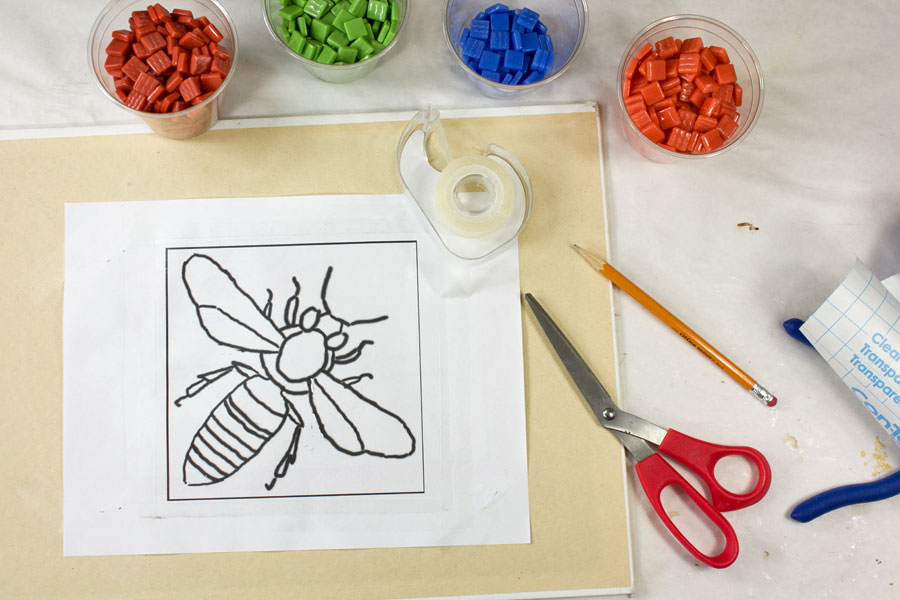
Make sure you tape the contact paper UPSIDE DOWN. The purpose of the contact paper is to keep the tile from moving around as you lay out the design.

Clear packing tape can be substituted for contact paper, but you may want to pat the tape with your hands several tiles to make it less sticky.

Lay Tile UPSIDE DOWN on the Sticky Pattern

The pattern is sticky because it has a piece of upside down contact paper taped over it. Lay pieces of tile face down onto the pattern so that the textured backsides are facing up. Later we will coat the backer in glue and lay it on these upside down tile.

Lay Tile Upside Down
Lay tile upside down on the sticky contact paper so that the embossed texture of the backsides is facing up.

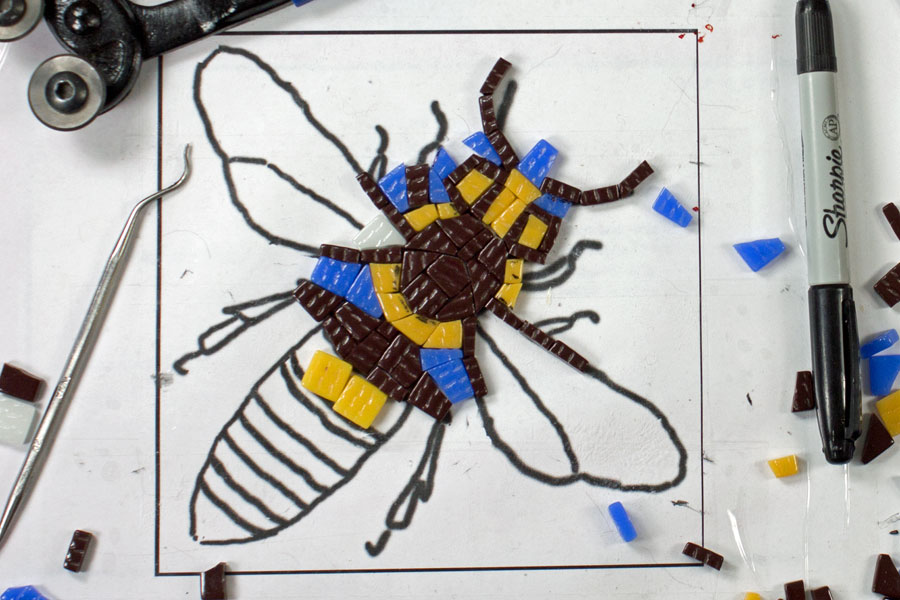
Work from the Center of Pattern

Tile on pattern for mosaic bee
Tile pieces (called tesserae by mosaicists) on the pattern for a mosaic bee. Also shown are the essential tools: Mosaic Glass Cutter and dental picks and tweezers.

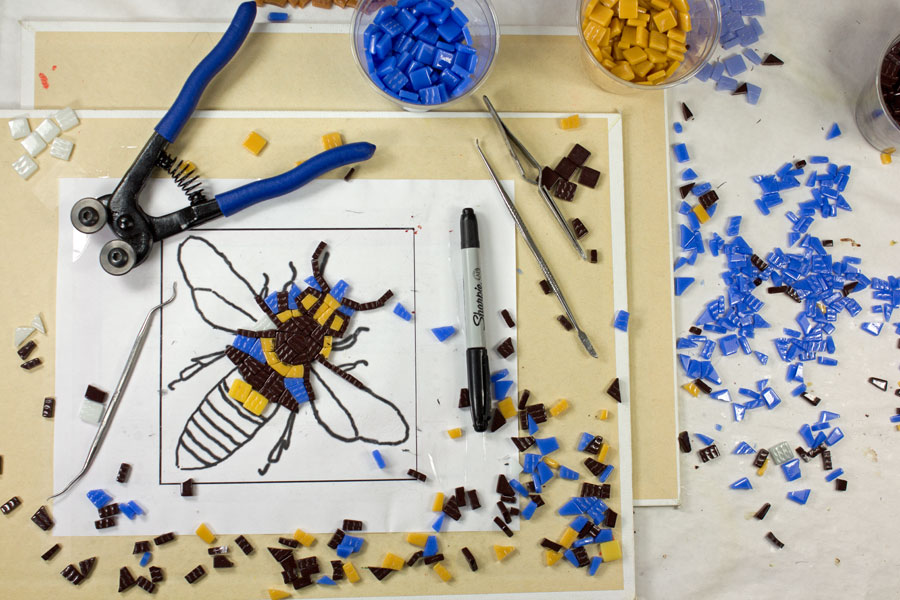
Begin cutting and laying tile near the center of your mosaic and work outward to avoid having to squeeze a piece between tiles that have already been laid, which can be frustrating and require more trimming.

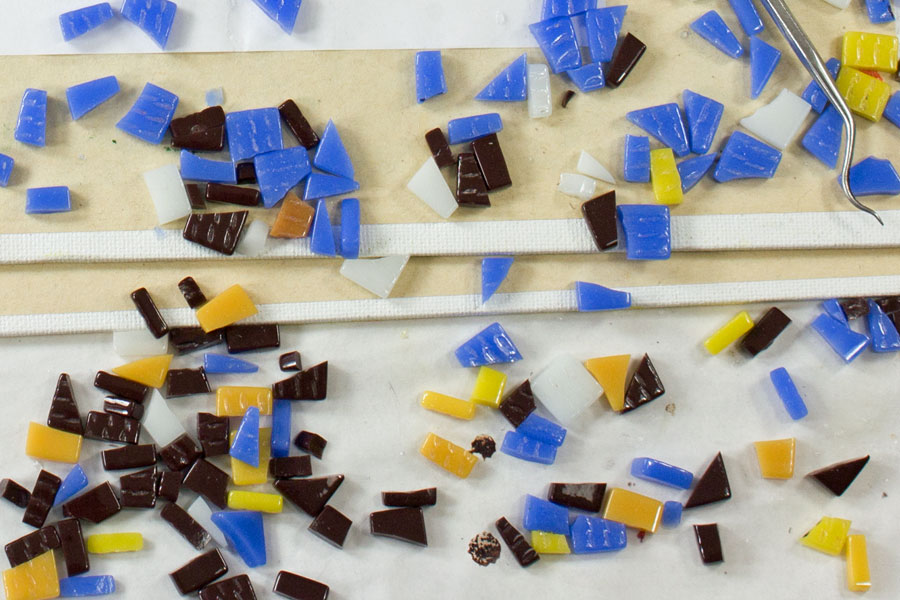
Trim Less, Waste Less

Trimming tile to shave off just a little bit off is MUCH more difficult than cutting a piece into two parts . Trimming is difficult because tile will often crumble at the edge and not break as predictably or as cleanly as it would if you were cutting off a more substantial piece. That is why you want to avoid trimming as much as possible by doing the following:

  • Cut a few alternate pieces and use the best instead of trimming.
  • Remove small amounts by rubbing the piece on a marble file instead of trying to cut it off.
  • Work from the center of the mosaic to avoid the need to trim.
  • Tolerate less exact pieces and the grout gap these pieces create.
Tile pieces tesserae
Tile pieces (tesserae) cut into standard shapes (rectangles, trapezoids, triangles, irregular polygons) so that the artist can pick the best piece instead of trying to trim a piece to size.

Change Tile Color If Needed

Mosaic bee in progress
Mosaic bee in progress with the previous butterscotch color replaced with a more intense yellow.

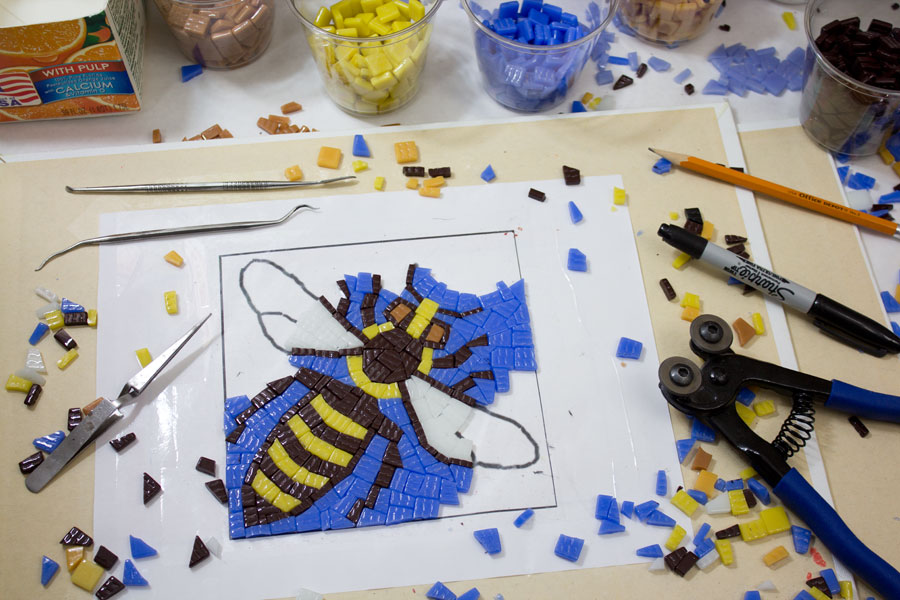
The contact paper holds tile in place while you arrange the tile, which allows you to fit pieces more closely and even replace a color if it doesn’t look right.  A dental pick is useful for pulling up tile, but take care not to snag the contact paper or pattern. I dull my dental pick on concrete to prevent this.

Do Not Tile Beyond Borders

Bee Mosaic Tiling Complete
Bee Mosaic Tiling Complete. Do not tile past the outlined border.

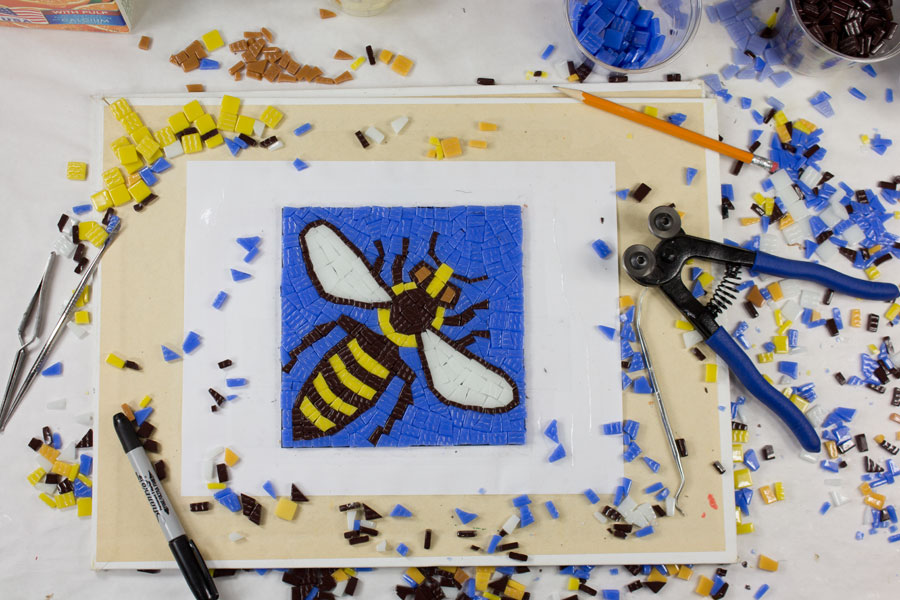
Do not lay tile beyond the outline of the border so that the mosaic fits on the backer. Make sure each tile is within the border by a hair or touches the border but does not extend beyond. If you have a few pieces that do, the finished mosaic can be filed with a marble file, but it is better to file or cut the pieces before gluing.

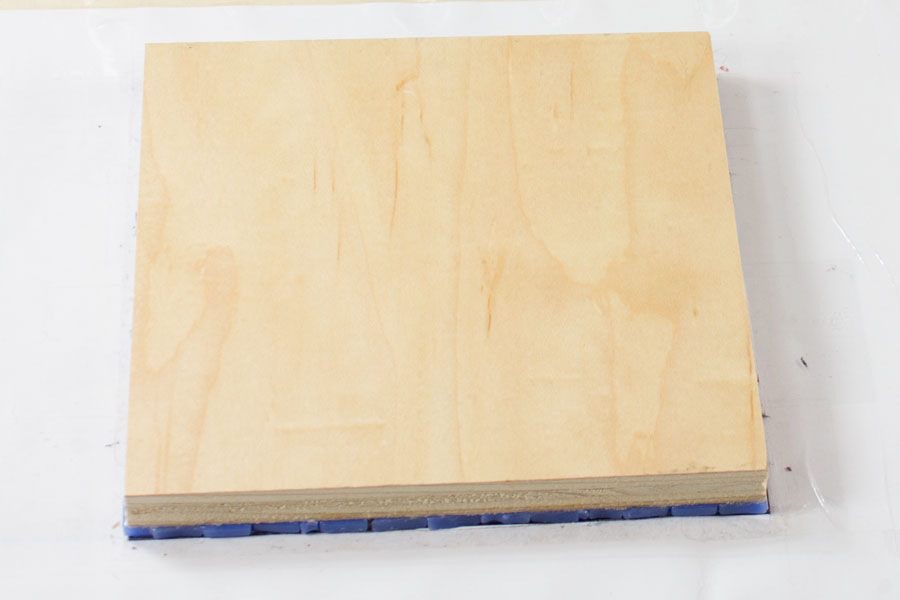
Seal Backer With PVA Glue

Seal Backer PVA glue
Seal backer with a white PVA glue. Weldbond Adhesive is spread on the 6×6-inch plywood mosaic backer with an artist’s palette knife.

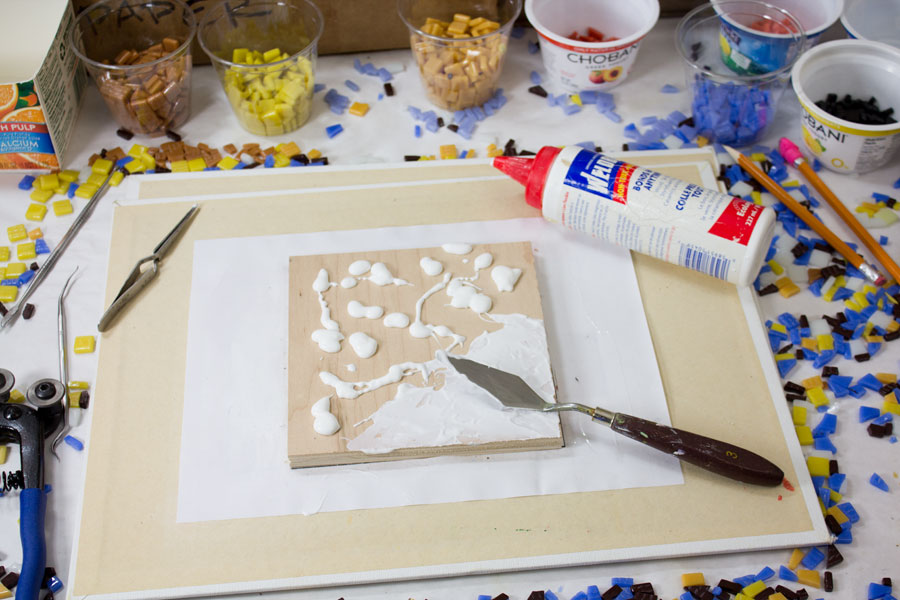
Plywood backers should be sealed with the same white PVA (polyvinyl acetate) adhesive that will be used to attach the tiles. This sealing coat should be applied and allowed to dry completely before proceeding.

We wouldn’t need to do this pre-sealing if we were gluing each tile individually with a generous blob, but we are going to glue on all the tiles at once in a layer spread thin, and we want to make sure that the second coat of glue that actually attaches the tile isn’t all sucked up by the plywood in places where it happens to be spread thinnest.

Spread Backer with 2nd Coat of Glue

Glue on Mosaic Backer
Glue on Mosaic Backer. After the sealing coat has completely dried, a second layer is spread.

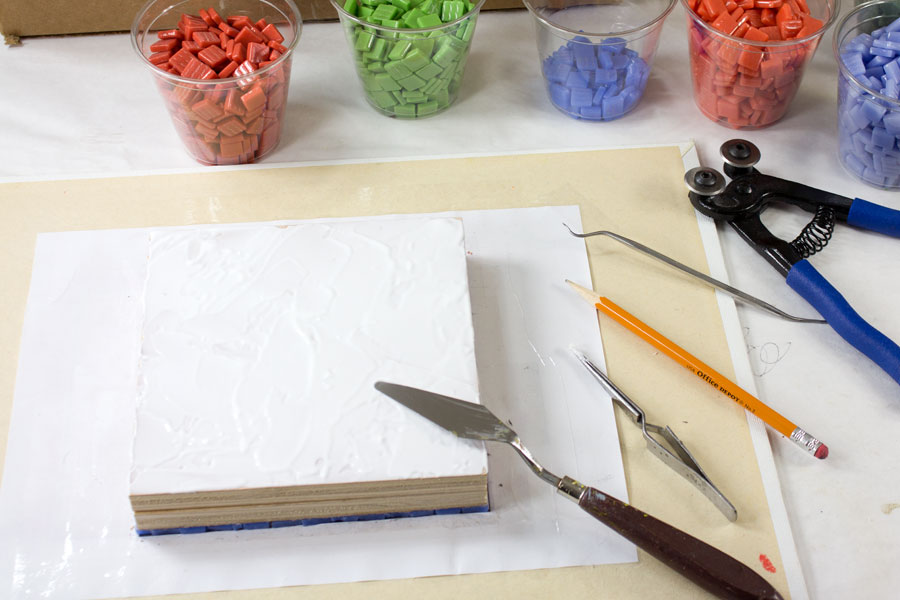
How thick should you apply the glue? Place a few test tiles and pull them up and look at them. Make sure the glue wets the bottom of the tile completely. The glue has to be that deep, but don’t over do it. Try to spread it thinly enough so that the glue doesn’t come up too high between tiles placed closely together.

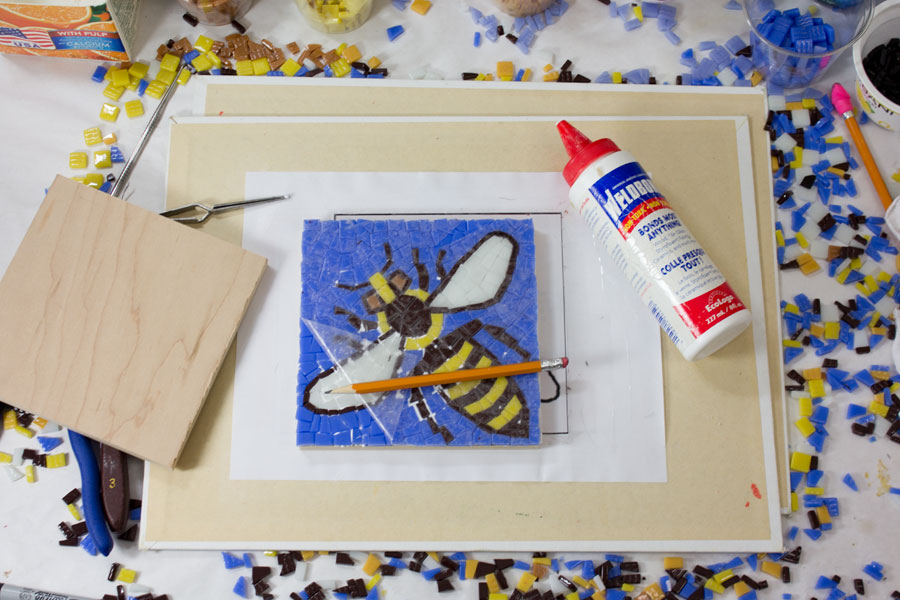
Place Glue-Covered Backer on Mosaic

Glue backer on mosaic
Glue-covered backer is carefully centered and lowered onto the mosaic.

Center the backer on the mosaic before it is lowered down because it is difficult to move the backer from side to side without moving the tile. If you do need to push the backer to center it, hold a straight edge on the opposite side to keep the tile from moving.

Untape Contact Paper and Flip Mosaic

Mosaic flipped upright
Mosaic flipped upright.

The contact paper is untaped from the work surface, and the mosaic is flipped upright so that the face of the mosaic is visible. Notice the occasional place where glue squeezed between the tile. This can be removed with a dental pick once the glue is thoroughly dry.

Remove Contact Paper

Contact paper removed from the bee mosaic.

Allow the glue to dry before peeling off the contact paper. Also avoid cleaning the faces of the tiles or handing the mosaic until the glue under the tile is dry. If you bump one tile and it moves, other tiles are also moved, and they move again when you try to fix things. Tiles start sticking to the drying glue on you fingertips and pulling free from the backer. Don’t risk this. One touch can spiral into disaster.

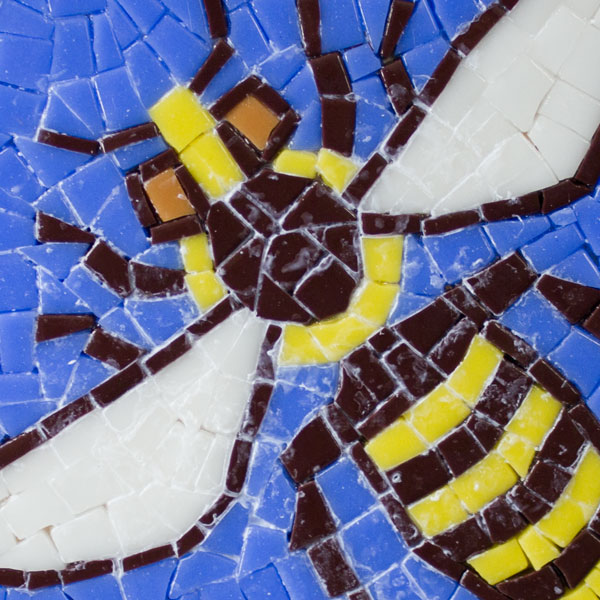
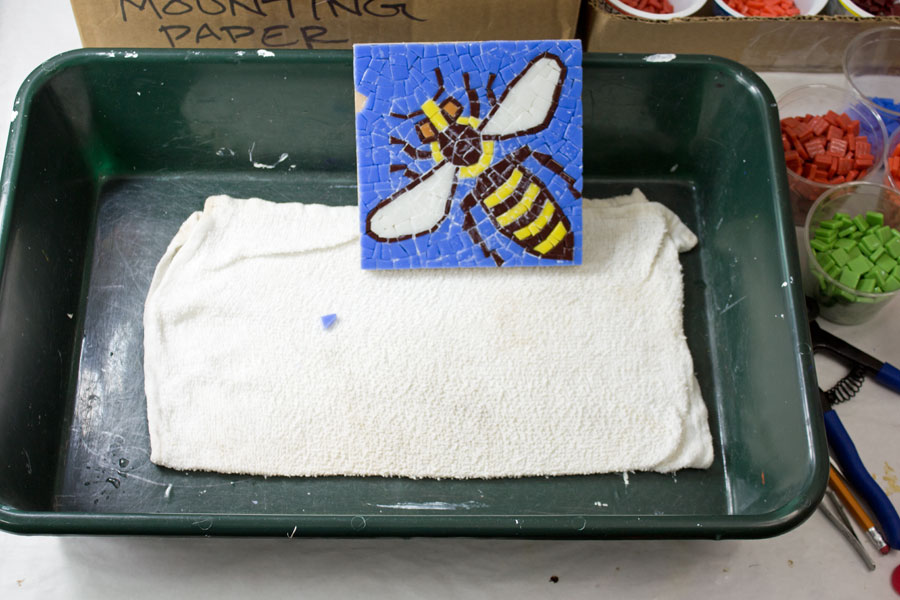
Removing Glue Residue

After the glue dries and you remove the contact paper, you will notice places where the PVA glue got squeezed up between the tiles and filled the grout gap. There will probably be places where the glue smeared onto the faces of the tiles. The glue is clear when fully dry, but if it is misted with water, it will turn white and be more visible and softer and easier to remove.

Glue residue bee mosaic
Glue residue on bee mosaic can be turned white by misting with water.

We use a wide plastic pan with a wet terry washcloth spread on the bottom. We lay the mosaic face down on the wet cloth and allow the glue to turn white. We rub the mosaic on the cloth with a gentle even pressure making sure that not water squeezes out of the washcloth and between the tile. The washcloth should be thoroughly wet but rung out so that it does not drip or squeeze out water when pressed.

Of course, I am talking about a washcloth that has been retired and no longer rubbed on people’s faces. Glass slivers can nest in knitted fabrics and outlast the washer and dryer.

Keep an eye on the glue that is holding the tile to the board  (by looking at the side of the mosaic and in gaps and make sure that the glue there does NOT get wet and start whitening. Stop working and dry the mosaic and leave it to dry if you see that happening. 

Removing glue residue from bee mosaic
Removing glue residue from Roman bee mosaic using a wet terry washcloth.

If a few tiles pop free, they can be reglued after the mosaic is cleaned up. A dental pick is used to clean glue residue from between the tiles. Take care not to pry with the dental pick because you can crack and splinter the glass tile very easily by prying with small tools.

Mosaic Ready For Grouting

Roman Bee Mosaic ready to be grouted


Posted

in

by

Comments

36 responses to “Using Contact Paper to Transfer A Mosaic Design”

  1. […] If the mosaic is relatively small. I can spread adhesive on the backer and then press the backer onto the mosaic. In that case, I would want to position the tile upside down.  Of course, this reverses the mosaic design from left to right as if in a mirror. Complete instructions for working in this way are given in my blog article Using Contact Paper To Transfer A Mosaic Design. […]

  2. RJ McHatton Avatar

    Terrific educational article. Thanks for sharing.

  3. Kim Chisum Avatar
    Kim Chisum

    I have been looking for a site that truly explains the details in completing a mosaic. So glad I came across your shop and blog. Thank you for sharing your knowledge.

  4. Laurie Hinshaw Avatar
    Laurie Hinshaw

    Wow, this was awesome. Got my work cut out for me, but with this excellent tutorial, I’m ready to try. Thank you

  5. Candace Bowman Avatar
    Candace Bowman

    Can you use a large piece of glass instead of wood to glue the mosaic colored glass to?

    1. Joe Moorman Avatar
      Joe Moorman

      Yes you can, but I would make sure the glass backer is thick enough to support the weight. I would use our GE Silicone II to attach the glass.

      Thanks,

  6. Joseph Avatar
    Joseph

    I would be interested in a technique for applying glass tiles to a metal aluminium or stainless steel backer plate for eventual use as a display behind a large cooking range.

    1. Joe Moorman Avatar
      Joe Moorman

      Hi Joseph,
      Metal isn’t a good backer because mortar corrodes it and white PVA adhesives don’t bond as securely to metal as it does concrete backer board. You could use foam-core tile backer board such as Wedi or Kerdi in a frame made from angle iron if you wanted the mosaic to be movable and not built in.

  7. Philip Smith Avatar
    Philip Smith

    I’m wondering is a modified version of this could be used to do mosaic strips? I’m building a pizza oven and I’d love to do a roman style mosaic design that curves around the base of the oven, could I do strips of mosaics with pva on paper or something then lay it in pieces on the curved surface and just torch the paper after the mortar on the backside sets up?

    1. Joe Moorman Avatar
      Joe Moorman

      Hi Philip,

      Yes, you could definitely use this technique on a pizza oven and use strips. Mounting Paper is removed by misting with water and peeling off after the thinset has cured. For this reason, starch glue or a washable glue such as Elmer’s School Glue is used for the temporary mounting. You wouldn’t want to use a strong PVA such as Weldbond because it would be difficult to get the paper off.

      Joe

  8. Terri Avatar
    Terri

    What type of contact paper do you use? I know some are too sticky to use.

    1. Joe Moorman Avatar
      Joe Moorman

      I’ve only seen one brand in the stores in Georgia for as long as I can remember. It’s the Con-Tact brand.

      1. Terri Avatar
        Terri

        Thank you!!!

  9. Jim Witterschein Avatar
    Jim Witterschein

    Outstanding article, extremely well-written and so it’s very easy to follow you every step of the way. I like this article so much that I am sharing it to my FB wall just as soon as I finish writing this comment.

  10. Andrea Peck Avatar
    Andrea Peck

    Can this be done using stone tesserae and thinset?
    Thank you.

    1. Joe Moorman Avatar
      Joe Moorman

      Possibly, but stone is rougher than glass, and so you might need Mosaic Mounting Tape, which sticks more aggressively.

  11. Zina Wilson Avatar
    Zina Wilson

    Hello, I am just getting started & exploring the world of mosaic art projects, so I am so excited to have run across this blog! This is such a great idea for doing the pattern design. I am wondering if this technique can be used to place designs onto terracotta pots? Thank you! 🦋

    1. Joe Moorman Avatar
      Joe Moorman

      Yes. I recommend concrete pots instead of terracotta because they are so fragile.

  12. Kim Avatar
    Kim

    May be dumb but. Where do you find clear contact paper?

    1. Joe Moorman Avatar
      Joe Moorman

      I get mine at the grocery store or discount store.

  13. Debbe Harte Avatar
    Debbe Harte

    thank u thank u. what a font of wonderful detailed helpful support. i want to do mixed media mosaic on a milk can. The Can has been sanded; spray painted throughout. Came to your site looking for best adhesive to use. Have E600-(quite toxic stuff)-and other ones you showed. Is sanding off paint necessary where tesserae are going? Yikes..Using Smalti where no grout required..Any insight w your experience…? D

    1. Joe Moorman Avatar
      Joe Moorman

      I would consider using GE-Silicone II as an adhesive and leaving the paint on the can. Don’t make a thick layer of adhesive between the tiles and can because it is still compressible when cured.

  14. Dorothy Klinger Avatar
    Dorothy Klinger

    Thank you for the tutorial. I am 74 and my fingers don’t work as well as they once did. So the contact paper seems like a great alternative to sticking tiles on with adhesive. Going to give this a try. Want to make an elephant for next project, with lots of color.

  15. Stella Avatar
    Stella

    Sito ben fatto con spiegazioni molto dettagliate. Vorrei sapere che tipo di legno si può utilizzare come base. Grazie

    1. Joe Moorman Avatar
      Joe Moorman

      Grazie! Le assi di legno possono dividersi e quindi viene utilizzato il compensato al posto del legno. Il compensato non deve essere utilizzato all’aperto perché l’umidità lo fa gonfiare e contrarsi.

  16. Simone Avatar
    Simone

    Could you place contact or window frosting onto a large mosaic in mesh to stabilize before adhering to a wall using thinset?. Mesh flimsy and movement loosing tiles

    1. Joe Moorman Avatar
      Joe Moorman

      You could, but Mosaic Mounting Tape would be more reliable.

  17. Gale Thomas Avatar
    Gale Thomas

    Awesome, great article. 20 years and I’ve never done it this way. Couldn’t wrap my head around it lol
    Thanks

  18. Paula Wood Avatar
    Paula Wood

    I see that your free designs fit on a 6 in by 6 in backer board. If I wanted to make a bigger mosaic, it looks like I could enlarge the picture in order to do this. Besides needing more tiles/supplies, can you think of any other problems with enlarging to say an 8 by 8 backer board?

    1. Joe Moorman Avatar
      Joe Moorman

      Hi Paula,

      You would need to use larger tiles if you will be cutting tiles to match the shapes shown in the pattern. Rather than doing that, you could use the outlines of the figures and ignore the shapes of the tesserae or use multiple pieces to make the shapes.

  19. Susan Avatar
    Susan

    Thank you so much for your tutorial. I was wondering, can you glue a paper design onto MDF and then glue the tiles directly onto the paper template? I am thinking of creating a wall hanging.
    Thanks Susan

    1. Joe Moorman Avatar
      Joe Moorman

      Only if you don’t care whether it lasts very long. For indoor work, you have a lot of latitude, and can actually do stuff like that, but it has no archival properties. The first time it gets wet, it’s more or less ruined.

  20. Katy Vanoni Avatar
    Katy Vanoni

    I think I get it, but it has to be tile that is the same color all around, not tiles that are blank on one side. Right? I wonder if there is a way to do the same type of pour with non-uniform tiles.

    1. Joe Moorman Avatar
      Joe Moorman

      This method would also work with tiles with only color on one side. It doesn’t reverse the design.

      I’m not sure what you mean by non-uniform, but this method would be difficult with tiles of different thickness.

  21. Lauren Avatar
    Lauren

    Hi Joe! Thank you for this article! Just confirming, you used the 1/2″ glass tiles for the bee? Also, is there any way you could estimate how long this project took, especially the tiling aspect? Thank you!! Lauren

    1. Joe Moorman Avatar
      Joe Moorman

      Yes I did. It took probably 12 hours total to cut and position the tiles.

Leave a Reply to Kim Cancel reply

Your email address will not be published. Required fields are marked *

This site uses Akismet to reduce spam. Learn how your comment data is processed.