This article is about why we recommend “the opposite” of what the tile industry recommends for grouting glass mosaics and mosaics with a standard grout gap. This article also explains how to avoid scratching the glass tile while grouting with sanded grout.
Industry Recommendations
The tile industry recommends using sanded grout for gaps 1/8 to 3/8 inch and adding a coarser grade of sand for gaps larger than 3/8 inch. For gaps less than 1/8 inch, which is what mosaic glass mosaics have, tile manufacturers and industry associations recommend using non-sanded grout.
At Mosaic Art Supply, I have always recommended using sanded grout for everything except mosaics with hairline gaps between the tile. Why the difference? There are three reasons.
Plaques not Walls
Many of our customers are making mosaics on small movable surfaces like plaques or tabletops not walls or floors, and these smaller mosaics are subject to being dropped and impacted and vibrated and flexed more than an architectural surface. The sand provides tensile strength and helps the grout not be knocked out of the gaps as easily.
How Wide Is It?
Most novices tend to use wider gaps than they intended to use or estimate they used. If they actually measured the gaps, they would find that the gaps are actually larger than what they thought for two reasons.
First, most people are bad at estimating small distances. Second, many novices make mosaics with gaps that are inconsistent and problematically large in places. They might not need sanded grout in many of the gaps, but the places that do need the sand tend to need it desperately. Otherwise the grout in those places is prone to cracking and getting knocked out of the gap due to the reasons cited above.
Tough Sand
Sand is harder and tougher (more crack resistant) than portland cement (the grout itself). Many of our customers are making garden mosaics and stepping stones and other outdoor surfaces that see much more abrasion than backsplashes and shower walls. The quartz and feldspar sands used in grout are relatively hard compared to the soft grout, and so they help grout withstand wear and gouging.
Avoid Sanded With Glass Tile?
Glass tile manufacturers recommend using non-sanded grout, or at least many of them do, because the sand can scratch glass tile. We don’t. We think the reasons above are more important factors, and it is easy to grout with sanded grout and not scratch the tile if you use a little care.
Keep in mind that the manufacturer recommendations have to work for building contractors installing architectural coverings as quickly as possible. Think about floors that are being walked on by the workers as they are doing the grouting. You can work more carefully than that on an art project, even if it is a large mural.
The Correct Method
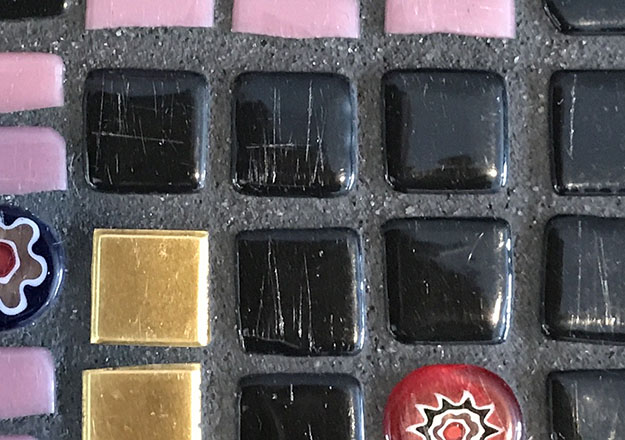
There isn’t any reason to fear using sanded grout if you don’t try to scrub the grout into the gaps with a lot of force. Gentle pressure and rubbing from every direction and repetition are needed, not force.
Remember, you can scratch hard ceramic tile glazes and even porcelain if you apply too much force.
The mosaic coasters featured in this article were made by artist Stefi Morrison, who describes herself as a beginner. It was her email about the problem with scratching that convinced me that I needed to write this article and clarify the correct method for working grout into the gaps.
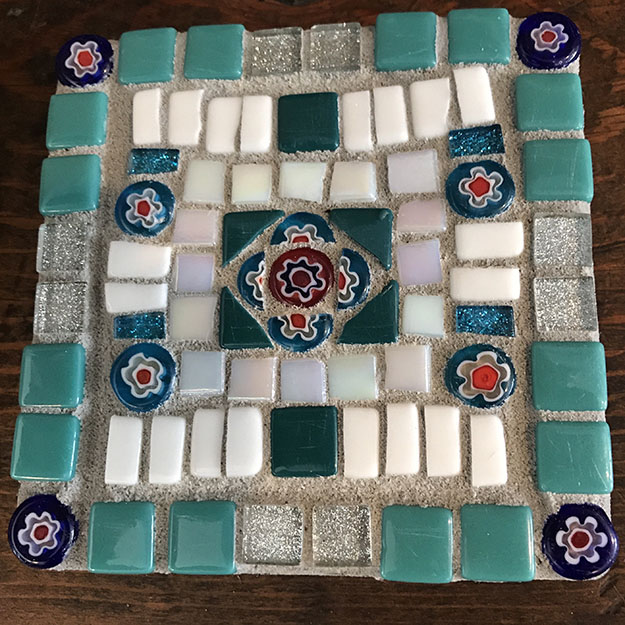
I really like the color harmony in the one below. We don’t sell those glitter tiles, but I like how the clear ones match the grout and make the border look like it is composed of four separate corner motifs.
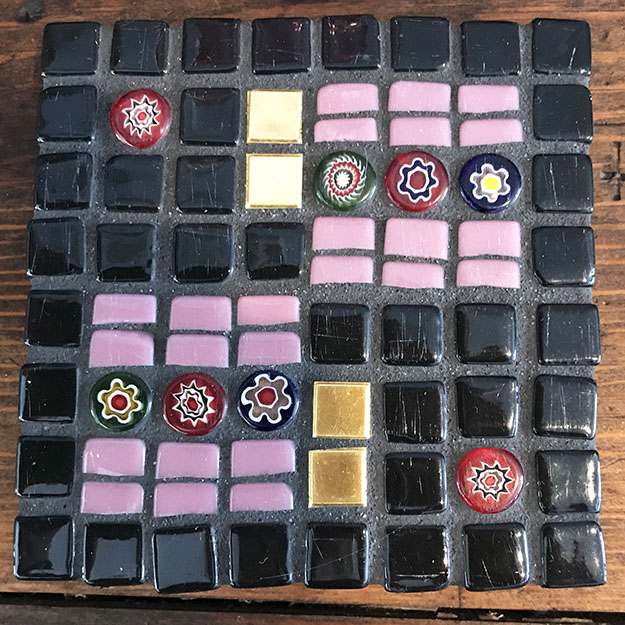
Note that Stefi’s mosaics has a large enough grout gap that it would be easy to get the gaps packed without a lot of rubbing, but most mosaics have places where the gaps are problematically narrow in at least a few places, and these narrow gaps are notorious for having voids or bubbles under a superficial crust of grout.
These voids are usually discovered only after the grout has hardened and the thin crust crumbles.
That is why rubbing or “working” the grout from every direction is needed. It helps ensure that the grout gets packed all the way to the way to the bottom of the gap.
But you do NOT need to scrub or scour the surface with the wet grout in order to get it into the gaps.
Working Wet Grout
You can accidentally erode the grout out of the gaps you are trying to fill if you rub too hard or for too long.
Work the grout into gaps by rubbing from different directions when you first scoop on the wet grout, not later when you are buffing off the excess and discovering voids or bubbles under thin crusts.
Don’t try to reshape the grout if it is more like drying crumbly dough than wet concrete.
Avoid rubbing too much if your grout gaps are large. Take care during early hazing. Let the grout get fairly hard before buffing.
Make grouting easier by keeping grout gaps under 3/16 inch max and shoot for 1/8 inch.
If you are installing in a wet or outdoor location, you don’t want to have places where tiles touch each other and can’t be packed with grout. Even if the glass tiles touch each other, there will still be a micro gap that needs to be filled.
Non-Sanded Grout

There are situations where non-sanded grout is preferred or even required, and that is when you use hairline gaps or only have a few incidental hairline gaps in a mosaic that was designed to not have any gap at all, such as in a mosaic icon or plaque that does not need to be grouted in order to keep out moisture.
If the mosaic’s gaps are all tiny, then the grains of sand are not needed for tensile strength, and some of the grains would be too large to fit in the gap. That would leave them on the surface the whole time you rubbed trying to fill the tiny gaps, and that would increase the risk of scratching.
Leave a Reply