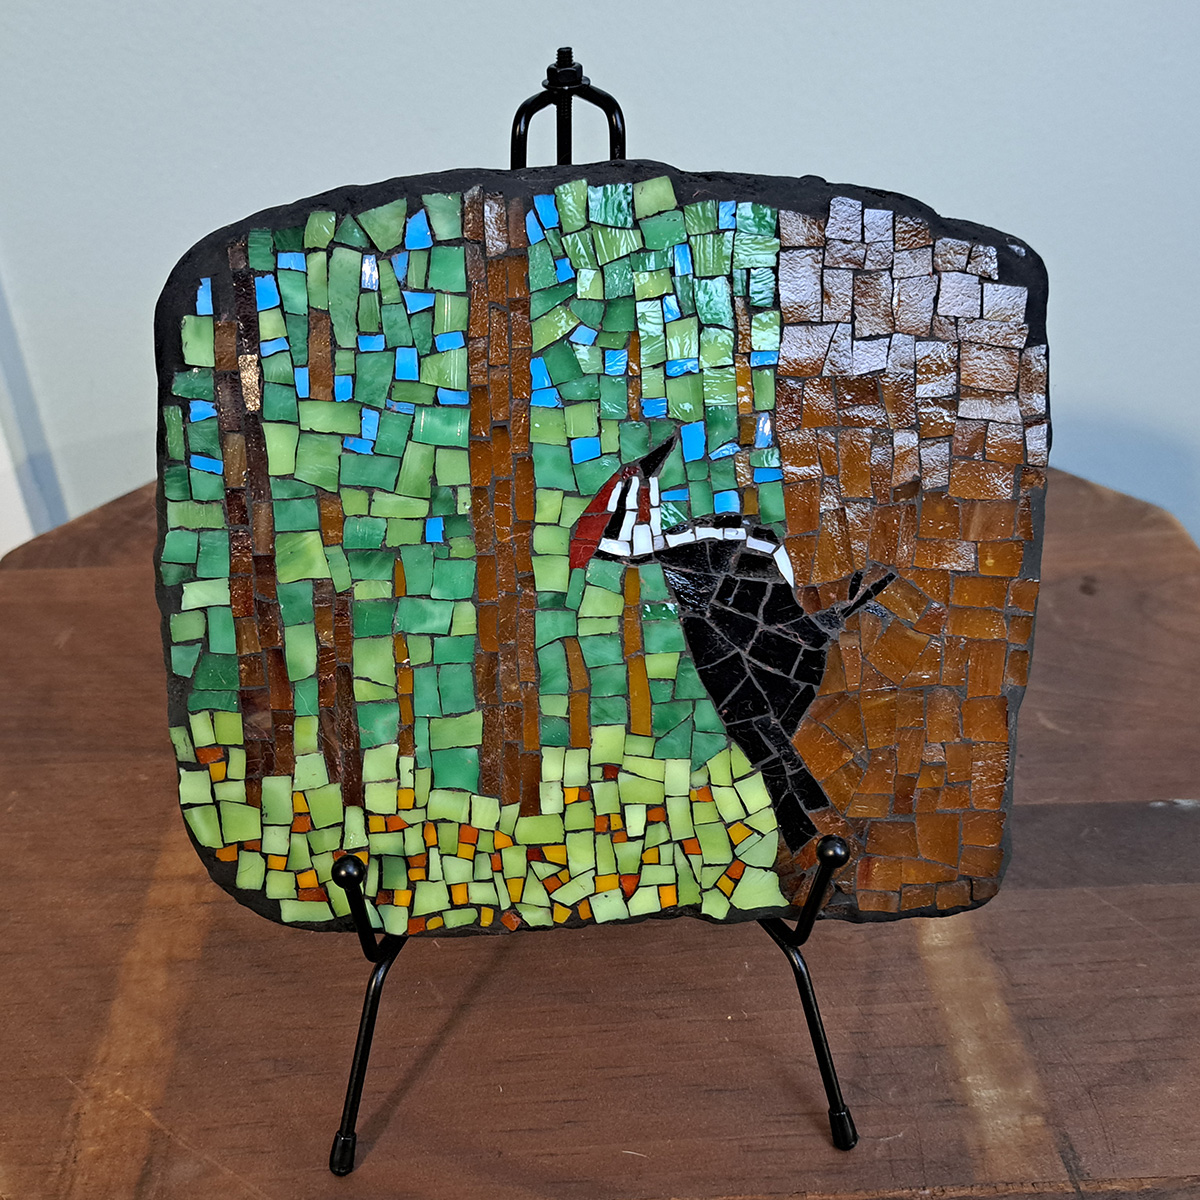
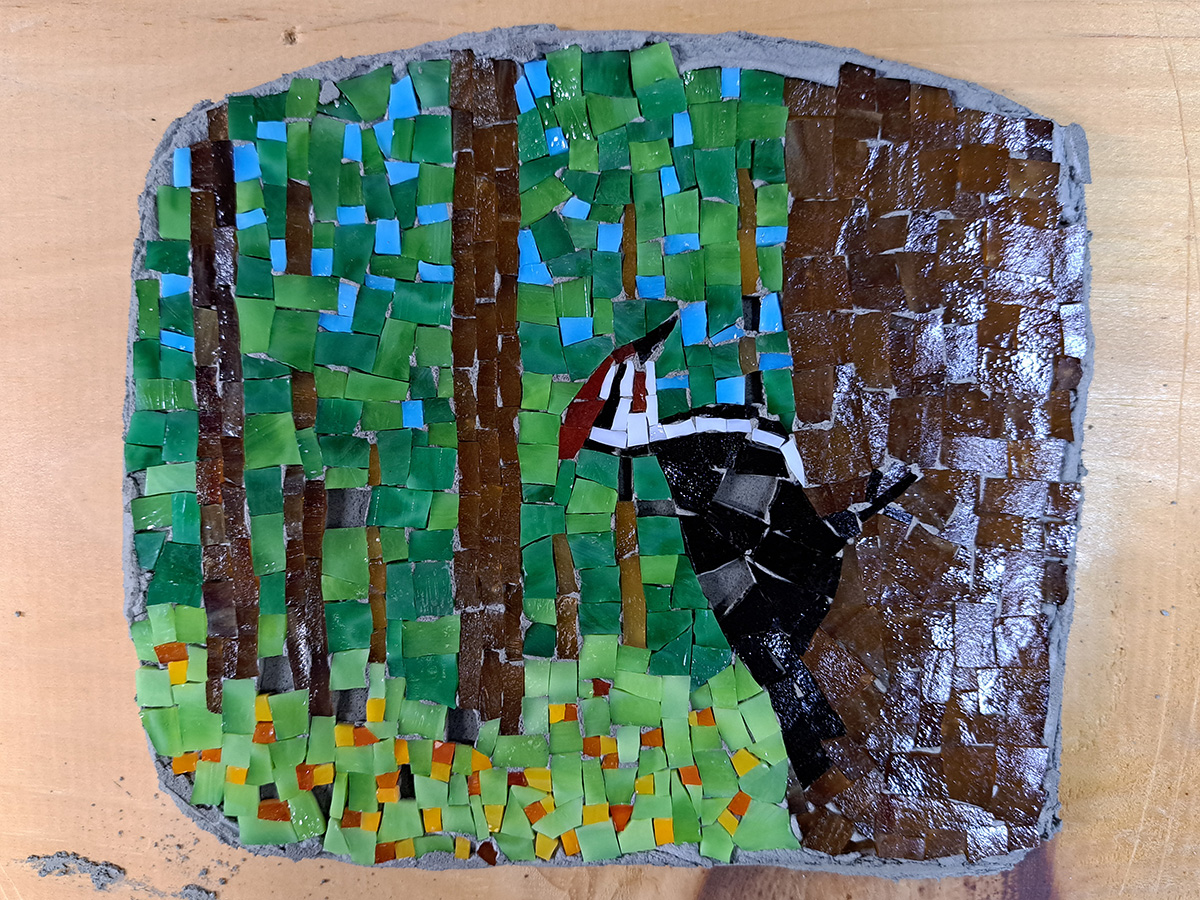
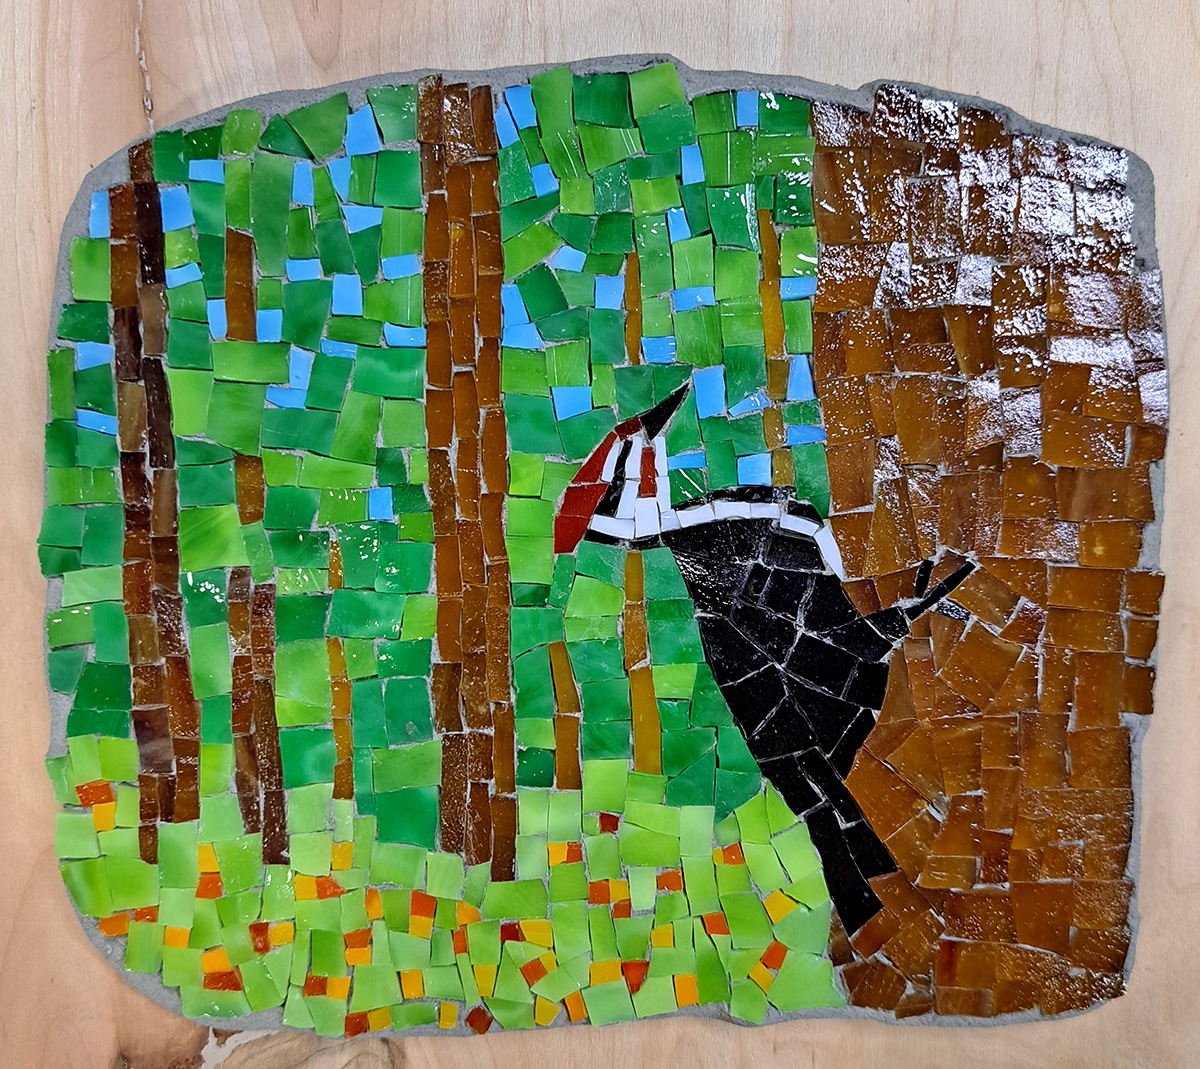
I recently completed a mosaic titled Woodpecker Forest, which shows a pileated woodpecker on the side of a pine tree in a forest carpeted with capensis flowers.
I think this composition is a good teaching example because it demonstrates several fundamentals of visual art.
There is strong value contrast (light-dark) contrast in both the figure and background.
The mosaic also has a sense of depth created by objects positioned at near, middle, and far distances.
The warm brown bark and the cool greens and blues of the forest canopy are a classic contrast of hues. The color wheel never lies.
I took photos of most of the major milestones of making the mosaic and its custom backer.
Creating the Mosaic
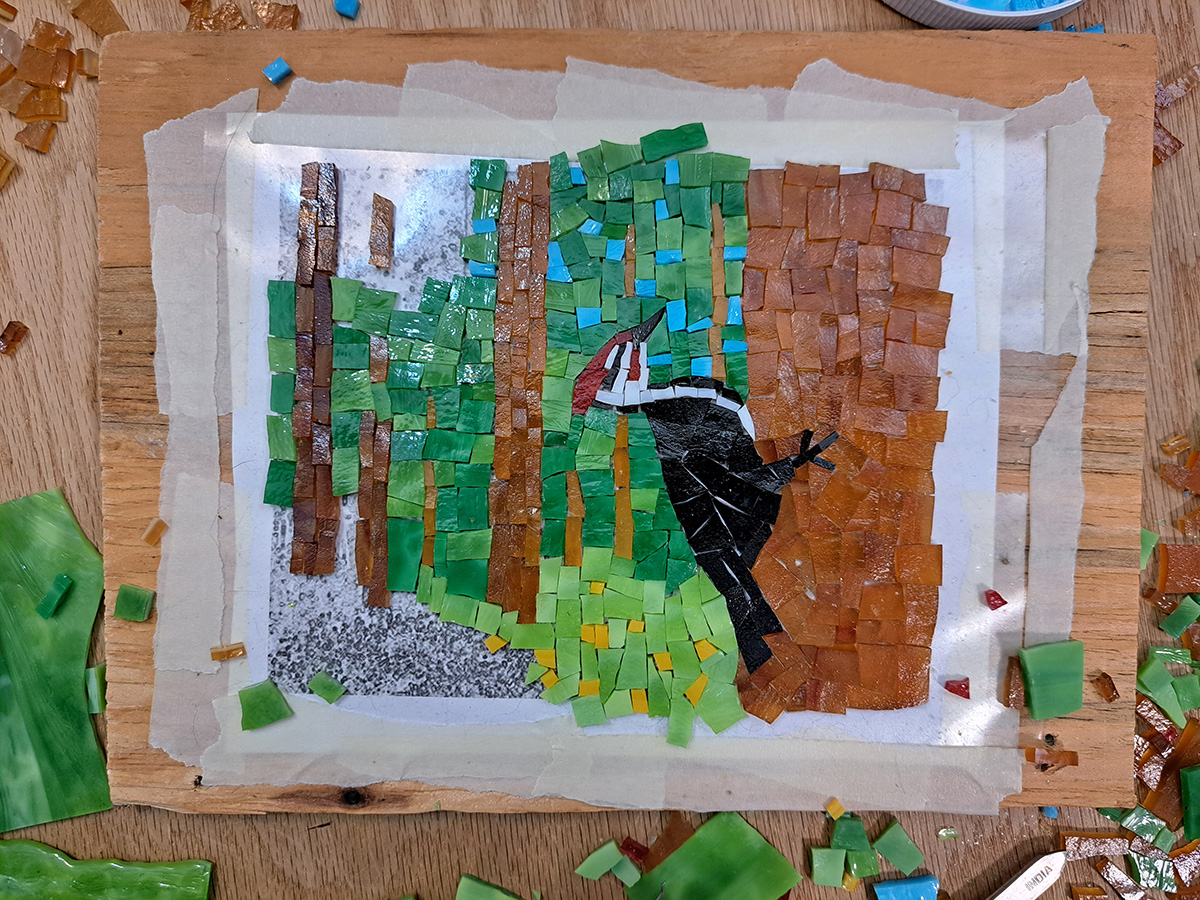
I used my customary method of improvising on a temporary surface of clear contact paper over a pattern.
The pattern was created from a photo collage made in Photoshop. The pattern and the collage are NOT followed closely in line or color.
I typically look at MANY online images as I improvise over the pattern.
Here is a photo of the mosaic being laid up on the clear contact paper:
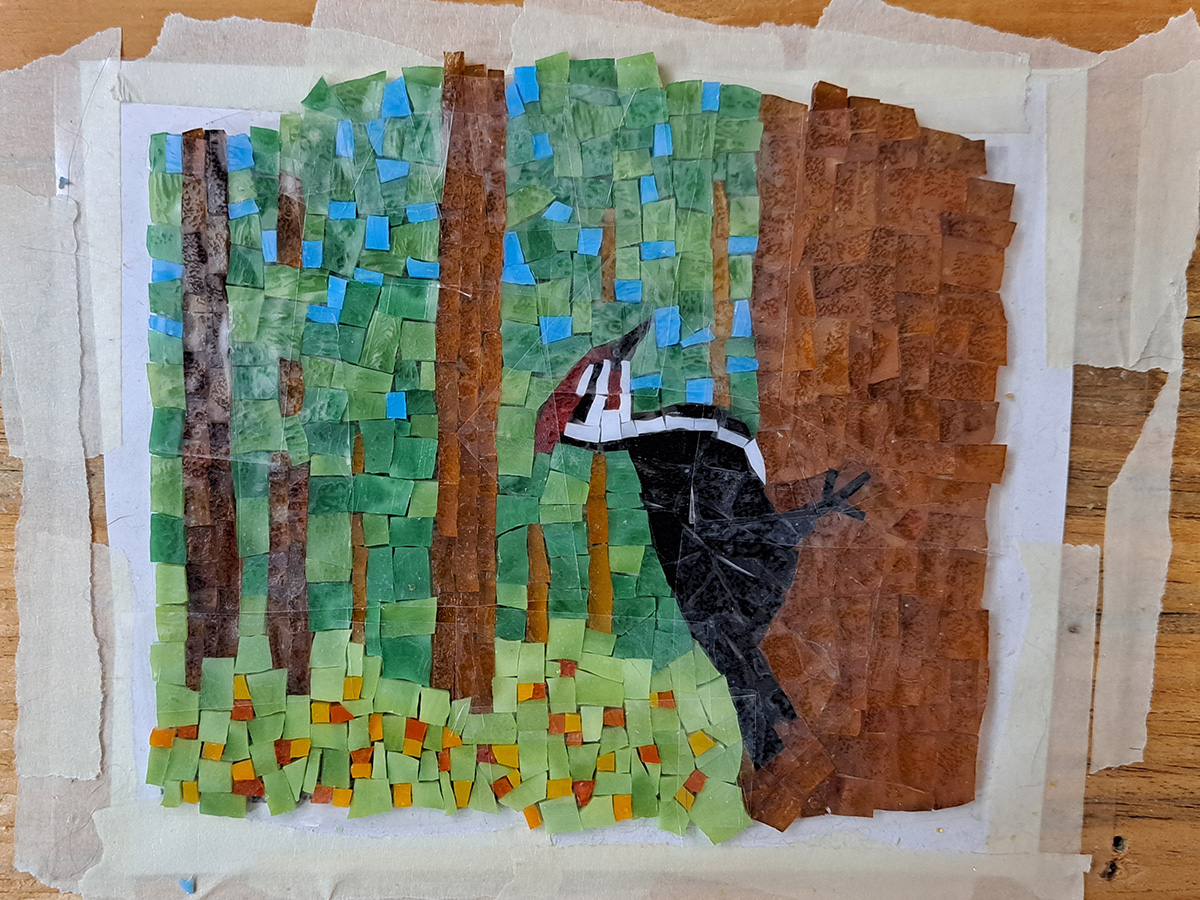
Here is a photo of the mosaic when it has been fully laid out. Note that clear Mosaic Mounting Tape has already been pressed onto the face of the mosaic:
Here is a photo of the backside of the mosaic after it has been lifted off the contact paper and flipped over:

A Critical Step
Here is a photo of the backer covered in thinset mortar and the upside-down mosaic right before they are pressed together:
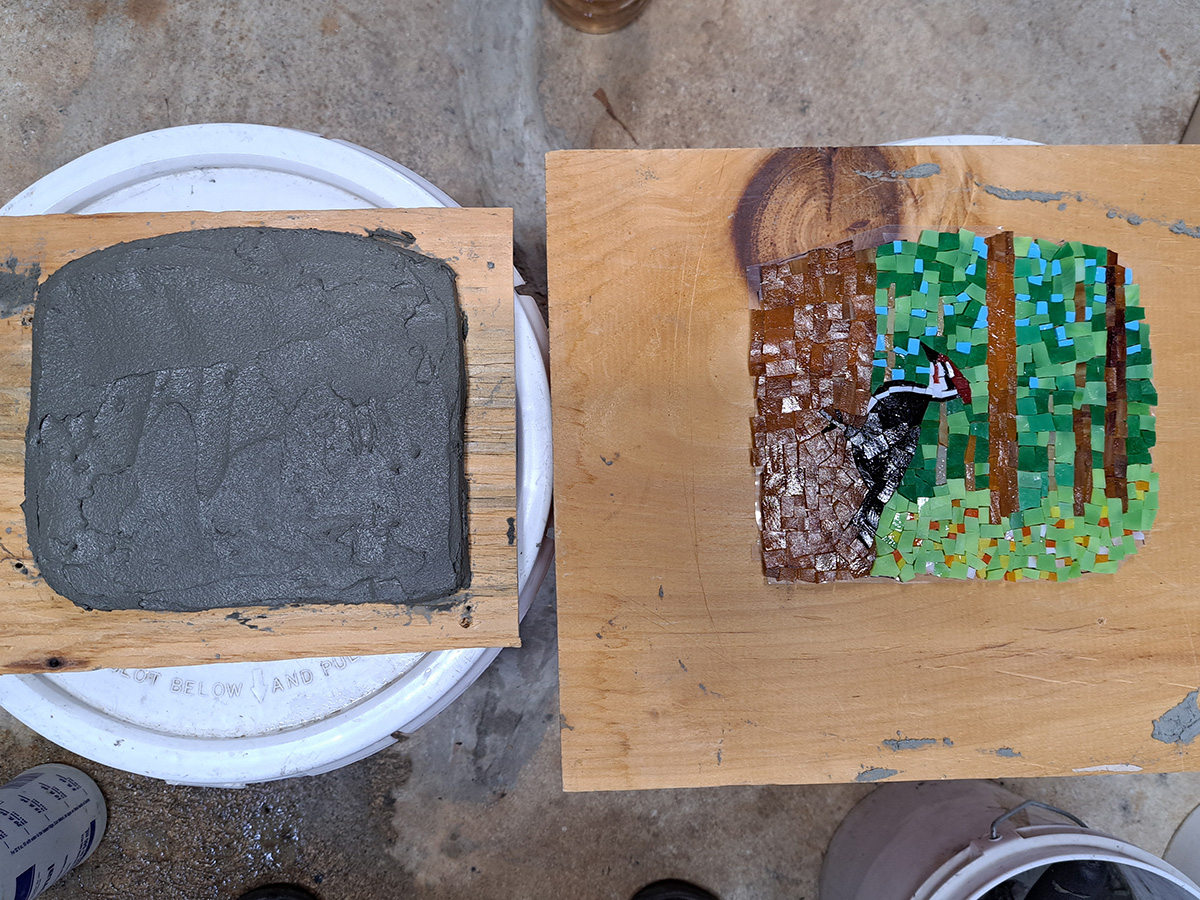
The thinset mortar on the backer is about 3/16 inch thick. Thickness is gauged roughly by pressing a nail or needle into it. Things work best the more uniform the thickness.
The backer is slowly lowered onto the back of the mosaic, taking care to align all edges. The backer is pressed down, and then the whole thing is flipped over so that the face of the mosaic is showing.
The next step is careful pressing of the face of the mosaic to ensure that each tiny sliver of glass in pressed into the mortar.
The goal is for mortar to press up into the bottom of the grout gaps but not all the way to the top.
I lightly press and pat the face of the mosaic using my fingertips to make sure that each tile is “wetted” with mortar at the molecular level and gripped mechanically and not merely sitting on the top of the mortar.
The result of all this patting and pressing is that the mosaic’s grout gaps will need cleaning up before the mosaic can be grouted.
Here is a photo of the mounted mosaic before cleaning:
Before Grouting
The next step after mounting the mosaic in thinset mortar was to clean up the grout gaps and remove any mortar that pressed up to the top of the grout gap.
I also used a Diamond-Grit File to shape the edges of the mosaic backer.
Here is a photo of the mosaic cleaned up and ready for grouting:
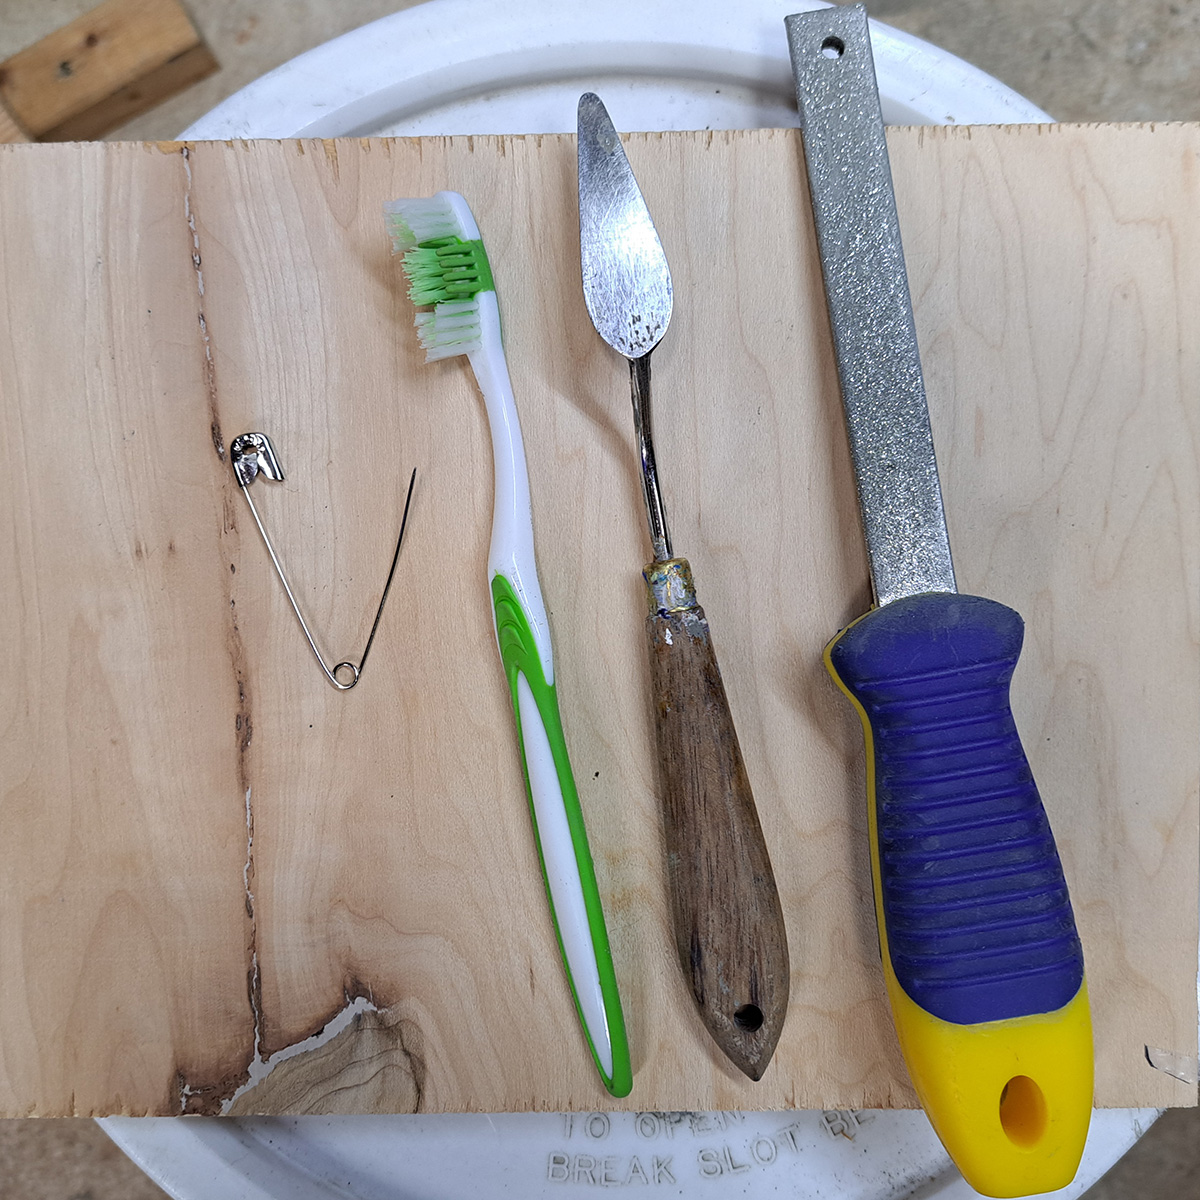
Typically I use a Dental Pick for this careful work, but I couldn’t find mine. I used the point of a large safety pin instead and discovered that I preferred it to my usual tool.
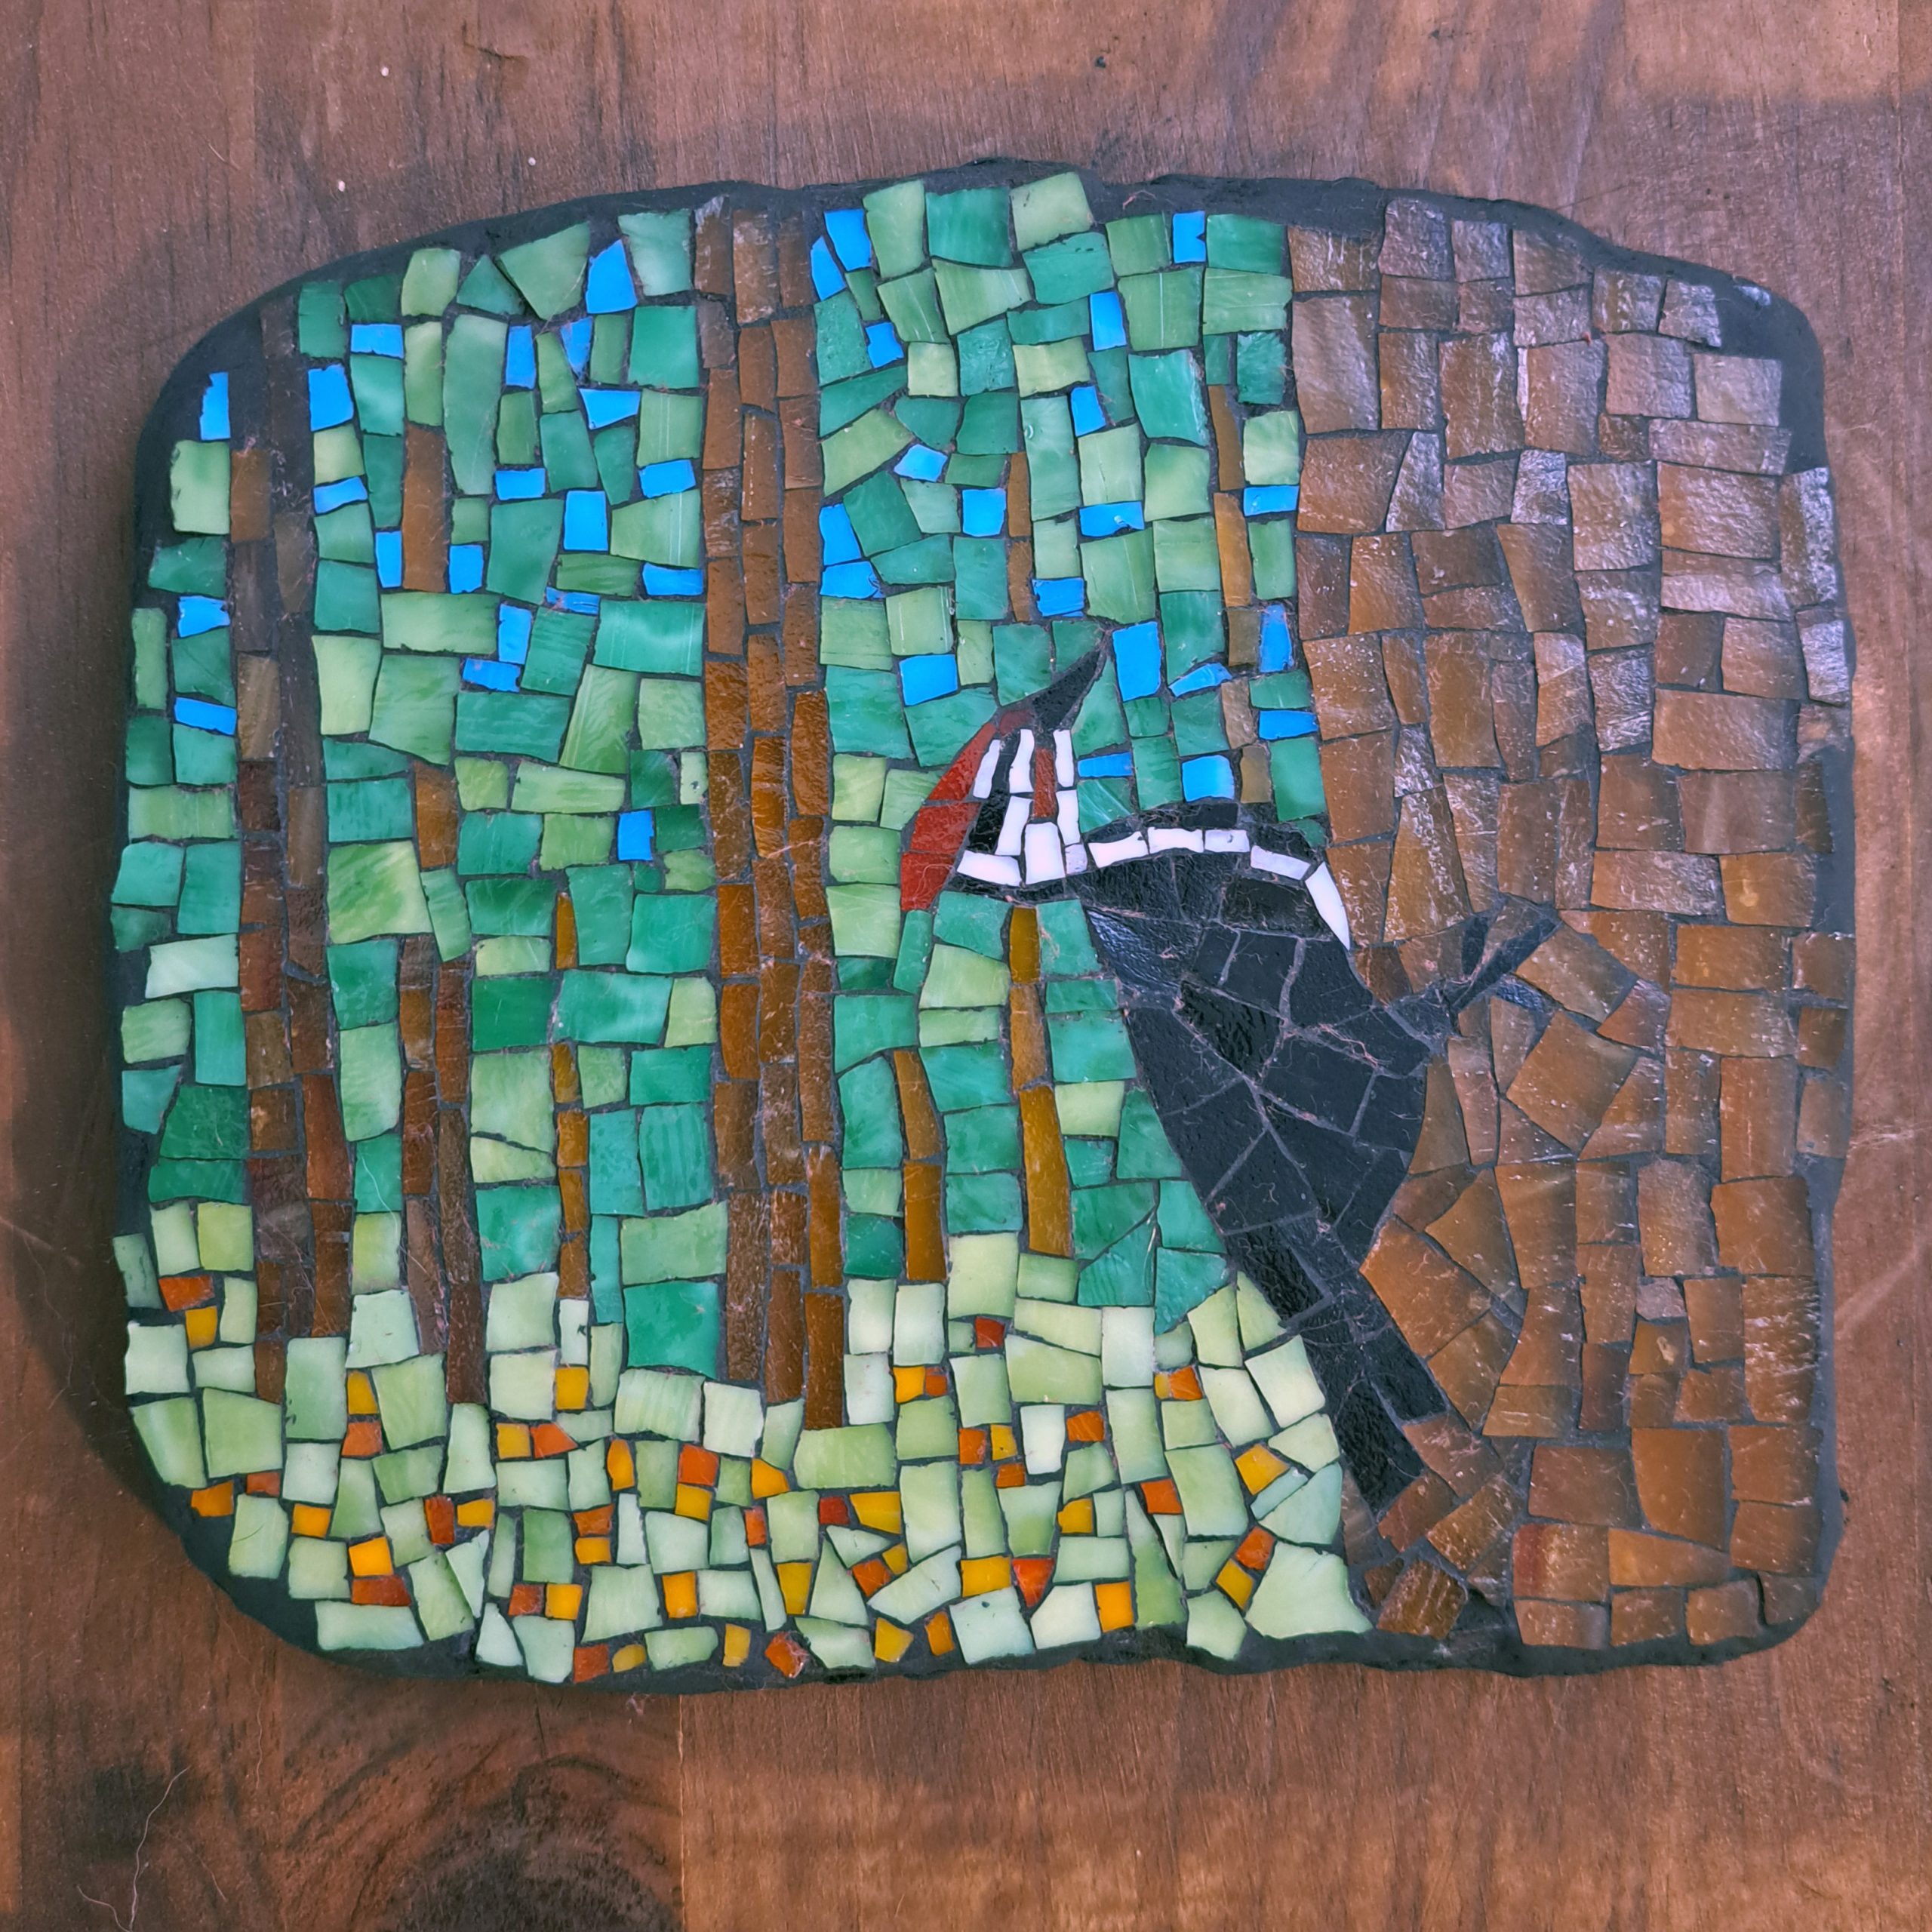
Grouting
I used black non-sanded grout because the grout gaps were tiny and incidental. Black grout and tiny gaps are the key to minimizing the color impact of grouting.
Here is a photo of the grouted mosaic:

Leave a Reply