Artist David Hilbertson recently completed his first mosaic and photo-documented the process of making it, which was somewhat of a tour-de-force in terms of using improvisation and working around problems.
Even the image itself is more improvised than not, and yet the results are akin to an Impressionist painting or a pixelated photograph.
Model as Starting Point
The image in David’s mosaic is an idealized version of a photo model that was modified and augmented mentally:
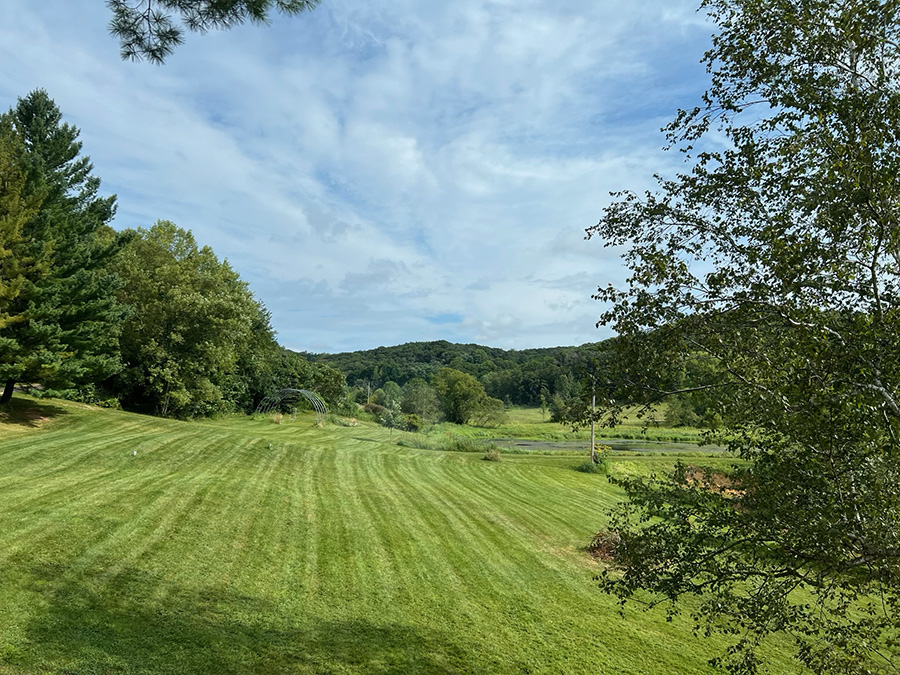
The mosaic David produced from this starting point makes it obvious that the artist has spent a lot of time thinking in terms of composition and color and what makes an image iconic.
David improvised a lot of contrast and color excitement that are lacking in the photo. The lighting and atmospherics are improvised. Even the vantage point is different from that of the photo and offers a more canonical view.
David didn’t have to tell me he has painted off and on over the years and photographed landscapes and done field work or that he is a retired architect for me to suspect something like that.
Much of this mosaic comes from an eye that has analyzed landscape as image and not the particular photo used as the nominal model.

Confidence
The recommended first mosaic is something small and non-architectural and not subjected to moisture.
David ignored all that.
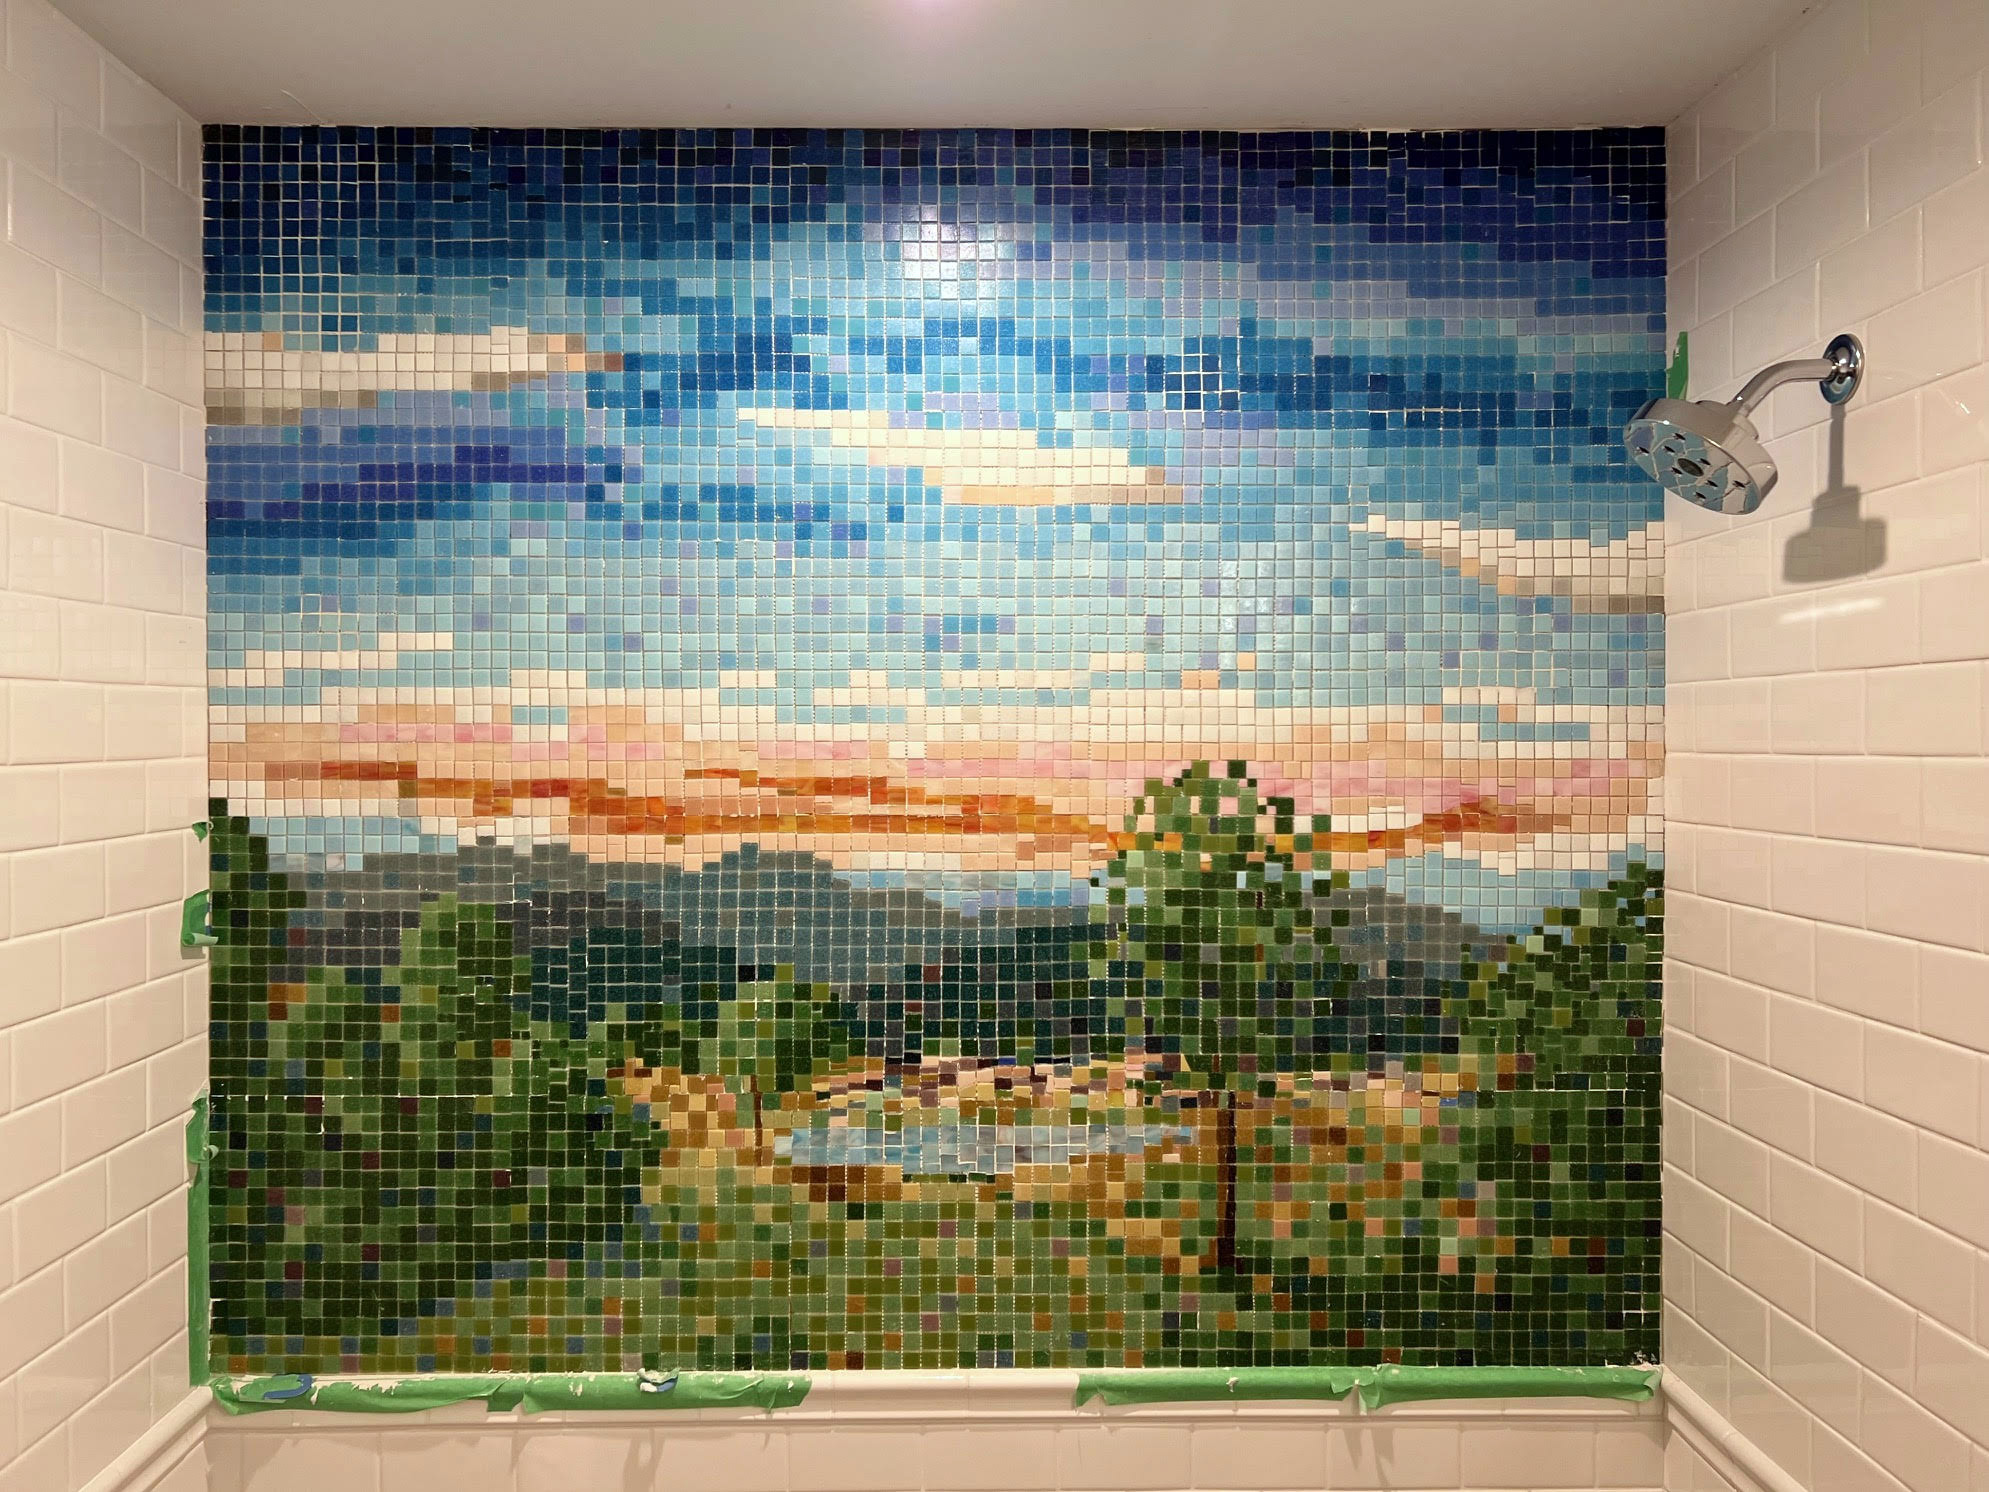
David’s first mosaic is a 4′-6″ x 5′-6″ ( 1.37m x 1.77m) mural. In his shower.
On top of that, David improvised his own methods.
Some of us learn by doing and are experienced fixing our mistakes and winging it. Some of us are experts at it, even when things are technical and complicated.
Others desperately need to stick to standard methods and following recommendations.
David’s confidence in his ability to make things work and handle setbacks was not misplaced.
You have to be prepared to put in the work if you deviate from standard methods on an architectural project or if the architectural project is also Art with a capital A and not just tiling.
David did both and succeeded.

Improvised Methods
Standard methods make processes less labor intensive, and so the only reason to deviate from them is when you know you need results different from what standard produces
The standard method for making a shower mural of gridded tiles is to use a Mosaic Mounting Grid to lay up sheets of tile on Mosaic Mounting Tape, which is quickly pressed to the faces of the tiles in the grid.
David wanted to be able to use beveled and non-beveled types of glass and have non-square pieces and deviations in the grid as needed:
Those constraints ruled out a Mounting Grid, at least for most of the tile.
In theory, a Mounting Grid could have still been used for much of the mosaic, but it is better to be consistent and have all the tiles positioned by hand if some of them are.
Tape Versus Mesh
I recommend Mosaic Mounting Tape as a temporary face-mount instead of gluing Fiberglass Mesh to the backs of tiles.
The bottoms of tiles on Mosaic Mounting Tape are totally socketed in the mortar without a layer of mesh and glue between them.
The final bond is superior and less vulnerable to moisture.
It is also easier to slide tape-mounted sheets around to tweak their alignment, which is needed for nearly every sheet.
Another plus for using Mounting Tape instead of Fiberglass Mesh is that mesh has to be glued to the bottom of the tile.
Mounting Tape can be pressed onto the face of a mosaic laid out on a temporary surface without having to flip things over.
Temporary Surface
David had to build a worksurface large enough to accommodate the full layout of the mosaic by laying out sheets of insulation board on 2x4s in the basement.
This worksurface could have been covered with contact paper sticky-side-up to make a tacky temporary surface.
Once the mosaic is laid out, Mosaic Mounting Tape can be applied to the face of mosaic as it sits on the temporary surface:
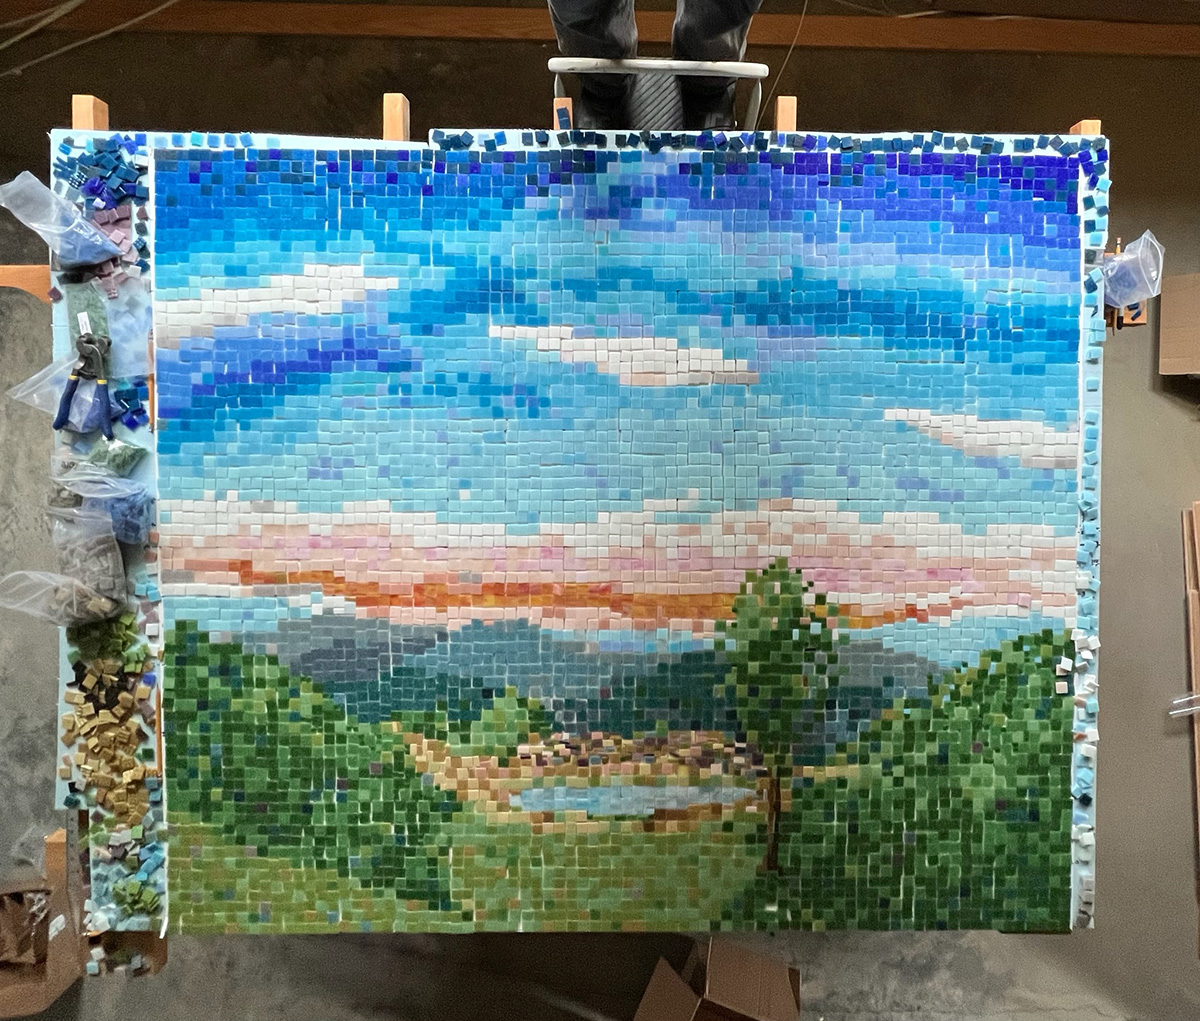
Once Mounting Tape is applied, a box cutter or other blade is used to cut the mosaic into sheets, with 12 x 12 inch squares being typical. Larger sized sheets are more difficult to handle and align properly.
David used Fiberglass Mesh instead.
He manually transferred one section of the mosaic at a time to to a piece of Fiberglass Mesh covered in Weldbond Glue.
The glue covered mesh was sitting on top of a gridded piece of cardboard covered in clear sealing tape to prevent glue damage.
This grid allowed David to position and align each tile as he transferred it from the layout to the sheet.
Design Evolution
David’s method of transferring tiles to mesh might have been more labor-intensive than most non-Artists could have borne, but real Artists at heart have a commitment to getting things right that transcends those type concerns.
David’s commitment shows in the final results.
Needless to say, the design evolved as it was executed, and that is where David’s ability to improvise really shines.
David’s own words best describe this process:
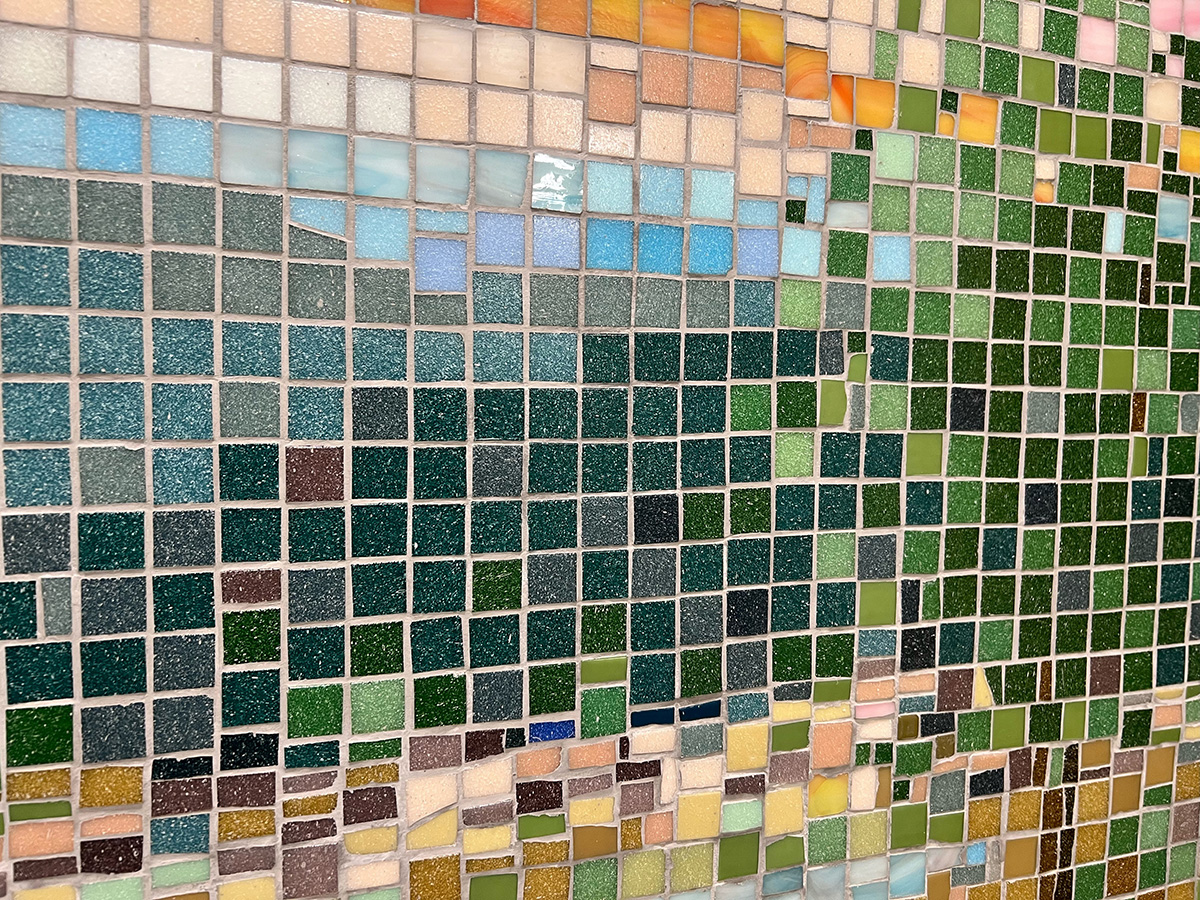
“A far as composition, I enjoyed creating the sense of atmospheric perspective. Going from three values of fairly saturated greens in the foreground, to dark blue-green in the middle distance,
then lighter blue-green and finally bluish gray, always intermixing them somewhat and adding some of the blues and purples.“I also enjoyed the brighter, more detailed area in the lower center creating a focus and contrast in scale and value.
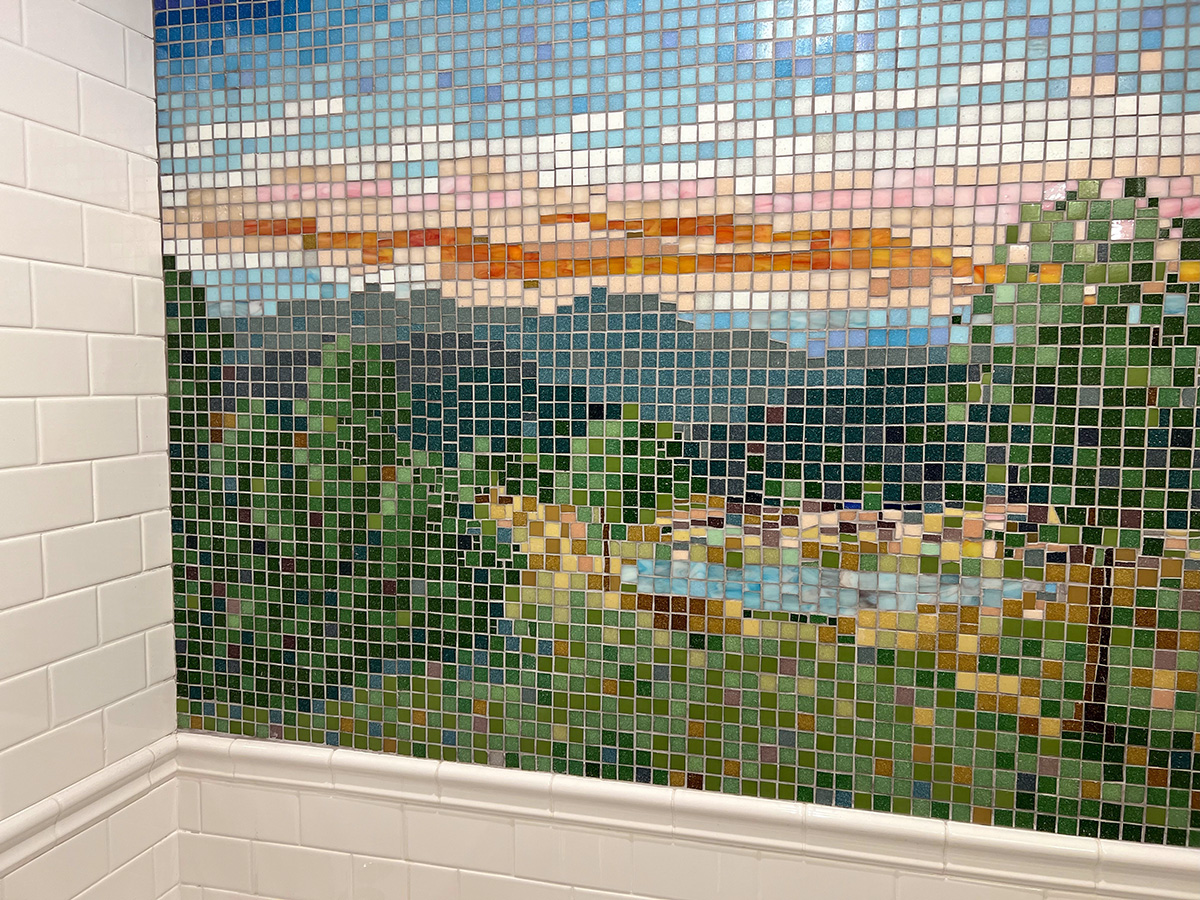
“It is an abstraction of a wetland and meadow in the middle distance.
“And the sense of transparency with sky showing through the big tree, and a few brown tiles that, subtly at a distance, suggest a continuation of the meadow uphill and behind the foreground trees on the left.”
“I had originally thought the sky would be blue at the top, pink at the bottom, transitioning gradually through light purple, but the pinks and purples really didn’t work.
“But the variety of your blue tiles was great, and allowed me to transition from dark to light, and to have areas that were in the cyan family and others in the ultramarine family.
“I also loved the dark greens especially.
“As I went on I realized that blending ultramarines in the cyan areas and vice versa was more interesting, as was adding purples in the sky and in the greens. The suggestion of individual trees, shadows and the like evolved as I looked at the images.
“There are at least three stages of refinement of the mural, first stage, then a big change in the dark-vs light green at the sides and foreground, along with tweaks to the sky later extending the light-colored area to the right of the foreground tree, additional detail in those tree areas (the pixelation you referred to) and suggesting shadows cast from the upper left to lower right.”
Leave a Reply