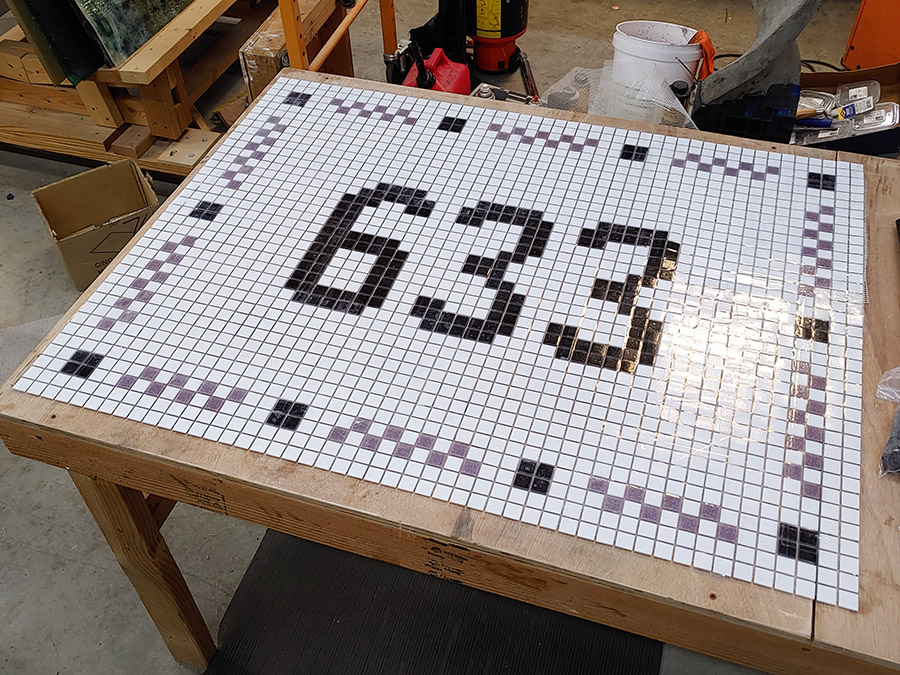
Natalija recently created an entranceway mosaic as one of the final projects in the renovation of her new home.
She did a great job photo documenting the process step by step, including some serious mistakes/missteps, and that is why I am eager to share it.
Also, the mosaic itself looks good and was well executed.
I also like the design in context, specifically that it isn’t overly personalized. Natalija designed the mosaic based on the probability that she sells the house within a few years.
The next owners probably won’t be into Japanimation as much as Natalija is, and so I think the decision to go with the street number instead of Sailor Moon was a good one.
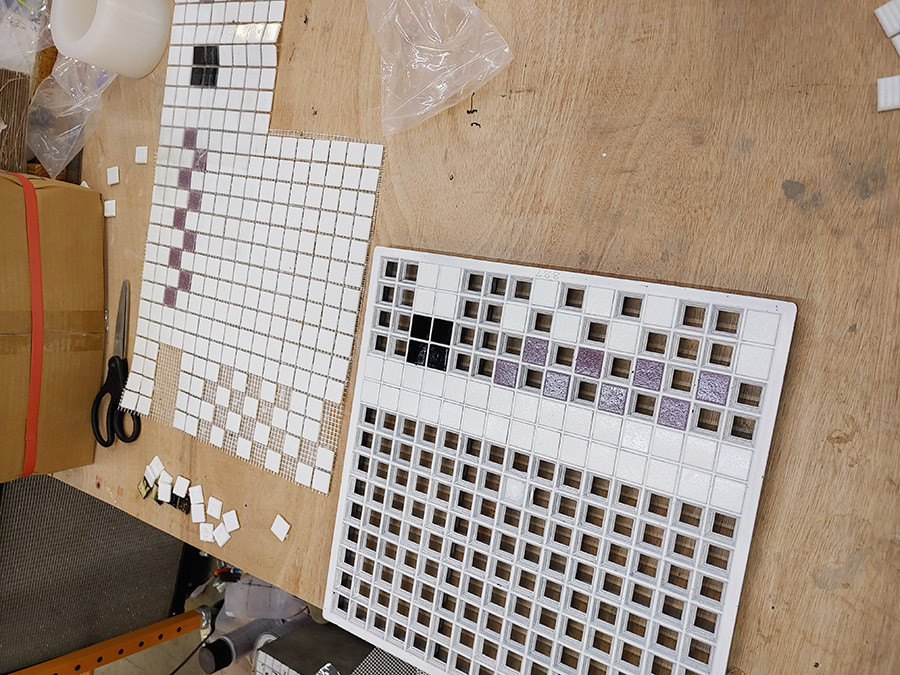
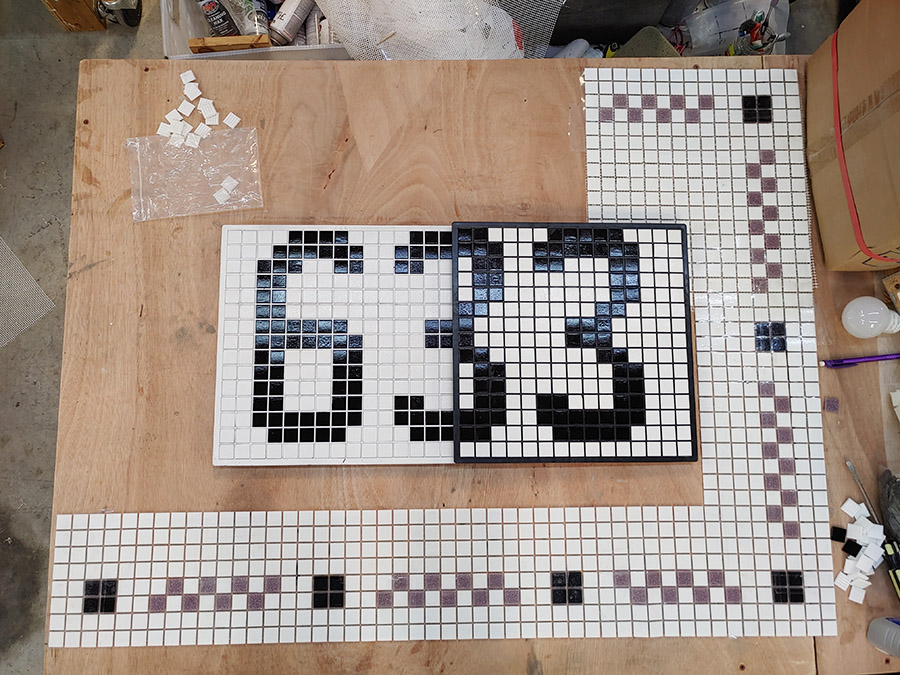
Tile Mounting Grid
Most mosaic artwork is made from cut pieces of tile, but for some architectural mosaics, whole tile is actually preferred. Natalija wanted to create an old-style entranceway mosaic with street number, such as popular in the early 20th century, and those were most often made with whole tile.
This is where a Tile Mounting Grid comes in handy. Otherwise it would be virtually impossible to maintain a uniform grout gap in both dimensions.
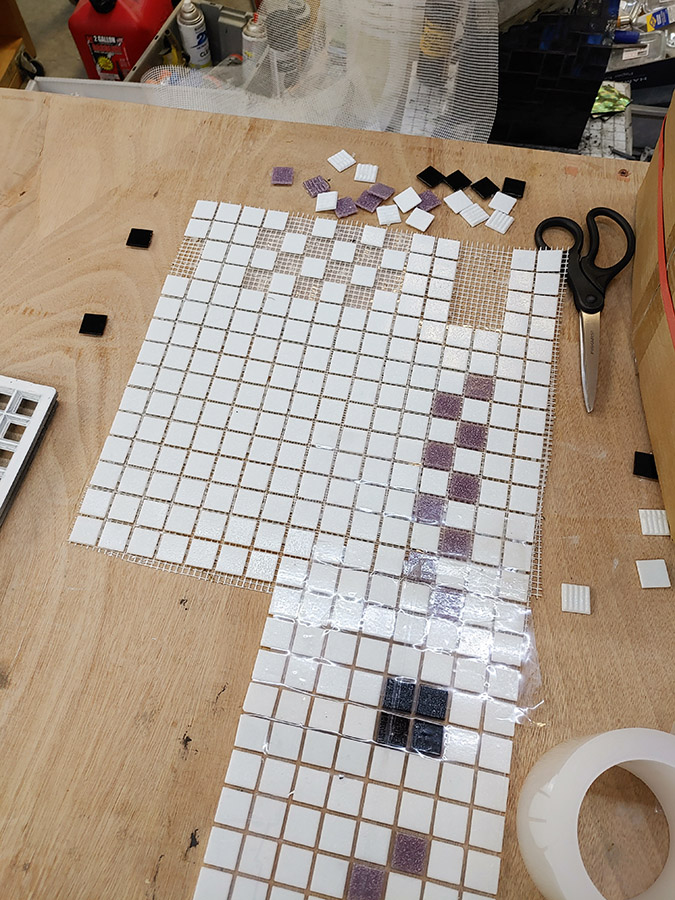
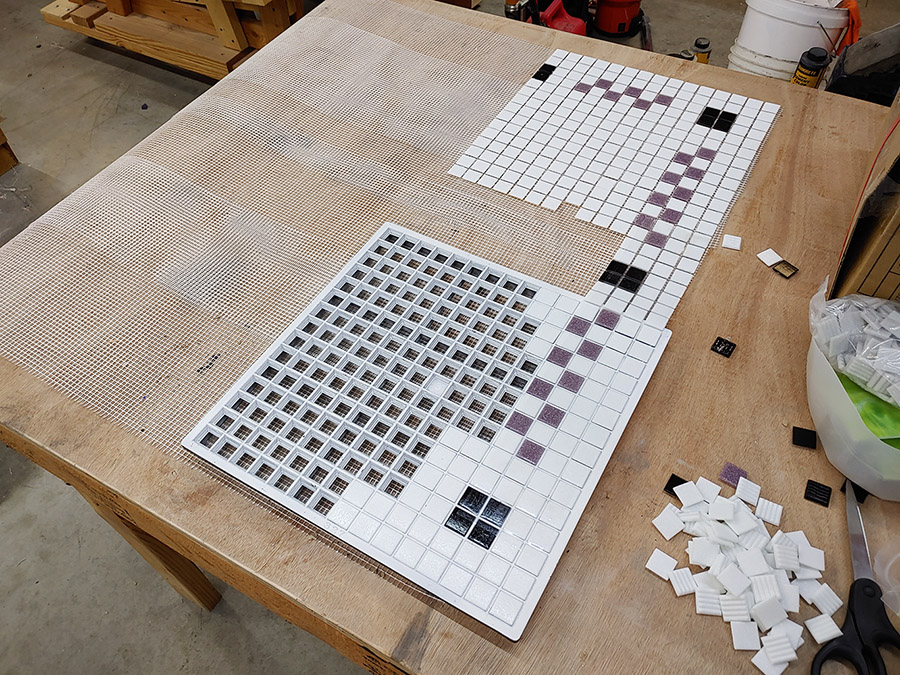
From Grid to Mesh
This whole section is an important FYI grids, mesh, and tape.
The usual method for using a Tile Mounting Grid is to make sheets of tiles that are temporarily FACE-mounted on Mounting Paper or Mosaic Mounting Tape. And that’s it. The sheets are pressed into thinset or adhesive, which then cures, and then the paper or tape is removed.
Natalija wasn’t wasn’t sure how she was going to install the mosaic, and at first she thought she would use Fiberglass Mesh on the back of the mosaic, before eventually settling on using mounting tape.
I avoid mesh when possible because it is an Achilles heel potentially because you have to use glue to attach the tiles to the mesh.
The glue is a potential point of failure if water gets to it, and it is much preferrable to have the whole backside of the tile stuck in thinset.
Also, when people use glue to attach tiles to mesh, they often get traces of glue on the sides of the tile, and so the grout can’t seal out moisture, which wicks down the traces of glue and gets beneath the tile.
If I were picking up designs from a grid using mounting tape, I wouldn’t bother with putting mesh on the back. You can link all those sheets together by taping the fronts together if desired.
If I did want to use mesh, I would have used cheap contact paper to “lift” the design out of the grid and not the significantly more expensive mounting tape.
By “lift,” I mean I would press and rub the contact paper onto the tiles, then place a piece of plywood or cardboard on top and flip everything over and lift off the grid. Then I would glue mesh to the upside down mosaic.
Sticky contact paper isn’t nearly as sticky as mounting tape, and so you have to be careful when using it as a temporary aid.
On the other hand, factories use mounting tape to ship finished sheets of mosaic overseas. (Mounting tape and contact paper might look the same, but they are radically different in terms of strength of adhesion.)
Eventually Natalija settled on only using mounting tape.
She didn’t assemble the whole mosaic immediately because she works like I do and improvised the size of the numerals by trial and error. She felt confident doing this because the overall size of the design and the symmetry of the border was carefully planned.
Symmetry and Calculations
Natalija laid up her design one grid at a time based on a mental sketch of what the design looked like as a whole, which was possible because of the symmetry.
When I make something “like” this, I’ve noticed that I usually produce more calculations than drawings.
Think about what a disaster it would be if you started making something like this and only realized near the end of the process that you had an extra row of tile on one side. Some basic arithmetic is indispensable when symmetry is important.
Test Fit
Before Natalija spread the thinset and installed the mosaic, she was able to do a fit test to see if mosaic fit because she had the mosaic all in one piece, as opposed to individual sheets such as used for larger murals and floors.
When Natalija positioned the mosaic where it would be installed, she noticed that the molding of the doorframe interfered. This was easily and neatly corrected by using a Dremel Tool to trim the bottom of the molding.
Note that the red that you see is a water barrier Natalija painted on the plywood subfloor. Eventually she is going to entirely replace the door molding, so it’s okay some of the water barrier got on the ends of the molding.
Final Test Fit
Here is a photo of the mosaic right before it was installed:
Protecting Frames
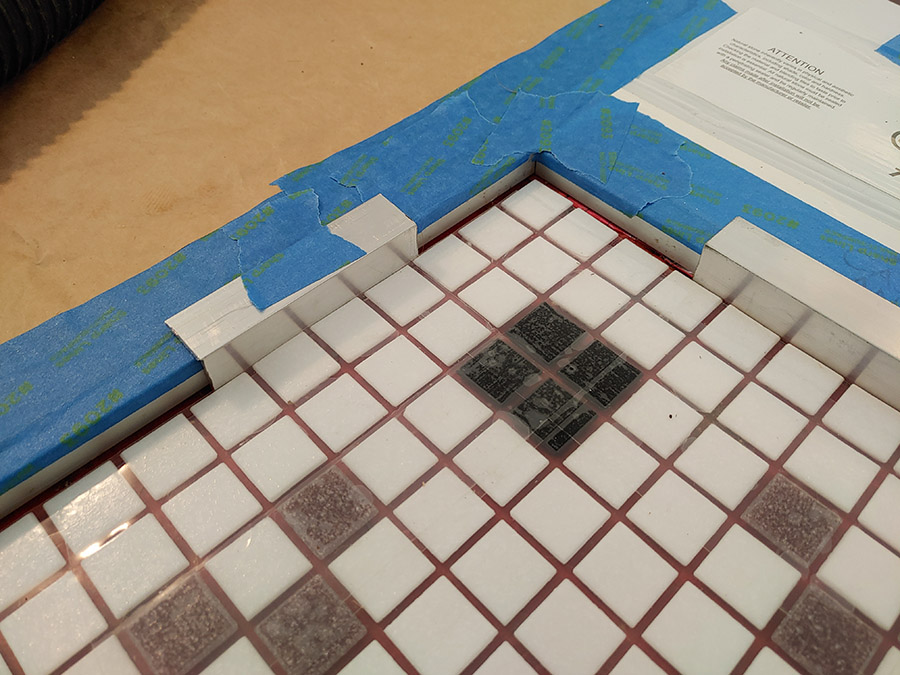
Frames need to be protected when using mortar and grout because they are mildly caustic and contain sand, two things that can ruin the finish of the frame. Metal frames are particularly vulnerable to oxidation by cement products.
In the photo above, you can see how Natalija used painter’s tape to cover the frame before she spread the mortar.
Notice how she used leftover pieces of the frame material as shims to keep the mosaic from touching the frame and ensuring a grout gap was left there.
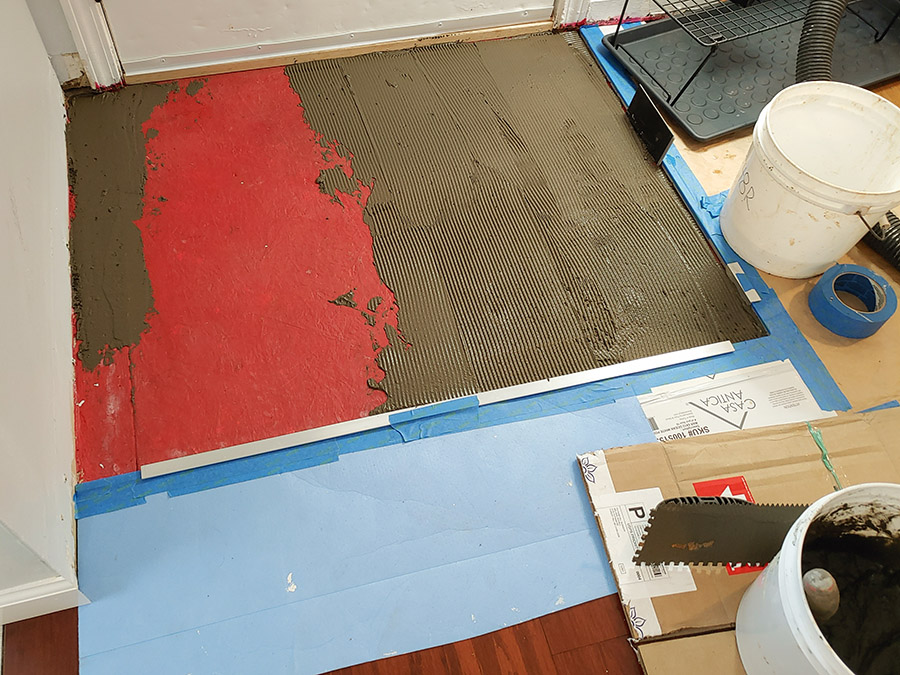
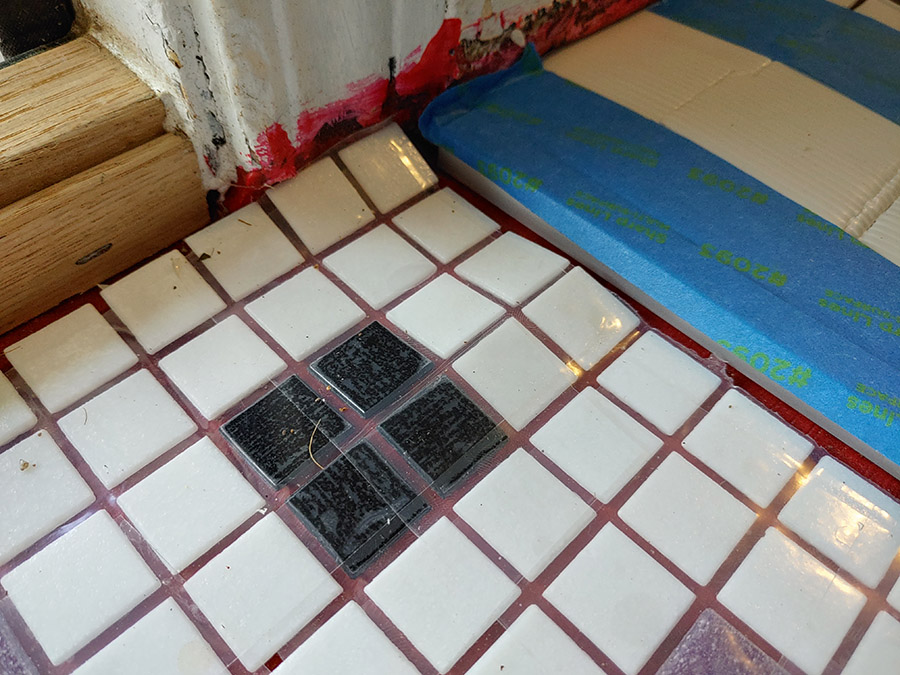
Spreading Thinset Mortar
Natalija used the WRONG trowel for spreading the thinset mortar for glass mosaic tile, and so she spread too much mortar. Note that the trowel you see in the photo above is INCORRECT.
The correct trowel for glass mosaic tile has smaller V-notches and applies less thinset.
A notched trowel spreads just the right amount of thinset for the size of tile you are mounting, and so always use a trowel with the correct size and shape notches, especially if your tile is small.
In the photo below, notice how the excess thinset mortar squeezed up into the grout gap:
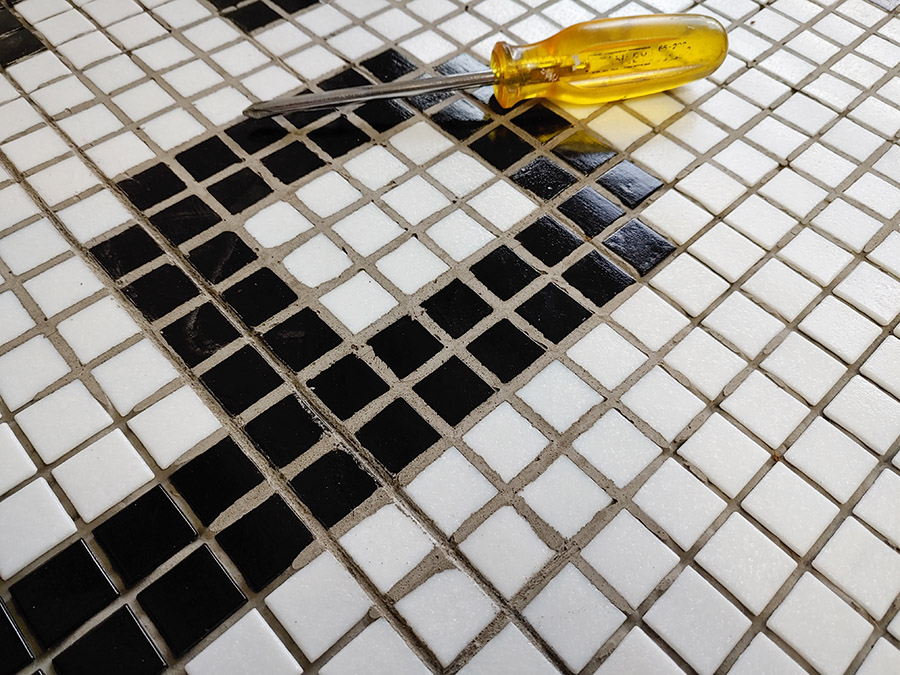
Mortar Problem
Natalija spread too much mortar for glass mosaic tile, and normally this is easily removed using a Thinset Removal Tool while the material is still wet.
Unfortunately, the mounting tape on the face of the mosaic prevented her from scraping it out before the thinset cured.
This meant that she couldn’t get to the mortar in the grout gaps to remove it while soft.
The thinset hardened, and then she had a real problem to deal with.
While I routinely leave thinset in the grout gaps of found-object mosaics, I don’t recommend doing that for architectural mosaics simply because the manufacturer doesn’t mention using the product in that way. As always, use standard materials and methods to avoid unexpected problems.
Note that Natalija did NOT use the screwdriver in the photo to remove the hardened thinset, only to evaluate its hardness. Using a screwdriver or other metal tool would have inevitably chipped a corner of a tile with so many gaps to clean.
Instead, Natalija used some mesh disks with a battery-powered rotary tool to remove the hardened thinset.
Once all the excess thinset was removed from the grout gaps Natalija grouted the mosaic and took care of the finishing touches.
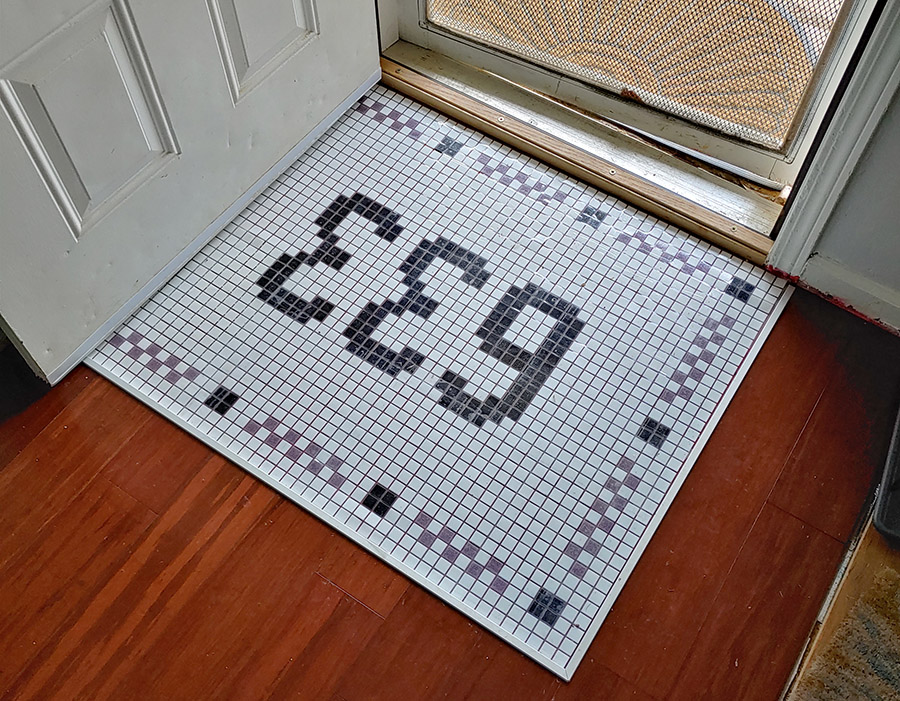
Finished Entryway Mosaic
Here is the finished entryway mosaic:
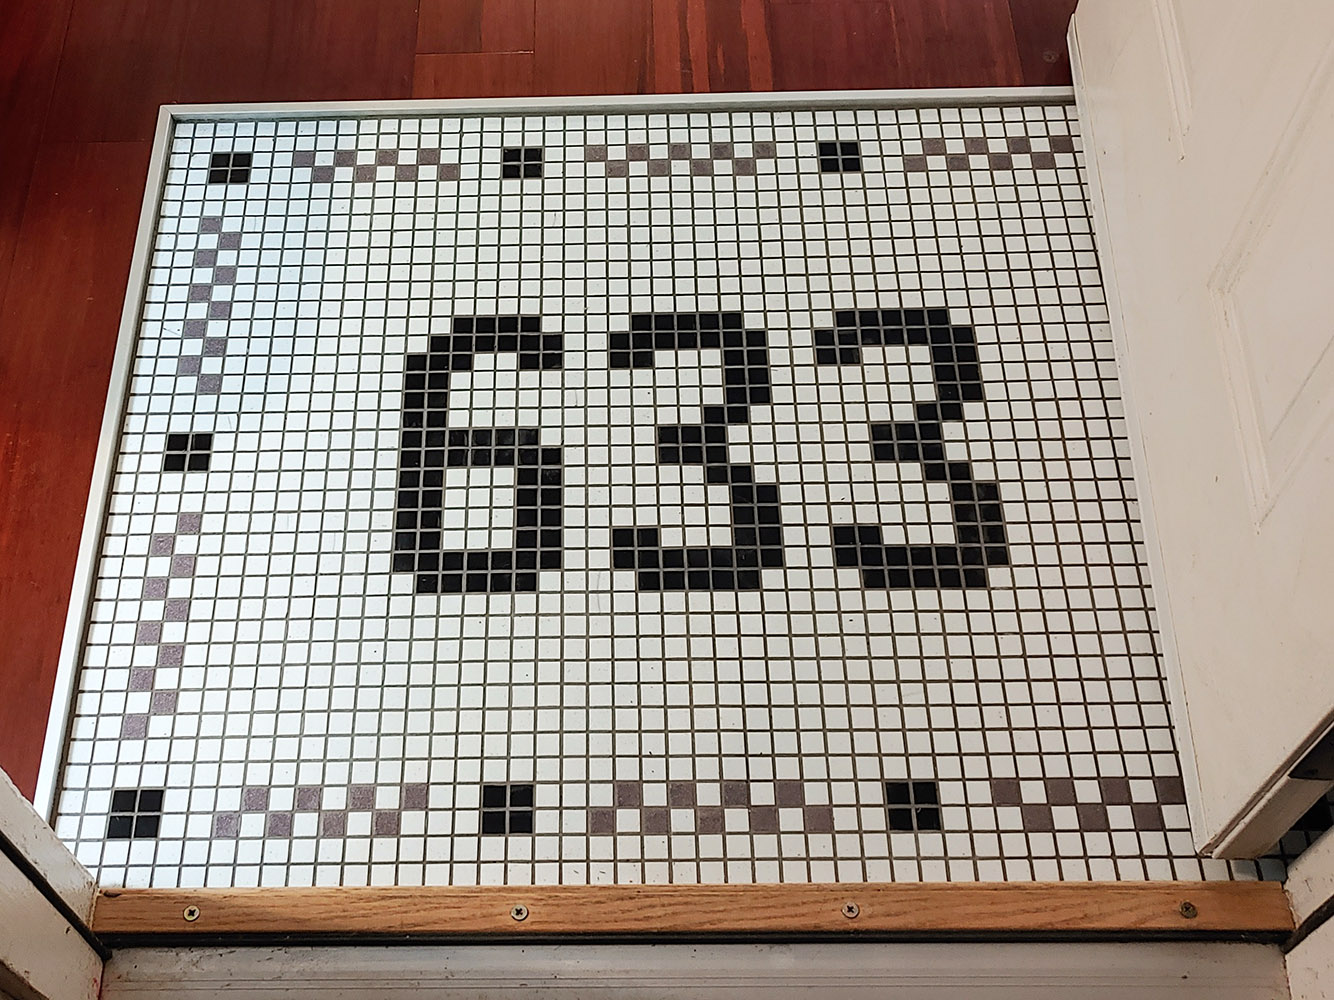
This last photo was made using diffuse sunlight, not glaring noonday sun or electric lights, which usually have a warm hue and are lacking in blue tones.
Leave a Reply