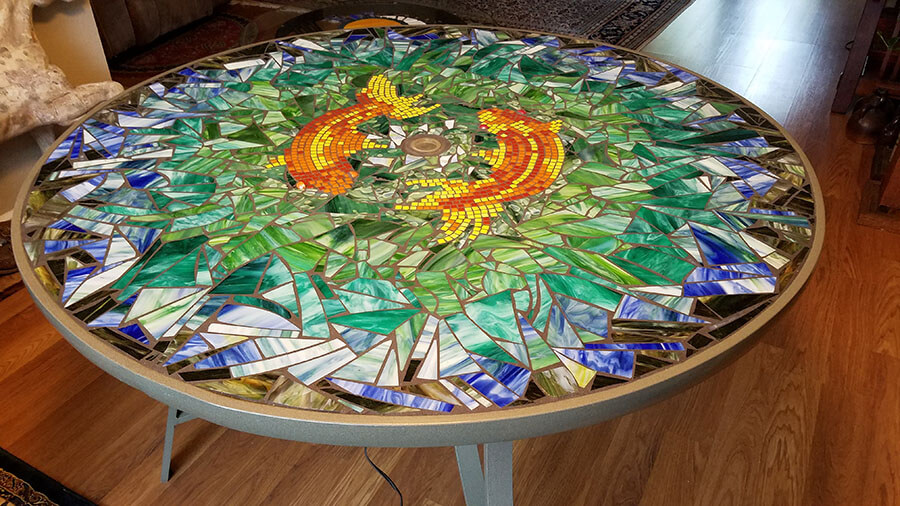
Artist Melanie Squires recently completed a stained-glass mosaic table, and I wanted to show it off for several reasons, and not just because it looks so good. There are some materials and methods to discuss, and there is the use of impressionism for the koi, which I thought was particularly effective.
The Table
Melanie made the table from a metal patio table with a glass top and attached the stained glass to it using silicone adhesive.
Warning: If you use a glass patio table for a mosaic, make sure the glass is thick enough to support the weight of the mosaic. It is possible to find glass patio tables at thrift shops where the original thick glass has broken and been replaced with something thinner. It is also possible to come across cheaply-made tables with thin glass, especially end tables and coffee tables.
Never use a table for an outdoor mosaic merely because that is the table you happen to have. Before you invest time, money, and materials, make sure it will last.
If the table will be outside, make sure the material isn’t wood or plywood or MDF. Wood of all types swells and contracts with changes in humidity, and tiles start popping off relatively quickly in all but desert climates. Even in the desert, a single rain can destroy a mosaic with a wooden backer, especially if the back and sides aren’t painted very well with exterior paint.
Make sure the table can support the weight of a mosaic and that you aren’t making the table top heavy and unstable. This last concern is particularly important for tall and narrow bistro tables.
Most bistro tables are fine with glass mosaic (4mm thick), but thicker stone and ceramic tiles are likely to be too much. All that being said, bistro tables should always be anchored or blocked in by other furniture such as chairs, in my opinion, because they are prone to getting knocked over even with plain lightweight tops.

Silicone Adhesive
For years, I discouraged silicone adhesive for use in mosaic because people used it for outdoor projects like mosaic bird houses hoping that the silicone would compensate for mounting the mosaic on plywood (it can’t), and we try to discourage any mosaic work that is destined to age poorly.
But silicone has its uses, especially for glass-on-glass mosaics where water-based PVAs such as Weldbond cannot fully dry and turn clear but remain white between the glass for months.
It took me a while to accept silicone because I disliked the short working time and the fact that it cannot be cleaned up easily with water.
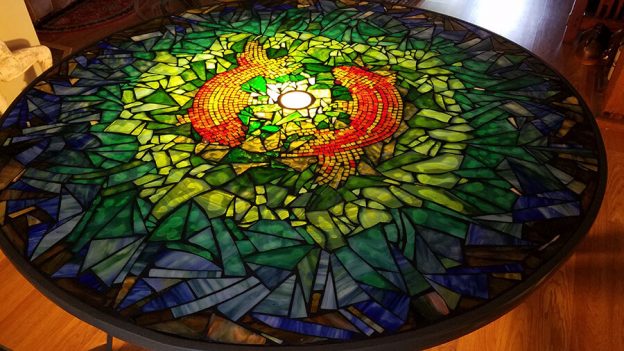
Then my employees started making their mosaics using stained glass more and more, and eventually Natalija started doing glass-on-glass mosaics that could be backlit the way Melanie’s table is. For these glass on glass mosaics, Natalija used GE Silicone II, and she found that it worked very well, even though she works by gluing down one tile at a time, which is intrinsically messy compared to laying up the mosaic in advance on Mosaic Mounting Paper or Mounting Tape and then gluing it down all at once.
If you do decide to make a glass-on-glass mosaic using silicone adhesive, read my blog article about how to lay up a mosaic on mounting tape.
It’s fairly simple to do, and it is so much easier than gluing down one tile at a time, especially when you are using an adhesive that isn’t water soluble. If you do decide to glue down one tile at a time, have plenty of old rags available for wiping your fingertips.

Impressionistic Fish
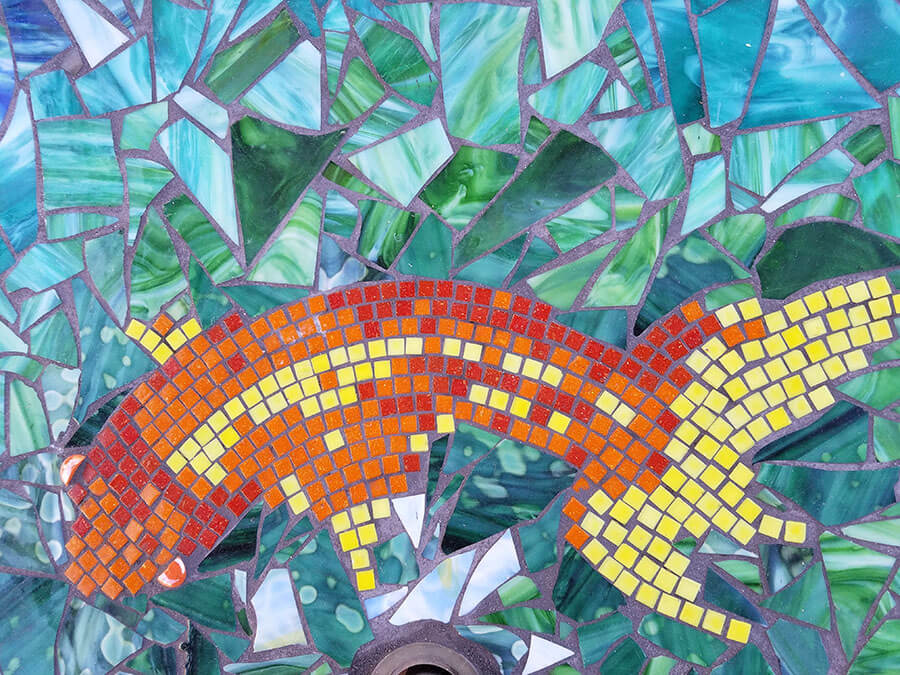
The mottled colors and variegations of stained glass make it arguably the best material for photorealistic and impressionistic mosaics. That is why I was very impressed with Melanie’s koi fish in the center of the mosaic. Although Melanie renders these fish with simple uncut glass mosaic tile, they look perfectly at home with the stained glass. Even though they may look coarse and chunky when viewed close up, they are the detailed focus of the mosaic at a natural viewing distance. Very good work!


Leave a Reply