At the end of 2019 Mosaic Art Supply was e-mailed by a local homeowner about repairing a stone mosaic that was being displayed outdoors.
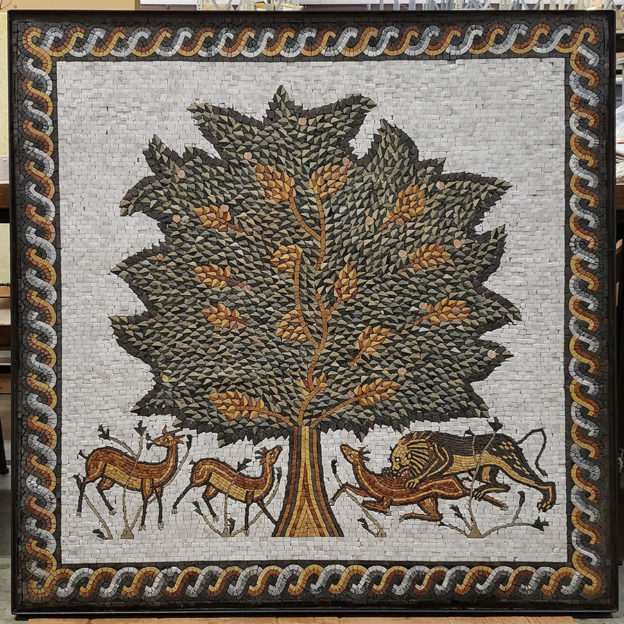
The design of the mosaic is a smaller-scale interpretation of the “Tree of Life” mosaic found in the bath of Hisham’s Palace in eastern Palestine. The palace dates to the 700s and today is considered one of the most important examples of Islamic architecture in Palestine. This particular mosaic was most likely made in the 1990’s.
Natalija Moss writes up the process she and Angela Bortone performed to restore the mosaic:
Initial Conditions
The mosaic measures approximately 4 feet by 4 feet. It was suffering from water damage. The backer was disintegrating, tiles were popping off, and the surface of the mosaic was beginning to warp and wrinkle. The steel frame around the mosaic was thoroughly rusted, with holes in some places. The edge of the mosaic was stained with rust in several places.
I felt like the mosaic was repairable, but I would need some help. I contacted local muralist Angela Bortone, who used to work at Mosaic Art Supply, and together we decided we would tackle the restoration.
Plan for Work
Angela and I decided the best solution would be to give the mosaic a new waterproof backer and we would put the mosaic in a new frame. The homeowners had a more sturdy frame made out of angle iron welded locally and delivered to the Mosaic Art Supply warehouse.
Transferring the mosaic to the new backer was without question going to be the most difficult part of the process. But it was absolutely necessary, as the old backer was made of some type of paper/particle board composite that was absorbing water and falling apart.
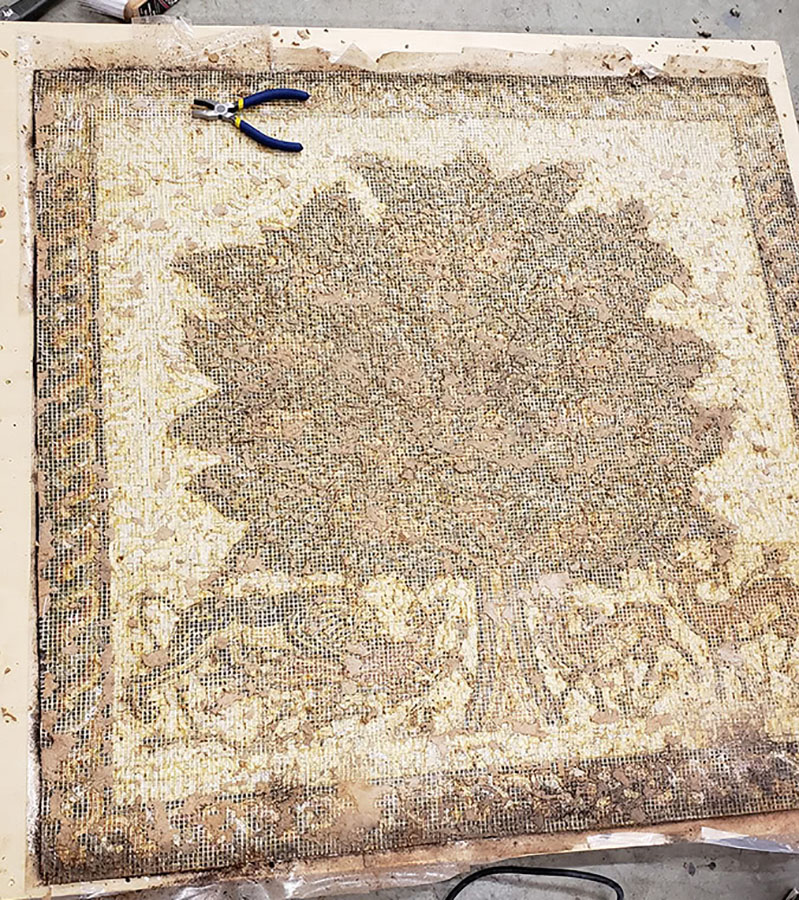
Fortunately for us, the most deteriorated sections of the backer revealed that the mosaic was adhered to a sheet of fiberglass mesh which was then glued to the composite backer. We considered a few possible methods of removing the backer, and we eventually settled on applying mosaic mounting tape to the surface of the mosaic and then physically removing the backer.
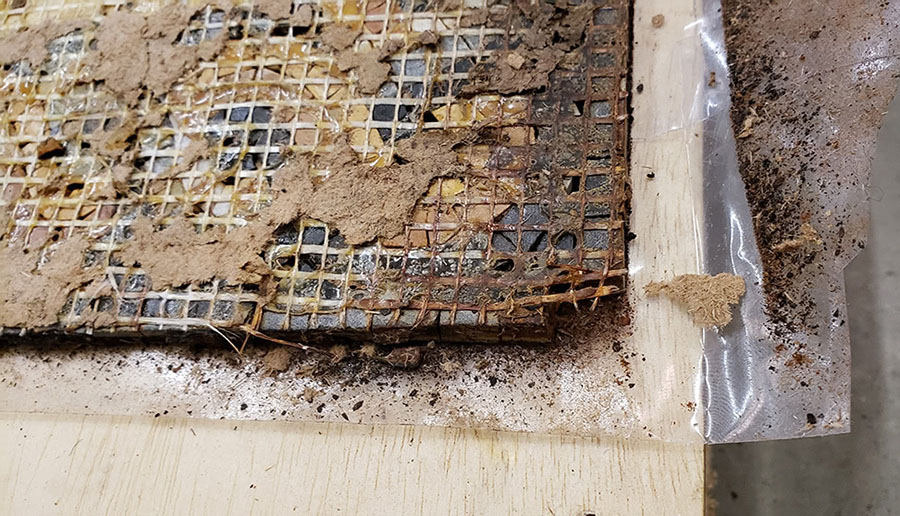
The backer above might have lasted a little longer in the dry climate of Israel, but here in humid and rainy Georgia, the deterioration started immediately.
Avoid wood and plywood for outdoor and wet mosaics. We often receive emails from people whose outdoor mosaics on wood started falling apart in a matter of a few months, sometimes only weeks. Rain is not required. Changes in daytime/nighttime humidity are enough to cause problems.
Mosaic Mounting Tape
We cleaned the surface as well as we could, because we wanted the mounting tape to have a really good bond to the surface of the mosaic. We laid down 6″ strips of tape, pushing the tape as tightly to the surface as possible, and overlapping the edges of each consecutive strip to make it into one large piece.
We also rubbed the mounting tape thoroughly with our hands to ensure the it stuck to each tile, some of which were slivers. We were concerned that the mesh and its adhesive might be weakened by the process of removing the backing, and we didn’t want tiles popping off while we worked on that.
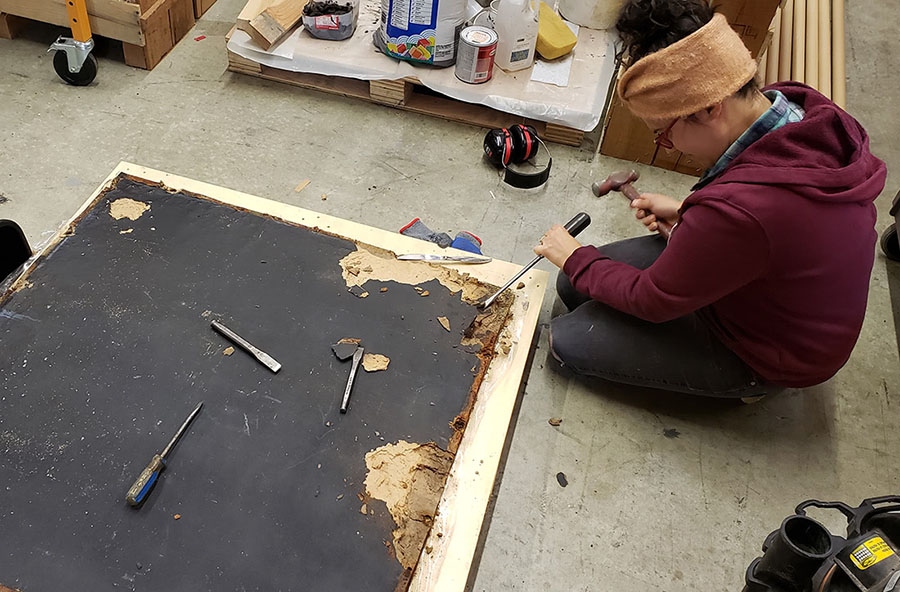
Removing the Old Backer
Angela and I took chisels, hammers, and flat-head screwdrivers and gently chipped away at the backer, separating it from the mesh. Some sections crumbled in our hands and just broke off, but it took a couple hours to completely remove the backer. Chipping or scraping risks snagging the mesh and knocking tiles loose, so we had to work carefully.
Spots of the backer remained where it was strongly glued to the mesh but the great majority of it came off, so that one could see the reverse of the mosaic. It was really intersting to see the picture from behind!
The New Steel Frame
The new frame the homeowner gave us was made out of welded angle iron. It was four sides only with no braces or cross supports of any kind. I felt like it wasn’t sturdy enough, so I welded some diagonals on the back at each of the corners.
The New Waterproof Backer
For a backing surface we used Kerdiboard which is a foam-based backing material with a waterproof coating. We used two layers of half-inch kerdiboard glued together with some heavy-duty shingle adhesive from the hardware store. We wrapped the edges of the backer with their “Kerdiband” material and thoroughly plastered that with thinset all around the backer.
Attaching Frame To Backer
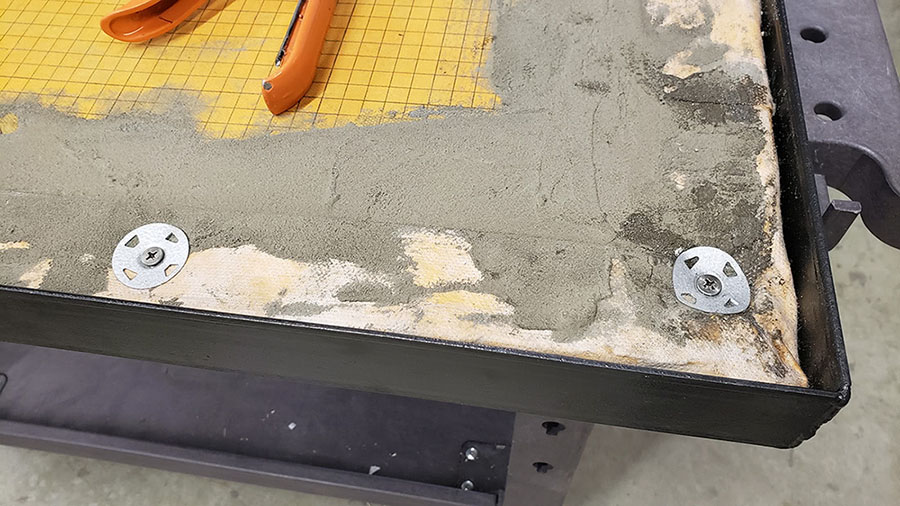
Once our test fit was complete we used bolts to attach the backer to the frame through pre-drilled bolt holes.
Our hope is that the bolts would never have to be removed, but we used stainless steel bolts just in case, so that even if the frame rusted to the point of disintegration, the hardware could still be removed.
Note from Joe: The large specialty washers used for anchoring foam-core backer board are typically underneath tile that is 4-inch or larger. For mosaic art made from tiny cut pieces of tile, a washer of that size could potentially interfere with many tiles. The solution is to have sufficient thinset on top of the hardware. You might even want to plaster over the washers with thinset a few days before you install the tile.
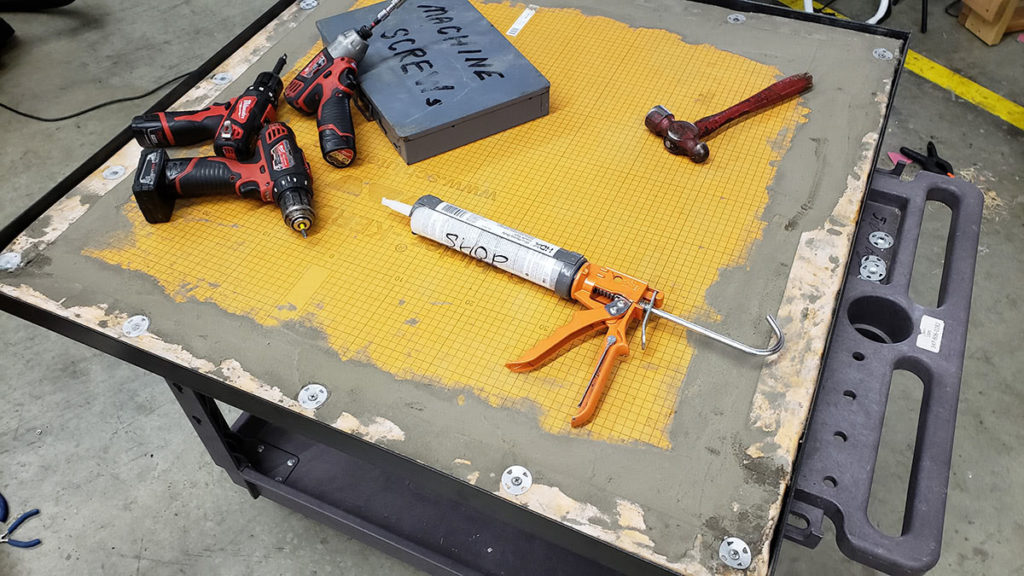
We used GE Silicone II Adhesive in the channel between the backer and the frame that surrounds the backer on all sides. We want as few places as possible for water to pool.
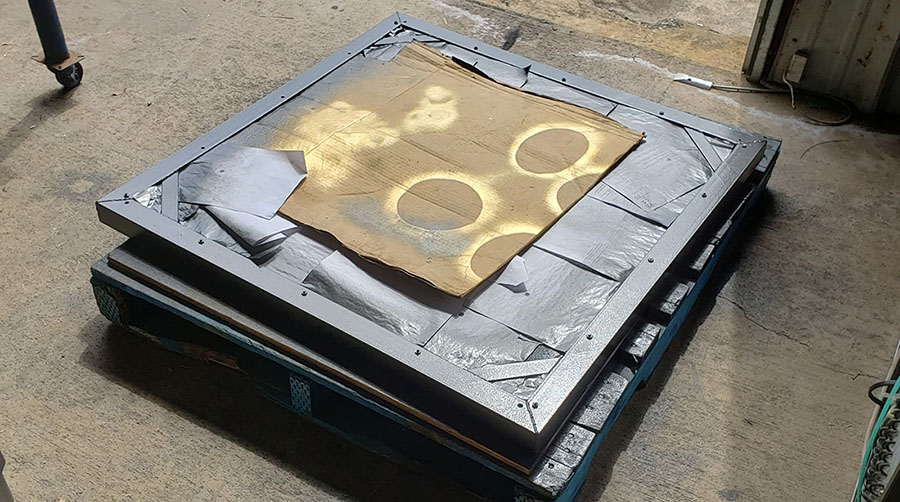
After the backer was secured to the frame I masked the back of the backer with paper and then re-sprayed the frame with paint.
Transferring and Mounting
With the frame and backer complete all we had to do was reinstall the mosaic.
Angela and I mixed up half of a 25-lb bag of Versabond thinset mortar and troweled it across the face of the backer. Note that we put the mortar on more thickly than the standard method of making a “measuring pass” with a notched trowel and then smearing smooth.
Once we had a level bed of mortar about 1/8 to 1/4 inch thick, we lifted the mosaic and carefully set it in place. Then we pressed the mosaic into the mortar by gently rubbing the face of the mosaic, taking care not to press so hard that mortar filled all gaps for missing tiles.
Note from Joe: The typical approach would be to try to fill the gaps in the mosaic while it is on the mounting tape before pressing into mortar. The mesh on the back of the mosaic prevented that from being done in this case.
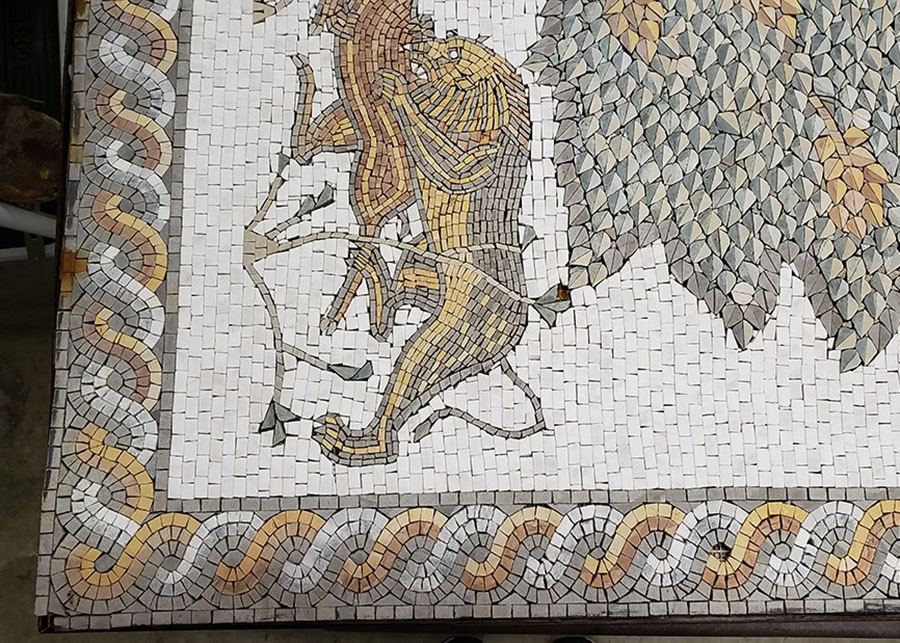
The next day we removed the mounting tape and set to work on repairing the damage to the face of the mosaic. We did our best to color-match the missing tiles with the stone cutting strips we sell, and we made new pieces to replace all the tiles that had fallen out. These missing stone pieces were mounted using small amounts of thinset mortar and positioned by hand.
We also tried to remove as much of the rust as possible from the stones that got stained by it.

We mixed one final batch of thinset mortar and used it to fill the gap in between the frame and the edges of the mosaic. A day later I sprayed three coats of stone sealer on the face of the mosaic, and with that the restoration was complete!
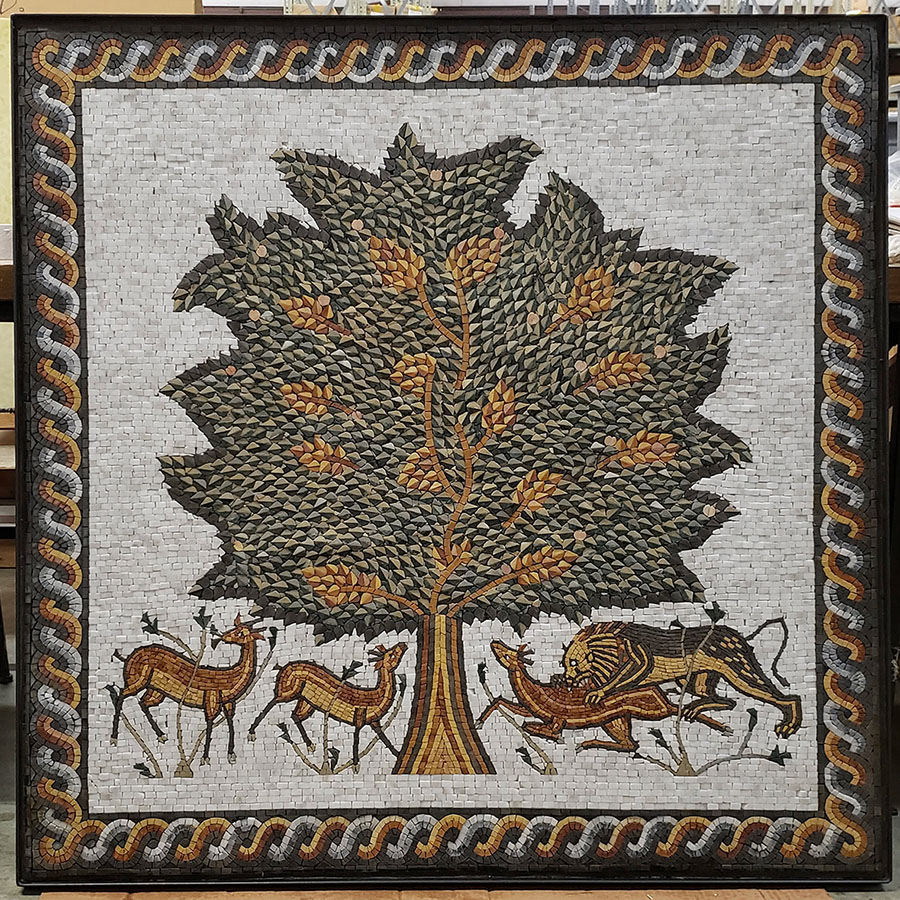
Our complete photo shows the color a little more strongly than it appears in person — the stone sealer hadn’t fully dried, but you can use stone enhancer to permanently bring out the color of stone mosaics.
The goal of the restoration was to repair as much damage as possible and do the best we could to prevent future water damage. We were able to repair almost all of the damage, and we were also fortunate enough to have been able to reduce the wrinkling that was present in the center of the mosaic.
The backer should be able to last for the rest of the lifetime of the mosaic, and the frame is much more sturdy than the original frame. We took care to fill any voids and places where water to pool on the new frame, which should ensure that it lasts decades longer than the original. And even when it fails, the stainless steel hardware makes it easier to replace.
I’m thankful we were able to work on this mosaic, and I’m happy with how well the restoration turned out.
A Note About Mounting the Mosaic
This mosaic was mounted on a backer with a steel frame because the client wanted it to be moveable. Mosaics of this size are typically mortared directly to a masonry or concrete wall. For a moveable mosaic of this size, mounting must be secure, either by by bolts in the frame or a french-cleat mounting system built into the frame. For this mosaic, the client had a wall mounting system already in place.
Leave a Reply