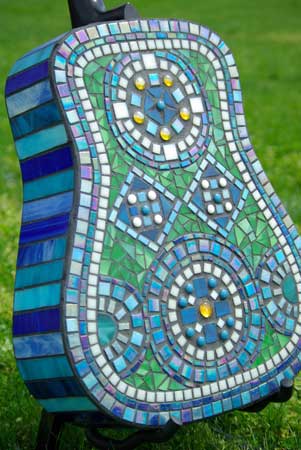
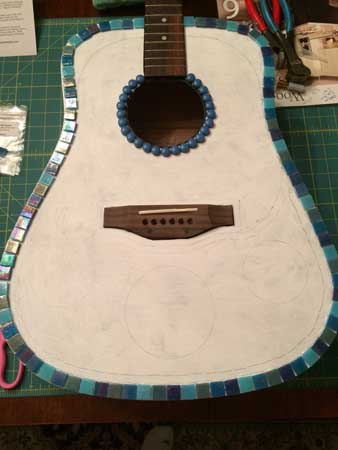
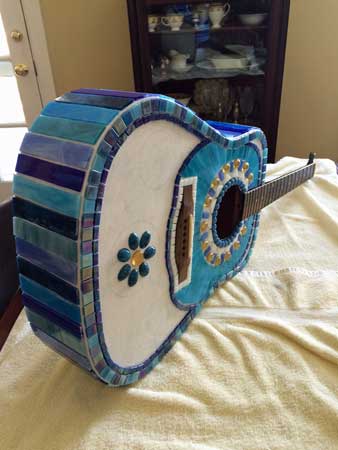
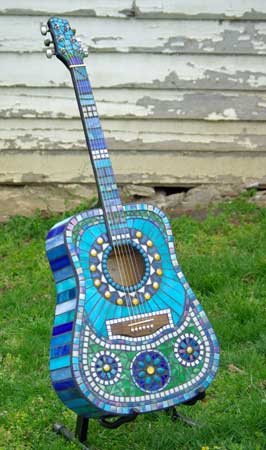
Artist MC Holt-Evans of Nashville recently made a mosaic sculpture very much in keeping with spirit of The Music City, and her mosaic guitar is worth taking a look at, especially if you are considering making a mosaic on an improvised base such as a musical instrument or a piece of furniture. The instructions below could be adapted for using other household objects as a base.

Mosaic Sculptures on Improvised Bases
Mosaic sculptures that use household objects as their base aren’t anything new. For example pique assiette (broken plate) mosaic furniture is fairly common, as are mosaic gazing spheres made from bowling balls. (Note that my article on gazing spheres explains why hard polystyrene makes a better base than a bowling ball.) However, a guitar can be a particularly challenging choice of mosaic base for several reasons: The shape is complex and curved, and part of it (the neck) is long and thin and has a lot of corners. The wood of the guitar’s sound box is thin, and yet it has a thick layer of lacquer that must be removed before adhesives and grout will bond to it.
Prepping the Guitar
Sanding
A medium grit sandpaper (120 grit) can be used to take off any lacquers or sealants. As always, wear an N95 rated dust mask for doing this type of work. (The N95 dust masks are cheap and readily available at a building material or hardware store.) I don’t recommend wet-sanding a guitar because you want to minimize its exposure to moisture until you get it sealed because the wood is thin and easily warped by moisture.
Modifying
Are you going to want to put the strings back on the guitar after it is mosaiced? Probably so, and that mean you need to take into account the thickness of the tile you are adding to the surface and raise the nut fret that separate the head from the neck. Use a hard wood for this such as bass (the wood used for sewing boxes and buttons) and not some soft wood like balsa.
Sealing
When you reseal the guitar with a water-based primer, you should apply two thin coats instead of one heavy one. To seal her guitar, Holt-Evans used an acrylic primer called Zinsser’s Bullseye 1-2-3 because it was recommended by an artist who works with mosaic guitars. Weldbond adhesive could also be used to seal/prime a guitar, and it might be the better choice because it is the adhesive that will be used to attach the tiles, and thus you wouldn’t have to worry about how well the adhesive and primer bonded to each other, but you would still need to give the sealing coat at least a week to dry out completely and fully harden before you tiled on it. Holt-Evans reported that she left coarse brush strokes in the sealant. This improves the bonding of adhesives and grout.
Using What You Have on Hand?
Be careful selecting a primer at random because Weldbond might not bond to some of them, definitely not oil-based materials. You want an acrylic, something like an artist’s gesso and not a latex house paint. PVA’s like Weldbond won’t bond to the vinyls and other binders in some house paint. Using what you have on hand isn’t necessarily being frugal if it doesn’t last nearly as long as it would have with the right stuff.

Mounting the Tile
Holt-Evans used Weldbond to attach the glass tile, penny rounds, and stained glass she used.
Partially Crushed Liquor Boxes
Use partially crushed liquor boxes to cradle the guitar or sculpture while you work on it. You can rearrange the boxes to re-position the guitar as needed so that whatever part of the curved surface you are working on is facing up.
Brush on the Adhesive and Let It Get Tacky
If you are having problems with tile sliding around, use a small paint brush to spread the Weldbond onto the surface and allow to sit for a few minutes and get tacky before you add the tile. Depending on how dry or moist your air is, this can be about 15 minutes, perhaps much faster if it is dry midwinter air and the heater is running. Remember, if you let the glue skin over too much, then it won’t bond to the glass as well.
Dental Picks and Cotton Swabs
Dental picks (or tooth picks) are invaluable for adjusting the positions of tiles without contaminating your fingertips. Cotton swabs can help clean up messes with precision and not move tile out of position. Tip: Don’t thow your wet-glue swabs into the trash. Instead, let them dry out and peel the dried glue off them next session and get another life out of them.

Grouting
Grouting Studio or Bench Space
I like to grout outside on a patio or some place that can be hosed off. You can use drop cloths indoors, but you still have to be relatively neat, or you will track sand on the floor and ruin it. Grout and thinset mortar are concrete, not paint. That being said, grouting inside can be done without making a mess and is routinely done by mosaic artists. A plastic folding table or a table covered in construction plastic from the building material store is ideal for a project that might require multiple sessions to grout.
Grout Colors
Black grout makes color stand out more. All grout colors are lighter when the grout hardens, especially black grout. Black grout is usually jet black when mixed up but hardens to a charcoal gray or lighter. Pure white grout makes a mosaic look like a summer camp project.
Thinset Mortar vs Grout
I prefer thinset mortar instead of grout for projects like these. Thinset has an adhesive polymer in it that makes it strong and resistant to impact. Compared to ordinary concrete and grout, thinset is a lot less likely to crack and crumble when dropped. However, thinset contracts slightly as it cures, and so you might observe hairline cracks when used on a three dimensional object that can flex slightly, such as a wooden guitar. Like grout, thinset mortar can be dyed with concrete dyes.
Special Concerns
Grouting something like this is best done in multiple sessions. Unlike a mosaic chair or desk, a guitar has multiple places where special are has to be taken in order to not soil or clog some detail. A guitar has frets and working pegs and a saddle and a sound hole to take into account. Painter’s tape can be used to protect the bare wood inside the sound hole. Use crushed liquor boxes to cradle the guitar in different orientations while you grout it.
The color of a grout can look different if different amounts of water are used to mix up different batches or if they are misted differently. Try to mix up and handle your grout in a consistent way.

Grouting Sequence
Holt-Evans started by grouting the back of the guitar because it was the largest flat area with no obstructions and therefore the most straightforward surface to be grouted. When she grouted the back, she continued the grout over the sides so that there wouldn’t be a grout seam right at the corner because corners are vulnerable places and subject to many impacts.
The head and neck were each done in separate sessions, and for both of these elements, Holt-Evans did not take the mosaic and the grout around to the sides and backs. Only the top faces were covered, and so this meant that the grout had to be tapered off to the corner.
The front of the guitar was done in a later session because of the detail work required to get the grout tapered to the edge of the sound hole. The grout was carried down over the side to join the grout from the back on the sides.
To prevent a hairline crack where new grout meets the old, you should moisten the edge of the old grout with a little water on a cotton swab before grouting. This keeps the old grout from sucking all the water out of the new grout before it has a chance to harden.

Leave a Reply