Santa Fe Rail Trail Mosaic sprocket mandalas

Santa Fe Rail Trail Mosaic

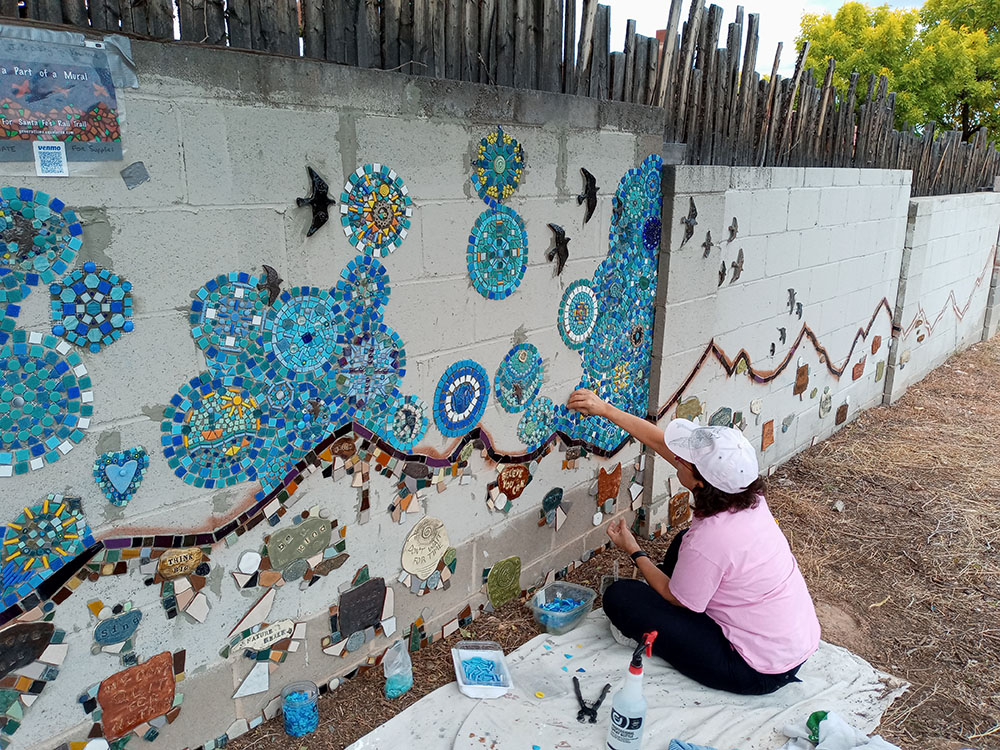
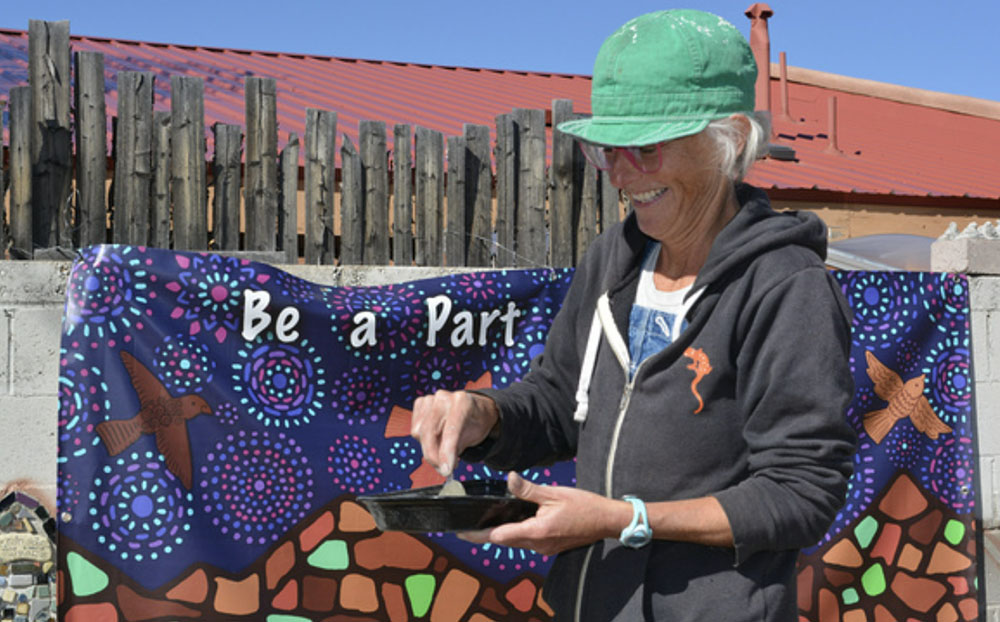
Artist Julie Deery is working on a mosaic mural for the wall of the Santa Fe Rail Trail.

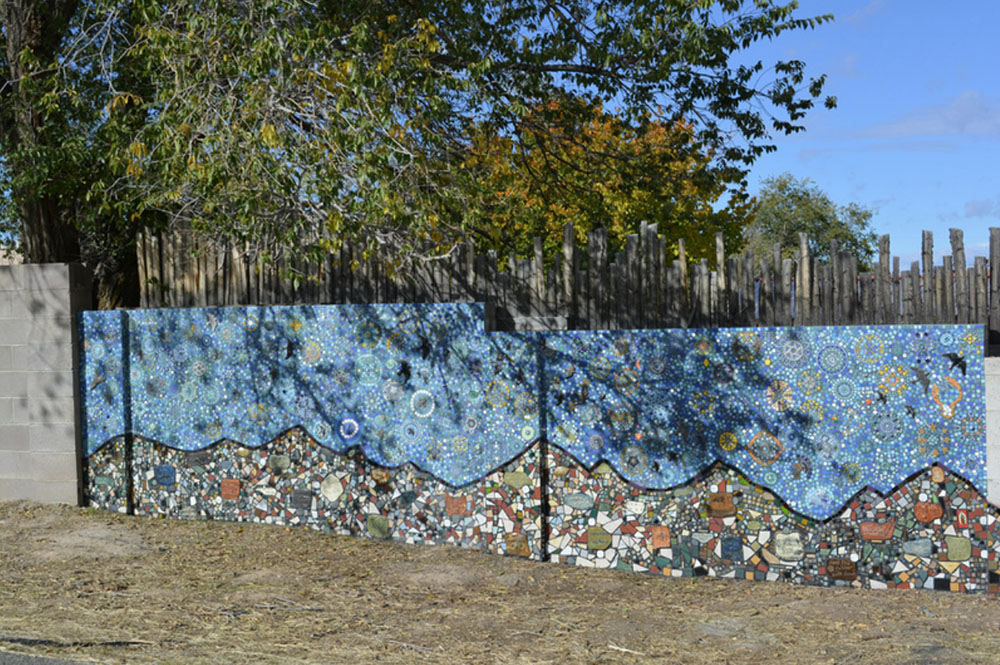
The location for the mosaic mural is 130 feet of cinderblock wall along the Rail Trail just north of Siringo Road in Santa Fe.

The theme of the project is “Generations” with the goal of having community members of all ages work on the project.

Currently there is no formal funding or grant for the ongoing project, which is being created by volunteers using donations of materials and cash.

A list of materials needed and instructions for donations can be found at Julie’s website.

Santa Fe Trail Mosaic. Photo by Daryl A. Black, Blacks Crossing Photography and Writing
Santa Fe Trail Mosaic. Photo courtesy of Daryl A. Black, Blacks Crossing Photography and Writing

Several of the photos in this article are courtesy of Daryl Black, Blacks Crossing Photography and Writing.

Already Successful

The mosaic mural will be completed in additional segments, but so far the projects has already succeeded at community engagement based on the photos of volunteer community artists at work.

The result speaks for itself.

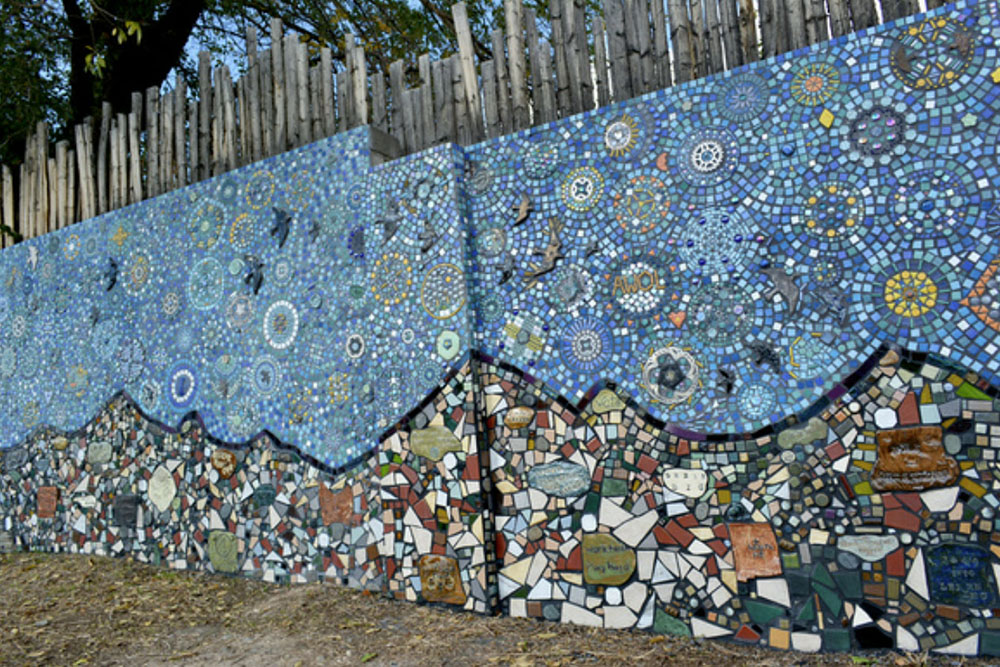
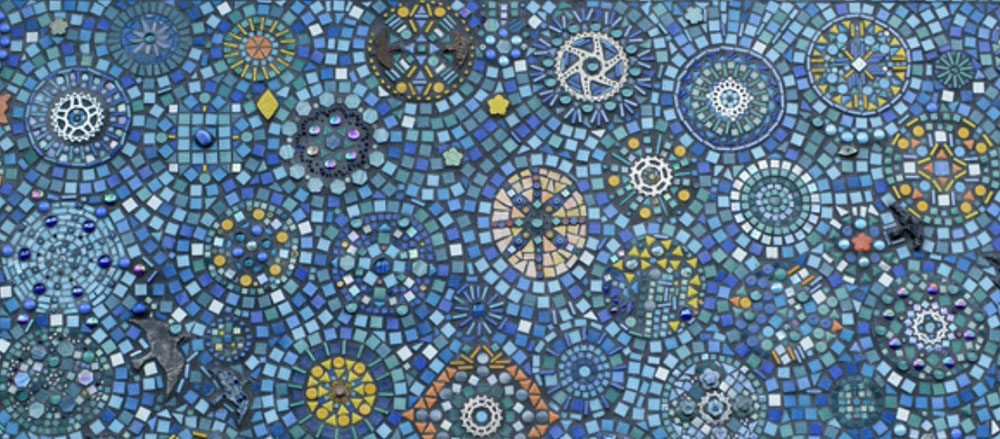
The first segment shown above is wonderful: a night sky of resonating stellar mandalas over a terracotta desert landscape.

I looked at it and thought: How do you capture the intensity and energy of the night sky of the high altitude desert? Like that.

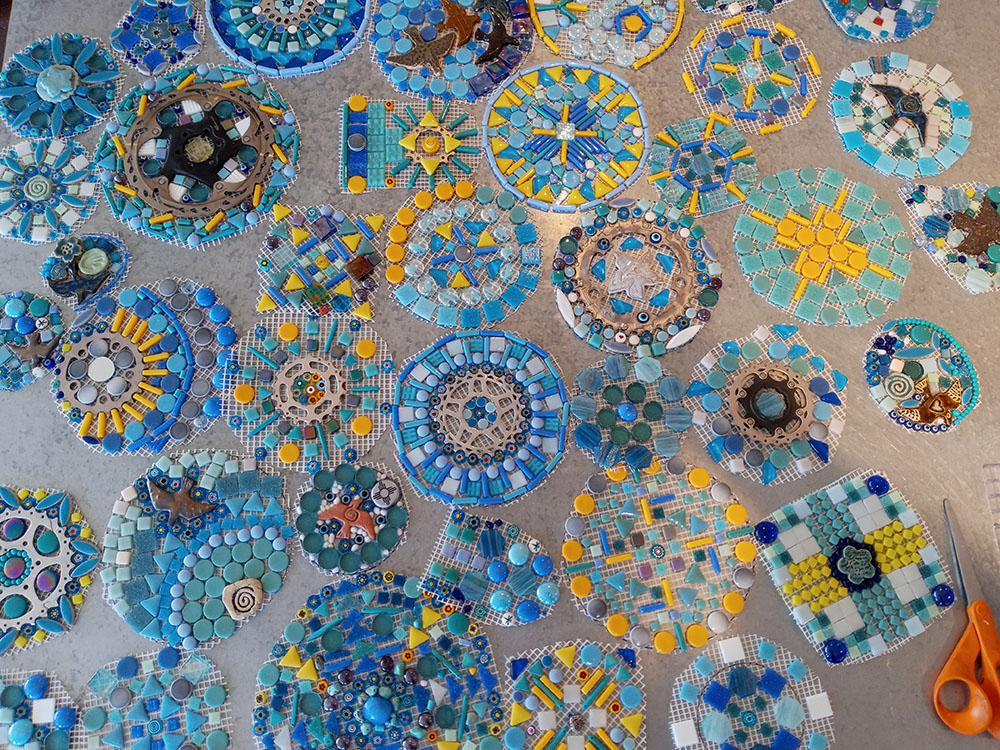
Julie spent most of the summer of 2002 holding community mandala-making popup sessions facilitated by Vital Spaces and ArtWalk Santa Fe.

Fifth-grade students from Aspen Magnet School made ceramic birds for the mural, and participants at a tile workshop at Raven Tree Studios in Eldorado made “wisdom stones” ceramic plaques inscribed with quotes for the base of the mural.

Santa Fe Trail Mosaic ceramic bird insets

Many of the bicycle sprockets used for the sprocket mandalas were donated by local business Mellow Velo.

Santa Fe Trail Mosaic sprocket mandalas
Santa Fe Trail Mosaic sprocket mandalas laid up in advance on fiberglass mesh.

Materials and Methods

This project uses mesh for laying up elements in advance. Mesh is sometimes used for outdoor mosaics on vertical walls, but definitely not for horizontal elements where water can pool or stand.

(Here I am speaking of handmade mosaics of small tiles not factory sheets of larger tiles with factory adhesives precisely applied.)

Remember, the glue used to attach tiles to mesh is a potential Achilles heal if water gets to it. All that is required for that to happen is to have a residue of glue smeared up the side of the tile so that grout doesn’t cover it.

Santa Fe Trail Mosaic in progress
Santa Fe Trail Mosaic in progress with volunteer at work filling in between elements previously mounted.

If you do use mesh for outdoor murals, make sure the glue is applied in the centers of tiles away from the edges. Do not cover the entire bottom of the tile with glue. Leave some glass bare so that the thinset mortar can bond directly to the glass.

Even a mosaic mounted in thinset mortar needs to be expertly grouted and sealed with three applications of a tile and grout sealer.

An outdoor mosaic with elements attached with adhesive instead of thinset mortar needs to be kept out of standing water. They need to be checked annually and resealed as needed for long life.

Santa Fe Trail Mosaic in progress

Caveat

Cinder Block walls are routinely destroyed by freezing and thawing water. For this mural to last, the wall must last. That requires that the backside and top of the wall be painted at a minimum. A hydraulic mortar would be preferred.

I couldn’t find the photos, but there was a large figurative mosaic mural destroyed in less than two years, and all because they didn’t adequately paint or mortar the backside of a cinderblock wall or the top of it.

The water pooled inside the porous blocks just above the horizontal layers of mortar. Then it froze and broke the blocks free of the mortar. That was in the Texas panhandle I think, or maybe the Dakotas. It was someplace unforgiving and decidedly not Mediterranean in climate.

Santa Fe Trail Mosaic detail 4. Photo by Daryl A. Black, Blacks Crossing Photography and Writing
Santa Fe Trail Mosaic detail. Photo courtesy Daryl A. Black, Blacks Crossing Photography and Writing
Santa Fe Trail Mosaic detail 6. Photo by Daryl A. Black, Blacks Crossing Photography and Writing
Santa Fe Trail Mosaic segment. Photo courtesy Daryl A. Black, Blacks Crossing Photography and Writing
Artist Julie Deery at the Santa Fe Rail Trail Mosaic
Artist Julie Deery at the Santa Fe Rail Trail Mosaic. Photo courtesy of Daryl A. Black, Blacks Crossing Photography and Writing

Posted

in

by

Comments

5 responses to “Santa Fe Rail Trail Mosaic”

  1. Sharon Avatar
    Sharon

    Inspiring. Thanks for the info on applying mosaic on mesh and how to avoid water destroying vertical mosaics. I always wondered as I live in a hot in summer freezing in winter climate.

  2. Cindy Avatar
    Cindy

    This is so informative. I wish people would heed advice on NOT using wood for outdoor mosaic project. Usually will just get very defensive and say “well its been outside for years.”

    1. Joe Moorman Avatar
      Joe Moorman

      I could not agree more! Each year I receive many emails from distraught people whose mosaics are falling apart, and so I have strongly worded recommendations about not using wood and adhesives for external mosaics.

      I’m not sure why people feel the need to point out how they ignored a particular recommendation but got lucky and not experienced a problem YET, but I’ve noticed what you say about their being defensive, especially about using wood and adhesives outdoors.

      I’ve also noticed that “years” usually means 3 or 4 years, nothing close to a decade.

      The problem is that too many mosaics turn to poop in a matter of months when wood and plywood are used outdoors as backers.

      Some of these people spent several hundred hours on their mosaics and produced results that any professional artist would be proud to have made. It is demoralizing to see photos of these creations falling apart in less than a year.

      We try to promote practices that will allow a mosaic to last as long as the ancient Roman mosaics, but at this point, I would settle for having people thinking in terms of decades instead of years. 🙂

  3. Julie Deery Avatar

    Thanks for the informative post. I am still trying to figure out what the best grout sealer is for such small mosaic pieces. I tried a spray type but if anyone has good suggestions, send them my way. I don’t own this wall but the owners are agreeable and would most likely let me paint or seal the backside of the wall. I did have a structural engineer make sure the wall was in good shape before starting to mosaic. Its a long wall and will most likely take years to finish. Exciting though.

    1. Joe Moorman Avatar
      Joe Moorman

      Hi Julie,

      We have been using TileLab brand Tile and Grout Sealer, which is a wipe on/wipe off silicone-based sealer. I recommend using a liquid sealer like that because you want deep penetration.

      I would also call local tile contractors in your area to see what they are using for EXTERNAL mosaics. Because of the extreme heat and insolation, you need to use something that is UV resistant.

      I will be looking at ways we might be able to help with the project, but this has been the toughest year in 20 years of operation. I am excited about this project, especially if the different sections have different designs.

Leave a Reply to Joe Moorman Cancel reply

Your email address will not be published. Required fields are marked *

This site uses Akismet to reduce spam. Learn how your comment data is processed.