I’ve already written about Brad Srebnik’s first mosaic and how impressive it is. It’s also amazing how well Brad documented the process as he was learning it.
Brad emailed me a summary of his methods and the lessons he learn from the project. He has some good photos of some important steps, including making a small study before the main project.
The small study is a huge help when everything about tile mosaic is new to an artist: cutting tile, using thinset, spacing tile, selecting colors, selecting grout color, etc.
The small study lets you get things right. It also lets you work more efficiently on the main project.
Improving your efficiency as a first-time novice can be absolutely critical, especially if your mosaic is highly detailed or large or an architectural covering.
TIP: It’s possible to discover that you desperately need to use a method different from the one you had planned to use. DISCOVER THIS ISSUE ON A SMALL STUDY NOT ON YOUR PROJECT!
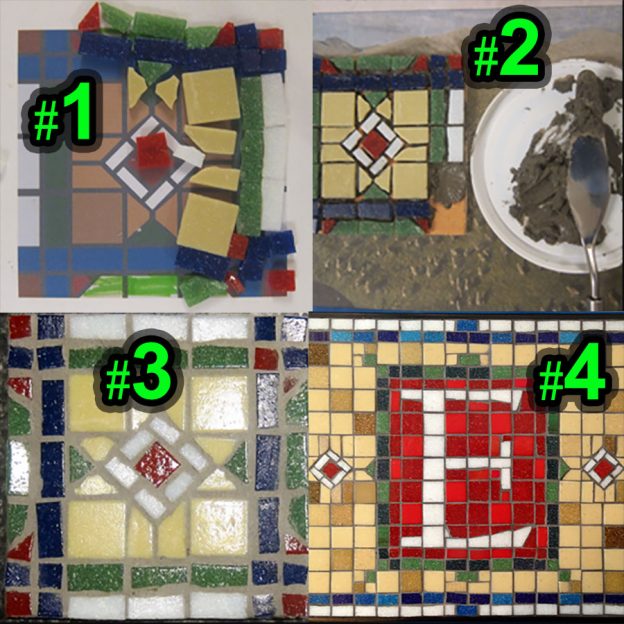
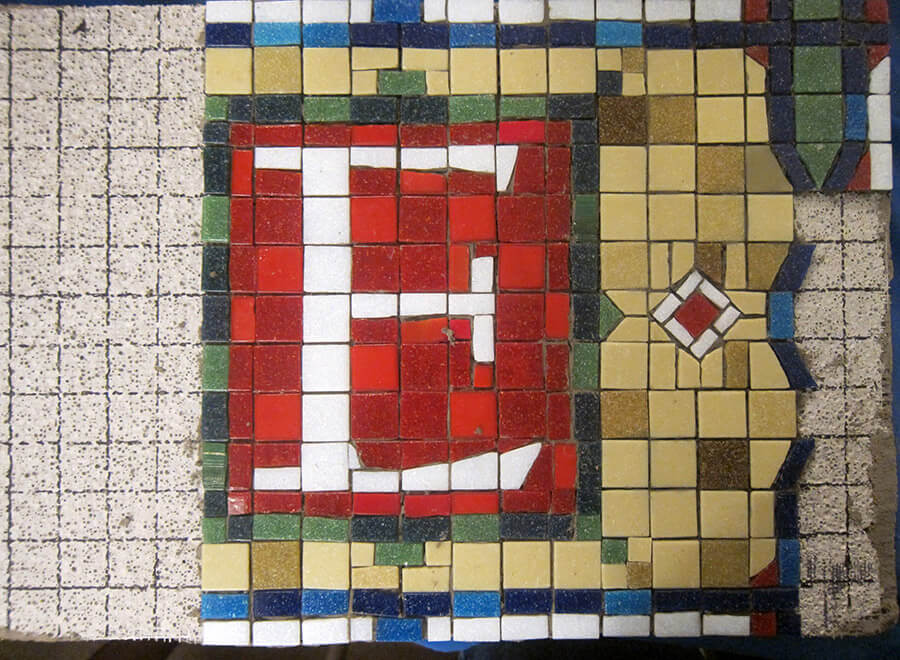
By comparing Brad’s study to his finished mosaic, you can see what all the small study taught him:
- The grout gap needs to be smaller.
- The grout color needs to be darker.
- The yellow was more intense than desired.
- Grout does not hide jagged cuts.
Now the original plan was to merely publish what Brad wrote so that I could take the day off, but first I have a few things to say about how he worked and why it makes such a great example of the one-tile-at-a-time method. I also need to discuss whether or not you should use this method.
For example, it can be difficult to mount each tile incrementally one-at-a-time like Brad did because thinset and glue are sticky and messy, and thinset requires gloves and has sand in it. There is an alternative method you might prefer.
A Less Messy Alternative
Many novices may find it easier to print out a reverse image of the pattern so that the E is backward and then tack Mosaic Mounting Tape over the pattern with the sticky side up. Then all you have to do is lay out all the tile face-down on the tape until the whole pattern is tiled, and then spread thinset mortar on the backer and press it to the bottom of the face-down mosaic.
BUT, many people prefer to tile a mosaic one tile at a time like Brad did so that they can see the work as it progresses.
I only use the one-at-a-time method when I am working with found objects and thinset. I prefer to lay out tile designs on a temporary backer (such as Mosaic Mounting Tape) and then apply all the glue or thinset at once for the whole mosaic when I mount it to the backer.
Great Example
I you are looking for an example of how to work in the one-tile-at-a-time incremental way one a mosaic that requires thinset mortar, Brad’s photos and execution are very good.
NOTE: Most people would not be able to hand-set tiled and maintain a grout gap this uniform without a mounting grid or simple spacing gauge (such as a dime).
I suspect Brad’s main project would not have been as tightly executed if he hadn’t made the small study first.
Spreading thinset mortar in small batches in order to lay tile in adjacent sections isn’t trivial, and there is a learning curve:
- You have to learn how to manipulate and position a sticky glob of thinset without bumping adjacent tile.
- You have to learn to use two palette knives in concert to scape each other clean (or butter knives or putty knives).
- You have to learn to estimate how far a glob will spread with a notched trowel so that you don’t run out of room to spread it.
Practice helps.

Brad’s summary of methods is below. My comments are inserted in [[double brackets]]:
Lessons Learned from a First-Time Mosaic Maker, by
Brad Srebnik
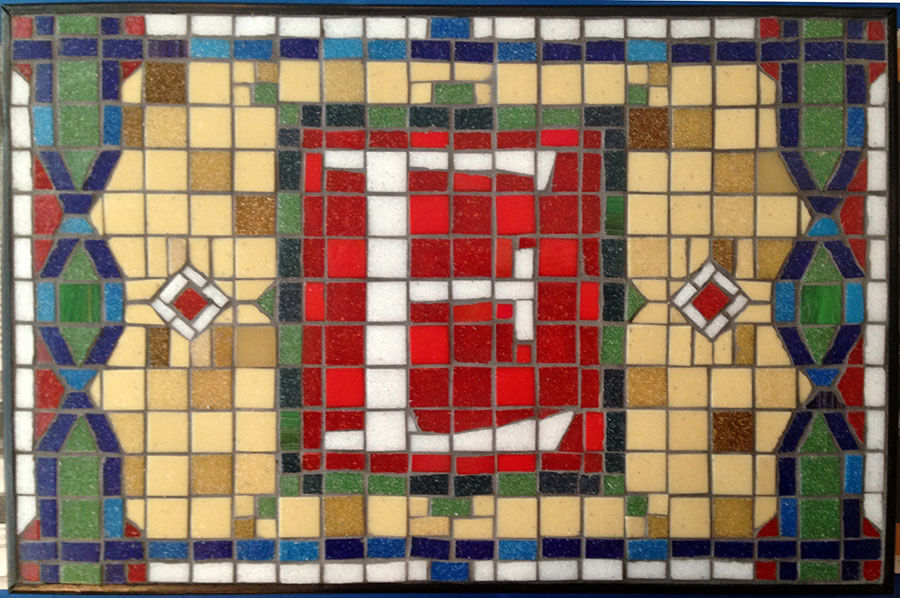
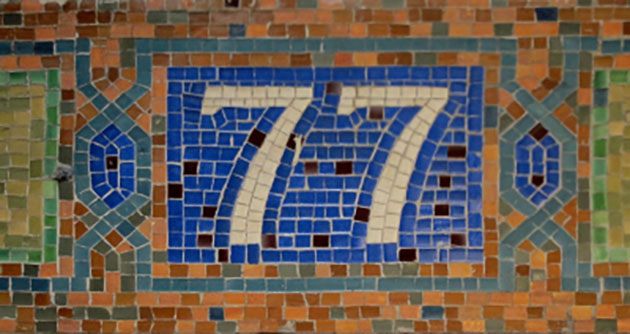
I had the idea of making a mosaic for a friend in the style of old New York City subway station signs. But I’d never done anything like this before. Here’s how I did it.
Design
First I had to come up with a design. I looked through many pictures online, and settled on using a mosaic from a 77th Street station as a rough inspiration. After a quick e-mail exchange with Joe at Mosaic Art Supply, I chose ¾ inch vitreous glass tiles as the basis for the piece.
Having experience as a graphic designer, I used Adobe Illustrator to make a full-size template for the design. I created the design mostly following a grid pattern. With the tiles being .75 inches square, I made the grout lines .075 inches wide. After some work I ended up with a design 13 tiles high and 20 across. With the grout lines this comes out to 10.65 by 16.425 inches. Yes, I like being precise, which made the tile cutting go a little slower, as you’ll see later on. But the results were worth the extra time.
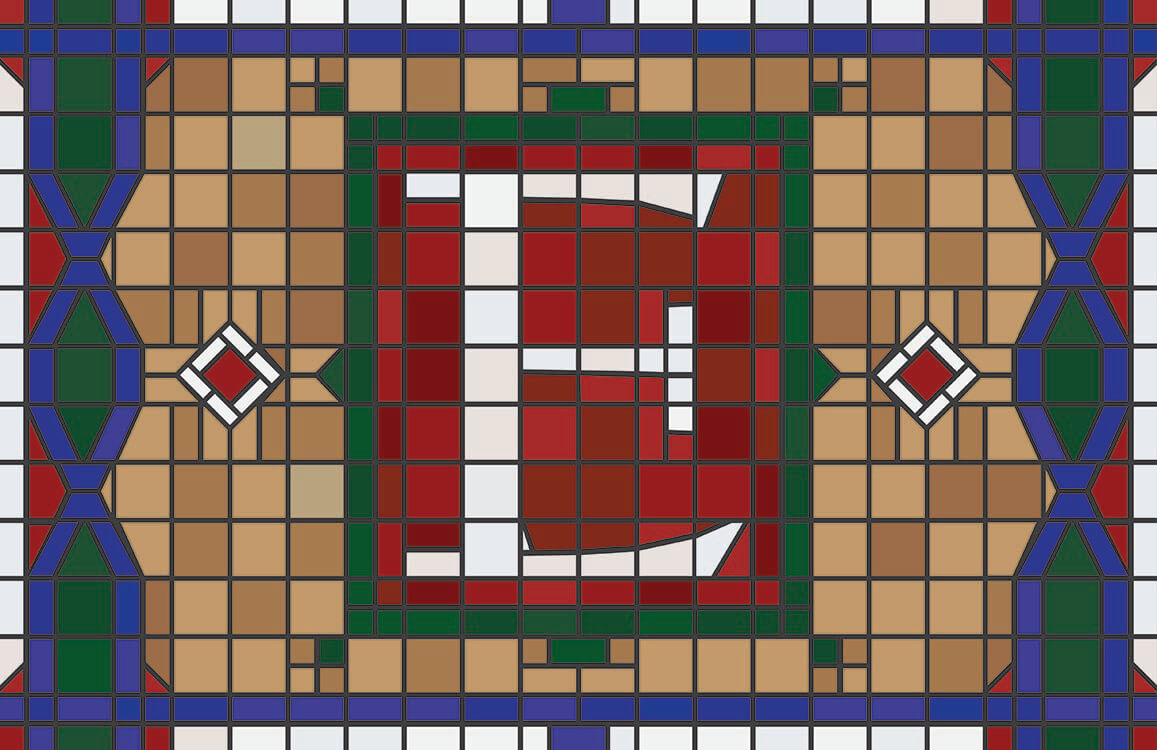
The design includes some triangular, diamond, and even rhomboid shaped pieces. To help make these shapes in Illustrator, I had a group of two long thin lines that were .075 inches apart – the width of the grout. When I needed to “cut” a square piece in the design I would make a copy of this group, rotate it if necessary, and then use the Pathfinder Divide command to break up a tile. Ungroup and remove the thin grout part and you have the right size for the pieces.
Real subway mosaics have some variety in the color, so I made some shade variations in the design. When the design was done, I printed it out to use as a template to lay out the cut tiles on. I have a color printer that can print on 11 x 17 so this size allowed me to print it at home, but you could use a local print shop.
Supplies
When I started this project, I had nothing I needed to make the mosaic, and no knowledge about the process either. Searching for information, tools and tiles online, I found Mosaic Art Supply and the wonderful FAQ’s on their site. Joe graciously answered a few questioned I had, and I bought most of the items I needed from then, adding a few tiles for color variety from local sources (which were much more expensive). My order also included a container of thinset mortar, a glass cutter, a two-sided ceramic-marble file, and a grouting sponge. The cutter takes some practice to use accurately, so make sure you have a dozen or more extra tiles for practice and mistakes.

[[Concrete backer boards aren’t the best backers for mosaic plaques because their edges are crumbly and require patching with thinset mortar. Concrete backer board is difficult to cut. There are foam-core tile backer boards and DYI foam-core backer boards that are better options for mosaic plaques, especially if unframed.]]
I didn’t know if the person I would give the mosaic to would want it inside or outside, so from the FAQ’s I got a 3’ by 5’ Durock backer board at a hardware store. It’s heavy and difficult to cut accurately (hint: score each side heavily about five times before breaking off a piece). I also bought a couple things online: a seven-pound box of gray sanded grout and a pair prescription safety glasses (best purchase ever!). For safety, I already had an extra N95 mask. If reading this in the 2020’s, you can probably guess why. I also had both thin medical gloves and thicker cleaning gloves for protection when using the thinset and grout.
Setup
I don’t have a workshop, so I used a folding card table to work on, covering it with both a cheap plastic tablecloth and some newspapers. I also set a box on the side of the table. When you cut tiles, small bits can fly off. I found these almost all went in the same direction. Placing the box correctly meant most would hit it and land on the table rather than ending up on the floor.
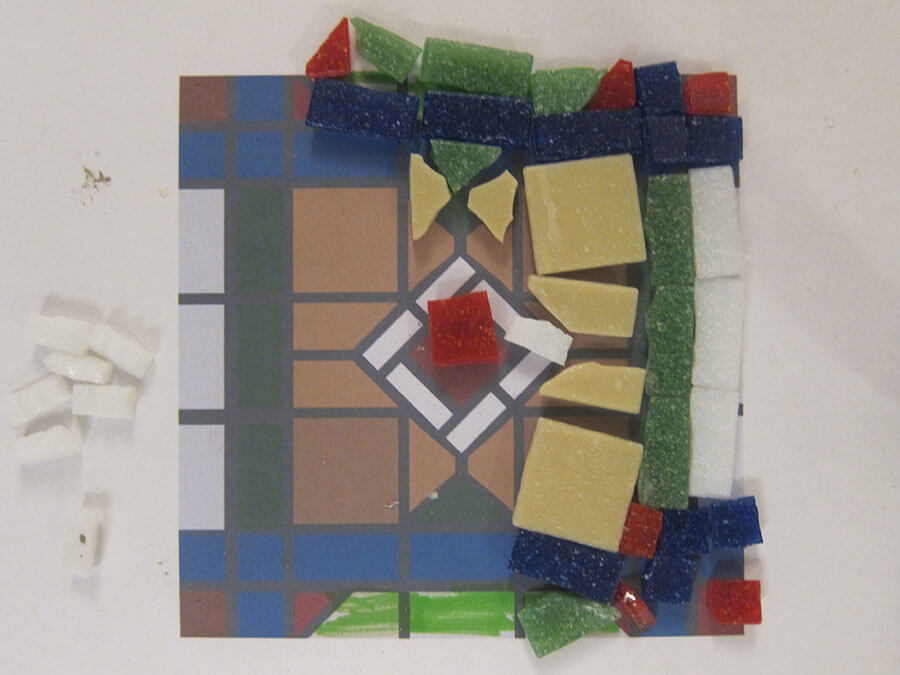
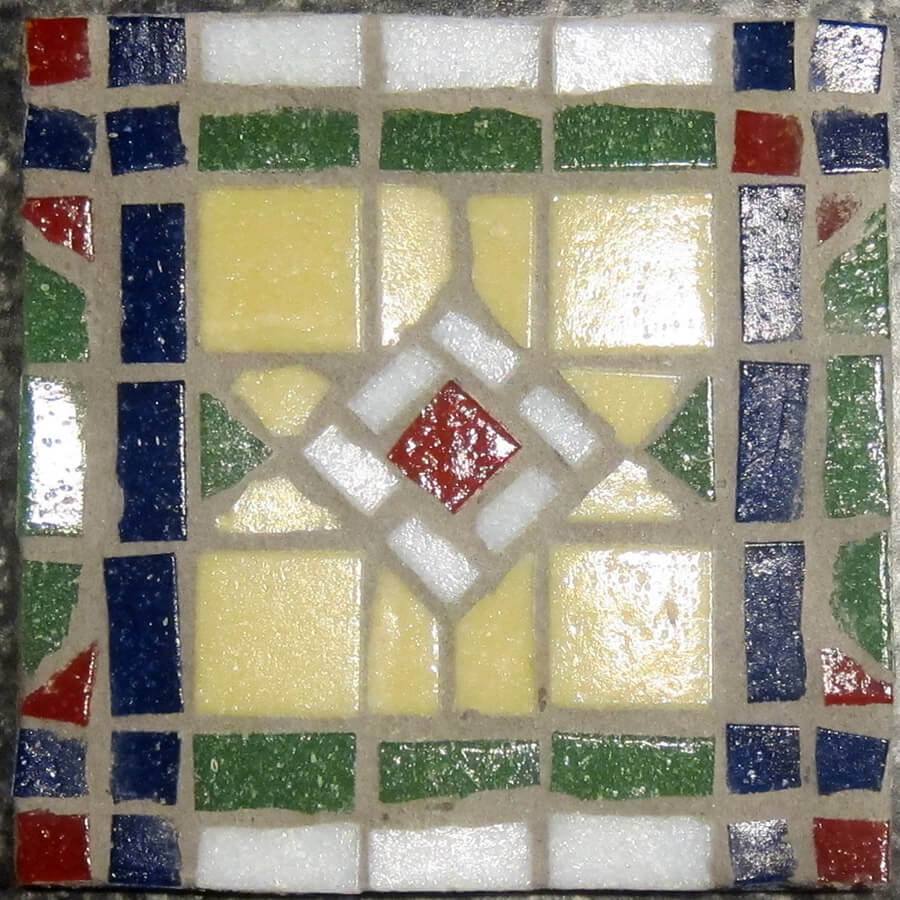
Practice Piece
Since I had no idea if I could pull this project off without embarrassing myself, I made a small practice piece. It was only about four by four inches – or five tiles wide and high. I put the pieces on a thin piece of plywood. I designed it with similar cuts that would be needed in the full-sized work. It was a valuable learning experience. My cuts were not yet as accurate as they needed to be, and I didn’t file the rough edges enough. The grout spacings were a bit variable and distracted from the design, to the eye of a perfectionist, at least. While not perfect, this now serves as a cute coaster for my work coffee.
Cutting and Filing Tiles
With a regular grid-pattern design, making the tiles the right size with clean cuts is challenging. My design had a lot of half- and quarter-tile pieces, and also some triangles and other shapes. All of these took practice and work with the file to get acceptable results.
For the half-tile pieces the issue was that the grout line would take up some of the space. So just cutting a tile in half doesn’t work. So first I cut across the tile a little to the side of the centerline. After some trial and error I found that cutting against the lines pattern on the back led to cleaner and more accurate results. So now I had one rectangle of the correct size, and one that was too large. But you can just cut .075 inches off the larger piece in one fell swoop. I found that three cuts to chip off the grout width would get close to the result needed (one in the middle, one near the top, and one near the bottom). Each would cut off a bit. The result was usually jagged and would take about a minute to file it smooth. I started with the rough side of the file, and then switched to the smoother side. Be careful! If the file slips you can cut your finger.
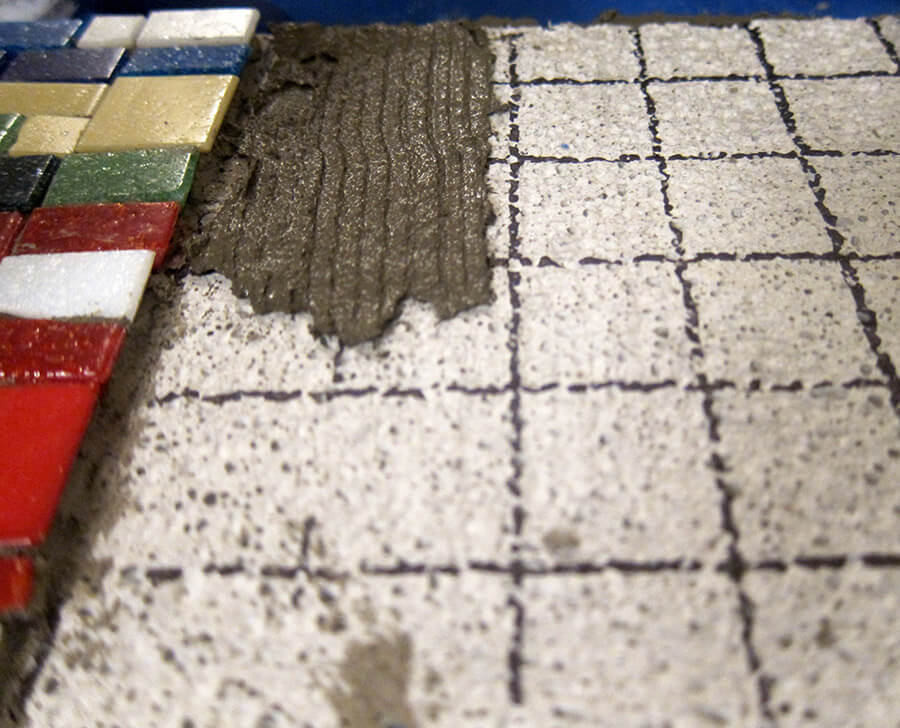
Gluing [[Mortar Mounting]]
Once I had all the tiles cut to the right shapes I was ready to “glue” them to the board with thinset. First I drew a grid on the board with a sharpie so I could align the pieces accurately. I mixed up a batch of thinset – about 60 to 100 grams worth at a times, using a kitchen scale to weigh it and the water needed. Then I applied it to a section of about two by three squares at a time with a palette knife. After I put that group of tiles in place, I used a small flat plastic scraper to push down on them so that the tops would be even. If you finish a section and don’t plan to do more that day, be sure to remove any extra that squished out from the last tiles you put down. Otherwise it will dry and be a problem for places the next tiles when you resume work.
Around the rough edge of the backer board I applied thinset to make a smooth edge, and repair any missing chunks, especially if needed to support the tiles on the edge of the piece. When this dried I used the tile file to smooth it further. This took a few rounds of adding and filing to get a nice enough edge.
Framing and Hanging
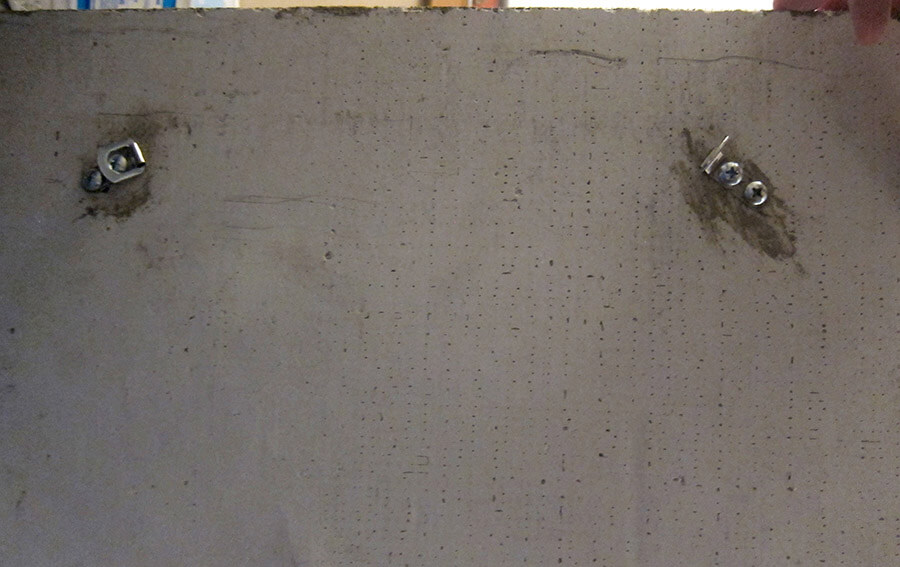
I wanted to apply a frame before grouting so the grout would fill the area between the edge tiles and the frame. I used a ¼ by ¾ inch piece of wood moulding. I miter cut four pieces to the size I needed, then primed and painted it. Using construction glue to attach them to the board, I kept the top about flush with the top of the tiles. I also put one small nail in each corner to attach the wood pieces together, and used a long clamp to make sure it stayed in place while the glue dried. Having a corner clamp would have been helpful for this process.
Grouting
Grouting the work was nerve-wracking. What color should I use? I polled some artsy friends but didn’t get a consensus. The FAQ’s suggested black, but I worried that’d be a bit severe so I hedged and went with dark gray, which worked well. When it had dried for a couple days I applied some grout sealer to protect everything. All done!
Leave a Reply