Once you have a design you would like to create in mosaic, the next step is to determine how large to make it.
The minimum size a mosaic can be is determined by the finest detail to be depicted in the image.
I recommend trying to render that one finest detail first to determine if it is even possible to render and to determine how difficult it is to render.
If there are other details just as small throughout the mosaic, being difficult to render might be the same as impossible as far as sizing the mosaic.
If you have trouble rendering this one fine detail, you have two options:
You can make the mosaic in a larger size, or you can simplify the design to eliminate the smallest of the details.
Mosaic Faces
Usually, the face or head of the central figure contains the smallest details in a mosaic.
It’s also the focal point of the image in most cases, and it’s usually the most scrutinized details in the image.
For this reason, the head/face is the natural starting point for determining the minimum size the mosaic needs to be.
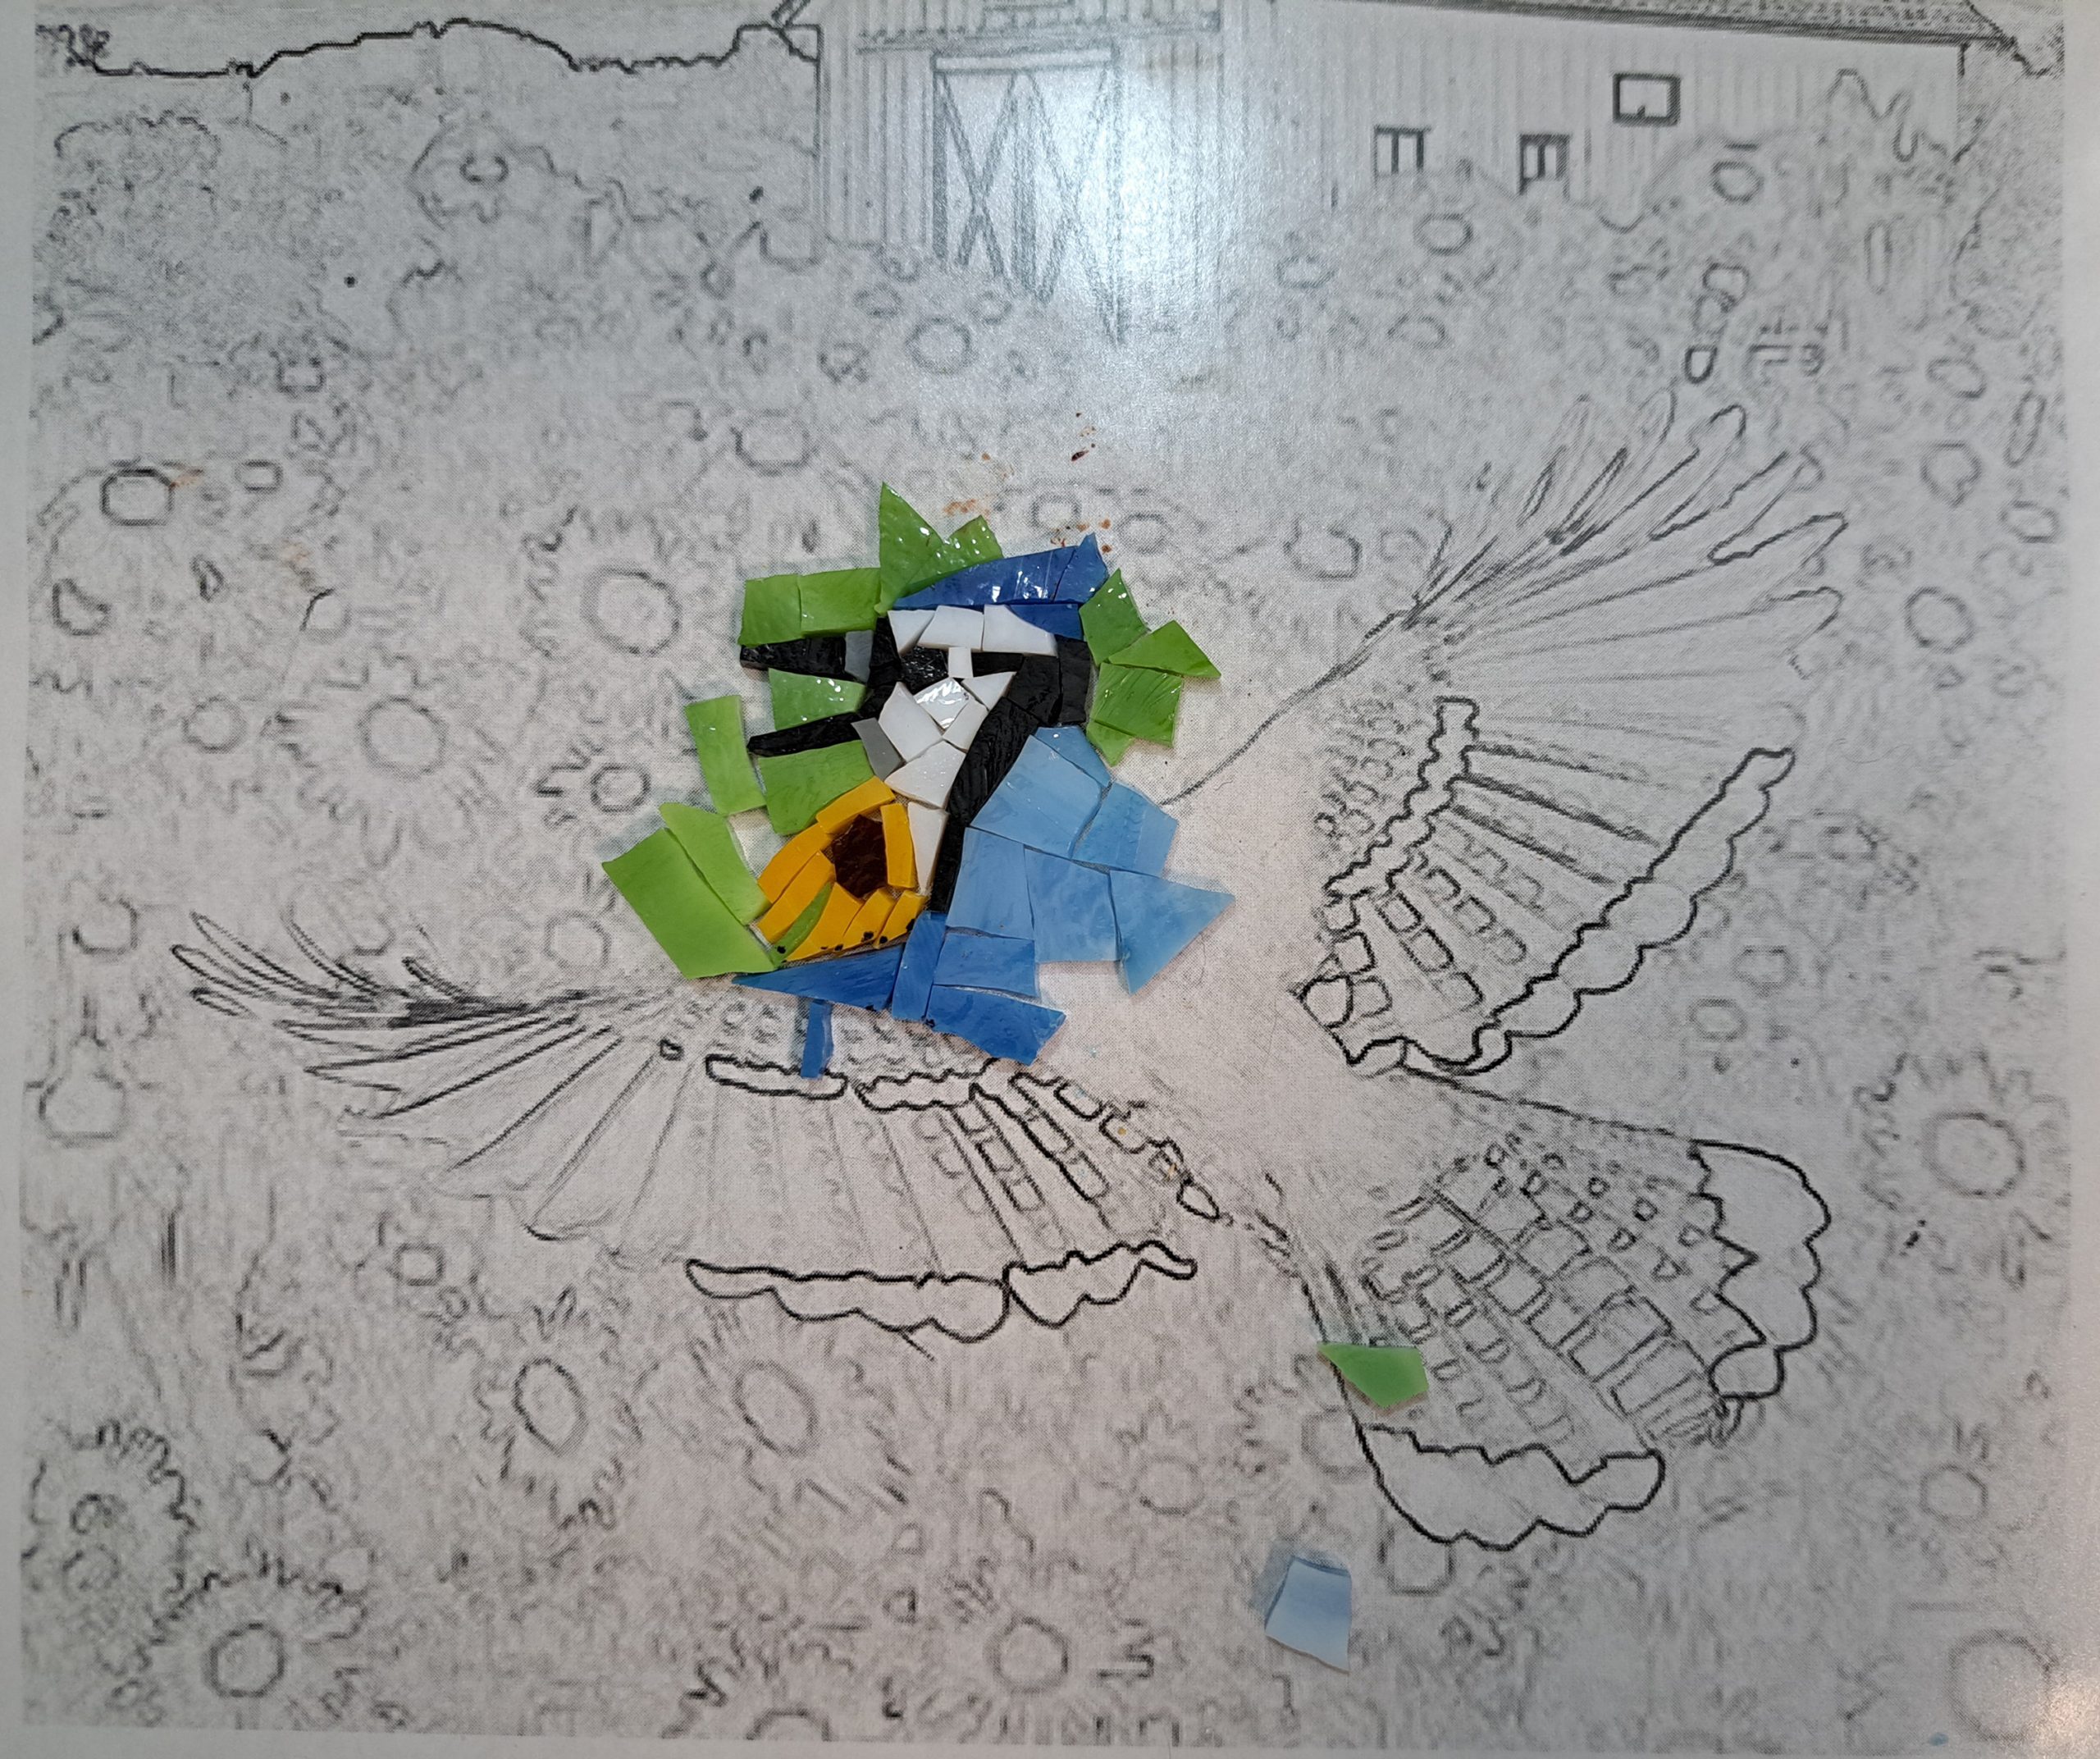
I start with the head/face so often out of habit, that I actually got burned recently attempting to make a mosaic of a blue jay.
It turns out that the face or head isn’t always the smallest detail that can’t be simplified.
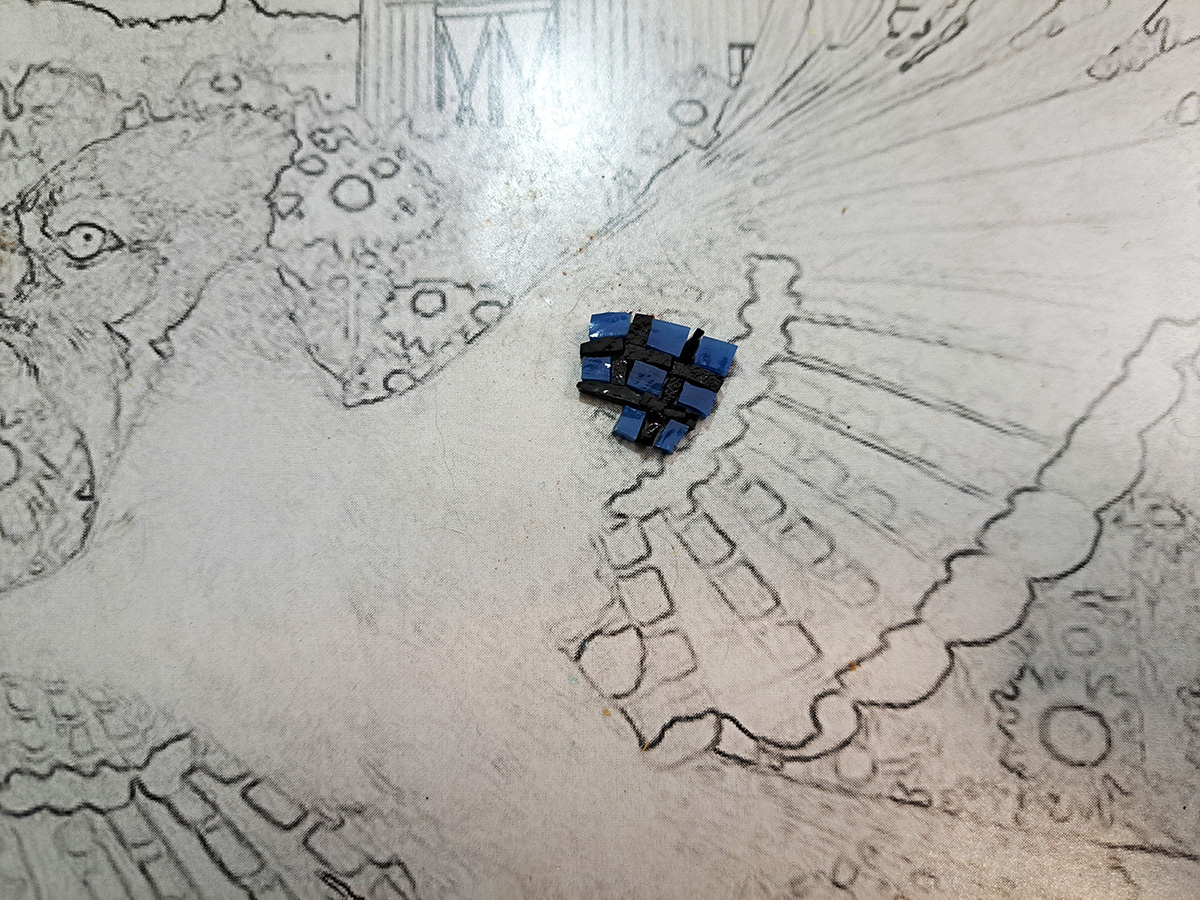
It turns out that the black bars of the blue jay’s wing feathers are the finest, most critical details in this design.
The black bars on the wing feathers are a distinguishing feature of blue jays, and so this detail couldn’t be eliminated in a simplified version of the design.
It just wouldn’t look like a blue jay that way.
A Third Option
I couldn’t simplify the design, but I also didn’t want to make a larger mosaic because I have fallen in love with fine-art miniatures.
The drive to make only small mosaics almost led me to abandon the blue jay design.
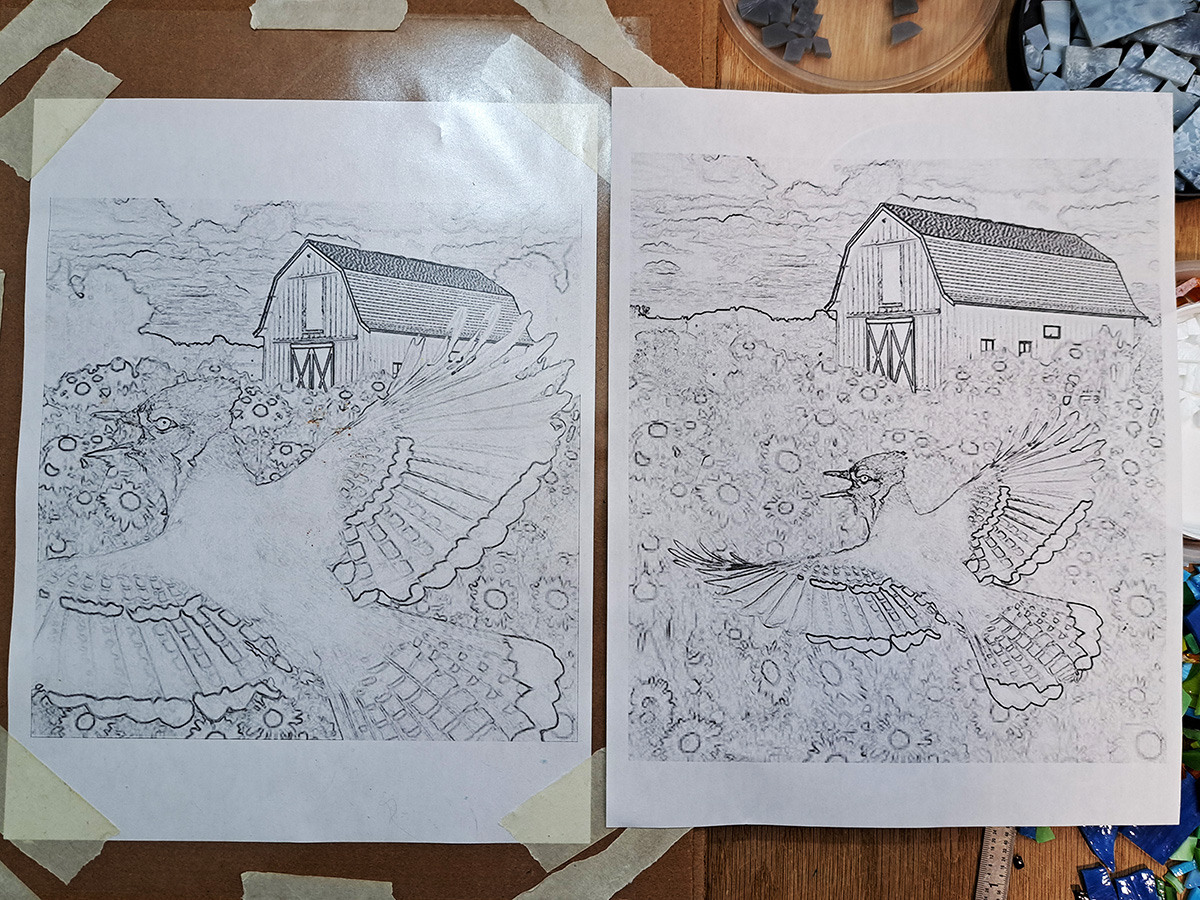
Then I thought of a third option: enlarging the blue jay in the design and cropping out one of the jay’s wings.
Cropping Images
As a rule, cropped designs with larger figures usually make better compositions compared to having excess background and space, at least for non-landscape images.
Here is the original pattern I made from a photo collage:

Here is the improved design:
Notice how the horizon has been made more crisp, and trees horizon have been added to the left and right edges of the horizon to “frame” the composition.
Tile Size
Another factor for sizing a mosaic is the size of the tile. Of course, this isn’t an issue when using pieces cut from stained glass or large tiles.
The most interesting case is when you are using very small tiles, such as our 8mm glass tiles, and you are trying to use mostly whole uncut tiles.
In that case, it is possible to evaluate the smallest detail in the mosaic and learn that the mosaic would be easier to make if the design were smaller.
Yes, you read that correctly.
Consider a mosaic design that contains a lot of flower stems or blades of grass or some other long narrow elements that are the smallest details in the image.
If you lay some tile on the pattern and see that each stem or blade is exactly 1 and 1/2 the width of an 8mm tiles, then you would be correct in thinking that the design might be easier to render if you reduced the size of the pattern so that the stems were the same width as the 8mm tiles.
Leave a Reply