Natalija has filmed a video of her laying out a rose mosaic inset for her new home, and it’s a good demonstration of cutting and fitting tile and other basic techniques. More importantly, it shows the process of design evolution by trial and error, something that is lacking in most craft videos.
Marking and Cutting Tile
One for the basic techniques Natalija demonstrated is marking the location for precise cuts on glass tile using a marker.
I don’t recommend grease pencils because the residue prevents glues from adhering to the glass. A fine point Sharpie brand marker works well.
Caveat
The precise cuts and exact fits required for Natalija’s style of mosaic would be difficult for many people. Natalija is a natural craftsperson who works effortlessly with very small parts. Keep that in mind if you are deciding how you want to work, or at least the scale of your mosaic.
TIP: You can make things easier if you increase the size of your mosaic so that the details aren’t as tiny. Before starting, try arranging some pieces of tile to make the smallest details in your mosaic. If that is difficult, you have three options. You can increase the size of your design, simplify the different detailed areas, or do a combination of both.
The Video
I like this video very much because there is no narration, and so you can focus on tile cutting and placement and the process of design evolution by trial and error.
Notice how many times Natalija revises the arrangement of leaves of the rose before ever gluing the first one of them down.
Notice that she started with a good version of the leaves already drawn, but she didn’t let that prevent her from playing around with different arrangements until she had one that was excellent.
There are tons of Youtube videos narrating you through a process which could be summarized as bulleted instructions and read in less than two minutes, but the better videos show something of the artist’s decision making process.
The better videos also show many different iterations of any basic process that has variations or is difficult or prone to error, such as cutting and placing different shapes.
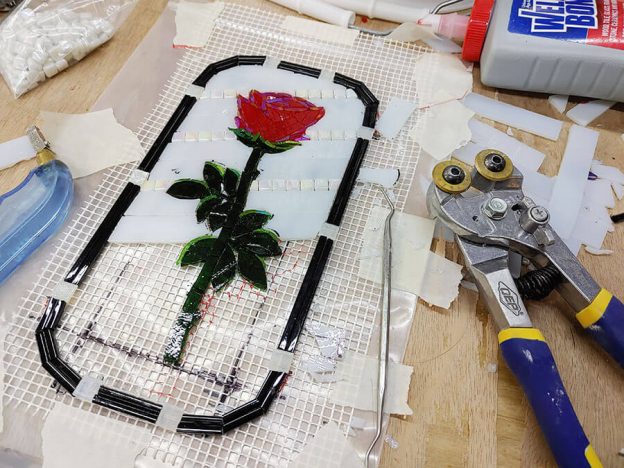
Natalija’s video shows the marking, cutting, or placement of every tesserae, and she uses many different types of them, ranging from slivers of stained glass to whole vitreous glass tiles.
Mesh
Natalija’s video shows how to use Fiberglass Mesh as an indirect surface for designs improvised with small piece of tile and designs laid up using a Tile-Mounting Grid.
I would not try to use mesh in this way for glass slivers as small as what Natalija uses in her flower.
When To Avoid Mesh
Fiberglass Mesh should not be used for outdoor and wet mosaics. Mesh is a point of failure if water gets through the grout and into the glue.
Fiberglass Mesh does not make your mosaic stronger unless you are using it to install the mosaic over drywall as Natalija intends to do.
The most durable mosaics have no mesh or glue.
Instead, Mosaic Mounting Paper or Mounting Tape is used and the tiles are laid face down on the sheet. After the tile is pressed into mortar, the paper or tape is removed from the face of the mosaic, which is then grouted.
Leave a Reply