In my recent blog article about black and white grout, I wrote the following tip for minimizing the width of grout gaps and working a little faster at the same time:
If tiles only touch at points but not along the length of their sides, then tiles can be positioned very closely and yet still be grouted. Consider working in this way instead of carefully cutting each tile to maintain a uniform grout gap.
I need to clarify what I meant by that.
Uniform Versus Consistent
Sometimes novice mosaicists will carefully cut each tile to maintain a perfectly uniform gap, which can be a little tedious, and worse yet, they make the gap a little wider than it should be because the artist does not have the experience to visualize what it will look like when grouted.
I think it is better to work a little less uniform, and to err on the side of being slightly narrow, even if that means tiles occasionally touch at a point or corner. By better, I mean more efficient, less tedious, and better looking.
All that being said, it is extremely important that the mosaic have the same type of grout gap in all regions. You want to be consistent in your style of gap. You do not want to have loosely executed in one place and tightly uniform in another, nor do you want wide gaps in one region and narrow gaps in another.

Round Tiles
Round glass gems and circular tiles are more difficult to nest closely together, and sometimes an artist will leave more of a grout gap than desired, especially if the pieces are dome shaped, which allows grout to cover the outer edges of each piece.
Over-sized grout gaps around circular tiles do not look like problems until the mosaic is grouted, but by then it is too late to change, and there are over-sized “blank” areas of plain concrete that look like sockets where tile should have been.
These empty spaces between glass gems look even more conspicuous if there are other regions of the mosaic that are made from ordinary square tile with a typical (narrow) grout gap.
A Case Study: Sun Moon Mosaic
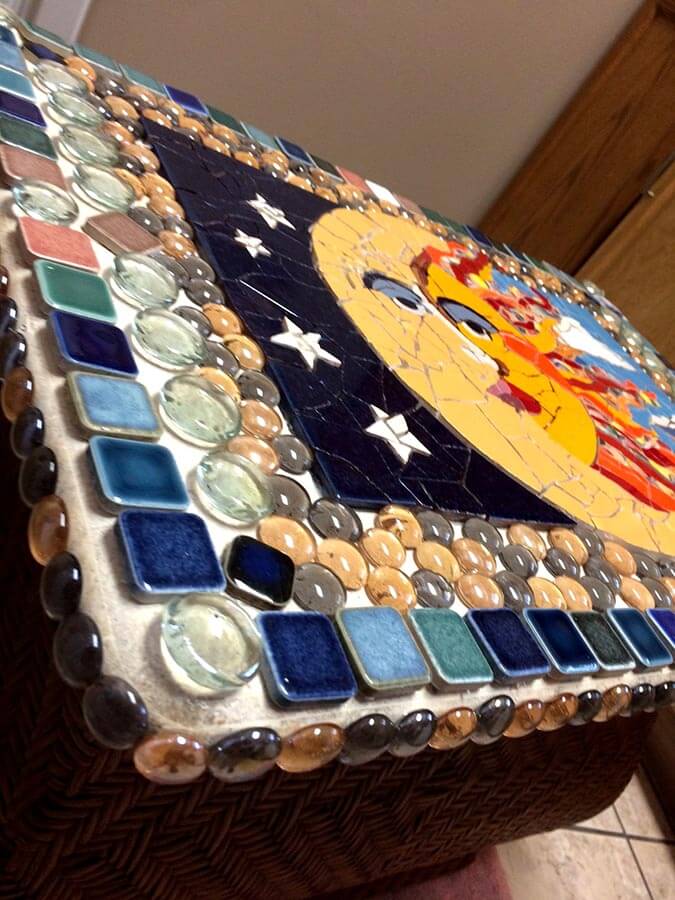
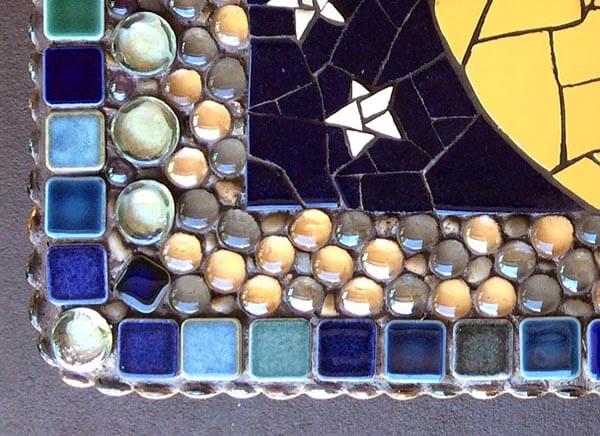
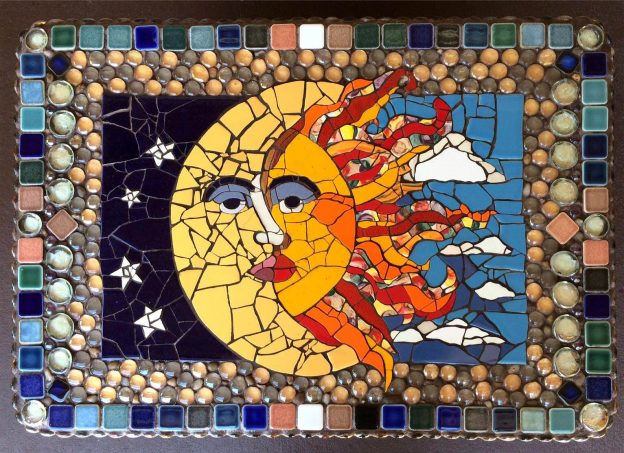
Artist Lynn Sposito emailed us photos of her unfinished mosaic table top asking for comments and advise on clear coats for pouring over the finished mosaic. Naturally we discouraged that, but we instantly saw an issue that we could help with, and that was the large gaps between the gems in the border, and how this was totally at odds with the narrow gaps used in the central image.
I advised prying off the gems if possible and nesting them more closely together. Lynn responded that the backer was a porous synthetic stone material and that prying a gem up was likely to pull up large chunks of the backer. In the end, Lynn was able to make the original placement work by back filling the larger gaps with smaller gems and pebbles.

If Lynn had not filled these holes with smaller pebbles, then the glass gem border would look more like pieces pressed into concrete than mosaic, and there would be a lack of continuity between this border strip and the figurative mosaic in the center.
Clarification
It is perfectly fine to make a mosaic or a piece of art where the overall look and feel is that of pieces pressed into wet concrete. That type of mosaic actually looks great. But it looks great by itself as a complete mosaic. It doesn’t look right when only part of the mosaic is executed that way while other parts are executed more tightly.


Leave a Reply