Why break up ceramic figurines to use the pieces in mosaic artwork when you can use the whole figurine? Artist Laurie Gilson emailed me some photos of her recent work, and they are great examples of how you can use ceramic figurines in your mosaics and still use standard elements such as tile arranged in rows.
Texture and Dimension
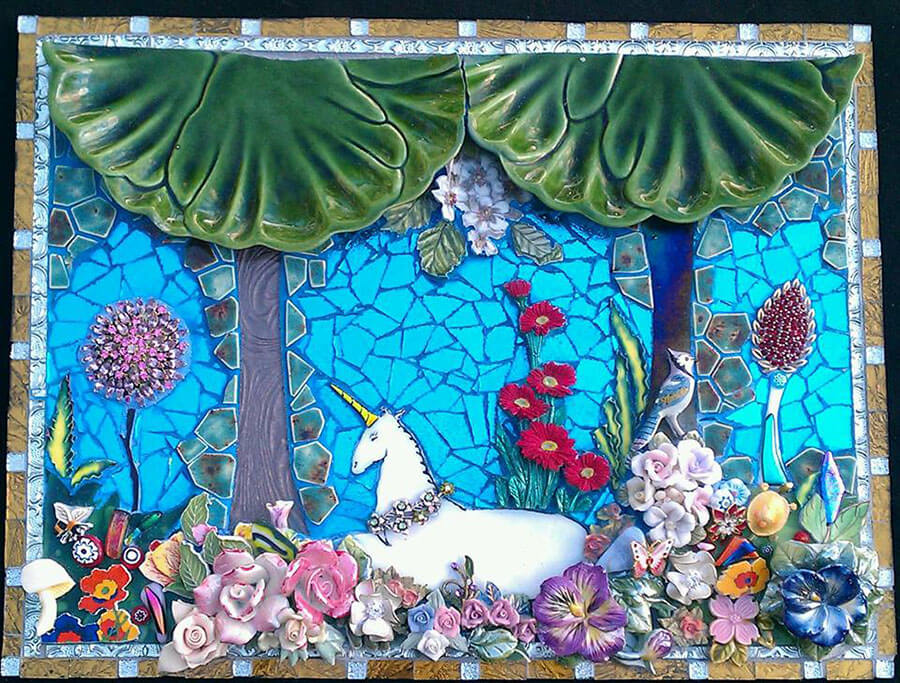
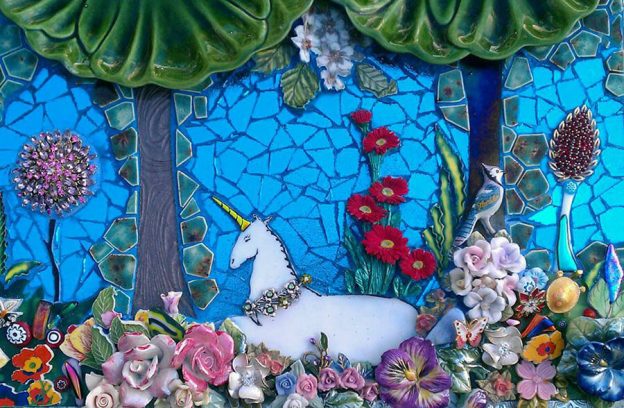
In Laurie Gilson’s “Unicorn Mosaic,” ceramic flowers of different type were used to create a “Garden of Eden” setting that is just right for the mythical beast. I love the blue jay and how the lily pad plates were used for the foliage of the trees.
A wet saw (powered saw for cutting ceramic tile) would be the best tool for cutting a plate evenly in half, especially if it has rims or folds like the lily pad plate does. Note that compression tools like Tile Nippers aren’t practical for making long straight cuts like that.
Note how the background is flat monochrome blue, which is essential for having the multicolored flowers stand out. Even the solid white unicorn probably wouldn’t stand out very well if the background was multicolored. All that being said, Laurie used our Ceramic Break-Off Tiles to transition from the dimensional figures to the flat background.
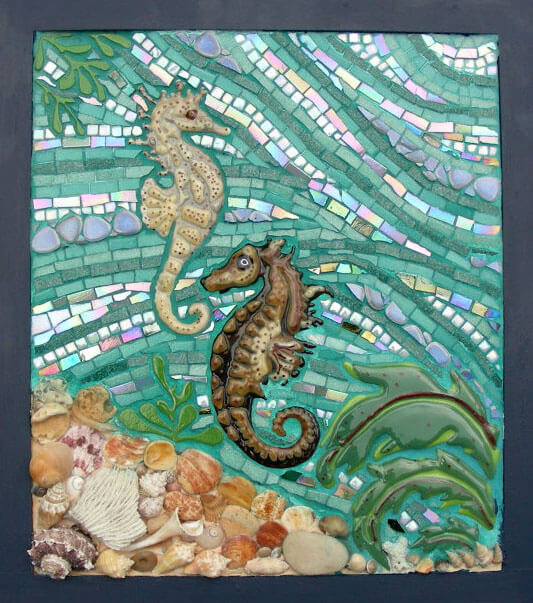
Traditional Andamento
An earlier work by Laurie, “Seahorse Mosaic” is a beautiful example of how you can have conventional andamento (arrangement of tiles in rows) in a mosaic that makes use of bas relief ceramic elements.
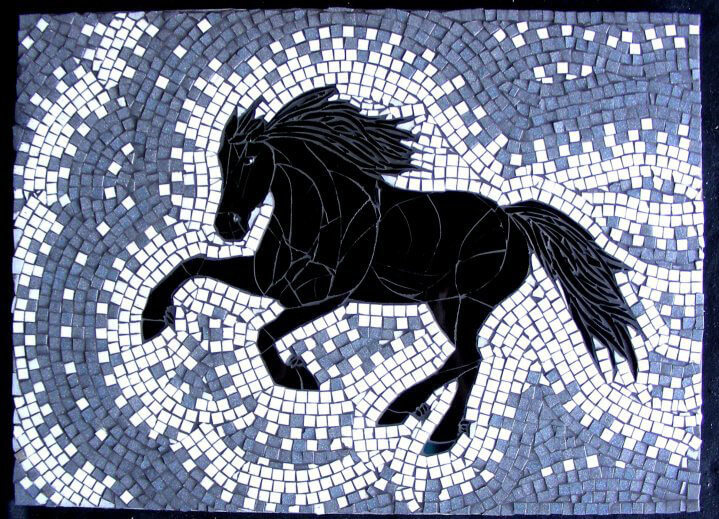
Laurie’s “Horse Mosaic” below also uses traditional concentric andamento to create a sense of motion in background, but in this second work, the figure is executed in stained glass in a mode more like stained glass artwork (fitted pieces representing whole components of a figure) than the mode of conventional mosaic (tiny pieces of similar size used to build up components). The horse’s tail and mane are notable exceptions to that last statement.
Bas Relief Mosaic Figures
Inserting ceramic figurines and objects such as seashells in one way to turn an otherwise flat mosaic into a bas-relief sculpture. A second way is to make the backer itself into a bas-relief sculpture with raised figures and then mosaic that. The mosaic below by artist Marilyn Keating is a great example of doing exactly that:
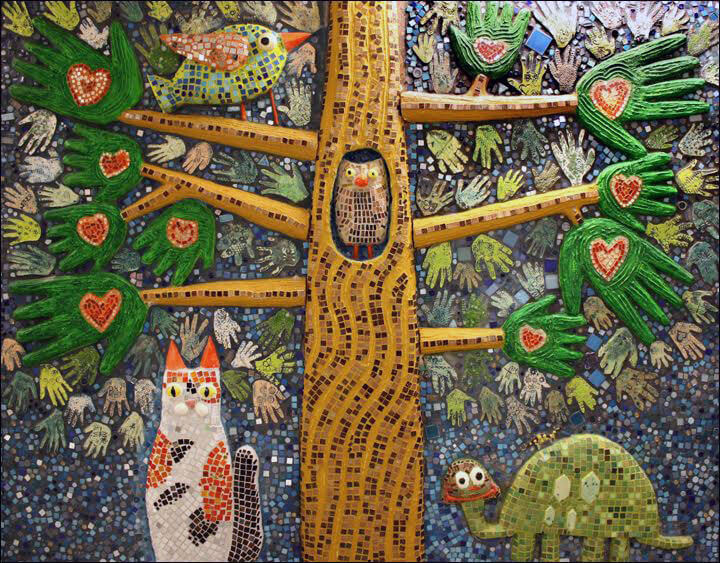
Marilyn uses a variety of materials to make her sculptural mosaics, including wood and particle board and stuff we preach and rant against all the time, at least for outdoor and wet locations. The reason we rant against that stuff is that it only takes a little water coming in through a pin hole in the grout, and then the wood swells and splits, and then the mosaic falls apart relatively quickly.
Of course, if your mosaic is dry and indoors, you can use wood and plywood as a backer without any worries.
Wood: Kids Don’t Try This At Home
“Kids don’t try this at home. This woman is a trained professional.”
Marilyn pre-seals her wooden bases with Weldbond mosaic adhesive and grouts thoroughly. She also seals the finished mosaic with multiple applications of a tile and grout sealer. If you are not absolutely certain that you could be this thorough in your work, then don’t even consider using wood as a base. If you think you CAN be this thorough, then keep in mind that it only takes a pinhole for humidity to get to the wood and expand it.
We get emails from people all the time who are upset about how quickly their outdoor mosaic on wood fell apart.
Our article on Mosaic Lawn Sculptures discusses some more reliable alternatives to wood. Save wood for indoor use only if you want to be sure.

Leave a Reply