I have often used a small screwdriver to pry up tiles when I wanted to change some detail in a mosaic, but in all of those cases, the mosaic had a grout gap, and it was possible to knock an individual tile out or shatter it without damaging its neighbors, at least most of the time.
But what if you can’t afford to damage surrounding tiles or you have a mosaic with no grout gap? Is it even possible to get tiles up? The answer is yes, and the method involves a wet cotton swab, a dental pick, and a sharpened chopstick.
WARNING: Prying up glass tiles is particularly dangerous because broken shards of glass and small tile go flying at high speed. Wear safety glasses with side shields or a face mask and do this work away from other people who could be hit with flying tiles or shards of glass.
Procedure
This method assumes the tiles were glued down with a white PVA adhesive, which is the recommended adhesive for dry indoor mosaics.
Step 1. Apply Water With Swab
Apply water to selected tiles with a cotton swab and let soak for 1-2 hours.
You can only apply so much water at once to avoid wetting surrounding tiles, and so you might have to re-wet often as the water dries up, but you can lay plastic wrap over the top to help with that. You will still have to re-wet as the water starts to soak down in between the tiles.
You may notice traces of clear dry glue turning white as the water soaks into it. This is good. That is what we want to happen beneath the tiles.
Try to keep the water contained to the closest halves of the surrounding tiles. If you apply water past the surrounding tiles, then you are working too loosely and need to spot dry with a rag to contain the water.
Step 2. Pull With Dental Pick
The next step is to pull up the tile with a hooked dental pick. If this is the first tile being removed, it may need to soak longer because the first tile is the most difficult usually. It has had the least amount of time to soak, and it is surrounded by other tile on all sides.
Step 3. Scratch With Dental Pick
Once this first tile is up, the dental pick will be used in a different way. Instead of using the pick to pull up, use it to scratch into the backer along the edge of the tile. You can also use a mini spatula for this purpose. The scratch in the backer at the edge of the tile is the place to stick the tip of your prying tool.

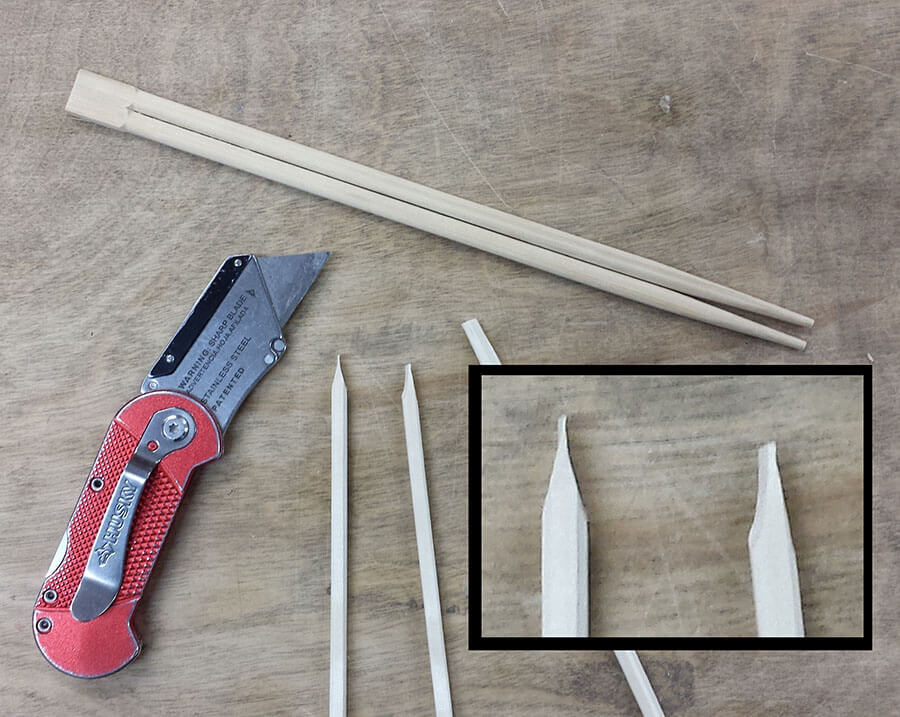
Step 4. Sharpen Chopstick
Using a cutting tool, sharpen a the end of a wooden or bamboo chopstick so that it is the shape of a straight chisel tip approximately 1/16 inch in thickness.
Step 5. Tap Chopstick
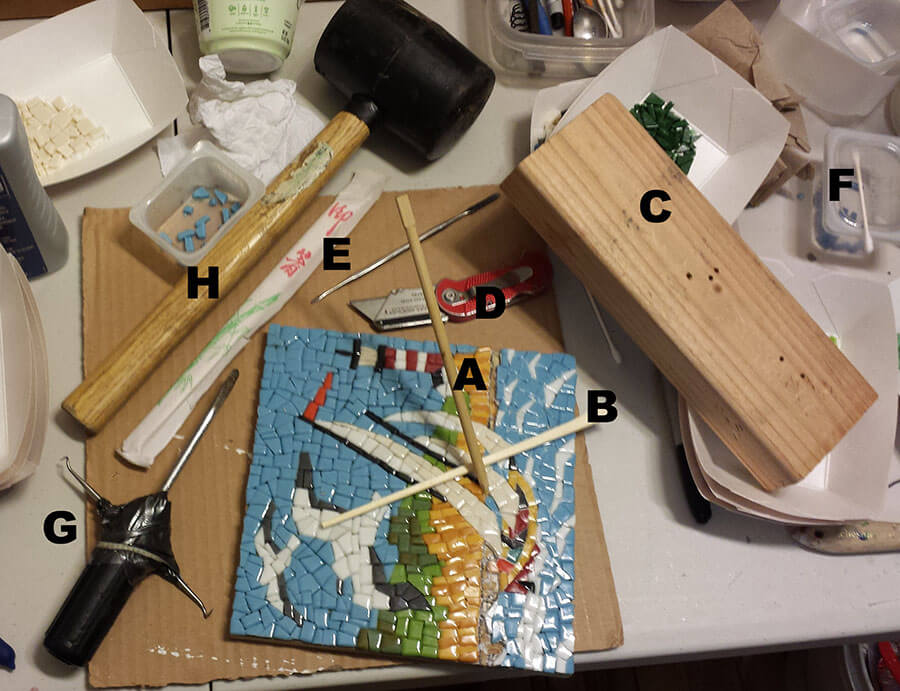
Position the tip of the chopstick in the scratch in the backer at the edge of the tile. Actually, most of the tile will be against the side of the tile, but that is OK. Hold the chopstick at an angle of roughly 45 degrees and tap it with a piece of wood or rubber mallet. I find that a small piece of 2×4 lumber works best.
Step 6. Manage Water
During all of these steps, you should re-wet the glue with the cotton swab as needed. If tiles are shattering instead of popping off whole, then you haven’t soaked the glue long enough.
You should use a rag to soak up any water that spreads beyond where you want it or gets on the bare wood backer after the tile has been removed. Dry the backer as quickly as possible to avoid damaging it or the glue underneath surrounding tile.

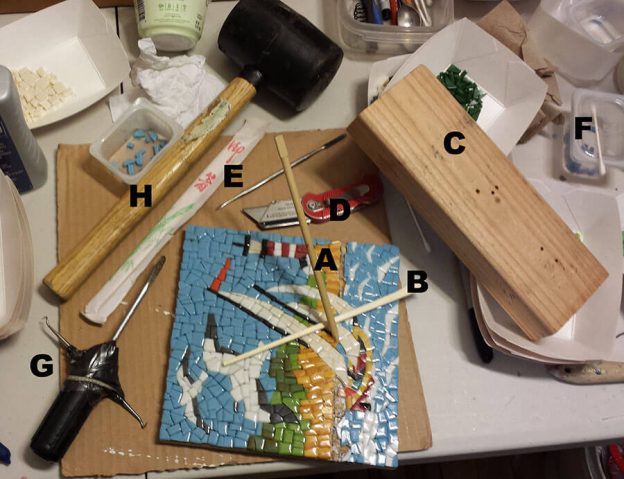
- A. sharpened chopstick chisel held at 45 degrees at the edge of the tile to be removed.
- B. second chopstick used as a fulcrum to protect surrounding tile if the first chopstick is used to pry.
- C. a piece of 2×4 lumber for tapping the sharpened chopstick.
- D. box cutter used to sharpen chopstick.
- E. miniature spatula tool (like a dull butter knife).
- F. cotton swab with cup of water.
- G. dental pick duct-taped to the handle of a screw driver so that the pick can be pulled with force. A dental pick taped to a handle is a dangerous tool, and you can rip your skin easily just by accidentally brushing it. Most people should not tape a pick to a handle or surface, and even people who are comfortable working around sharp and dangerous tools should take care to store this one in a box by itself.
- H. rubber mallet (optional).
Avoiding The Need To Pry
Instead of gluing down individual tiles on a backer, you can work indirectly on a temporary surface (such as a pattern) and then pick the whole design up with mosaic mounting tape and transfer it to a glue-covered backer.
To keep the tiles from moving around on the pattern, cover the pattern with clear contact paper with sticky side up. On this sticky pattern, you can arrange all the tiles and modify the design before you glue it to a backer.
After you have looked at the design for a while and made any changes, then you press mosaic mounting tape onto the tiles, pick them up, and then set the whole sheet onto a backer covered in glue. Once the glue hardens, the tape is peeled off, and then the mosaic is ready to be grouted.
I have a blog article explaining how to use contact paper and tape to lay up a mosaic design on top of a pattern.


Leave a Reply