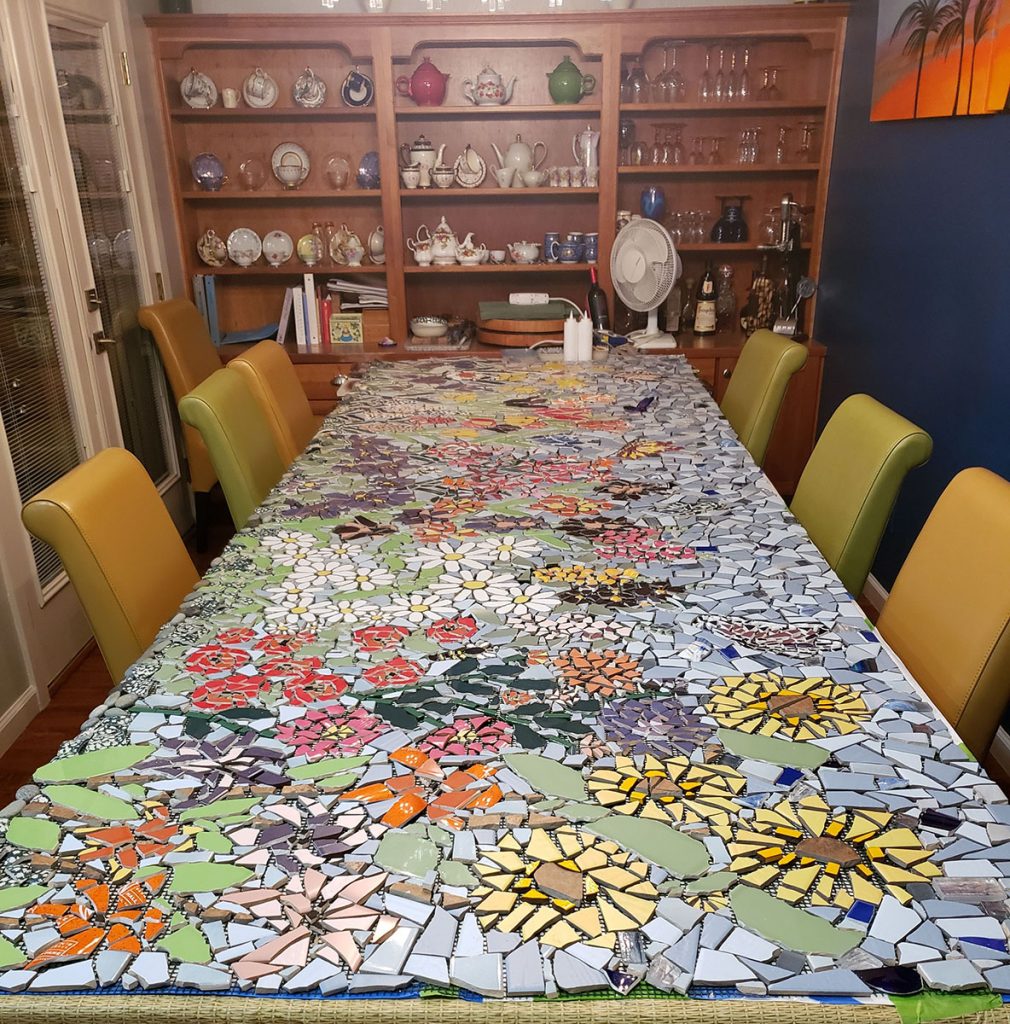
Artists Patricia Cream and Leah Mitchell recently completed an outdoor mosaic mural mounted on foam-core tile backer board, and they took excellent photos of the work in progress.
Each major step in the process is shown, including the french-cleat hanging brackets used to mount the mosaic to the cinder-block wall.
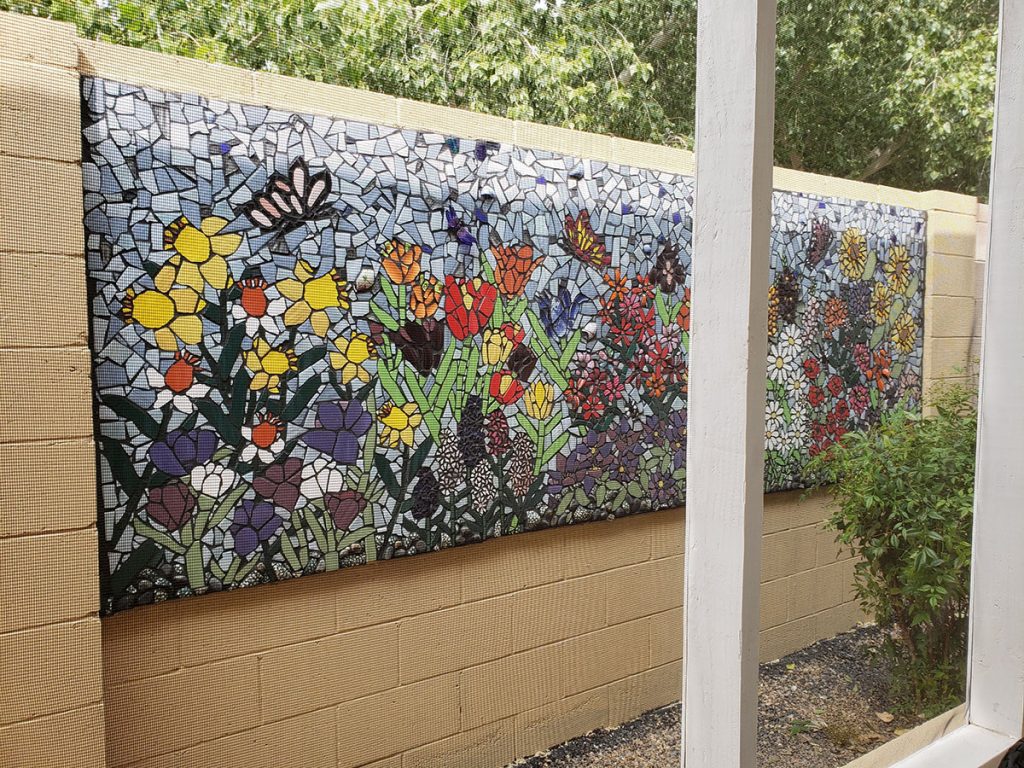
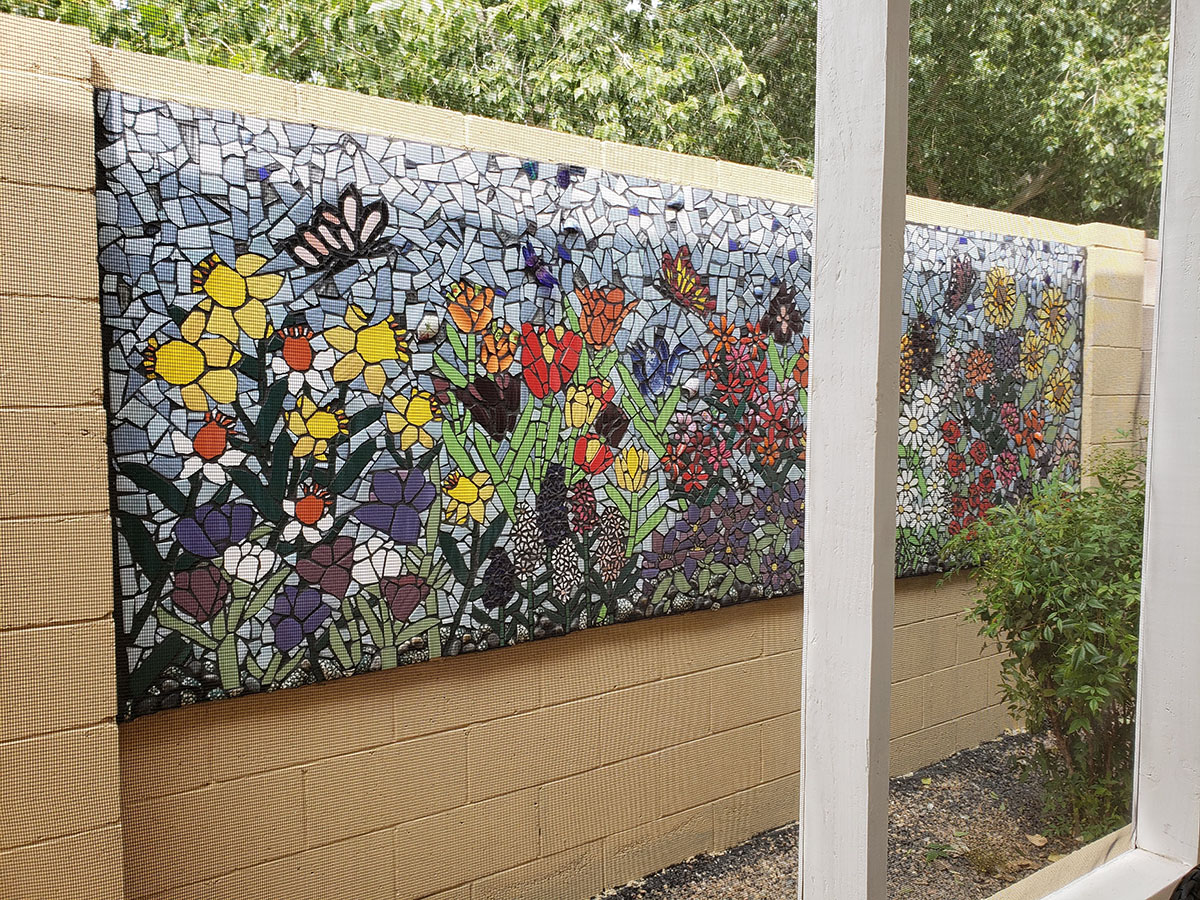
The mosaic mural is also impressive. Patricia and Leah really capture the energy of a mixed wildflower garden with all the different textures and shapes and colors.
One Step at a Time
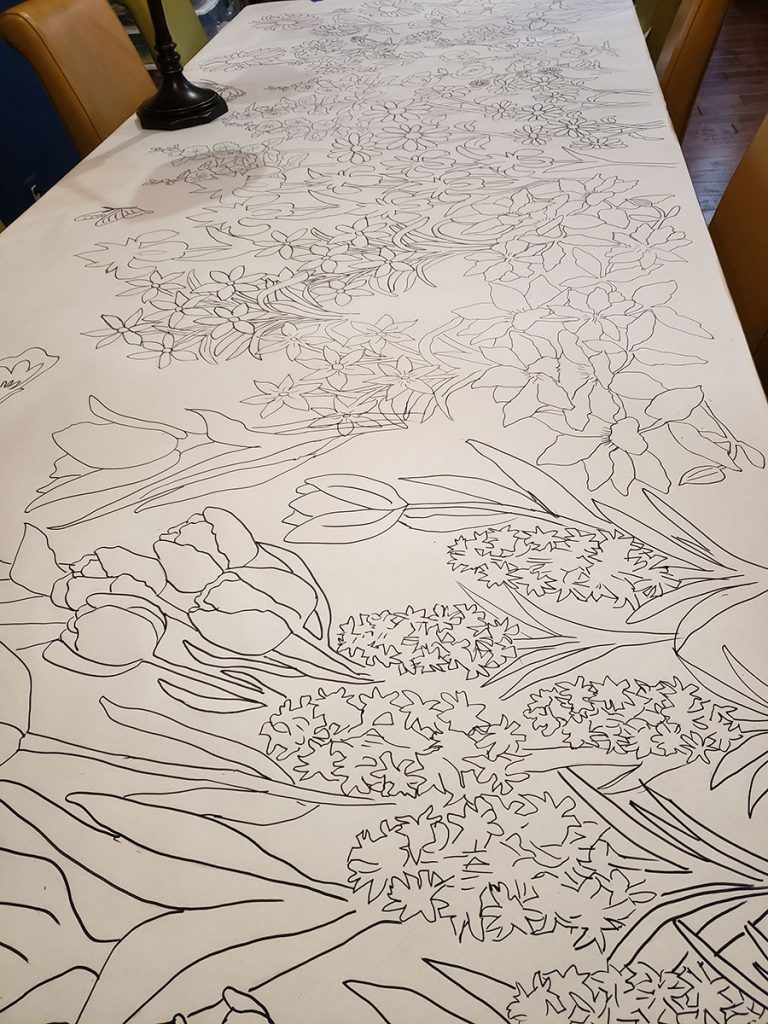
Note how the mosaic pattern or cartoon is nothing more than the outlines of figures and elements similar to a coloring book.
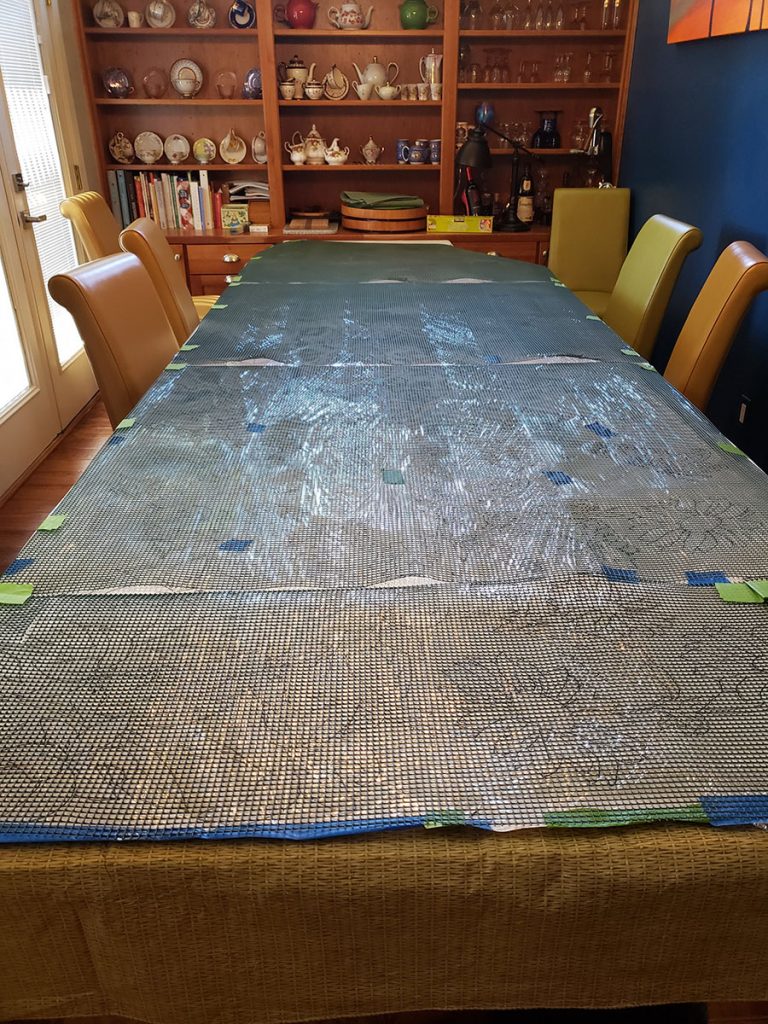
One large surface is needed to lay out the mosaic. All too often, the only surface large enough is the floor. Patricia and Leah had this great long table.
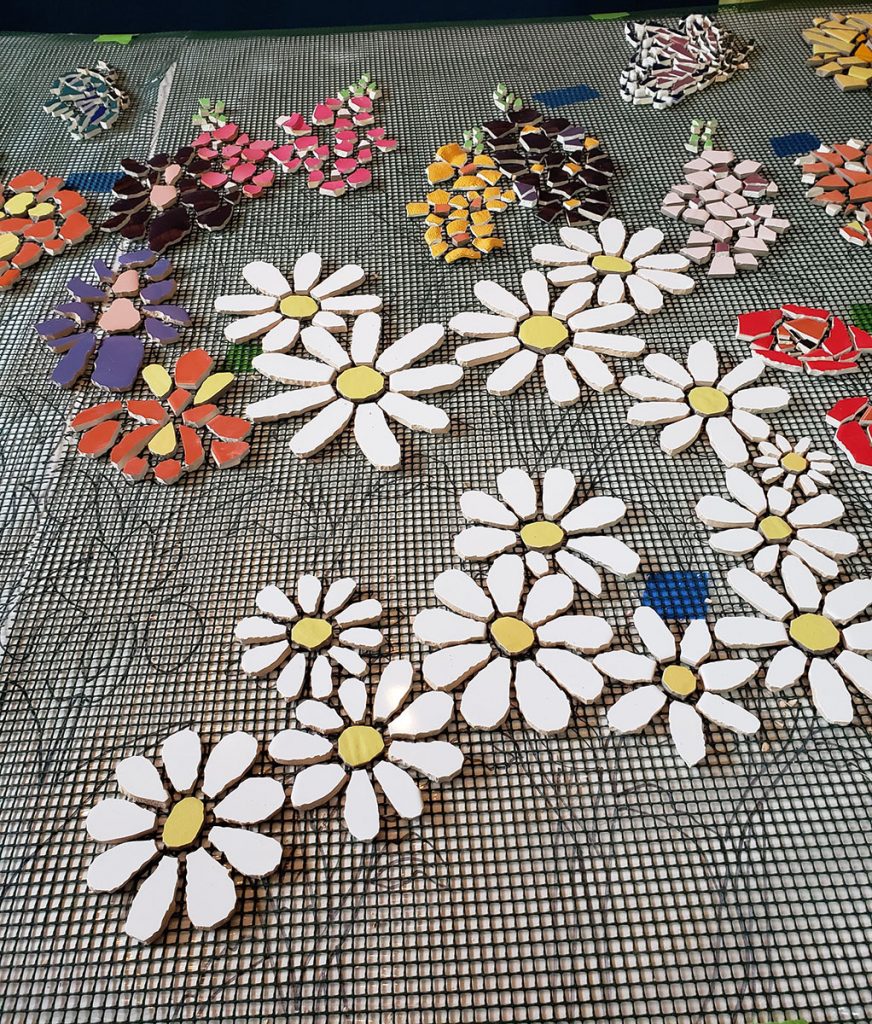
I avoid mesh for outdoor and wet mosaics because I think of it as a potential Achille’s heal and prefer to have all my tile’s bottoms to be completely encased in thinset mortar. This is particularly important for mosaic made of smaller pieces.
Note that this mosaic is made from shaped pieces of ceramic tile that are larger than pieces cut from small glass mosaic tile. The larger tile size makes it easier to glue the tiles to the mesh without getting glue on the sides of the tile.
Pro Tip: Glass tile is cheaper, more durable, and easier to cut than ceramic materials. There is also greater color selection available.
I should also point out that it is easier to construct rounded petals from small irregular triangles and rectangles of glass tile than it is to shape a round petal by nipping one large piece of ceramic tile.
What Patricia and Leah gain from using the larger ceramic pieces that aren’t perfectly flat is texture, a coarse chunky texture that begs to be touched.
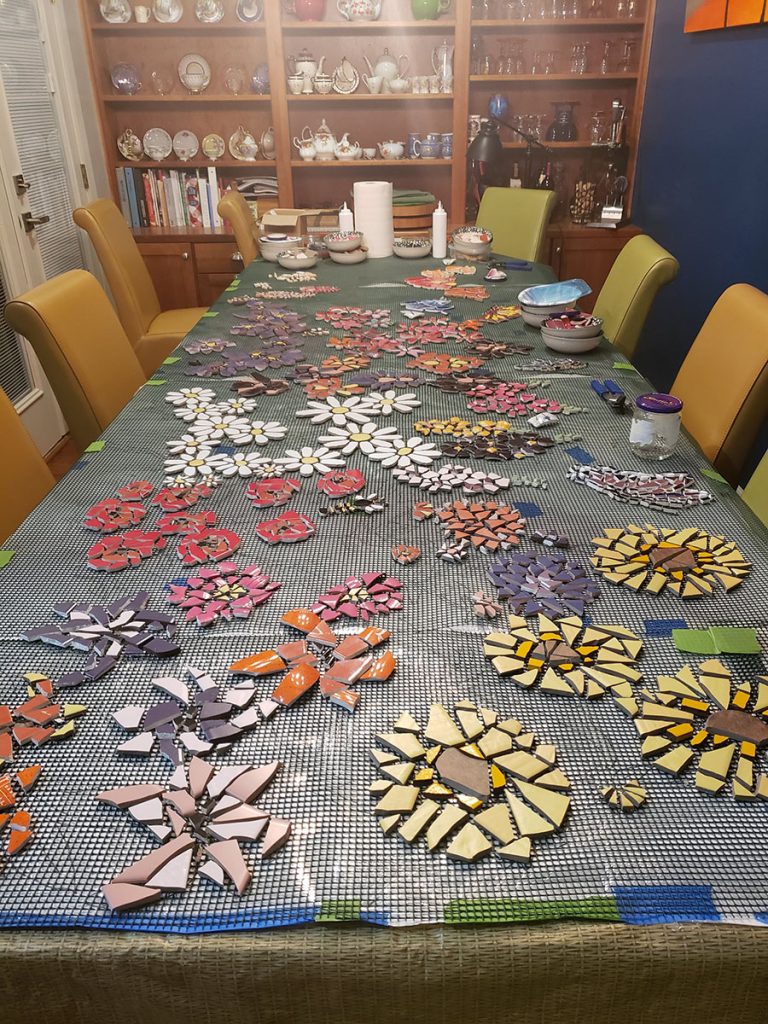
Figures (flowers) are laid out first with background added second by backfilling.
Backfilling the background between figures has one intrinsic pitfall that seems to snag a lot of novices: failing to keep the grout gap consistent with what was already used in the figures.
Notice how the piece size and grout gap are consistent between figures and background.
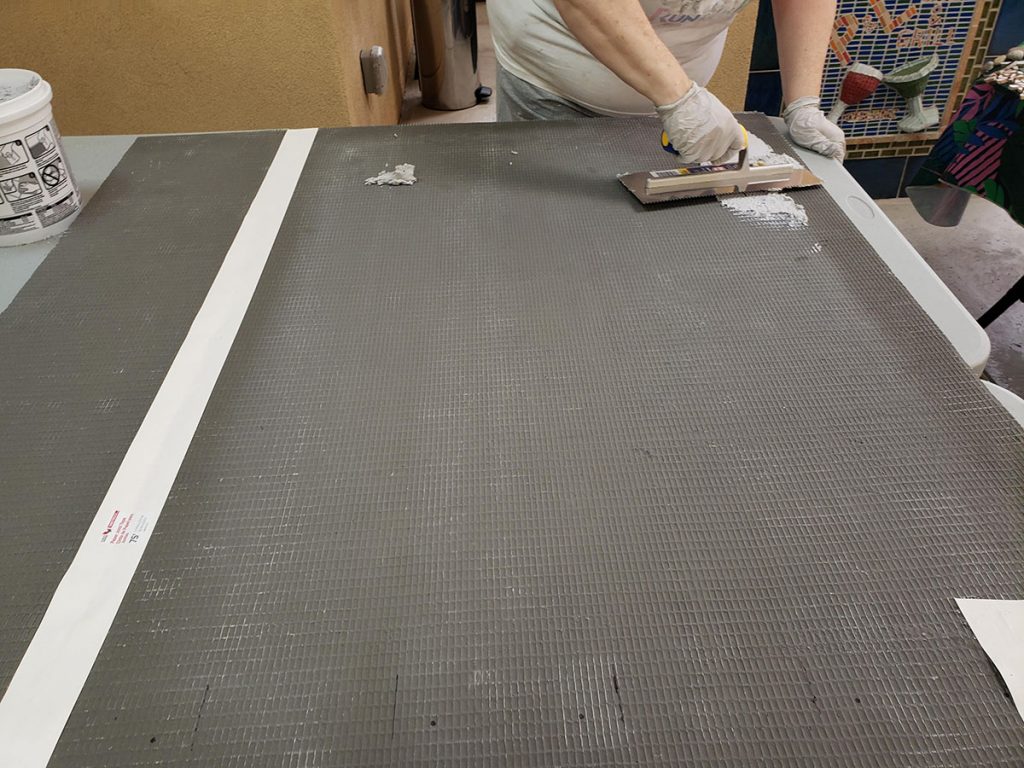
One key step has not been photographed, and that is the laying of the mesh-mounted mosaic on top of this wet mortar.
It doesn’t surprise me that this is the step with no photo: All hands available are usually needed to pick up the strips of flexible mesh covered in heavy tile.
It’s awkward handling. and it requires strength and precision to get the different strips or sheets positioned correctly. They must be aligned and not have a gap between that is larger than grout gap used within the sheets.
It helps to use a piece of plywood as a “tray” and slide the mosaic off the tray and onto the mortar. That keeps the mesh sheet from flopping and sagging as you handle it.
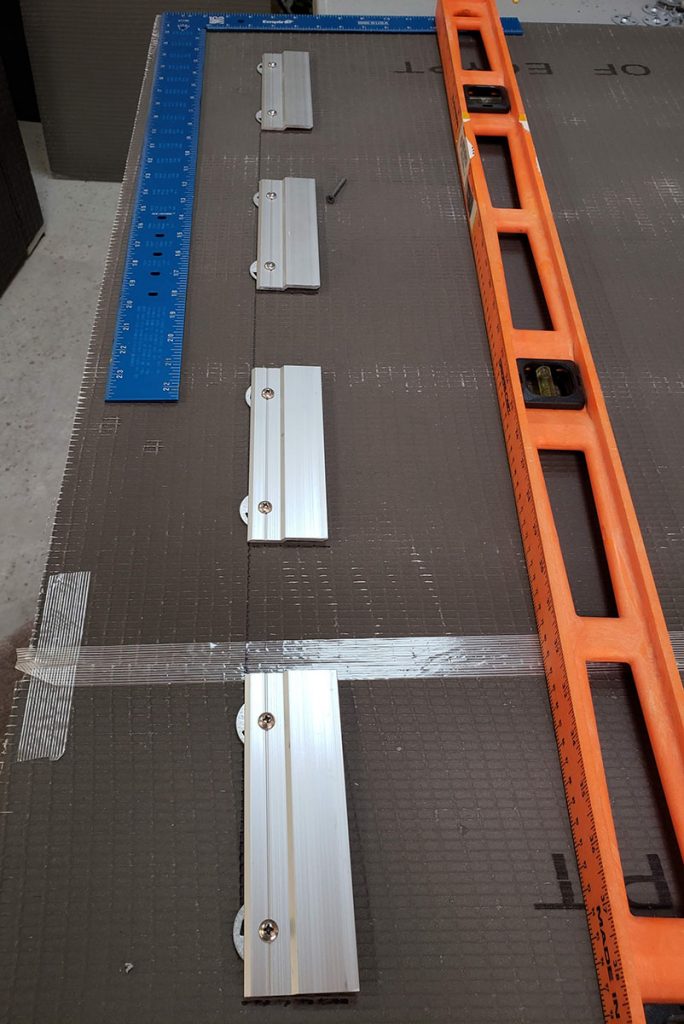
Note that the french-cleat brackets are screwed to foam-core tile backer board using the collared inserts recommended by the manufacturer for securing fasteners to the board.
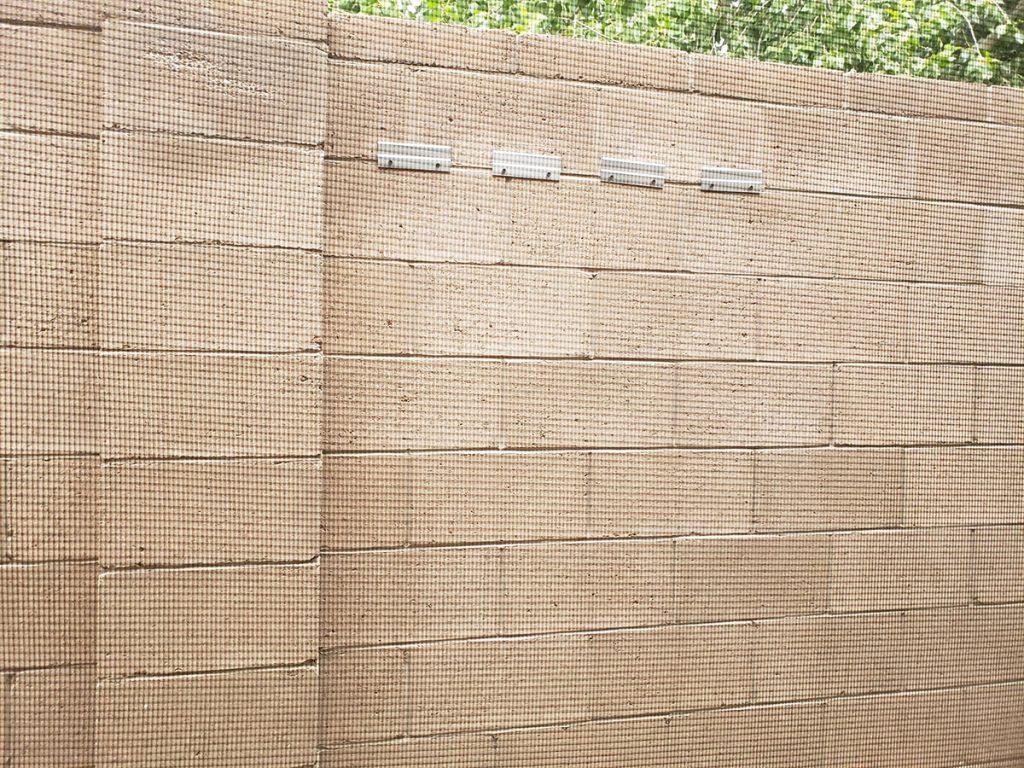
Note that the mounting brackets are only part of the hanging system for this mosaic. Before the mosaic was lifted onto the mounting brackets, the back of the tile backer board was covered with construction adhesive.
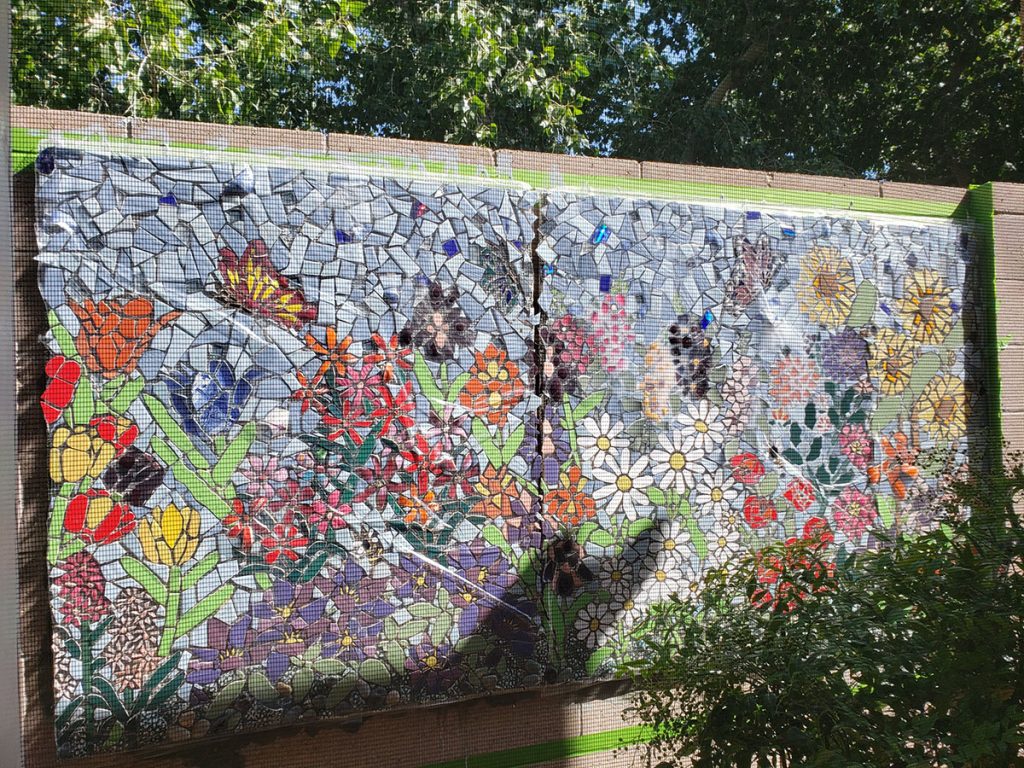
The mosaic mural was hung on the wall before the grouting process.

Leave a Reply