Mosaic Mounting Tape sticks well-enough to whole uncut tile as small as 12mm to allow the sheet to be lifted and dangled and handled without tiles falling off.
This is also true of whole uncut tile as small as 8mm, although the sheet can’t be handled as casually.
But what about using Mosaic Mounting Tape for small-cut pieces of tile or glass of variable thickness such as stained glass?
Mounting Tape and Tiny Pieces
In these situations, you can still use Mosaic Mounting Tape to lift a mosaic off a temporary surface, but you have to do it by sandwiching everything between small project boards and flipping everything over.
This leaves the mosaic face down on the Mounting Tape, sitting on the small board or tray you flipped it onto.
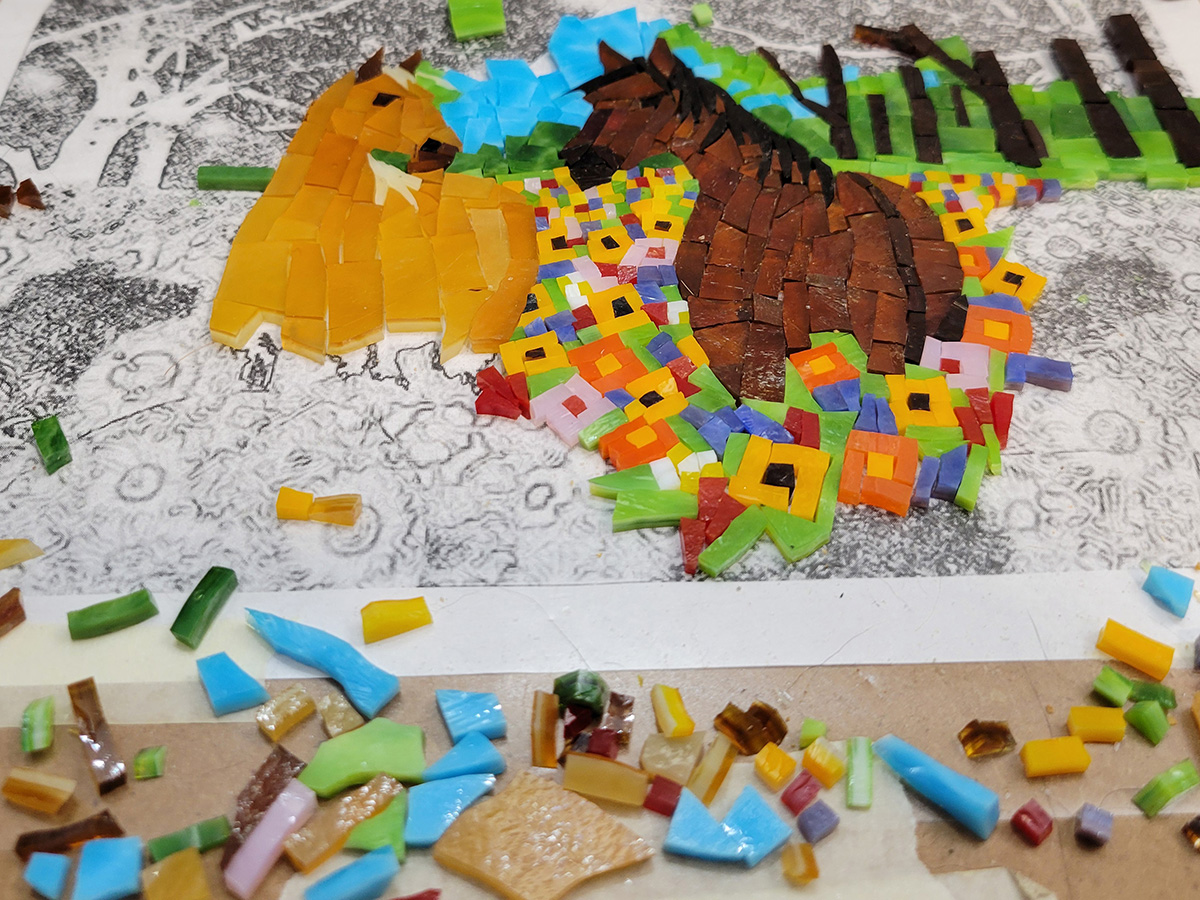
That is the method I have been using in my current series of mortar-stones covered in stained glass mosaic made from very small pieces, such as my Box Turtle and Blue Jay mosaics.
I keep the mosaic face down on the Mounting Tape and lower the adhesive-covered backer onto the back of the mosaic.
Partial Taping
Another IMPORTANT thing I have learned about using Mosaic Mounting Tape for small-piece compositions is that you can apply it in stages by zones over time as you lay out the mosaic.
This is very important because when small pieces don’t stick as consistently as desired on Mosaic Mounting Tape, you better believe that contact paper used as a temporary surface is going to have trouble holding onto them.
With one accidental brush of a finger, you can disturb an area that took hours and hours to lay out.
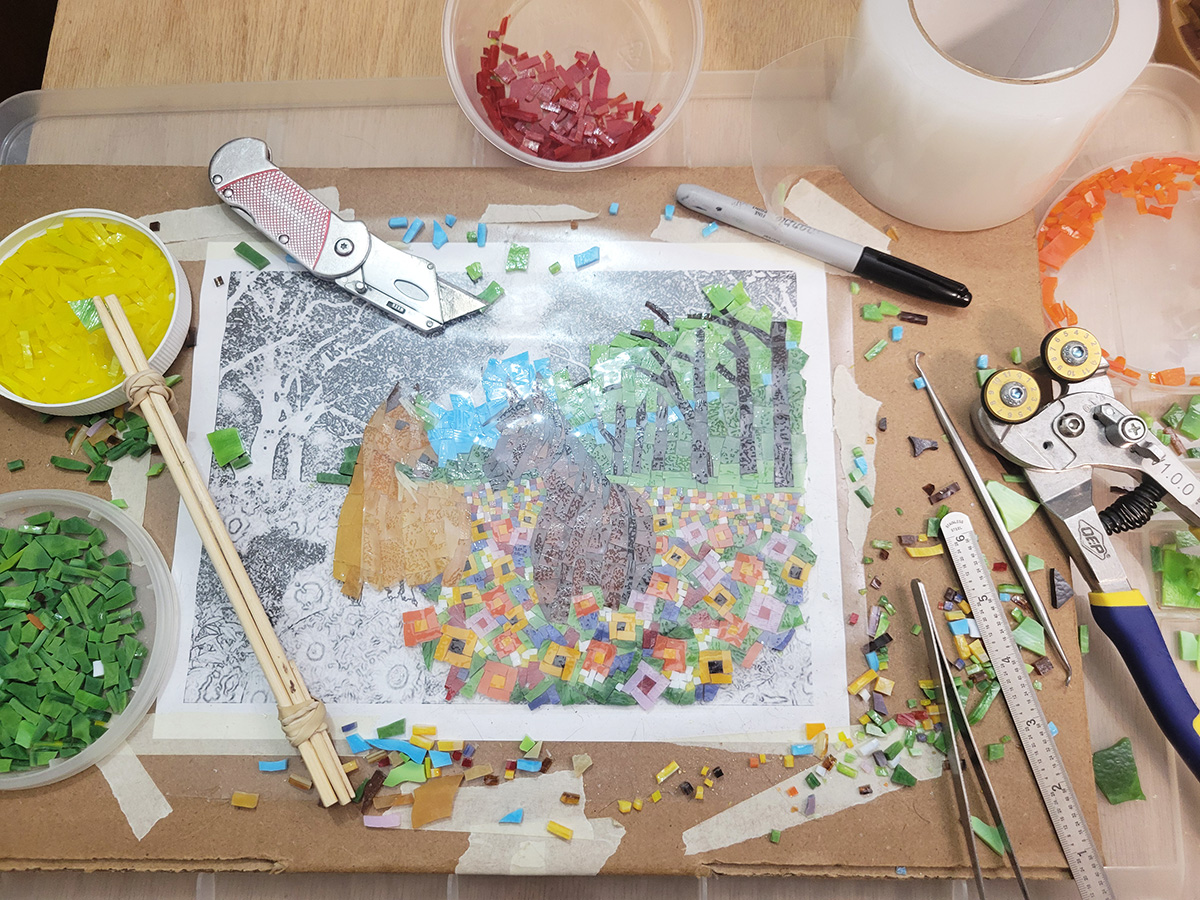
Instead of risking that, you can apply smaller pieces of tape to the completed areas and carefully trim away any excess with a box cutter such as shown in the photo below.
Scheme Before Taping
The big caveat about using partial taping is to make sure you have worked out the design well enough to know that you won’t need to change anything in the zone being taped early in the process.
The most-effective way to be sure you won’t need changes is to make sure nothing is taped until EVERY element in the composition has been rendered a little bit.
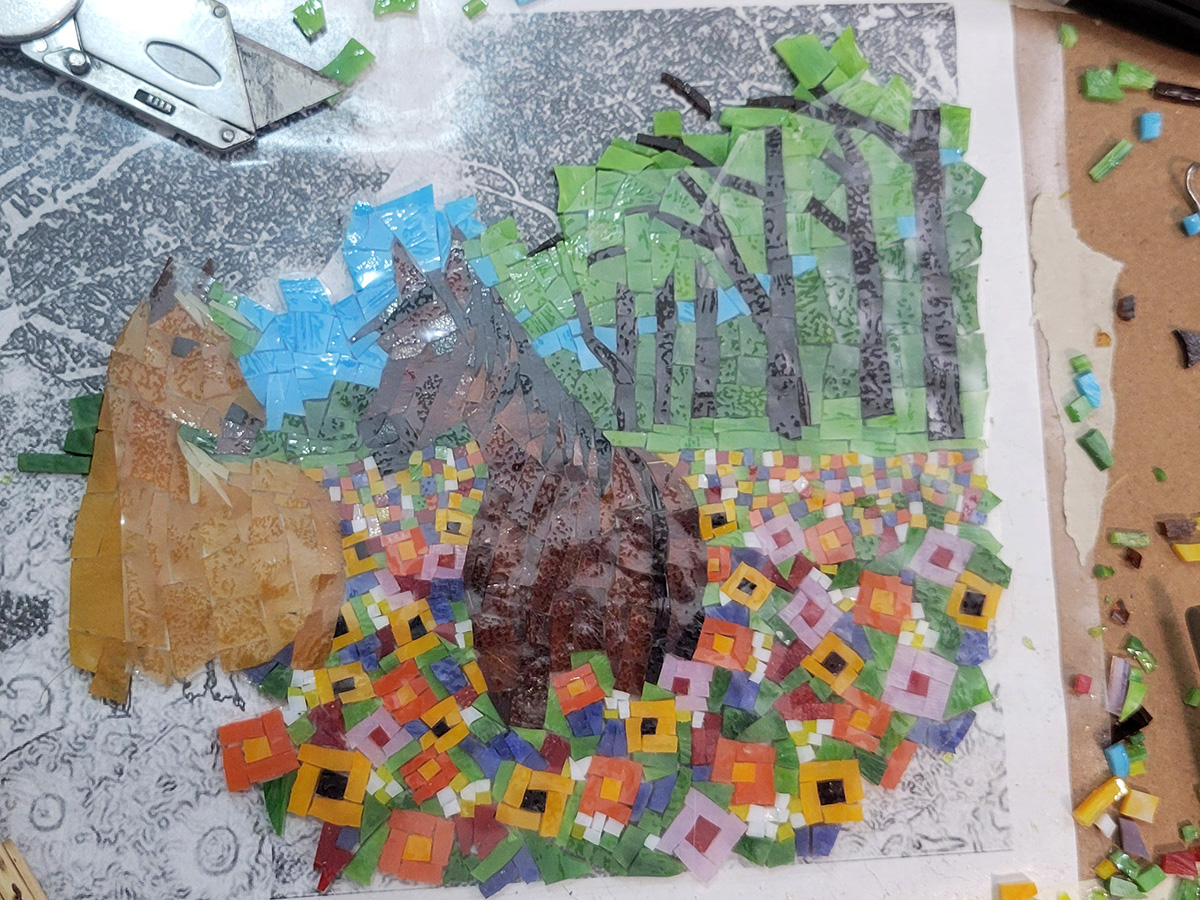
For example, if you haven’t rendered any tree foliage yet, how can you be sure that rendering them won’t cause you to rethink how you rendered the grass? What if the grass needs to be changed in pattern or color to make it distinct from the trees?
Make sure you have a color scheme and an andamento scheme for all elements before taping anything.
If you have a color and patterning scheme for every element rendered a little bit and feel tempted to tape an area prematurely, ask yourself this question:
Do the elements contact each other in new ways in other parts of the mosaic?
For example, if the horizon touches the sea in another part of the mosaic, I wouldn’t tape any part of the mosaic before I rendered a portion of the line of contact between sea and sky.
Know how each element contacts all others before taping anything.
Pro Tip
The easiest way to make lifelike images is to not stylize elements to miniaturize the image like I do but to work at a larger size and follow the pattern and model closely in terms of highlight, shadow, and hue.
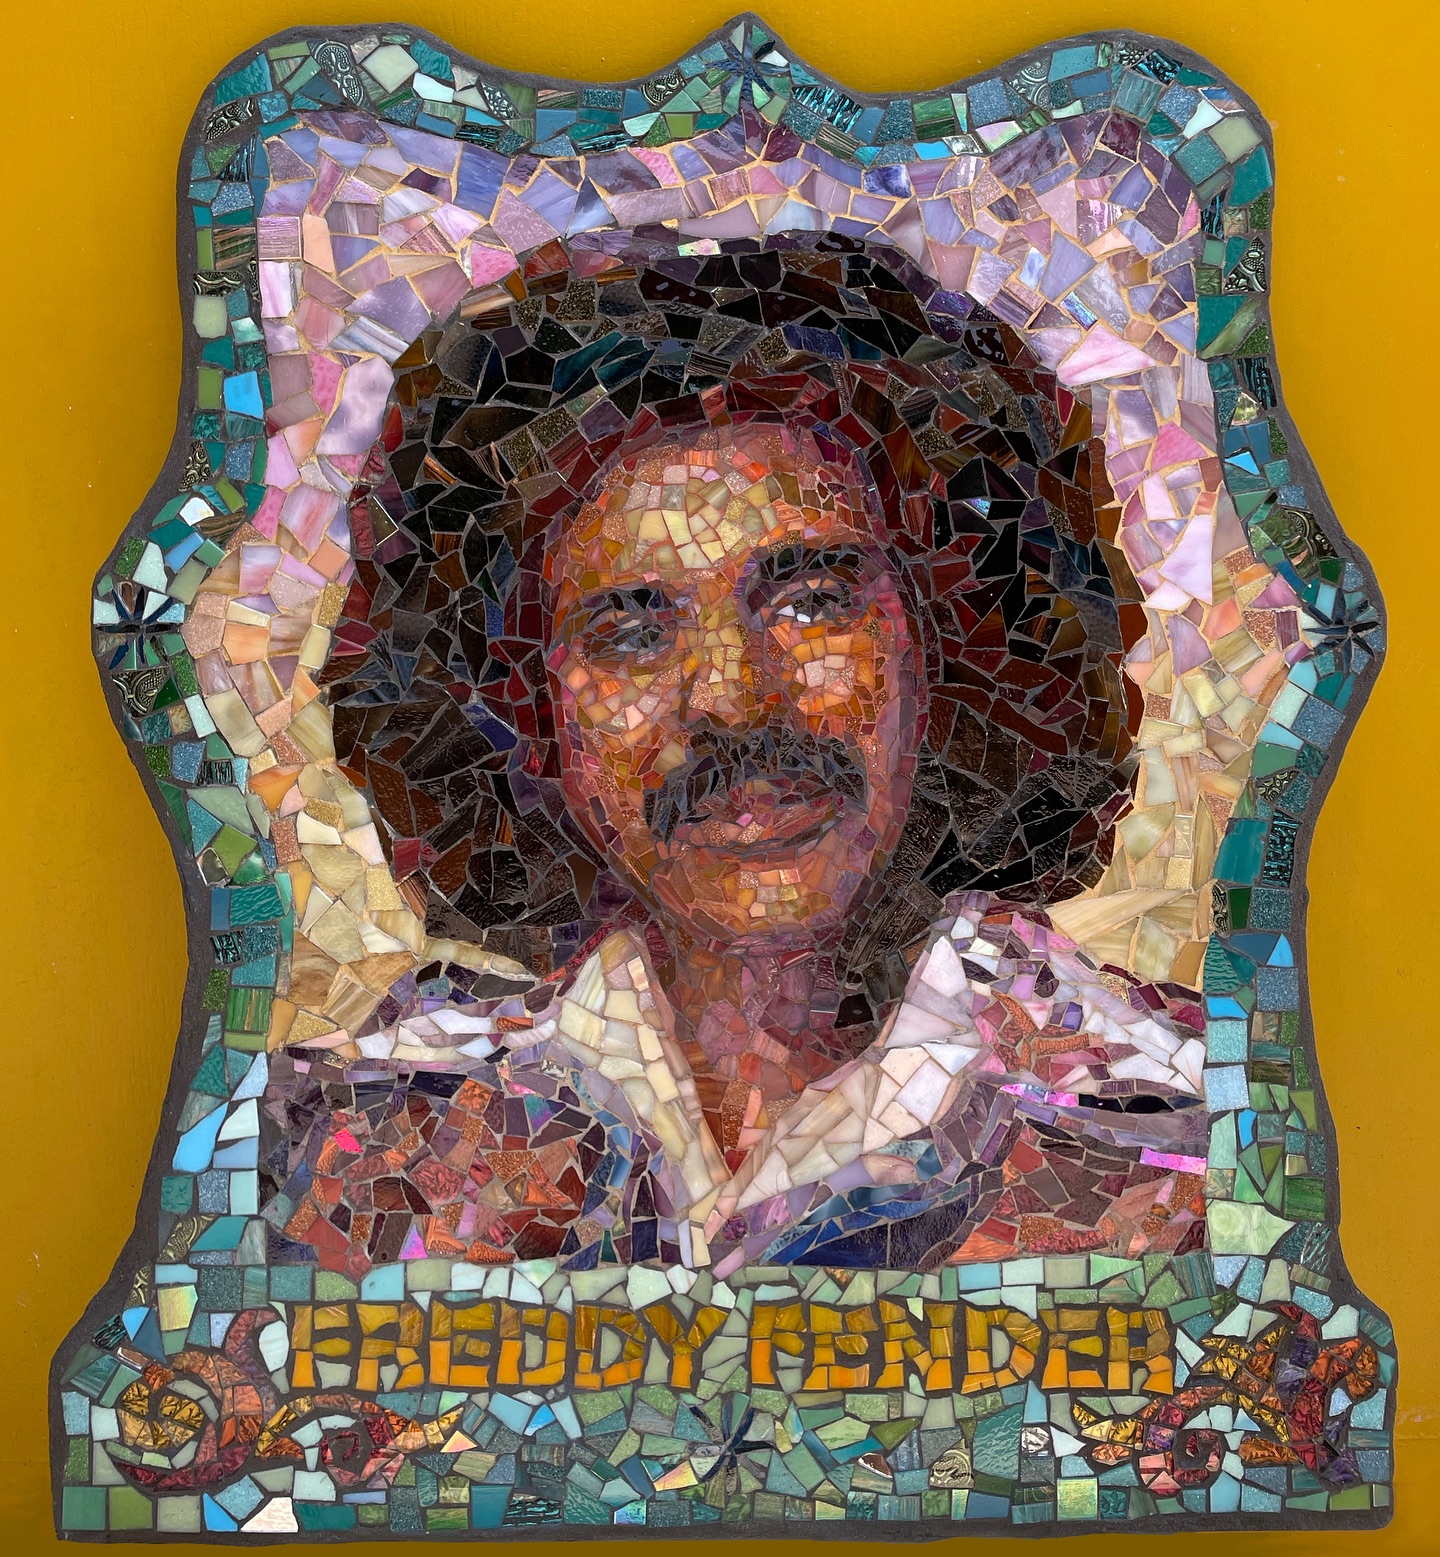
Carmen Rangel’s Freddy Fender Mosaic is an excellent example of what incredible likeness and color excitement are possible when using a larger canvas.
TIP: If you are a novice teaching yourself painting or mosaic by looking at examples, always consider the size of what you are looking at.
Carmen Rangel’s mosaic uses smaller pieces of glass and creates the image through impressionistic genius on a large canvas.
Problematic Method
With a large canvas like that, it is also possible to use pieces large enough to contain swirled/mottled hues and tints.
In that situation, one piece of the glass with the right sort of patterning can represent a patch of a figure complete with subtle shade and highlight.
Stained glass artists describe working in this way, “letting the glass do the work.”
I dislike that method because the artists spends too much time and material looking for the right pattern, especially when it is taken to the extreme.
If you work with small pieces like Carmen uses for her impressionistic genius work or small pieces for something like my stylized micro mosaics, you avoid that hassle and spend more of your time rendering.
Also, more of your glass is usable.
I think the “let the glass do the work” mode of rendering is a little dated because it comes from a time when people made mosaics in glass shops or glass factories with a lot of patterned material to choose from lying around.
In the home studio, that method is the hard way not the easy way.
Leave a Reply