Designs are said to be elegant when they “don’t try to push things uphill” but instead go with the natural flow of materials and forces.
Consider the Roman arch versus a rectangular doorway with a flat lintel on the top. The flat lintel could be constructed from a superior material than that used in the arch, but the arch is likely to be in place centuries or even millennia after the lintel has cracked and fallen.
The arch is intrinsically stronger because all its members are in compression. It’s simply a more elegant design.

A similar concept applies to making art: There are methods that are artificially labor-intensive and problematic, and there are methods that make use of how materials tend to behave on their own.
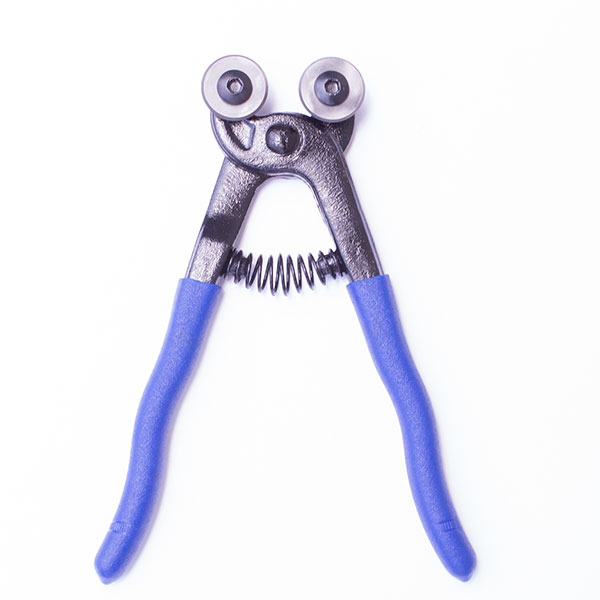
This is particularly true when cutting molded glass tile with a special pair of pliers known as a Wheel-Blade Mosaic Glass Cutter or Glass Nipper.
Molded Glass Tile
Cutting molded glass tile isn’t like cutting paper or plastic. The tile isn’t homogenous like these other materials because the glass is melted and cooled to a solid in a mold, (and glass needs a careful heat reduction/cooling curve to avoid the creation of residual thermal stresses inside the glass).
What I mean by that is the structure of the glass isn’t the same at the corners, and I think it is because the glass cools first at the corners and then inward from the edges to the center.
There are also embossing patterns to consider. They can cause cuts to curve instead of having a straight-line break.
For these reasons, you have to be aware of what cuts are practical and make sure you don’t design a detail that requires you to make a cut that takes a lot of trial and error and still doesn’t look right.
Corner-to-Corner
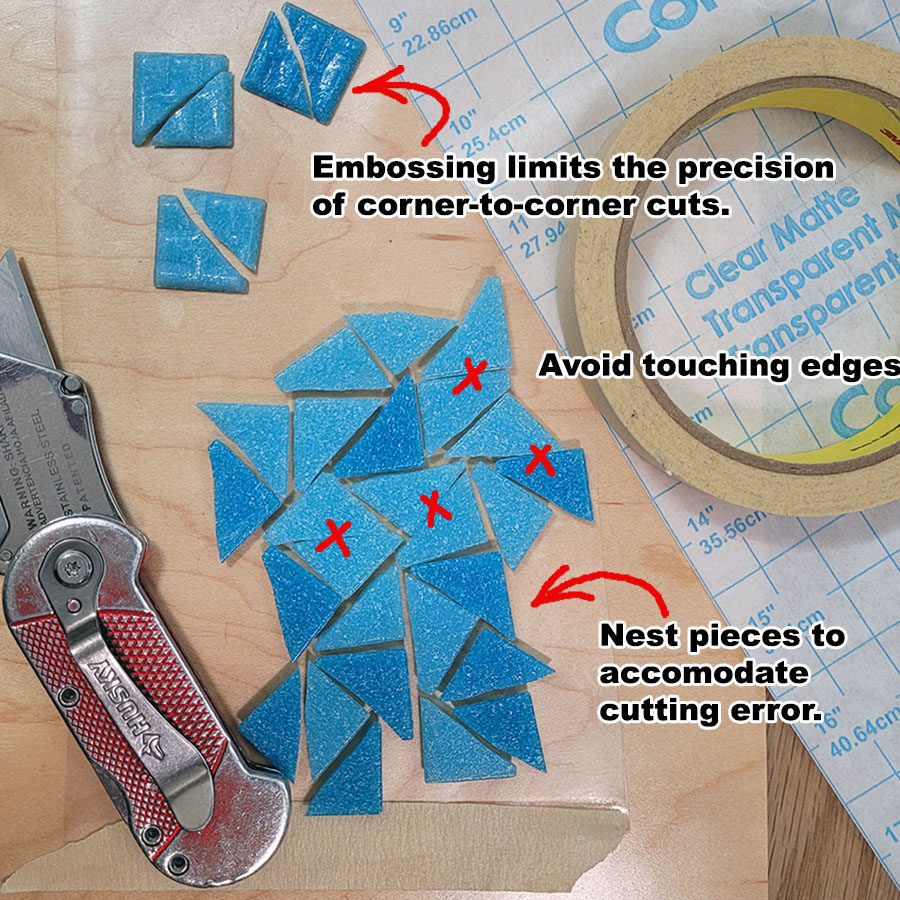
The embossing patterns on the bottoms of vitreous glass tiles limits the precision of corner-to-corner cuts made to produce triangular halves.
The tic-tac-toe pattern used for some colors is perhaps the most difficult pattern of embossing to cut into diagonal halves. Most Morjo Vitreous colors have an easier pattern of embossing on their bottoms.
Cutting toward a corner of a vitreous glass tile tends to result in curved or problematic depending on the pattern of embossing on the bottom the tile.
The Ease of Recycled Glass
The 8mm and 12mm Recycled Glass Tiles can be cut corner-to-corner into diagonal halves more reliably.
They are made from an enamel glass that is low-temperature fired from sintered glass, and so they are more homogeneous in composition than vitreous glass tiles and probably have less residual stress from the cooling process.
The also have minimal embossing compared to vitreous glass tile.
The reason we don’t carry any special tiny tiles for micromosaic is because it is too dang easy to cut 8mm into quarters to produce 4mm cuboid tesserae. The 12mm cuts up easily too. You can easily cut pieces smaller than you can easily handle and position.
Triangular Halves
When cutting glass mosaic tiles diagonally from corner to corner to produce two triangular halves, a certain amount of error has to be tolerated because few if any cuts will be perfectly centered and straight.
Most of the “triangular” halves will be more like exaggerated “half keystone” cuts with one vertex of the triangle actually being a short flat edge instead of a point.
Nest these pieces in a way that accommodates their mutual errors.
Don’t Trim Tile
Attempting to trim small slivers from the side of a tile usually results in jagged or curved edges. Instead of trimming a piece to size, cut 4 or 5 pieces and choose the piece that most closely matches the desired size and shape.
Build rounded or circular elements from smaller pieces in a true mosaic technique. Trimming a square tile into a circular element produces awkward-looking results.
Harness Natural Variation
Consider a mosaic made from curving rows of rectangular tesserae.
If you use rectangles that are perfect halves of square tile, you will end up scrapping a lot of material because most cuts won’t be perfect.
Worse than that, your mosaic won’t have as much visual interest had you made use of less uniform rectangles.
Harness the beauty of imperfection and error.
TIP: The eye is drawn to detail, and there isn’t any detail in perfect uniformity. Make use of slight variations in size and shape to increase visual interest in mosaic images.
Avoid Concave
Some error is not as beautiful. Concave edges and hourglass-shaped pieces can make odd distracting places in the grout line if they aren’t nested. Avoid putting these pieces next to a straight edge. Cut these pieces in half to eliminate the concave edge.
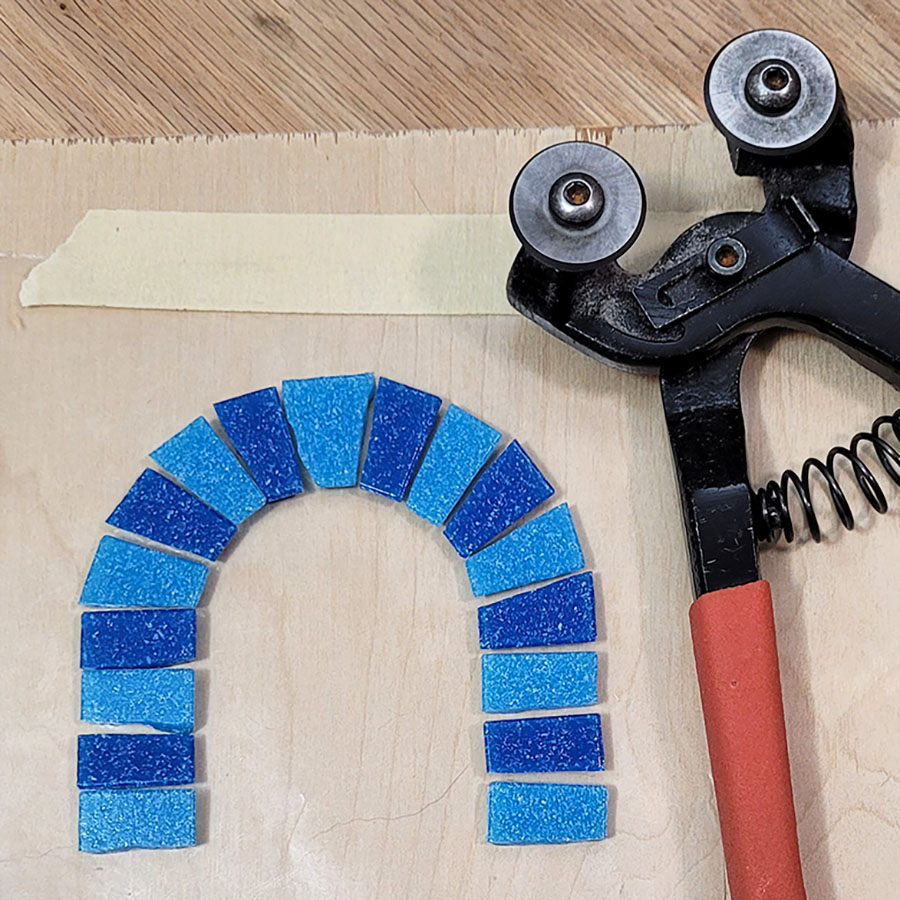
Keystone Arcs
A curving row of tile will have wider gaps at the outside of the arc unless you “keystone” the tiles to make them wider at the outside like the stones used in Roman arch.
Basic Design Aids
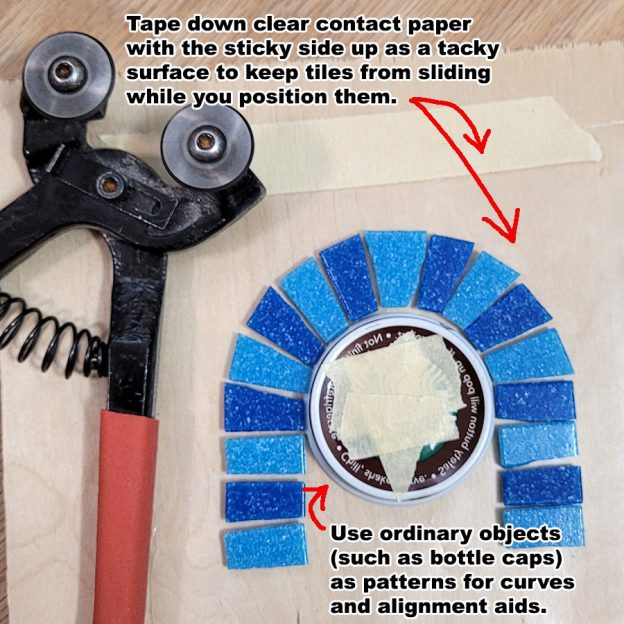
You can tape clear contact paper with the sticky side up to keep tiles from sliding around as you position them. (Later you can pick up the whole mosaic using a sheet of clear mosaic mounting tape or mounting paper.)
You can put a pattern under the contact paper and lay your tile out for the whole pattern without it sliding around.

You can use ordinary objects such as round bowls and lids as positioning tools for curves. More complex edges and curves can be laid out using a combination of a straight edge (ruler) and multiple circular objects of different diameters.
Leave a Reply