How To Transfer Mosaic Patterns Quickly By Tracing
This article explains how to use a charcoal pencil (or graphite pencil) to color the back side of a paper pattern and then trace over the pattern firmly to transfer it to a plywood mosaic backer board.
I have written a separate article explaining why tracing borrowed images is better than drawing for making patterns for small mosaics -even when the purpose is to create original artwork.
If your backer is much larger than your pattern, you can enlarge the pattern by transferring it to the backer using the grid method of pattern transfer instead of the method I explain here.
Example Using 6×6 Inch Backer
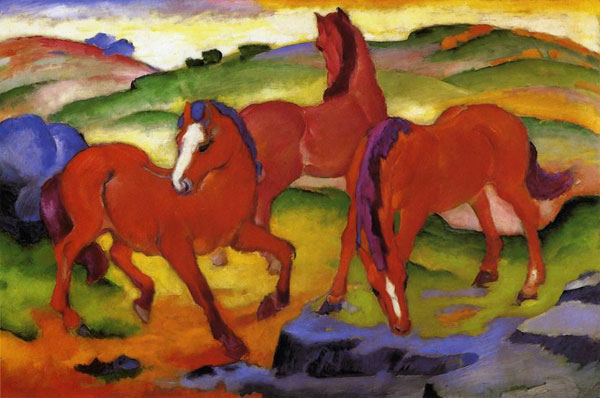
In this example, I use the 6×6-Inch Plywood Mosaic Backer Board we sell at our online store and a detail cropped from Franz Marc’s fauvist painting “The Large Red Horses.”
Large Red Horses fauvist painting by Franz Marc includes a prancing horse that is rich with curves that suggest motion.
Step 1. Find And Make Your Pattern
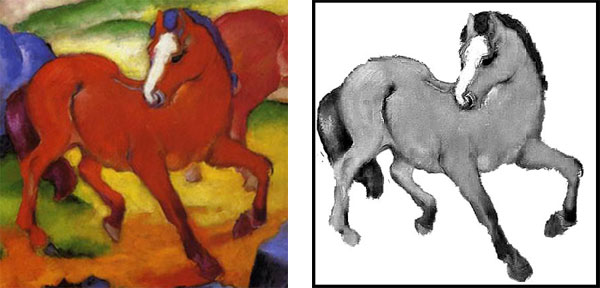
I used Photoshop to crop and size the image and convert it to a black and white, but you can also use photocopies from books and your own drawings as starting points. Read more about this process in my article How To Make Mosaic Patterns Without Drawing.
Note that the image was sized so that it was 6×6 inches and printed out on regular printer paper.
The Purpose Of The Pattern
For small mosaic icons and tabletops, you can work directly on the surface. Simply draw or transfer your pattern onto the backer. This pattern should look something like the black line drawing from a coloring book, just a map showing the outlines of different colored areas, possibly subdivided to show shading. (Shading and variation in these different color regions can be worked out when you start placing the tile, and so your pattern can be as simple as a cartoon outline.)
Photoshop was used to crop out a detail of the painting and convert it to a black and white image that emphasizes outlines. I also added a border to mark the 6-inch x 6-inch space to make it easy to line up the paper on the backer board. The outlines of the black and white image are what we will transfer to the wood mosaic backer.
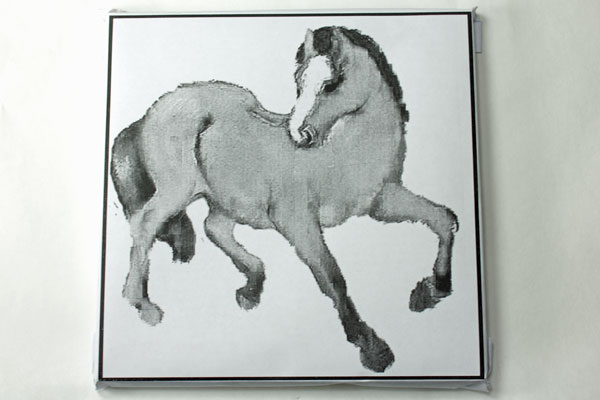
Step 2. Fold The Pattern Around The Backer Board
Fold the paper pattern around the backer board so that the image of your figure is centered on the board. Having a border drawn the same size as the backer board helps you line it up.
Fold your mosaic pattern around the backer board so that the image is centered. Note that my pattern should have centered the horse better in the square so that the tail isn’t so close to the edge. If the pattern transfers as shown, it will be difficult to render that part in tile, and i will need to make the tail slightly thinner so that I can put some background around it because tile can only be cut so thin.
Step 3. Unfold The Pattern And Remove Board
Unfold the mosaic pattern and remove the backer board. The folding was only done to get the paper creased at the edges of the pattern.
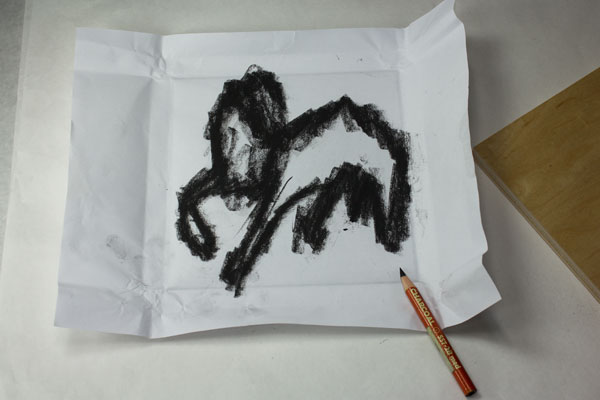
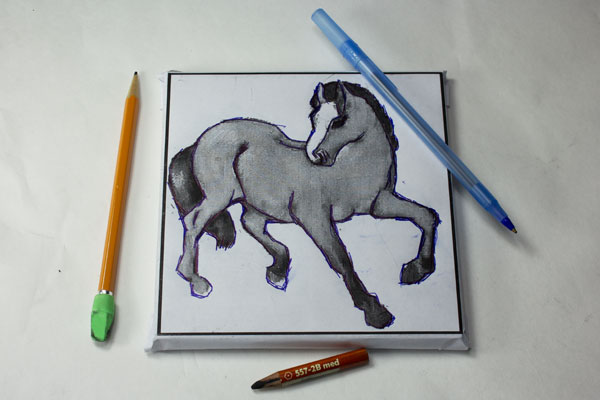
Step 4. Rub Outlines Of Pattern With Charcoal Or Pencil
Rub the outlines of the figure with a charcoal pencil (preferred) or a regular graphite pencil. Note that we are rubbing the BACK of the pattern not the front. Color every line that will need to be transferred.
*** FOR MOSAIC PATTERNS THAT SHOW EVERY TILE AND HAVE LOTS OF LINES, YOU MAY FIND IT EASIER TO USE CARBON PAPER INSTEAD OF RUBBING THE BACK OF THE PATTERN WITH CHARCOAL. ***
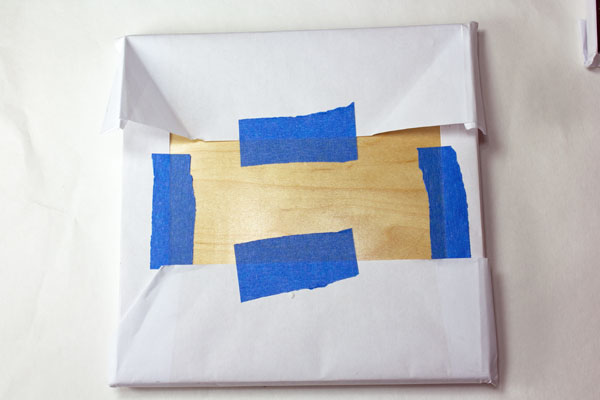
Step 5. Refold The Pattern Around The Board And Tape
Refold the mosaic pattern around the backer board and tape it in place, preferably with some easy to remove painter’s tape. The creases in the prefolded paper made it easy to line the pattern up without smearing the charcoal all over the wood. Note that the tape goes on the VARNISHED side of the wood. The charcoal pattern will be transferred to the UNVARNISHED side.
Step 6. Trace The Pattern Firmly
Trace the outlines of the figure firmly with a ballpoint pen or a pencil that is more dull than sharp. You want to press firmly so that the charcoal on the back of the paper pattern is transferred to the wood, but you don’t want to rip the paper. Avoid getting the paper humid or wet for this reason. Make sure you trace all the lines (curves) you would like to see on your backer.
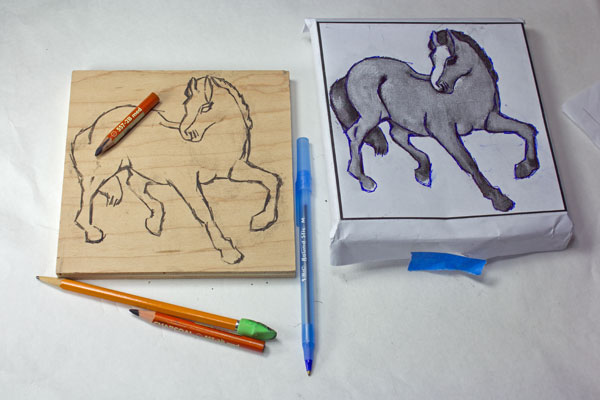
Step 7. Remove The Paper And Fill In Missing Lines
When you remove the paper pattern, you will notice small places where the lines (curves) of the design didn’t get transferred for whatever reason, usually because you forgot to trace there or sometimes because you didn’t put charcoal in those places. You can fix those by drawing the missing lines. It is easy to do even if you have little confidence in your ability to draw because the existing lines give you a frame of reference.
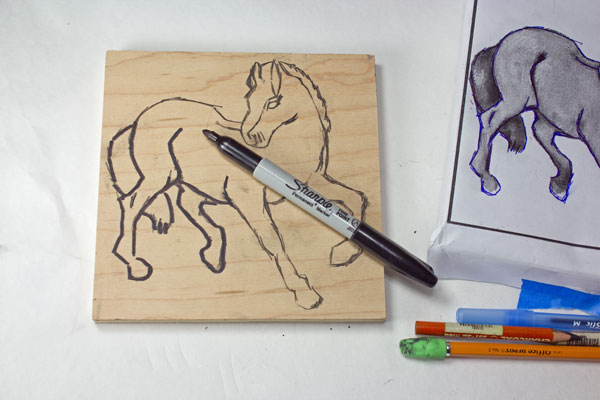
Step 8. Make The Lines Permanent With A Marker
Make the lines of your transferred patterns permanent using a fine-tip marker such as the Sharpie brand. If you don’t do this step, then your hands and glue will quickly rub off the pattern.
Ready For Indoor Use
The Mosaic pattern is transferred ready for tiling. This is a dry indoor mosaic, and so the tile can be attached with Weldbond Adhesive. For outdoor and wet mosaics. a concrete stepping stone or piece of flagstone could be used for a backer and the tiles mounted with thinset mortar.
Variations On This Method
There are a couple of parts of this method that could have been done through alternative means:
Instead of folding the paper pattern around the backer, it could have been cut to the size of the backer and taped on that way.
Instead for rubbing charcoal or graphite pencil on the back of the pattern, carbon tracing paper could have been used.
This article was extremely helpful! I am just starting out as a mosaic artist. I have taken a number of classes at Chicago Mosaic school. I love mosaics as an art form. Also, I am not formally trained as an artist. But, I have studied textiles and have created hand knit clothing extensively.
My question is, when preparing setting bed I find it difficult retrace/ recapture piece after covering image with thin set? Is it better to work in sections? Will this technique assist with re-creating the design as you set tesserae in mortar bed? Also is mesh more commonly used? I find that thinset is challenging, although I love working with smalti. Is thin-set the optimal choice as an adhesive for smalti? What do you suggest?
We don’t use lime putty for a reversal to lay up patterns. Instead, we lay the tile out on sticky contact paper taped over the pattern. Then we pick up the mosaic using mosaic mounting tape, or we improvise and use packing tape (which can be problematic to remove but is much cheaper). I wrote an article about this process: https://blog.mosaicartsupply.com/mounting-a-mosaic-on-clear-adhesive-film/
Working in sections is always best, but you have to make sure you get the sheets lined up during installation and avoid having a slightly larger gap between sheet, which is a common problem. You can work in sections even if your tile isn’t in a grid arrangement.
Thank you Joe for these tips and instructions. Similar to other commenters I am new to mosaics, but enjoy the process. I took my Husband who had dimentia to a course for help with his spacial awareness, and that’s where my interest started. Beryl


Leave a Reply