kingfisher-mosaic-finished-1200

Kingfisher Mosaic: Improvising over a Pattern

I made a video that shows how to translate an image into mosaic by improvising loosely over a pattern.

The pattern I used for this demonstration was the pattern I created quickly using Photoshop for a friend.

The Video

The Captions

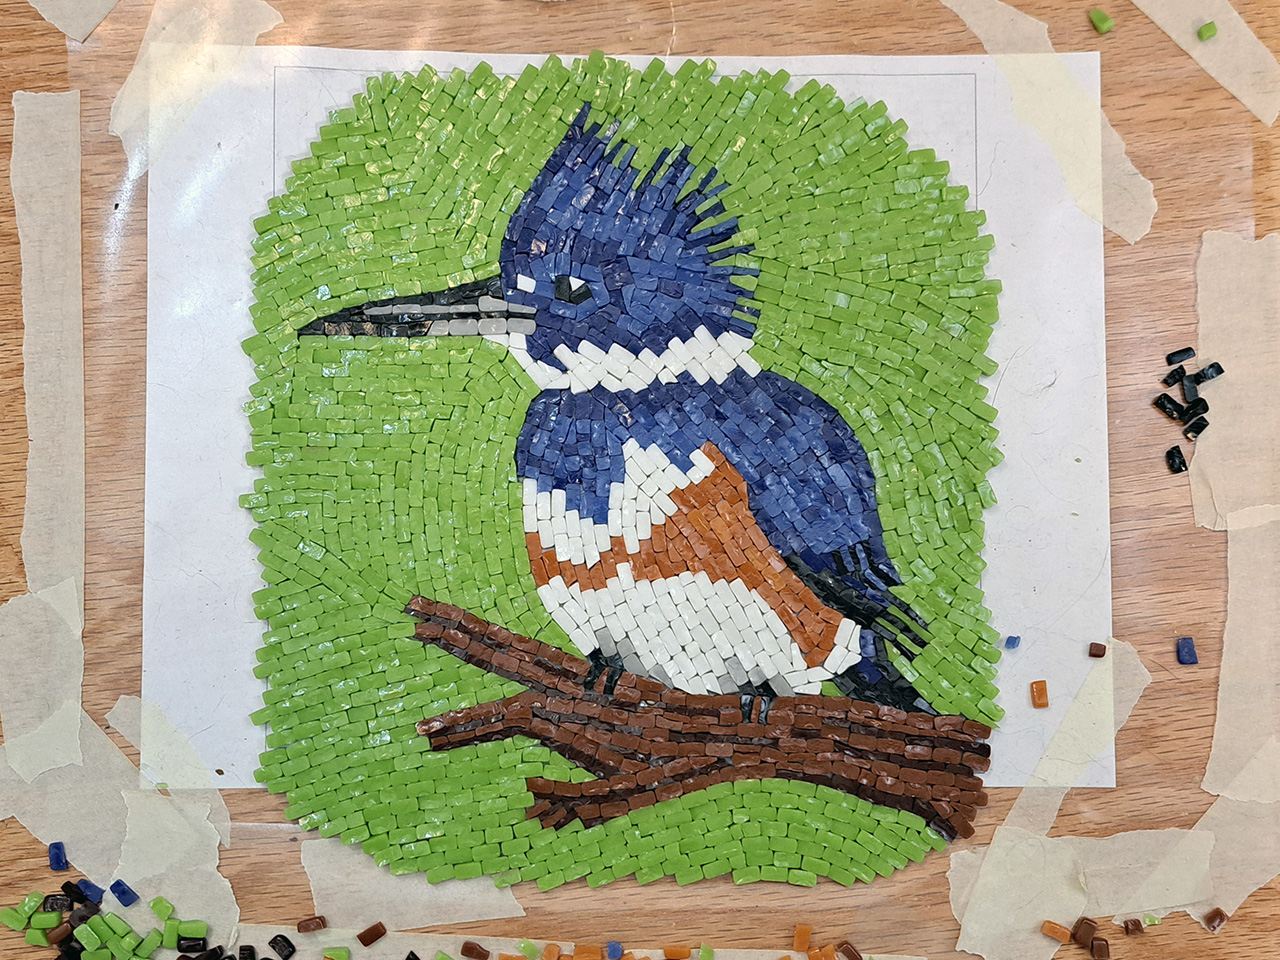
I am improvising over the pattern instead of following it closely:

kingfisher-mosaic-in progress-comparison-v3 copy
image: kingfisher-mosaic-in progress-comparison-v3 copy

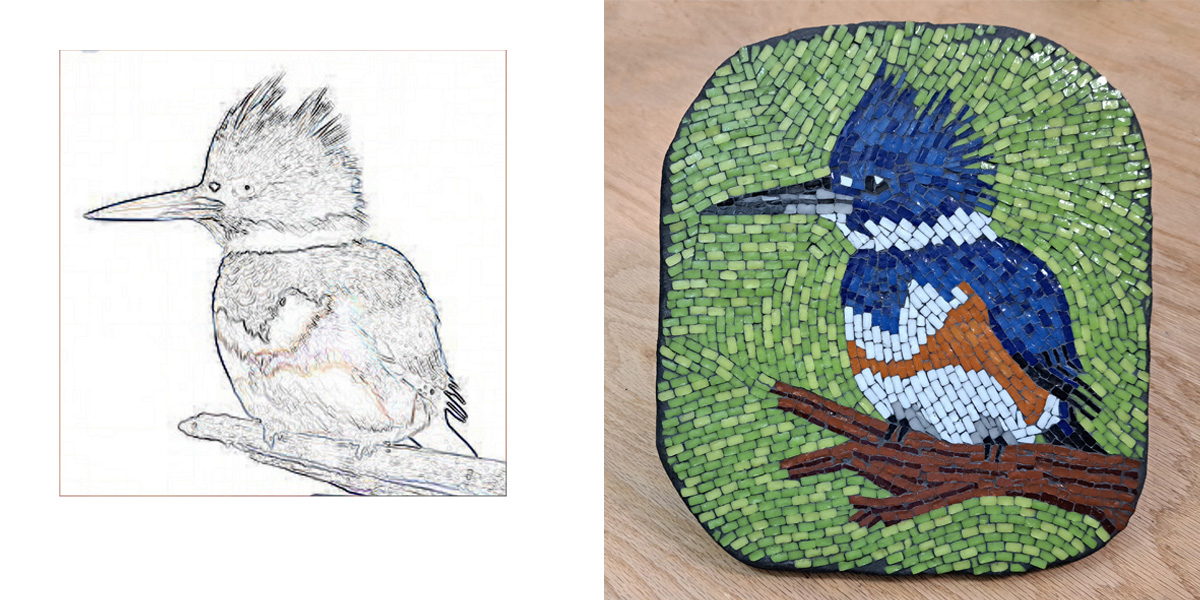
I’m not even following the colors of the illustration I used to generate the pattern:

kingfisher-mosaic-in progress-comparison-v4 copy
images: kingfisher-mosaic-in progress-comparison-v4 copy

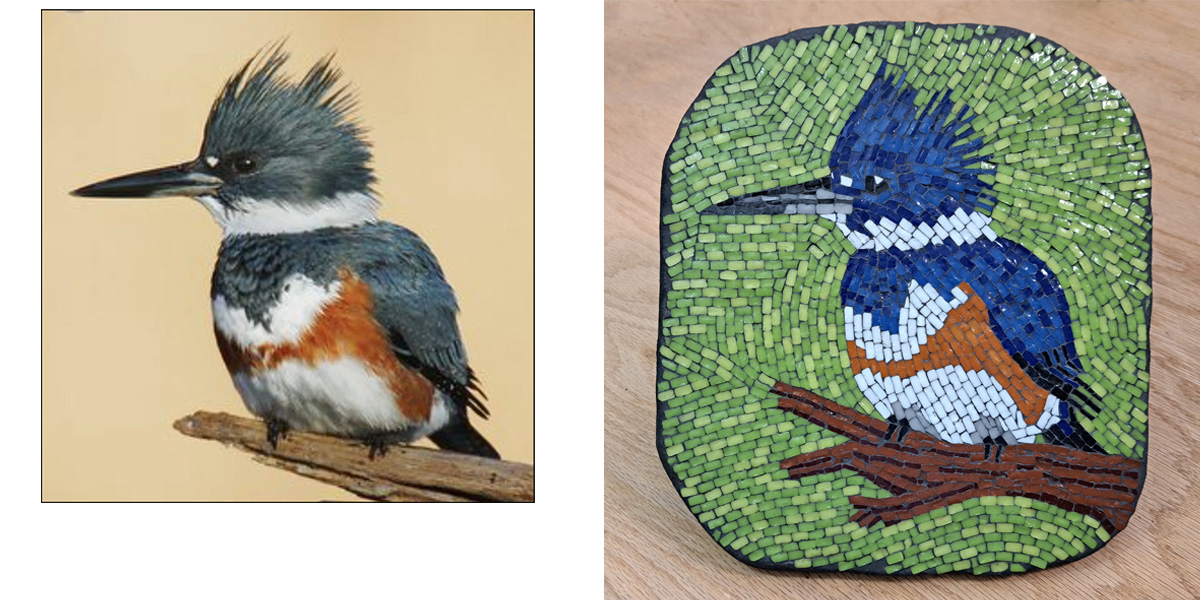
I am interpreting the photo in terms of the colors available in the tile color palette.

I also have to render with the shapes I can cut, and I have to think about the work lines (rows).

kingfisher-mosaic-in progress-comparison-v5 copy
image: kingfisher-mosaic-in progress-comparison-v5 copy

I am working on a temporary surface (sticky contact paper taped over the pattern).

The temporary surface allows me to easily make changes and try different variations.

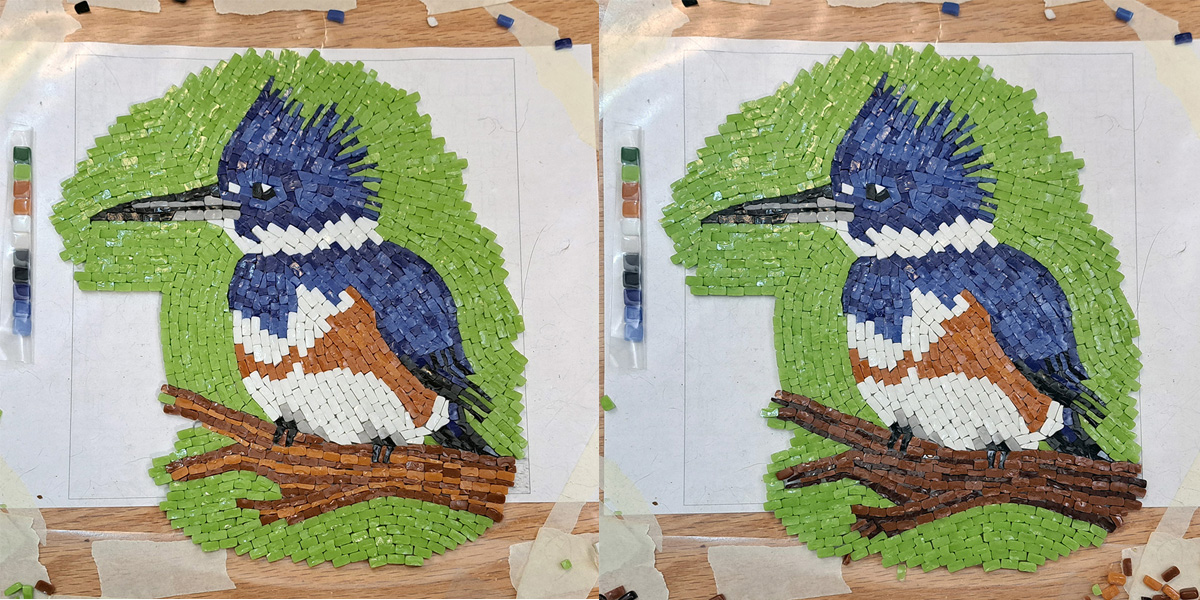
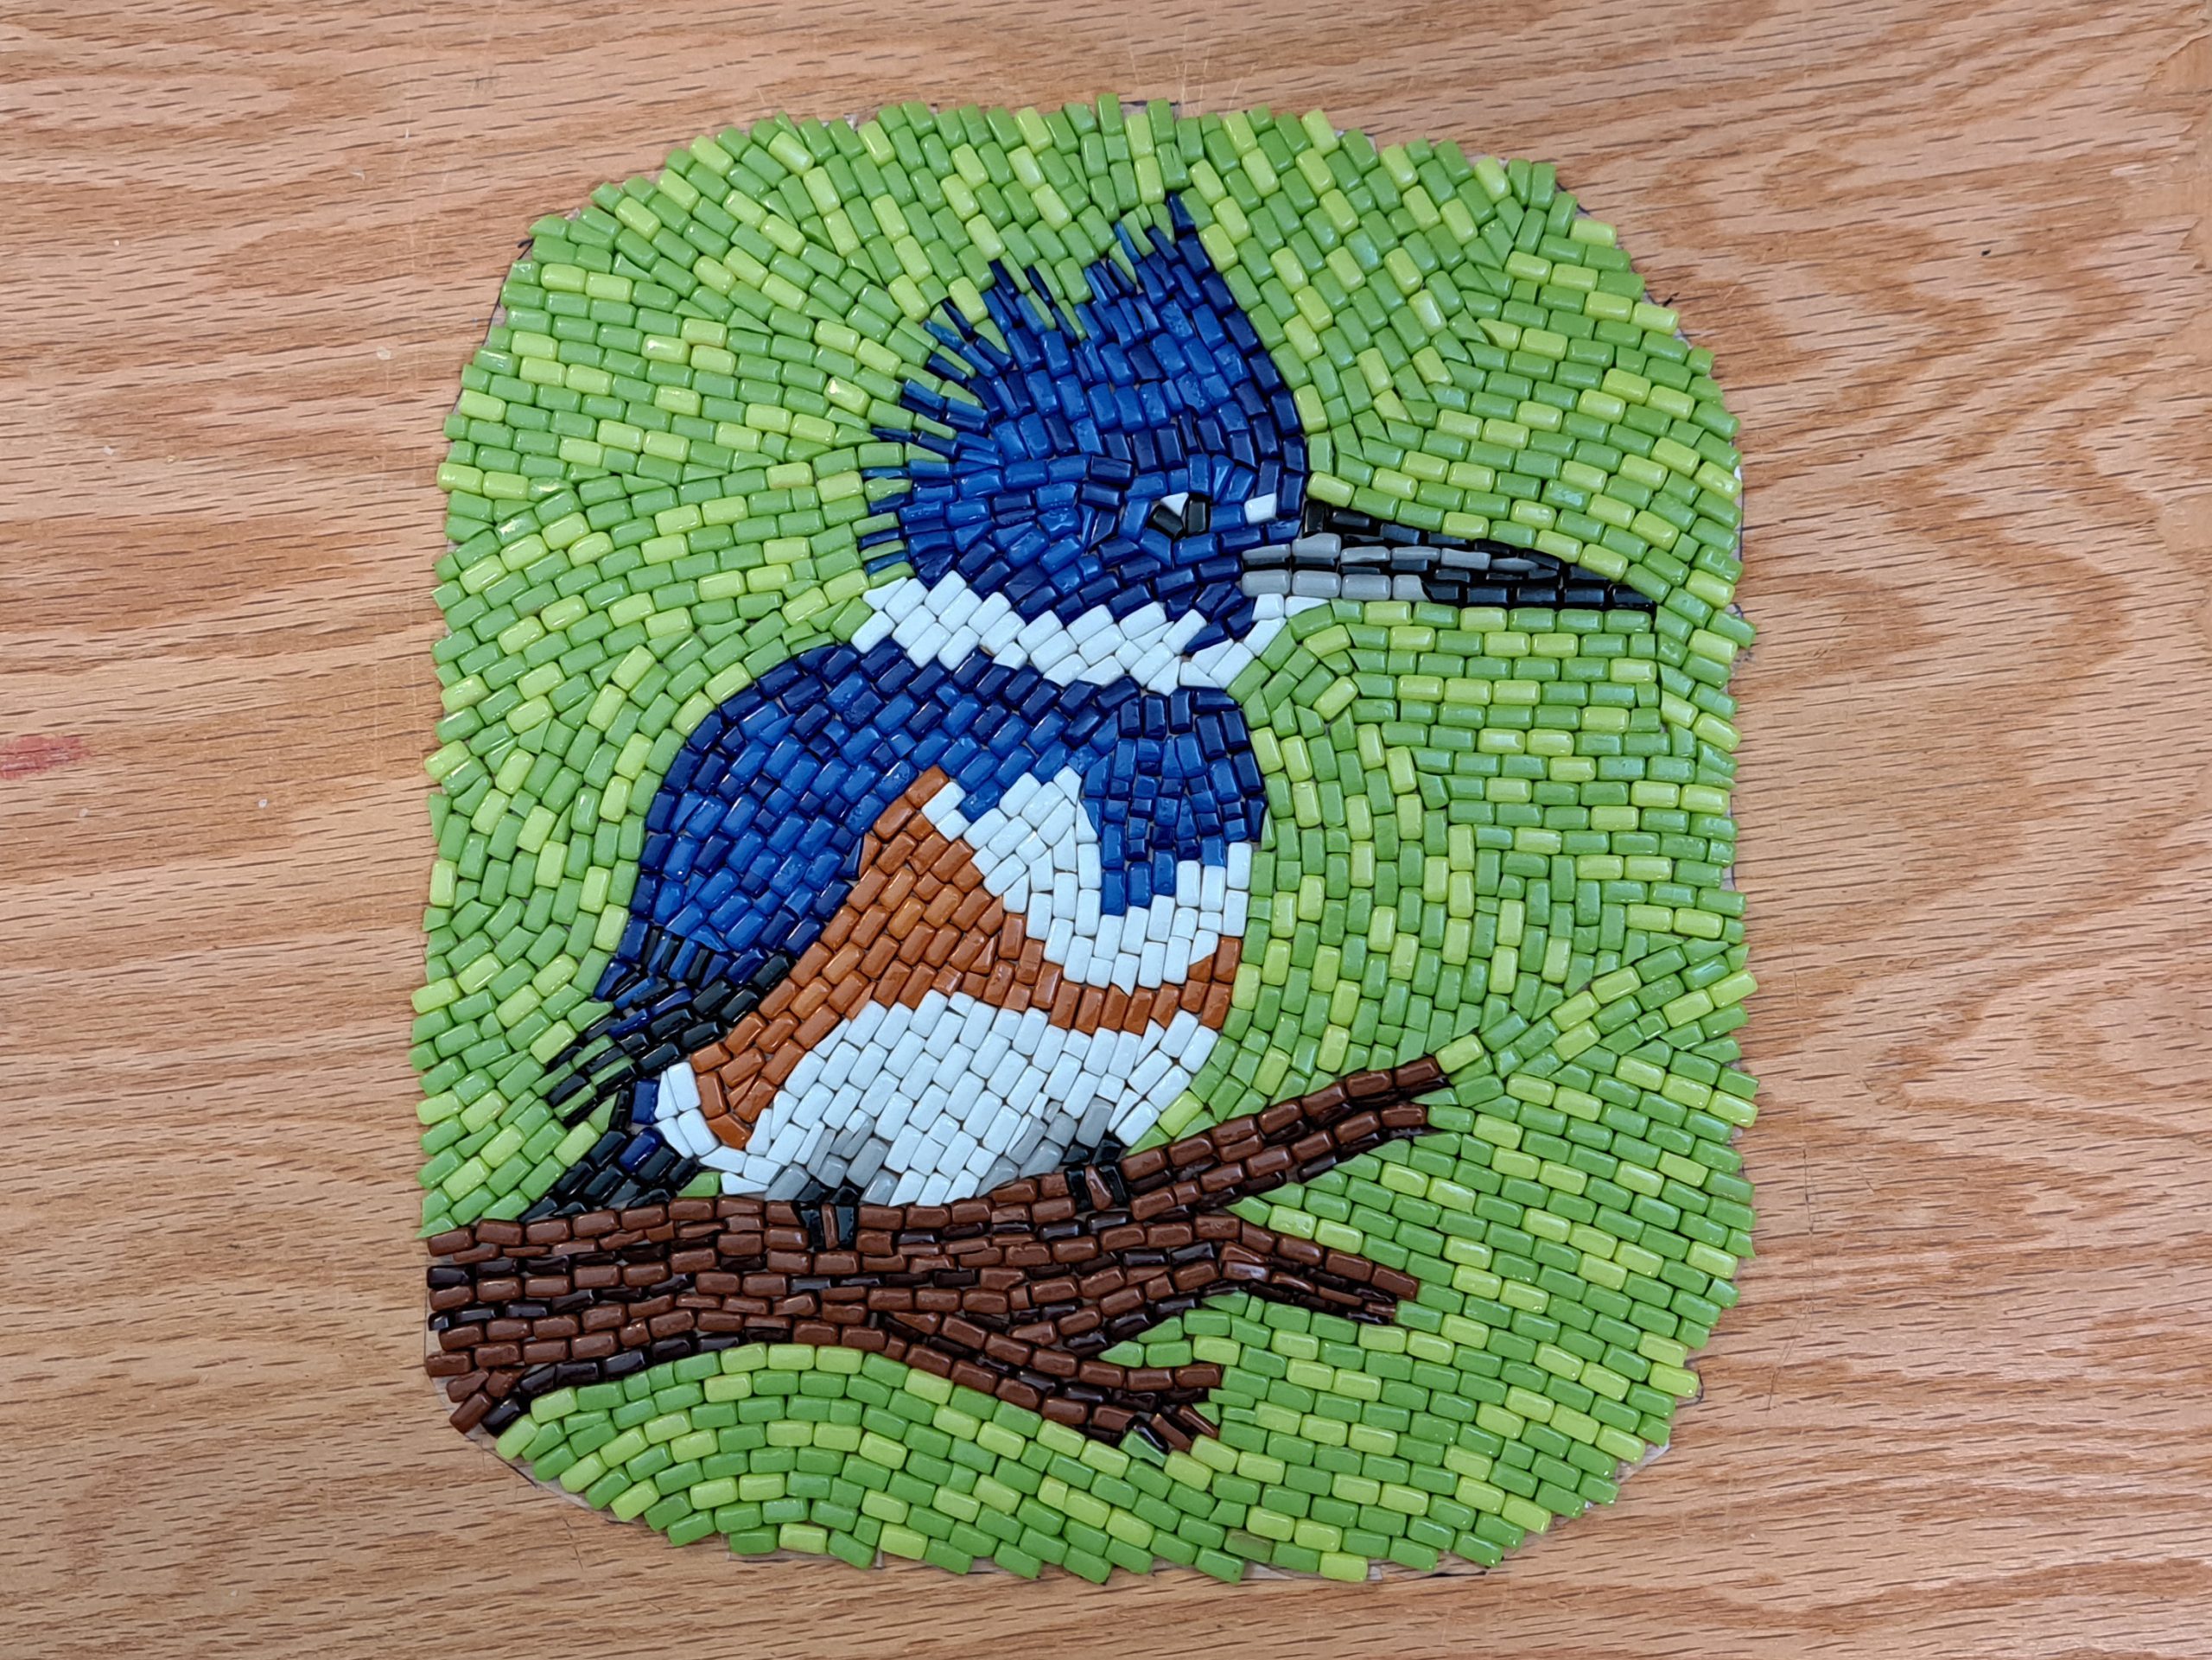
First full version with monochrome green background:

kingfisher-mosaic-in progress-46-060141
image: kingfisher-mosaic-in progress-46-060141

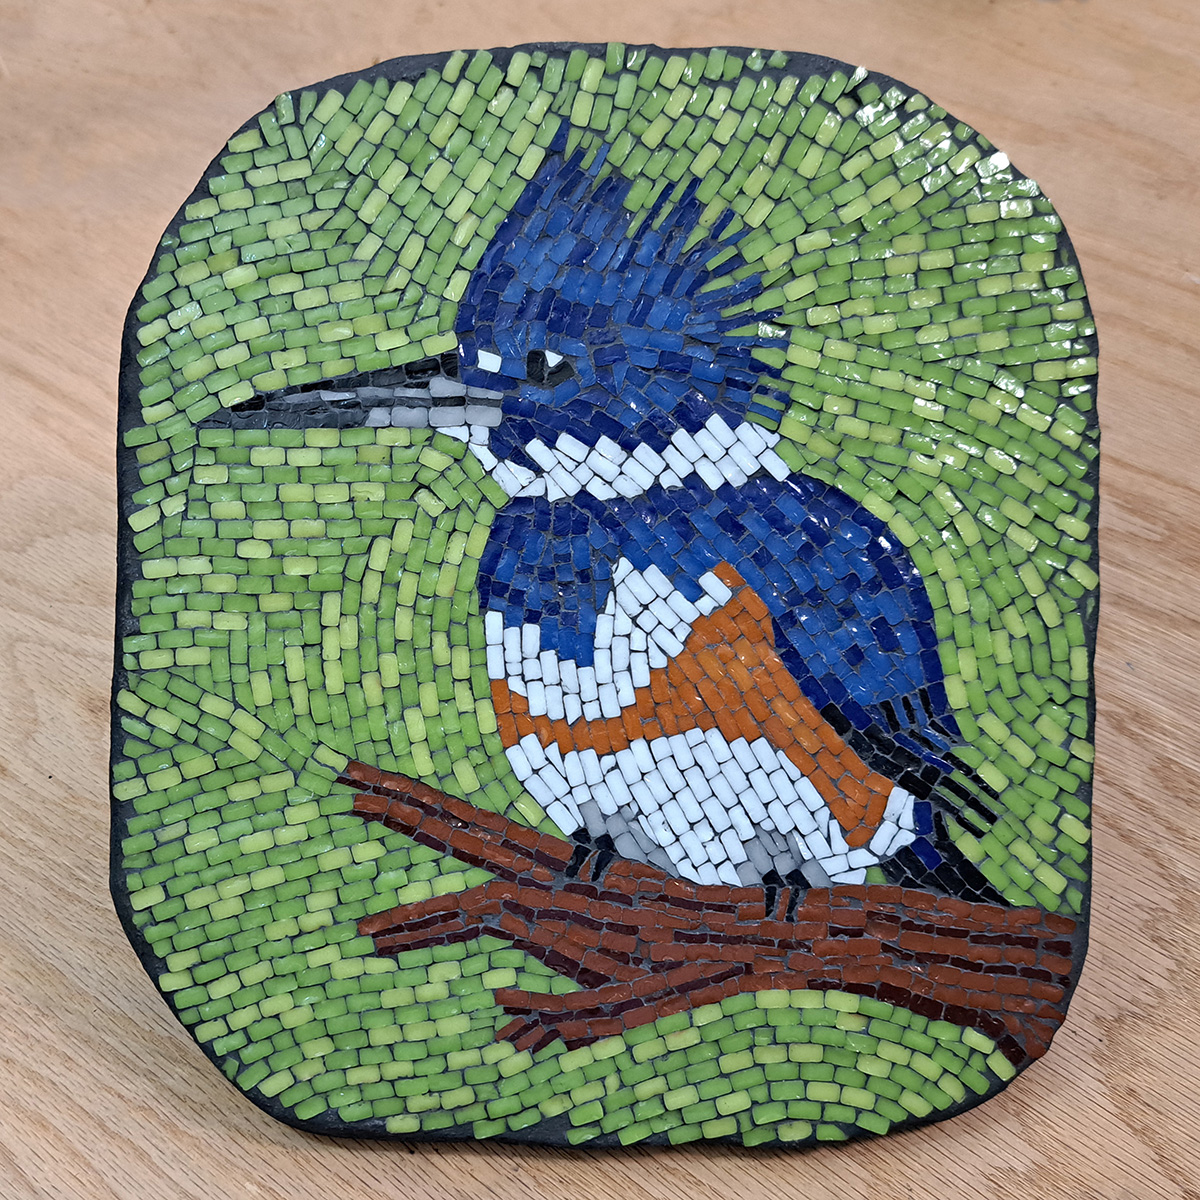
The background was made more interesting before the mosaic was mounted:

kingfisher-mosaic-in progress-comparison-v2 copy
image: kingfisher-mosaic-in progress-comparison-v2 copy

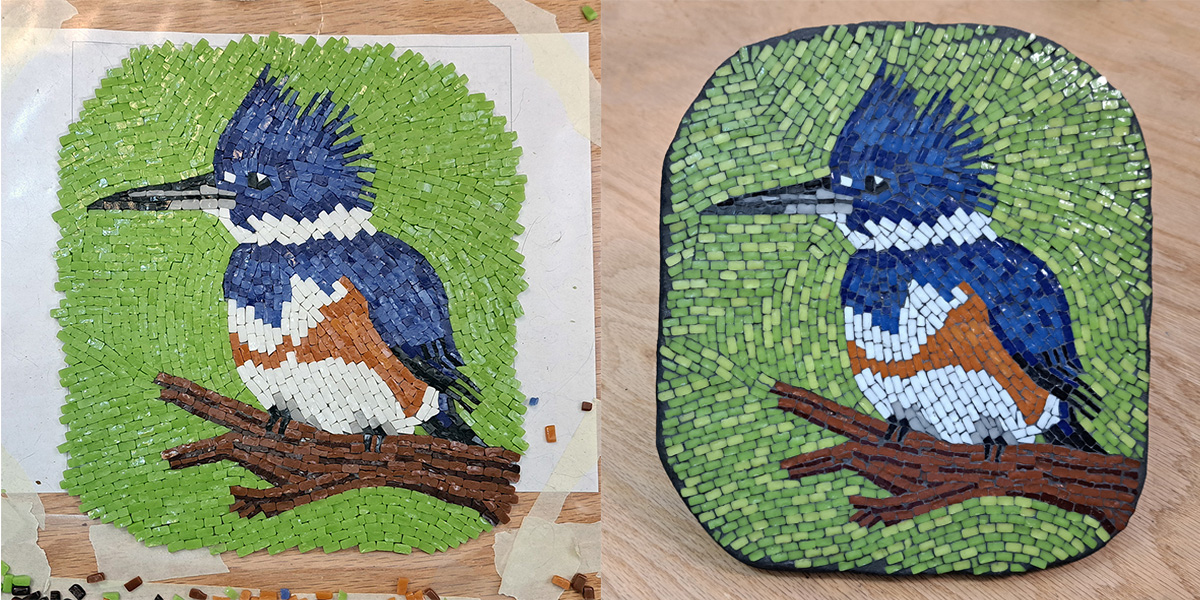
There were two things changed after the first full version was laid out.

The red-brown belt patterning on the bird’s breast was smoothed while the mosaic was still on the contact paper.

Before Mounting (face down on mosaic mounting tape):

kingfisher-mosaic-in progress-49-062605
image: kingfisher-mosaic-in progress-49-062605

The background was revised after the mosaic was already upside down on mosaic mounting tape.

A dental pick was used to pull select background tiles off the mounting tape.

Those tiles were quickly replaced with lighter chartreus tiles.

Laying out the background originally in monochrome allowed me to work out the andamento rapidly.

The addition of a second color to the background was necessary for visual interest and depth.


Posted

in

by

Comments

3 responses to “Kingfisher Mosaic: Improvising over a Pattern”

  1. Kathy G Avatar
    Kathy G

    Love this Joe – thanks for so much detail about your process, as usual.

  2. Leah D Avatar
    Leah D

    i am using large stained glass pieces I cut for the mosiac – and left over glass from other projects. It is irregular in size. Are you using purchased tiles that are consistent in size and shape? I fear my cutting my own pieces is a huge amount of time and effort…yet cheap. Any advice about cutting one’s own mosiac tiles? It feels impossible to get them consistent and challenging to get the pieces square. Thank you!
    Leah

    1. Joe Moorman Avatar
      Joe Moorman

      These are square tiles that were cut in half and glued down on one edge leaving the cut side showing. That allows you to use ordinary molded glass tile to make something looking like hand-cut glass. I love working that way.

Leave a Reply

Your email address will not be published. Required fields are marked *

This site uses Akismet to reduce spam. Learn how your comment data is processed.