mosaic-mural-complete

Mosaic Mural on Tile Backer Board

Artists Patricia Cream and Leah Mitchell recently completed an outdoor mosaic mural mounted on foam-core tile backer board, and they took excellent photos of the work in progress.

Each major step in the process is shown, including the french-cleat hanging brackets used to mount the mosaic to the cinder-block wall.

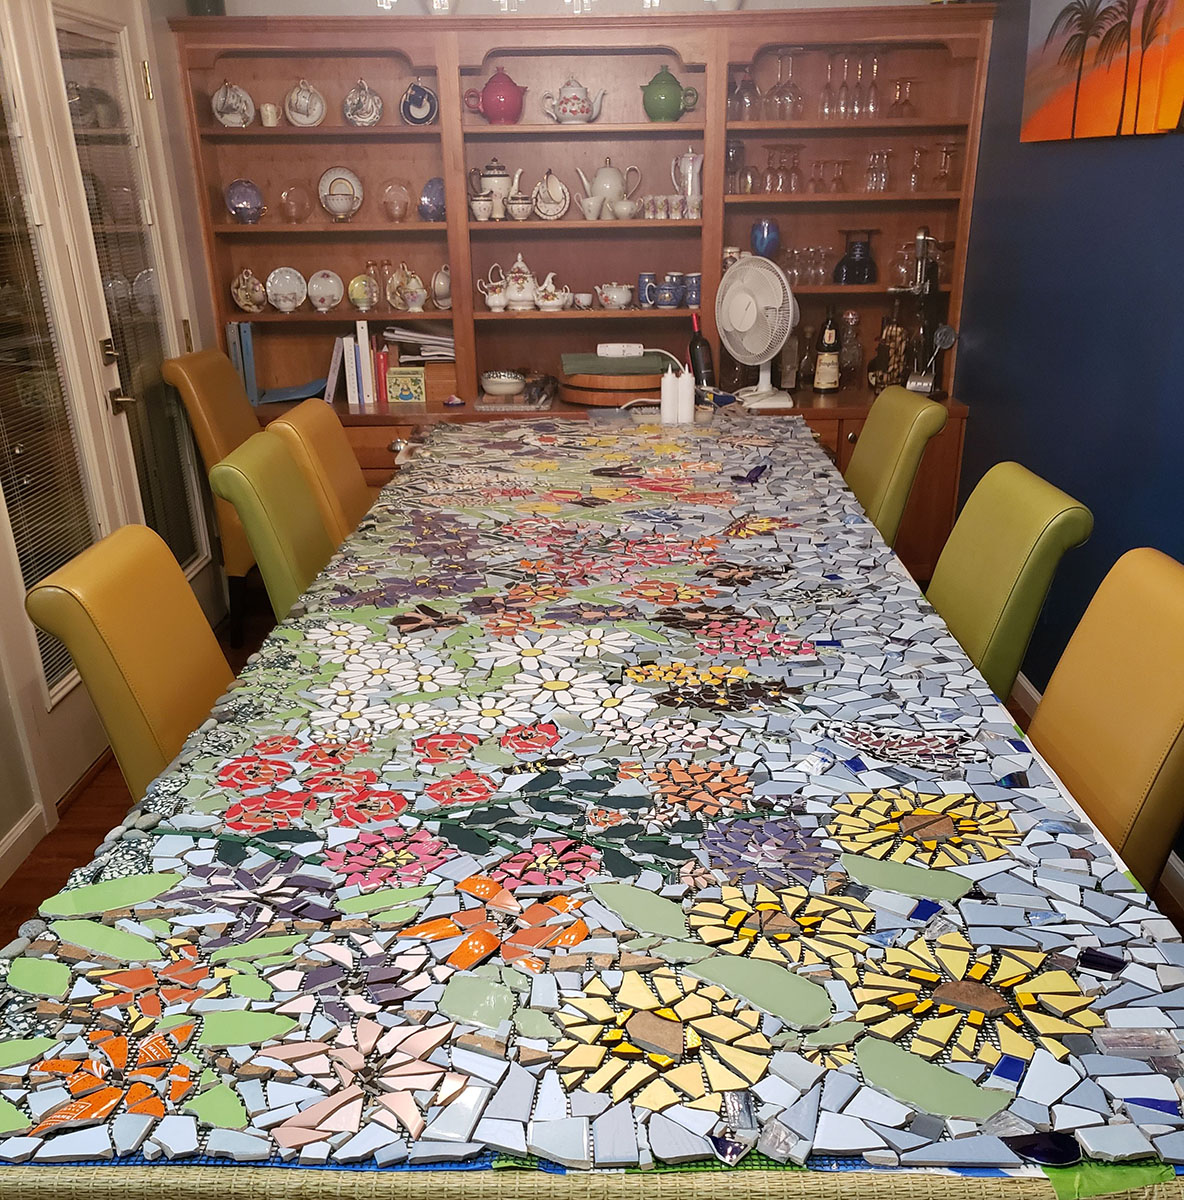
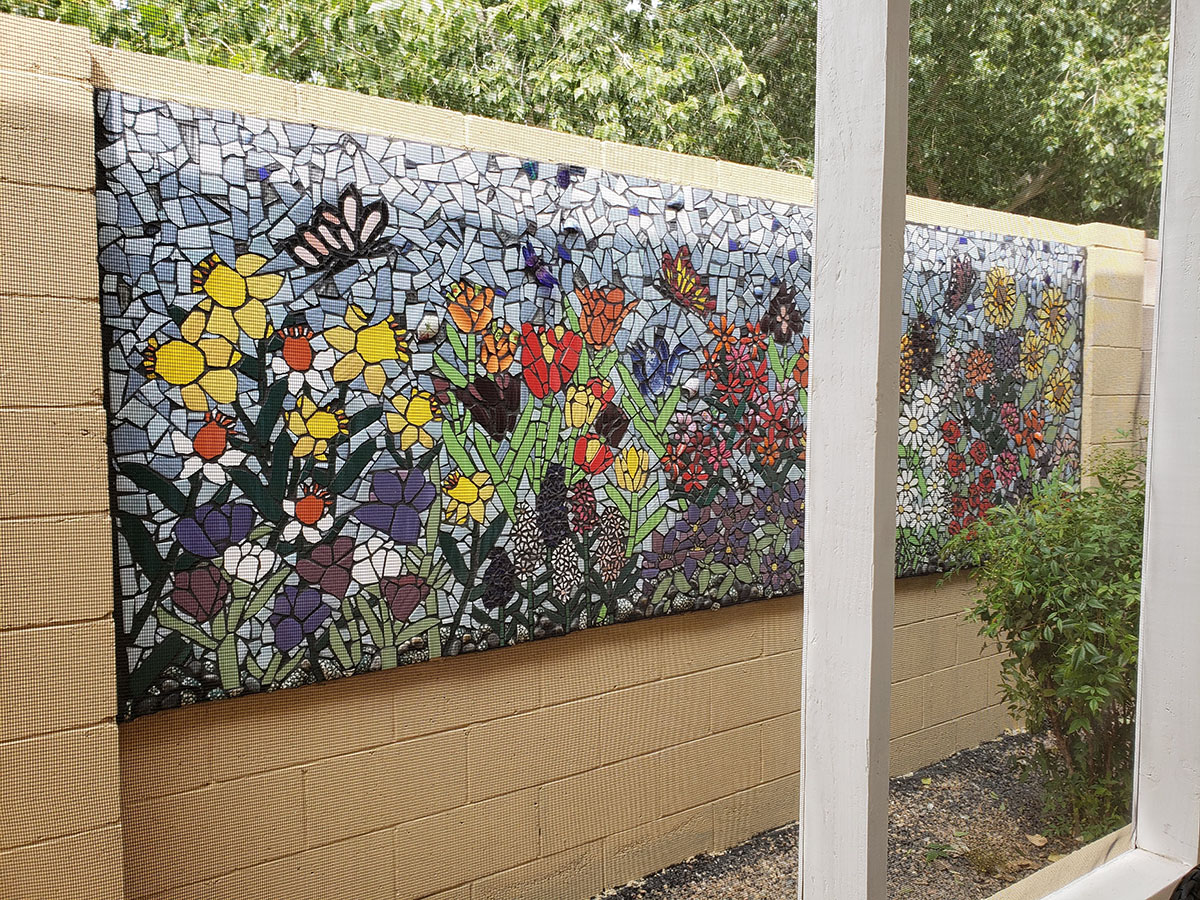
The mosaic mural is also impressive. Patricia and Leah really capture the energy of a mixed wildflower garden with all the different textures and shapes and colors.

One Step at a Time

mosaic-pattern
mosaic-pattern.

Note how the mosaic pattern or cartoon is nothing more than the outlines of figures and elements similar to a coloring book.

fiberglass-mesh-over-mosaic-pattern

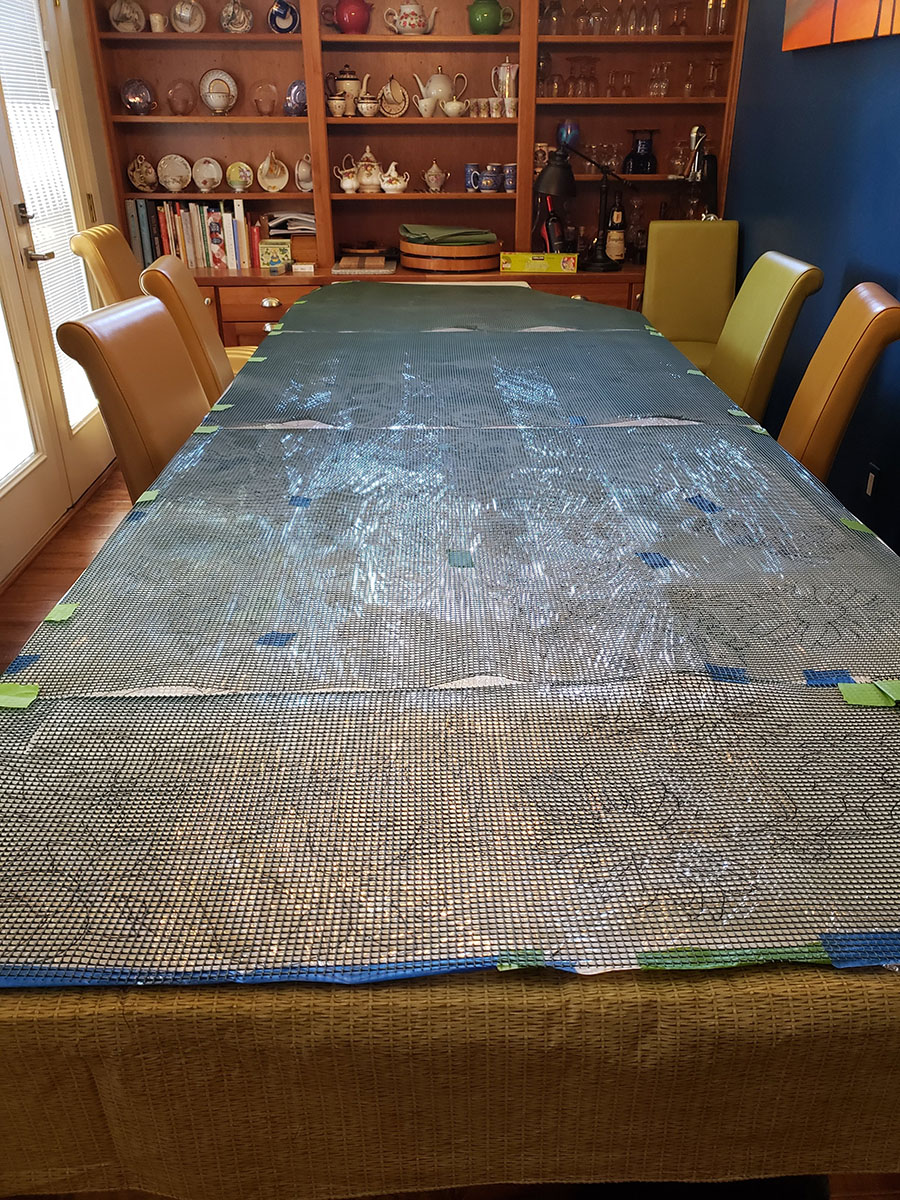
One large surface is needed to lay out the mosaic. All too often, the only surface large enough is the floor. Patricia and Leah had this great long table.

mosaic-in-progress-placing-tile-2

I avoid mesh for outdoor and wet mosaics because I think of it as a potential Achille’s heal and prefer to have all my tile’s bottoms to be completely encased in thinset mortar. This is particularly important for mosaic made of smaller pieces.

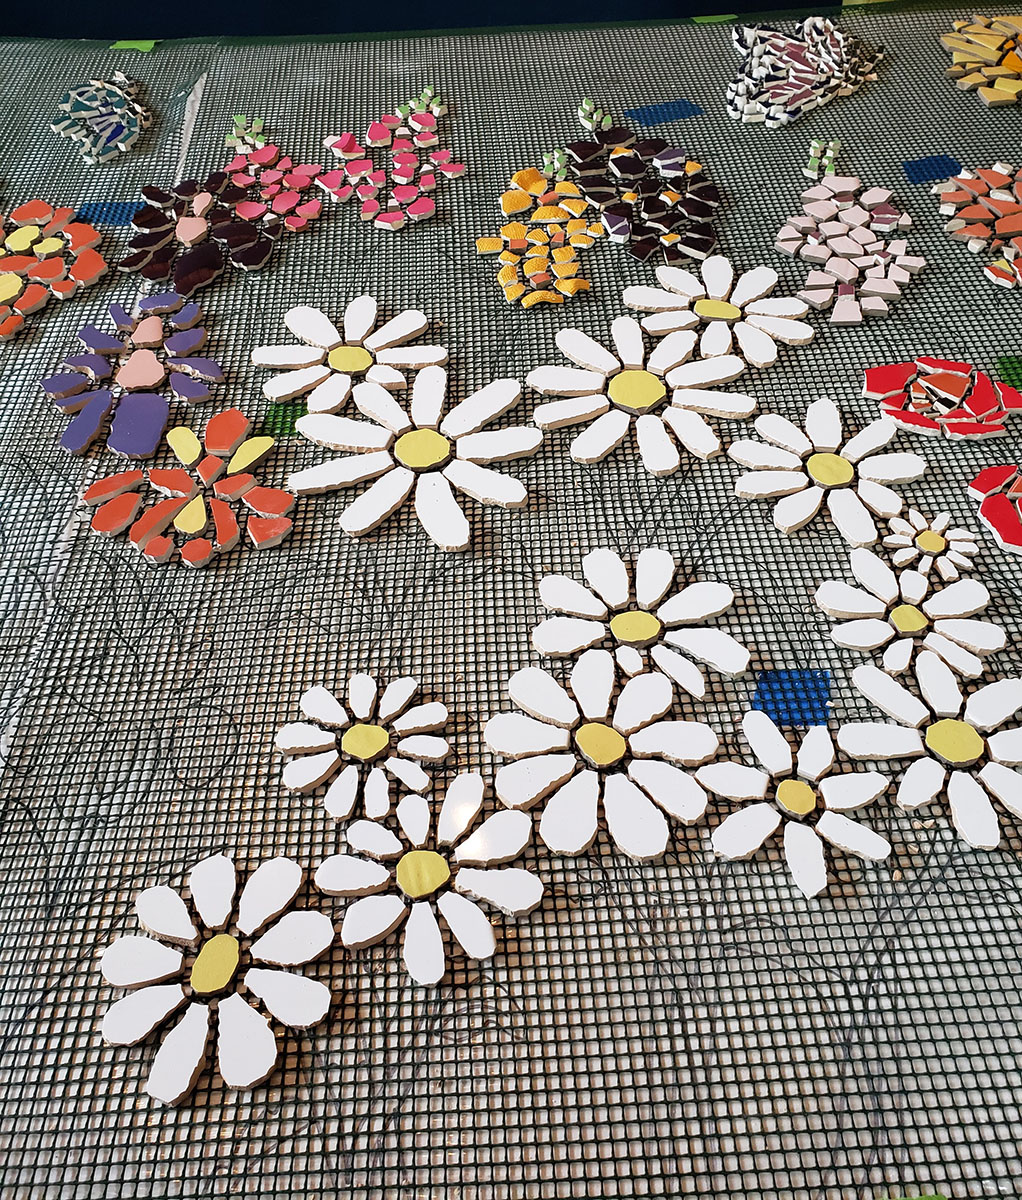
Note that this mosaic is made from shaped pieces of ceramic tile that are larger than pieces cut from small glass mosaic tile. The larger tile size makes it easier to glue the tiles to the mesh without getting glue on the sides of the tile.

Pro Tip: Glass tile is cheaper, more durable, and easier to cut than ceramic materials. There is also greater color selection available.

I should also point out that it is easier to construct rounded petals from small irregular triangles and rectangles of glass tile than it is to shape a round petal by nipping one large piece of ceramic tile.

What Patricia and Leah gain from using the larger ceramic pieces that aren’t perfectly flat is texture, a coarse chunky texture that begs to be touched.

mosaic-in-progress-placing-tile-3

Figures (flowers) are laid out first with background added second by backfilling.

Backfilling the background between figures has one intrinsic pitfall that seems to snag a lot of novices: failing to keep the grout gap consistent with what was already used in the figures.

Notice how the piece size and grout gap are consistent between figures and background.

mosaic-mural-all-tiles-placed
trowel-spreads-thinset-mortar-tile-backer-board

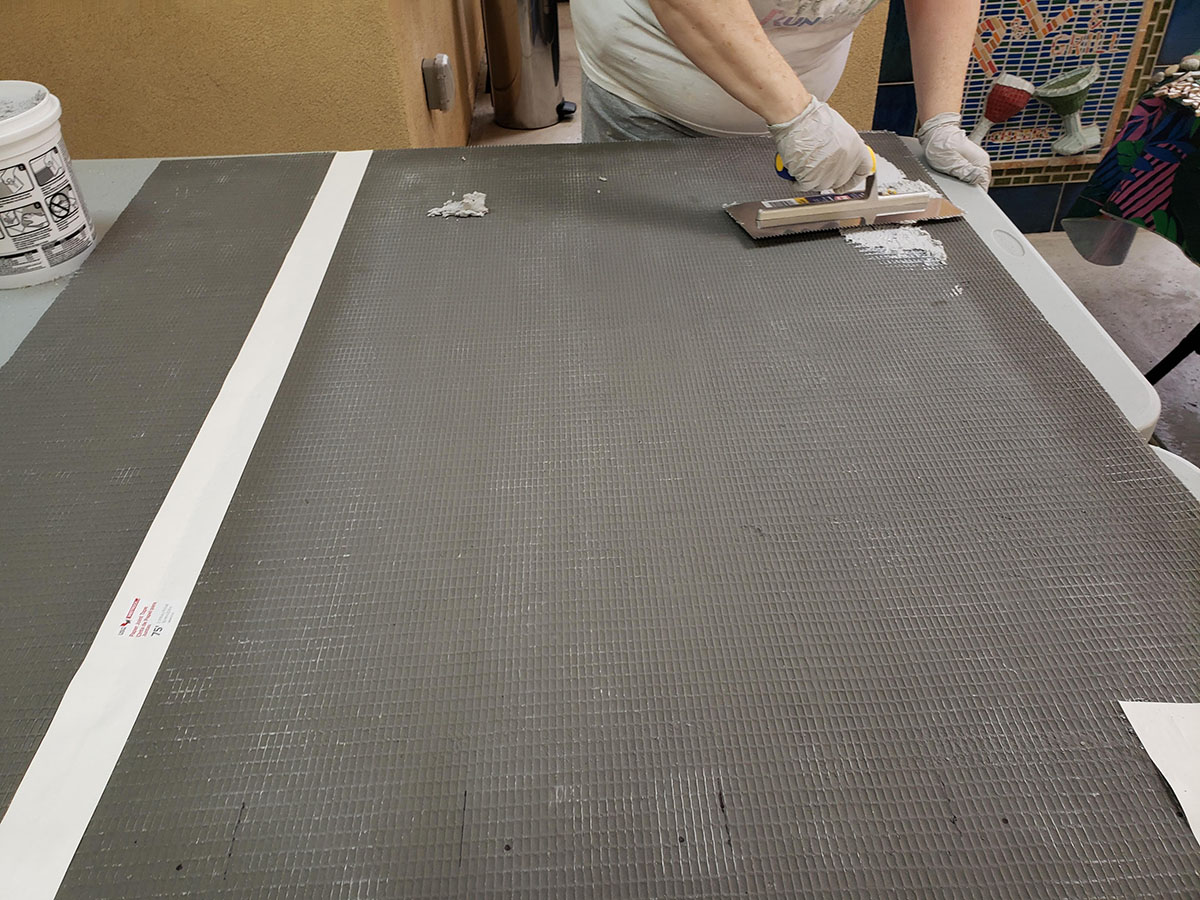
One key step has not been photographed, and that is the laying of the mesh-mounted mosaic on top of this wet mortar.

It doesn’t surprise me that this is the step with no photo: All hands available are usually needed to pick up the strips of flexible mesh covered in heavy tile.

It’s awkward handling. and it requires strength and precision to get the different strips or sheets positioned correctly. They must be aligned and not have a gap between that is larger than grout gap used within the sheets.

It helps to use a piece of plywood as a “tray” and slide the mosaic off the tray and onto the mortar. That keeps the mesh sheet from flopping and sagging as you handle it.

french-cleat-bracket-on-foam-core-tile-backer-board

Note that the french-cleat brackets are screwed to foam-core tile backer board using the collared inserts recommended by the manufacturer for securing fasteners to the board.

french-cleat-brackets-on-wall
french-cleat-brackets-on-wall.

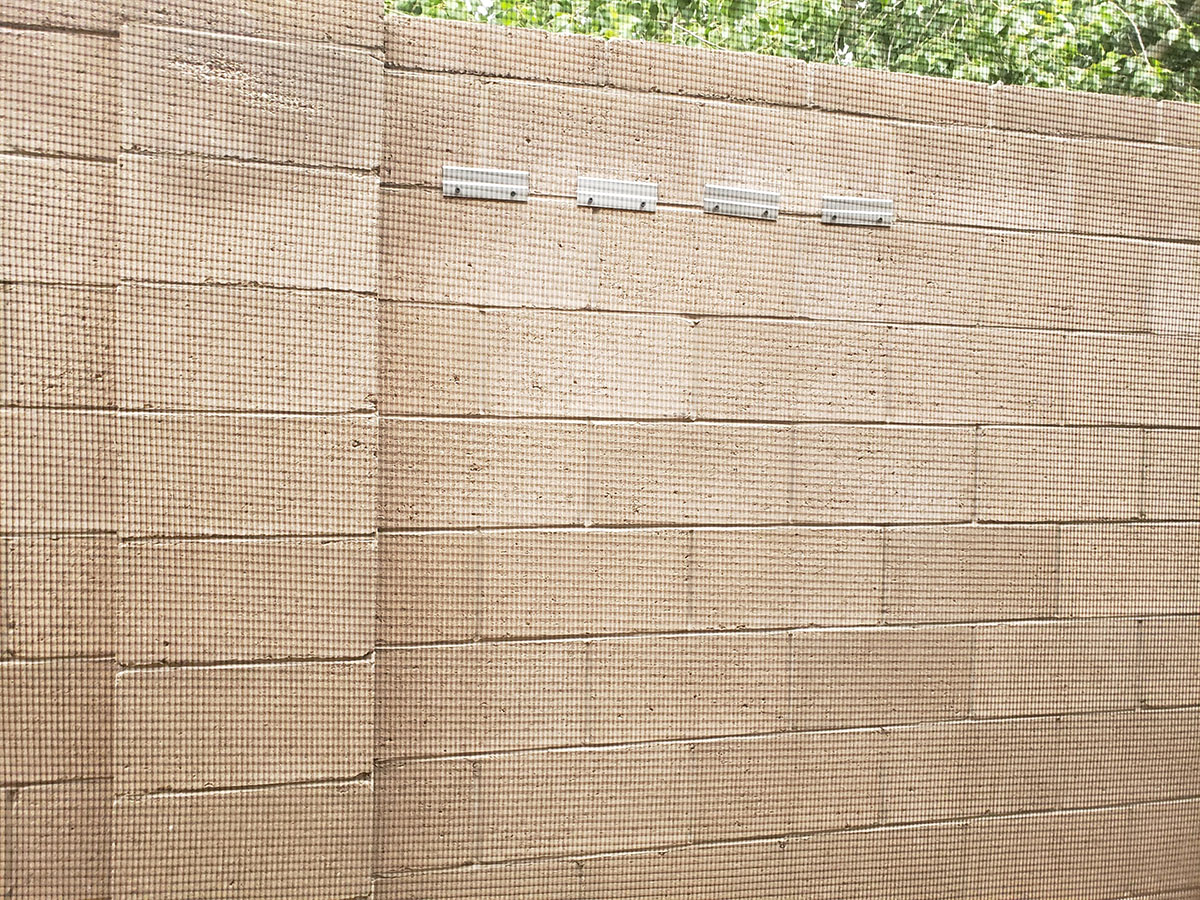
Note that the mounting brackets are only part of the hanging system for this mosaic. Before the mosaic was lifted onto the mounting brackets, the back of the tile backer board was covered with construction adhesive.

mosaic-mural-in-progress-pre-grout

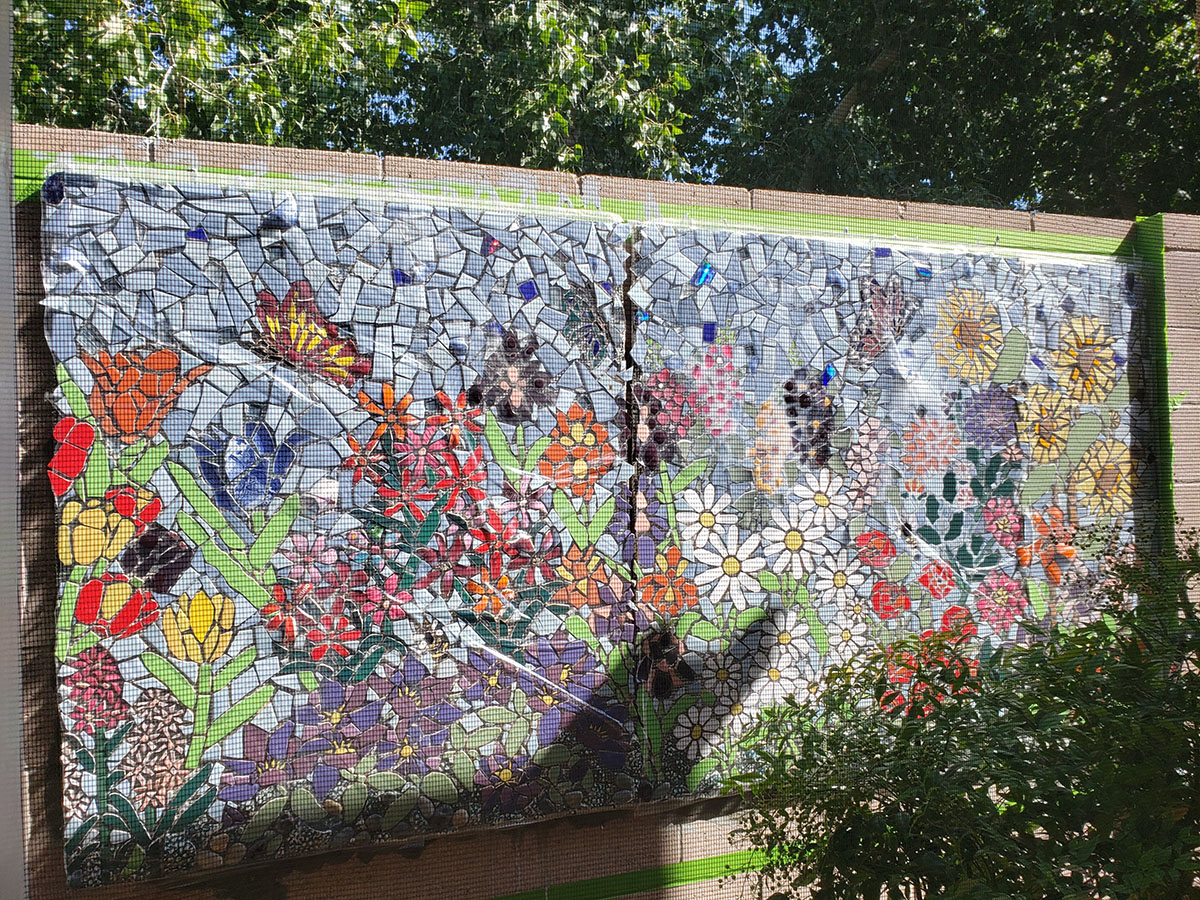
The mosaic mural was hung on the wall before the grouting process.

mosaic-mural-complete

Comments

17 responses to “Mosaic Mural on Tile Backer Board”

  1. Sandy Sparks Avatar
    Sandy Sparks

    Absolutely beautiful! Fabulous description of the process.

  2. Jim Price Avatar
    Jim Price

    I recently finished a mosaic using small tiles. Over 13,000 pieces that took one and a half years. So I really commend this yard project. Mosaic is not for those with short patience.

  3. Jen Avatar

    Why did they grout afterward and not while it was flat on table? Perhaps because of potential of the set grout cracking when the tile board was lifted and moved (with slight bowing on the lightweight foam)? I just finished a 3′ x 5′ ceramic tile mural on Go-board and had to grout before install. I worried a lot about it cracking in transit. I slid it onto a piece of plywood and was super careful. Happily all was well.
    Thanks for this step by step demo.

    1. Joe Moorman Avatar
      Joe Moorman

      The added weight of grout would increase the difficulty of handling and would be likely to crack or fatigue the backer.

  4. Lois Avatar
    Lois

    Beautiful mural! Wow! — why was the grouting done after it was hung, and not before?

    1. Joe Moorman Avatar
      Joe Moorman

      The added weight of grout would increase the difficulty of handling and would be likely to crack or fatigue the backer.

  5. Patti Linnett Avatar

    A beautiful mural, to be sure. I have a comment and a couple questions. My mosaic partner and I completed a 36′ x 5′ mural that we ended up making on panels of hardibacker as opposed to Wedi board. I contacted the Wedi board people, and while their product is much lighter in weight than hardibacker, they said they don’t recommend their product for outdoor installations…just sayin’. I wonder how theirs will hold up.
    Question 1: Why did they lay up their tile on mesh instead of directly on the Wedi board? That seems like an extra, and challenging, step to take (we’ve worked with mesh installations).
    Questions 2: An obvious large gap is evident in the pre-grout photo. It doesn’t show up in the completed photo (which has been reversed). Do you know if there is, indeed, a gap, and if so, what did they do to the close the gap between panels? It almost looks tiled over, but then what is the tile adhered to?
    Thank you! I really enjoy your posts!

    1. Joe Moorman Avatar
      Joe Moorman

      Patti,

      Other than not having the impact resistance that I would prefer as an external sheathing and concern about brittleness at low temperatures, I’m not sure what would decrease the life of an external mosaic made on foam-core tile backer board. A sealed mosaic should protect the backer board from UV and moisture.

      Keep in mind that we aren’t talking about using the foam-core board as an external skin over a 2×4 frame structure, which might the basis of the manufacturer’s restriction to indoor use.

      The mosaic murals on foam-core backer boards are mounted on walls which reinforce the impact strength of the mosaic.

      I would test the cold-temp brittleness of the foam-core board by putting pieces of it in my freezer and and doing some destructive testing by impact.

  6. Jill Gatwood Avatar

    Such an inspiration! Patricia and Leah have done some other amazing mosaics, too. I like to say they are proof of what a good teacher I am 🙂 but they’ve gone beyone anything I’ve ever done, so I learned from watching their progress on this beautiful mural. Joe, some mosaic artists use thinset mortar instead of glue to attach the tiles to the mesh. It seems like this might eliminate your concern?

  7. Annie Avatar
    Annie

    Absolutely Gorgeous!!!
    This came just in time for my vision project!
    I also will use this similar method, now that I’ve seen this process.
    My problem is, when I set the pattern of tiles on the fiberglass mesh, securing each one with adhesive, then begin to lift the 12″ x 56′ strip, some tiles get stuck(glued) and pop off!
    This was just a ‘test’ with few tiles on a much smaller piece. I was thinking,that when I’d have all the tiles in place, it would be heavier then, and maybe no tiles would stick then.
    Just wanted to know what you think about it, BEFORE, I set all the tiles in place:)

    Any suggestions?

    1. Joe Moorman Avatar
      Joe Moorman

      Most people cut the mosaic up into sections (either straight line cuts or zigzagging around tiles) and/or they use a board (plywood) to move the mosaic, which isn’t picked up but instead is slid on and off the board.

  8. Sue Avatar
    Sue

    Thanks for all the inspiration and insight.
    Q. I am having trouble sourcing a picece Wedi board in regional Qld. Is it possible to join 2 pieces 60×60 to make 120 x 60? For an outdoor mosaic.
    If so, how?

    1. Joe Moorman Avatar
      Joe Moorman

      Hi Sue,
      The retailers who sell Wedi Board also sell the materials for joining two sheets at the edge.
      Thanks,

  9. Jo garner Avatar
    Jo garner

    I’m also interested in why you would use mesh rather than gluing pieces directly onto the Wedi board.

    1. Joe Moorman Avatar
      Joe Moorman

      Hi Jo,

      Some people do it so that they can lay the mesh over the pattern. I prefer to work directly on the backer or to use a temporary face mounting instead of mesh.

      Mesh is a potential point of failure because glue is used to attach tiles to it, and so you are better off using thinset mortar to attach the tiles directly to the backer.

      You can lay up the mosaic in advance by FACE-mounting it on Mosaic Mounting Tape.

      I hope this helps

  10. Ava Kay Avatar
    Ava Kay

    Thanks for this helpful resource! I am curious how far off the wall the cleats hold the mosaic? I am thinking about using this technique but the frame I am using for the mosaic has a 1/2 inch spacer material between the back of the mosaic and the where it meets the wall wondering if the cleats will meet even with that space! If anyone knows haha

    1. Joe Moorman Avatar
      Joe Moorman

      Ava,

      I recommend putting 1/2-inch spacer on the back of the artwork and attaching the cleat to that space. I hope this helps!

Leave a Reply to Jill Gatwood Cancel reply

Your email address will not be published. Required fields are marked *

This site uses Akismet to reduce spam. Learn how your comment data is processed.