
I recommend that schools wanting to make a mosaic mural for their school consider “crazy quilt” displays that are assembled from individual mosaic projects all on the same size backer, say anywhere from 6×6 inches or 12×12 inches.
This allows each student a real art experience (making their own design) instead of just being a worker bee on a group project, which runs the risk of teaching mostly the craft/shop aspect of the process while being too light on individual expression/design.
A good compromise is to have the class work on a group project to “learn by doing” under supervision and them have them do small individual projects afterward. These individual mosaics are then arranged as a “crazy quilt” frame around the central group project.
It is important that any school’s visual arts class or art project actually be about students doing art (individual design and expression). Don’t lose sight of that in your school’s project.
Pre-Glue Exercise
When the students start gluing tile, you will be pre-occupied with showing inexperienced people how to glue without making a mess and won’t have much bandwidth for making sure everyone is working consistently in terms of spacing.
Showing the importance of small consistent grout gaps and how to arrange tile can be done before glue is ever involved.
As an exercise, have your students spend a session arranging 2 colors of tiles to form simple shapes like circles and letters with backgrounds around them.
Give the students feedback on grout gaps between the tiles. Give them feedback on the scale they are using compared to the size of their backer.
If tiles will be cut for the mosaics, have them cut a few tiles and do the same exercise as above and point out the differences in how whole tiles nest together versus how cut pieces can be nested together much more closely.
Explain to your students the level of “nesting” the group mosaic should have. Explain to them the importance of keeping this fairly consistent and not having areas varying randomly in how well the pieces are fit together.
Explain to the overly precise and the overly slack how to look at each other’s work and learn. Try to get the students to converge on a more consistent mode of working BEFORE YOU ACTUALLY START THE MOSAIC.
This one “extra” session of instruction with loose unglued tiles saves a lot of time and frustration in the end.
Working From A Pattern
Indoors or Outdoors?
Dry, indoor mosaics can be made on a piece of 1/2″ sanded plywood. Cabinet-grade plywood comes with a sanded finish and is available at local building material store.
We sell plywood mosaic backers, but you can save money by buying a whole sheet of cabinet-grade plywood and cutting it up yourself.
Never use wood or plywood or marine plywood as a backer for an outdoor mosaic.
Outdoor and wet mosaics must be mounted with thinset mortar on backers such as concrete backer board, foam-core backer board, concrete or masonry surfaces, flagstones, and other non-wood materials.
Grouting and sealing are particularly important for outdoor mosaics. Moisture penetration of the backer must be considered, and water barriers need to be installed for basements, retaining walls, and some floors.
Best Practices and Building Codes
Public art projects need to use best practices and meet building codes and architect specs when relevant. A mosaic floor is still a floor, and not all floors are the same even in the same building.
For example, floor in the entranceway of a heavily-trafficked public building shouldn’t even be considered in anything but porcelain, and it’s likely that not even our hard-as-hell porcelain tiles are as strong as the indestructible inch-thick materials the architect used.
Floor mosaics don’t make the best student art projects because of the thickness and hardness of the materials that are required, and amateurs and students tend to use larger grout gaps and leave sharp edges exposed.
Wall art can be treated as art and not the wall per se, but it still needs to be free of sharp edges, mounted securely on a wall that has been evaluated for the weight of the project.
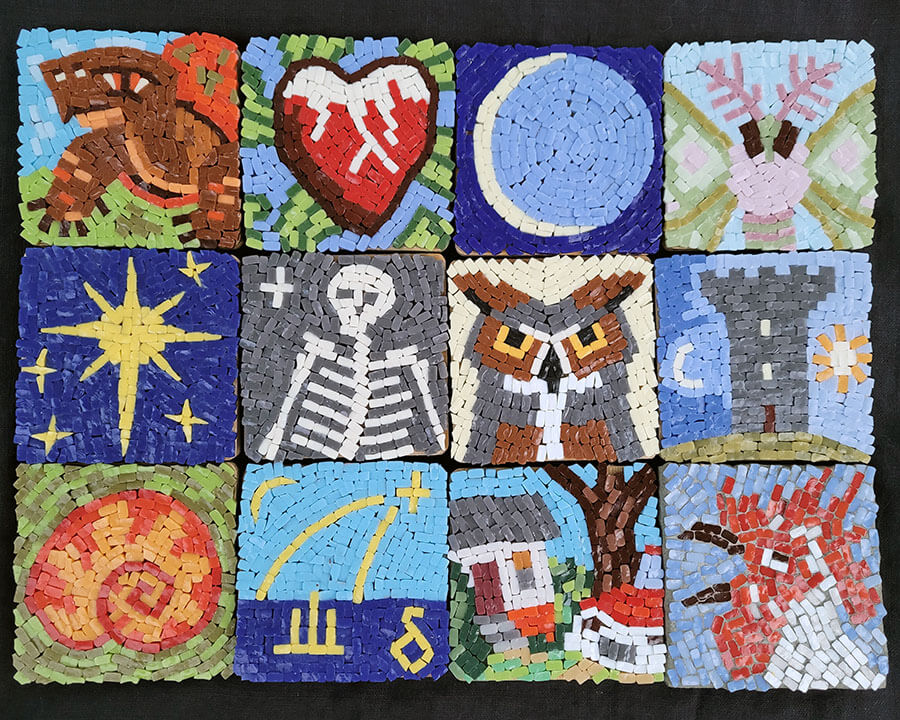
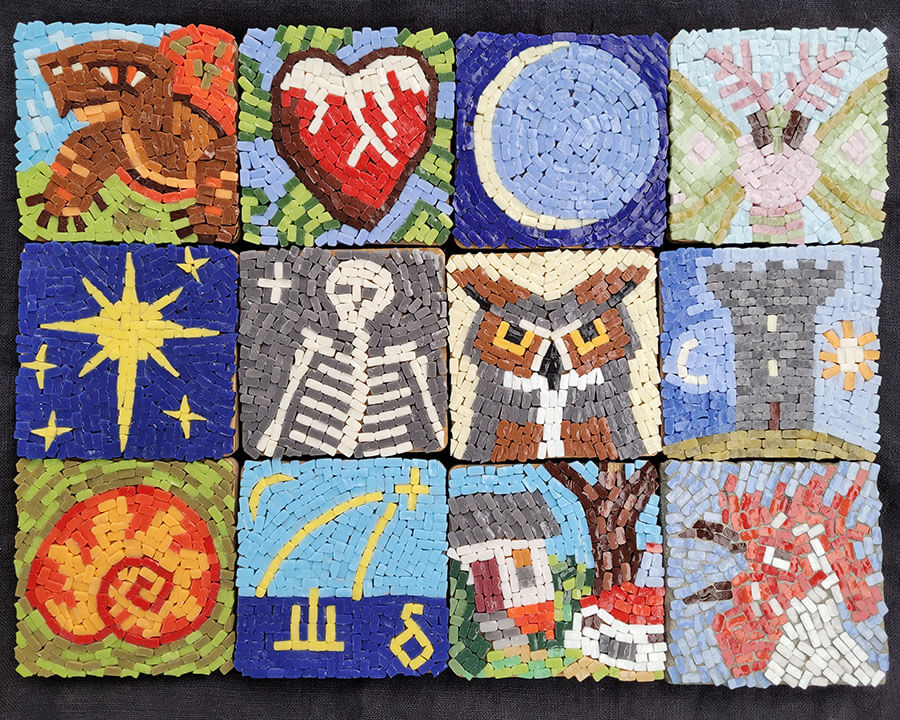
My Latest Mosaics
Here are the latest mosaics I am making on our 4 inch bamboo coasters. I am making these as insets in a altarpiece I am making from reclaimed wood. The altarpiece will be in the shape of a door frame. The door is small, but the frame is wide. Each side of the frame is as wide as the door. The door frame is 3 of these mosaics wide, I think. The door is engraved.
I am also building an Ark of the Covenant for the books I want to leave my son. I’m not sure if that will all be carved wood and gilt with twin heron cherubim or if it will be smaller and more practical have these inserts. I am probably describing two Arks I will make. There are also artifacts that need a home.
Anyway, the point is I never see one work of art I am making, I always see other versions that might have been and might be.
That’s why I like to build components and then arrange them in different ways. I work by trial and error.
I started the work on the Ark(s) by making these mosaic inserts, but now I am getting drawn into arranging them in at many different configurations. I will probably make more than is needed for the Ark and use only my favorites.
Leave a Reply