
Glass mosaic tile, particularly vitreous glass tiles have sometimes have a few tiny pits in their surface, and these tiny pits can get stained with grout.
Fortunately the pit staining can be prevented by applying a product called grout release before grouting, which is what installers use for large architectural tiling jobs.
You can also remove a lot of the staining by proper sponging and hazing after grouting.
Sponging and Hazing
A Grouting Sponge is used to clean away grout residue after grout has been rubbed into the cracks and the excess scraped away.
WATER DISCIPLINE: The sponge should always be damp but not dripping, and ideally NO (ZERO) water should squeeze out of the sponge even when pressed to the surface.
Forget what you see in videos of people installing large ceramic or stone tiles. For small glass tile mosaics with a lot of grout line per surface area, you can’t be sloppy with water while sponging.
Exposure to additional water while grout and thinset are hardening significantly degrades their hardness and bond strength.
Water Discipline
If you are sloppy about sponging and get water on the surface of the mosaic, then the only option is to wipe the mosaic dry and be done with sponging as quickly as possible.
If you avoid getting any water onto the surface of the mosaic while sponging, you can use sponge for longer and make more passes over the surface, allowing you to address pit staining.
If you use a dry clean cloth to follow up each swipe of the sponge, you can catch any stray drops of water and also remove grout residue (haze) more effectively.
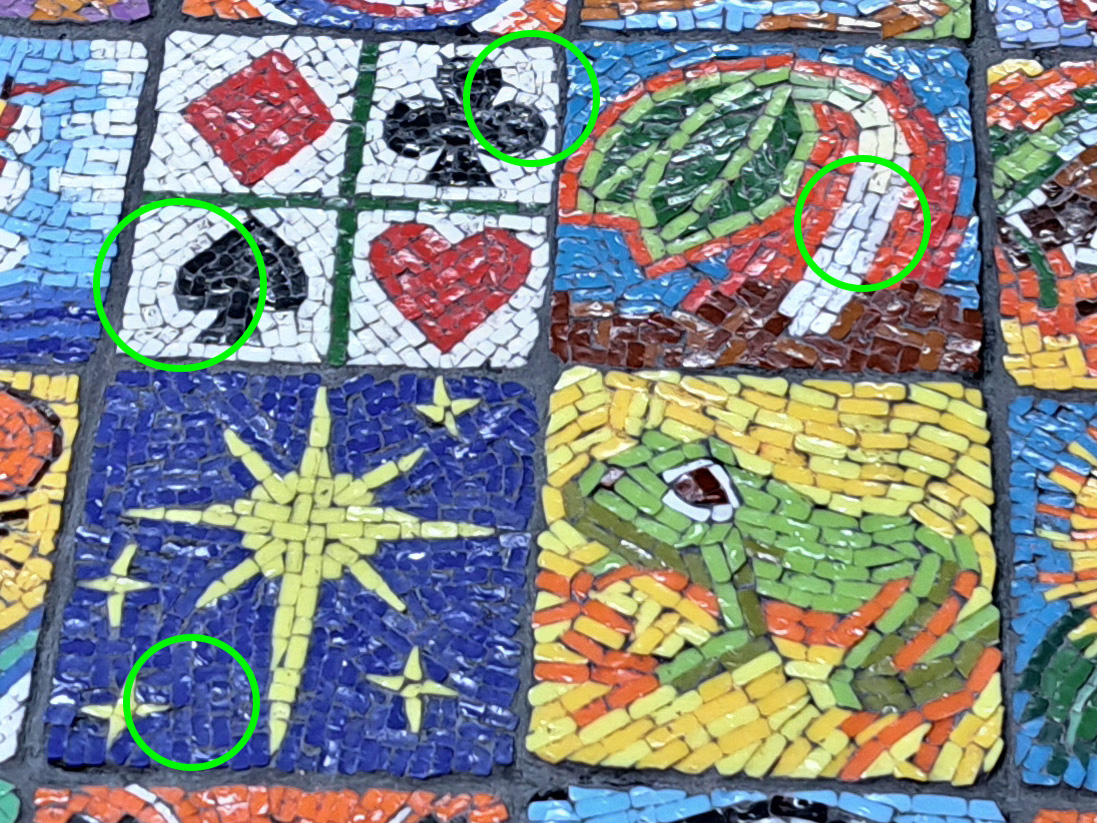
Pit Stains
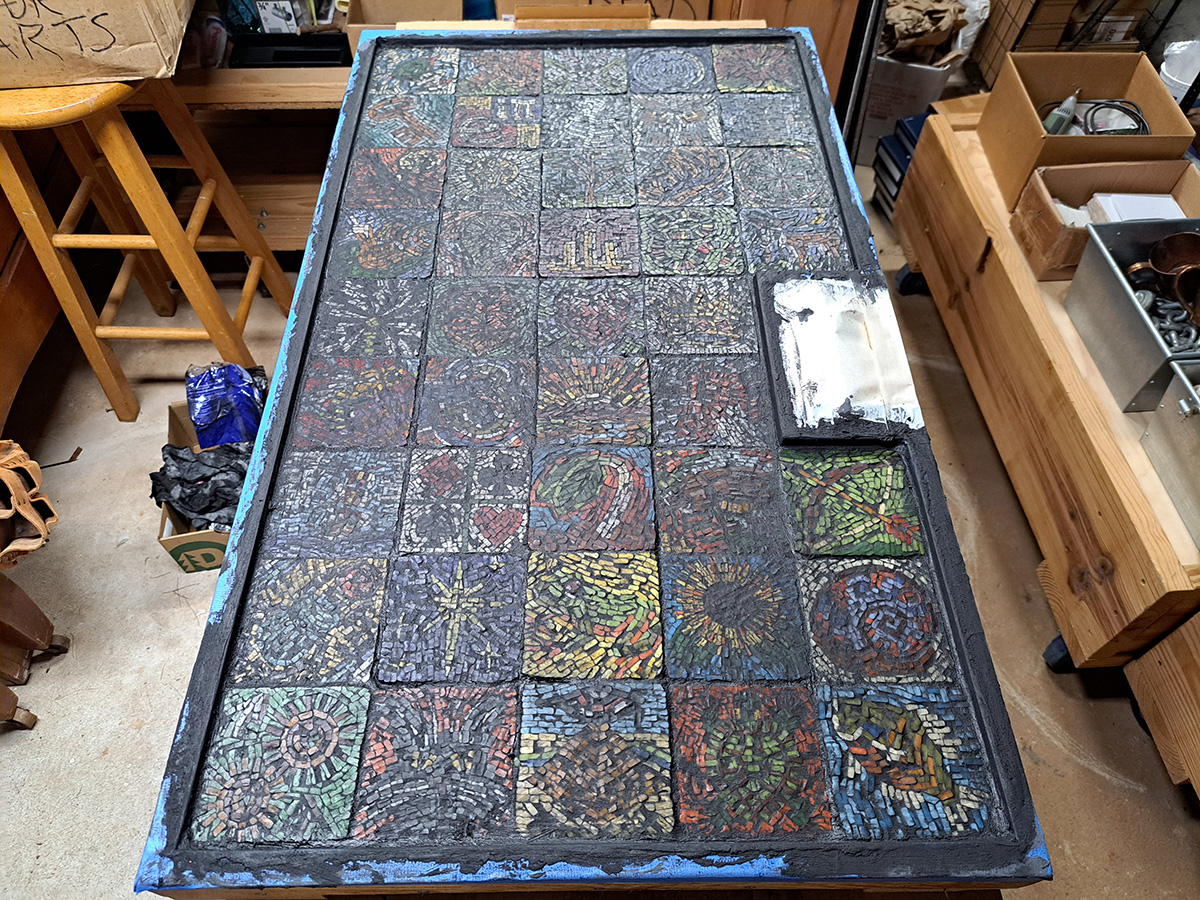
Sometimes you just can’t get all the pits cleaned out, which recently happened to me on my Mosaic Door project, which used the cleaved faces of Morjo™ Glass Tiles in 8mm and in 12mm.
Apparently there are occasional tiny voids inside the glass or the glass splits in some odd way that leaves tiny cracks or pits.
There was also a lot of places where the surface of the mosaic wasn’t smooth because the tiles weren’t as flat and level as they should have been.
These problems were made worse by the fact that I couldn’t find my grouting sponge and had to use shop rags, and so I didn’t sponge and haze very well.
The next day, it was painfully obvious how much residue I have left staining all these pits and cracks and rough places.
Vinegar Cleaning
Vinegar rapidly eats portland cement products like traditional grout and concrete, and so you have to make sure you don’t damage grout in the gaps by leaving the acid in place to long.
You can dilute the vinegar to make it less aggressive, but you still have to wet wipe the surface thoroughly after applying it.
I decided to use undiluted vinegar at full strength followed by immediate wet wiping to remove the acid quickly.
Even though the non-sanded grout I used wasn’t a portland-cement product, I wanted to be cautious.
I tested the vinegar on a tiny place in the corner of the mosaic and wiped it clean and allowed it to dry thoroughly.
I was looking for discoloration of the grout but observed none.
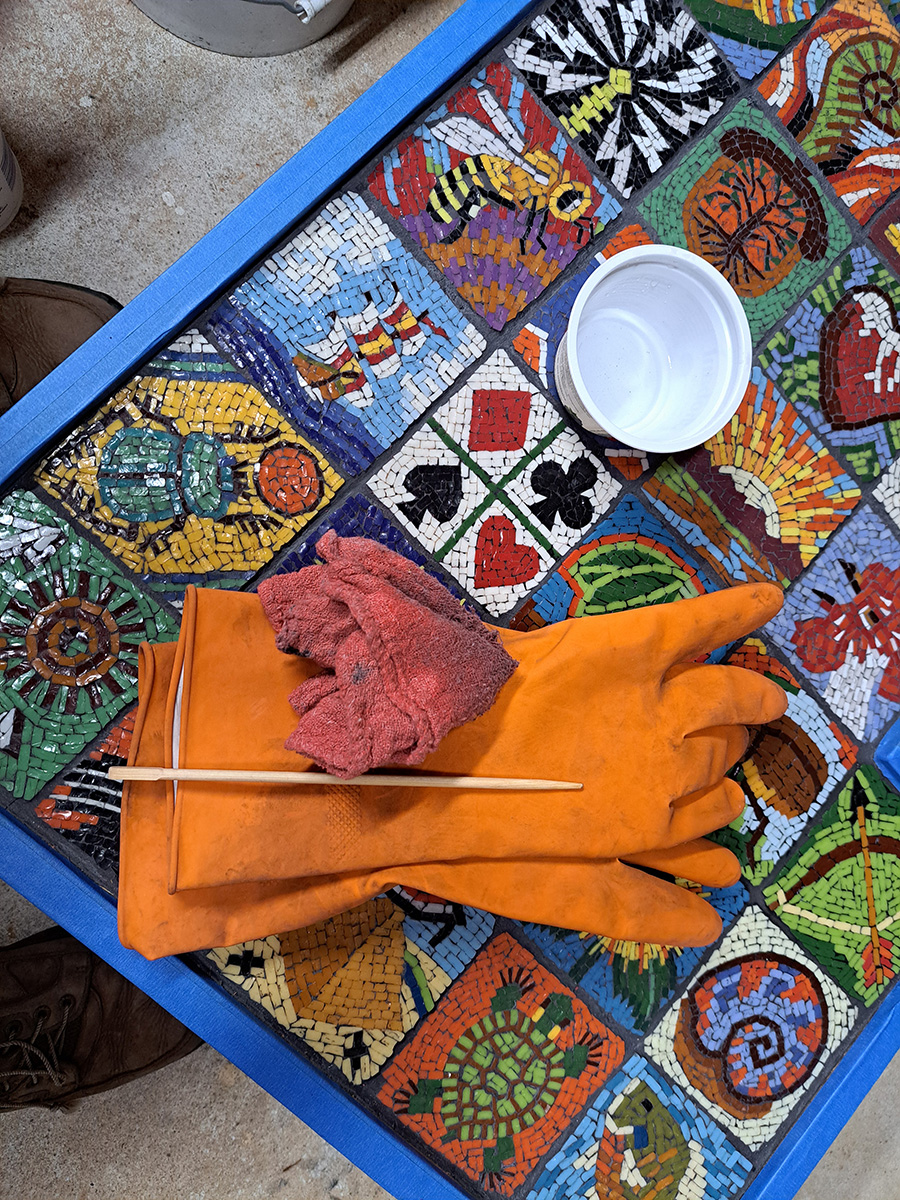
Focused Pressure
To make sure my scrubbing focused on the specific places where pit/crack stains were an issue, I folded the vinegar-soaked rag over the tip of a chop stick and used that as my scrubbing instrument.
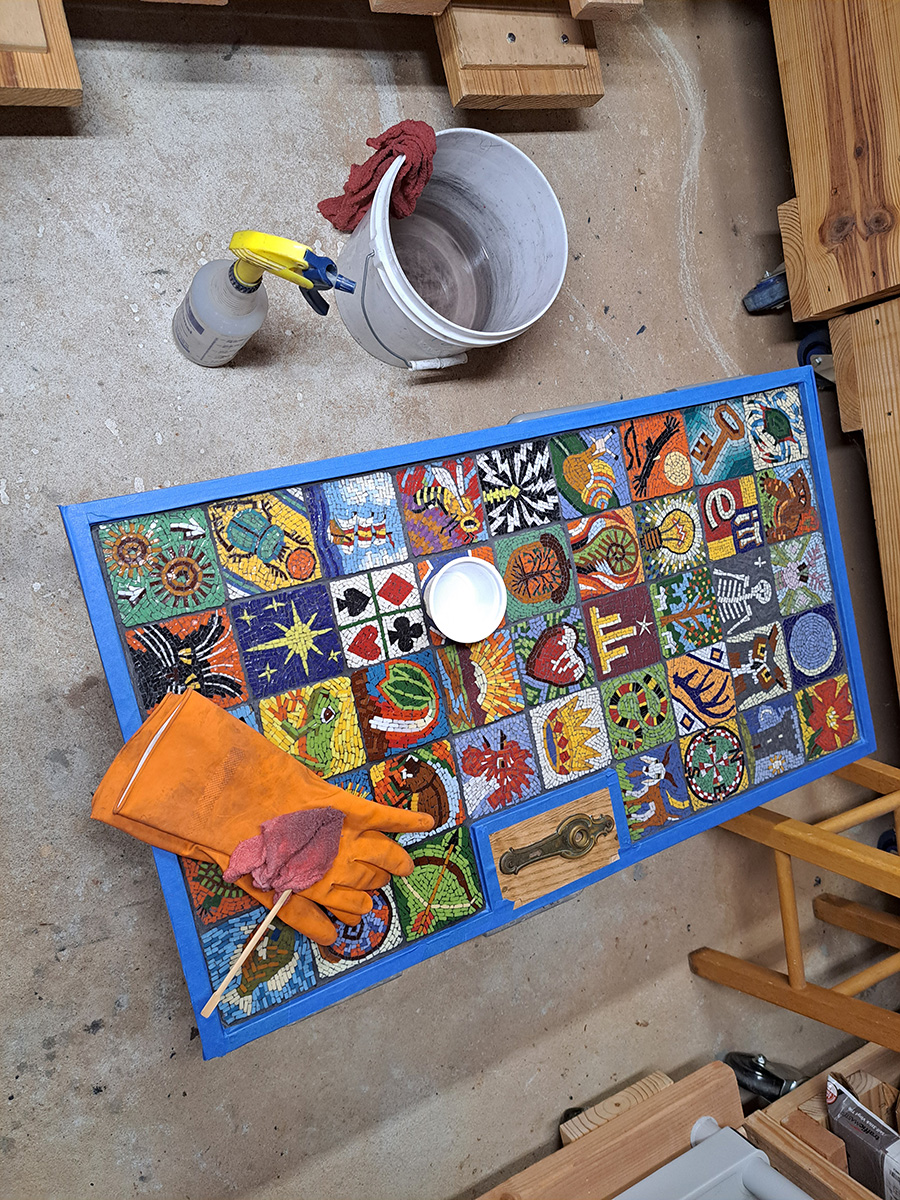
Wet Wiping
I kept a rag and a bucket of water beside the mosaic as I cleaned and used the wet rag to wipe away the vinegar periodically as I completed an area.
I worked in small sections, maybe two or three mosaic inserts at a time.
The rag I used would be wetter than a grouting sponge for the first wipe, and then the rag would be washed in the bucket and rung as dry as possible for a second wipe.
In this way, I was able to use the full strength of undiluted vinegar without eroding the grout lines or feeling like I was damaging anything. (Peace of mind is important.)
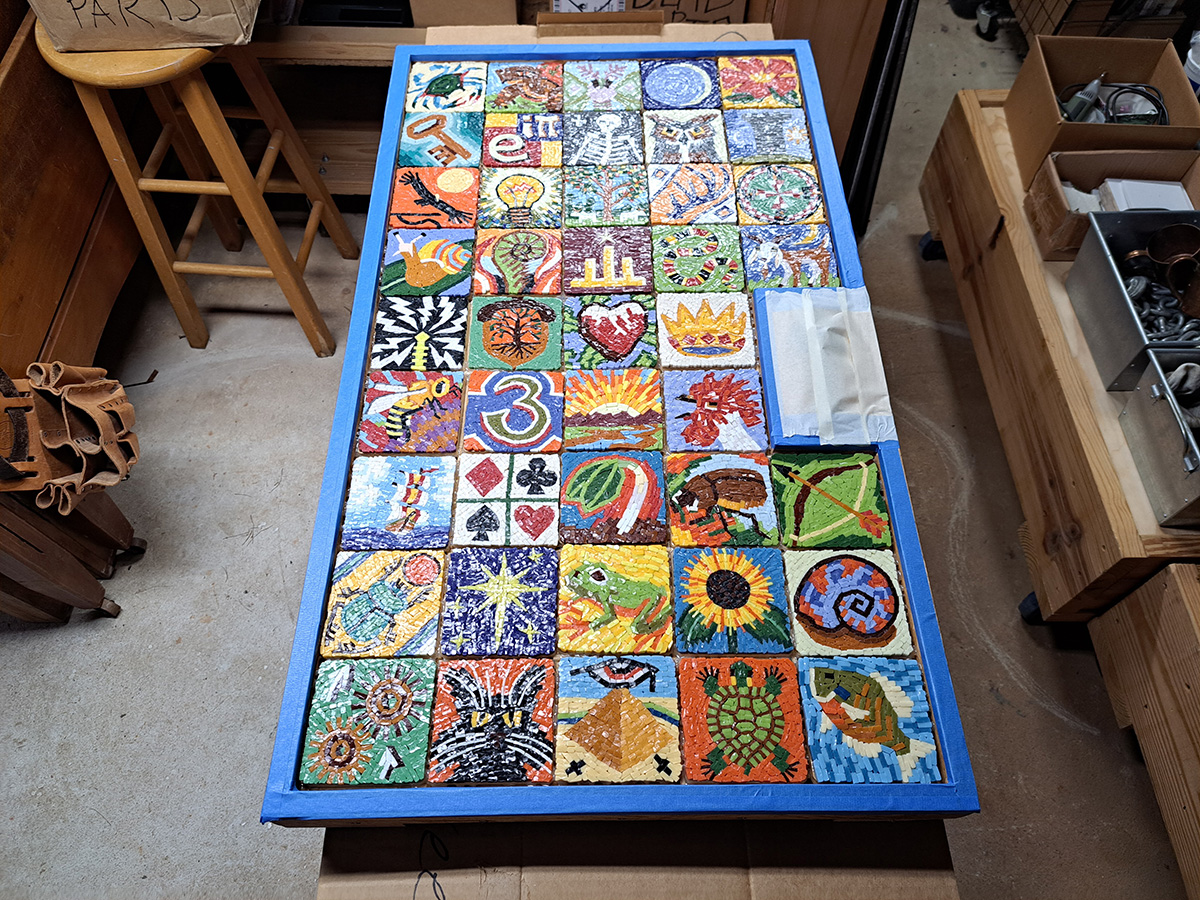
Mosaic Door Completed
Here is The Door of All Things, which is what I am calling this mosaic sculpture I made for an altarpiece of the imagination. The oak I used was reclaimed from a small church that was flattened by a tornado. I collected the wood years ago and have used it for special projects.

Leave a Reply