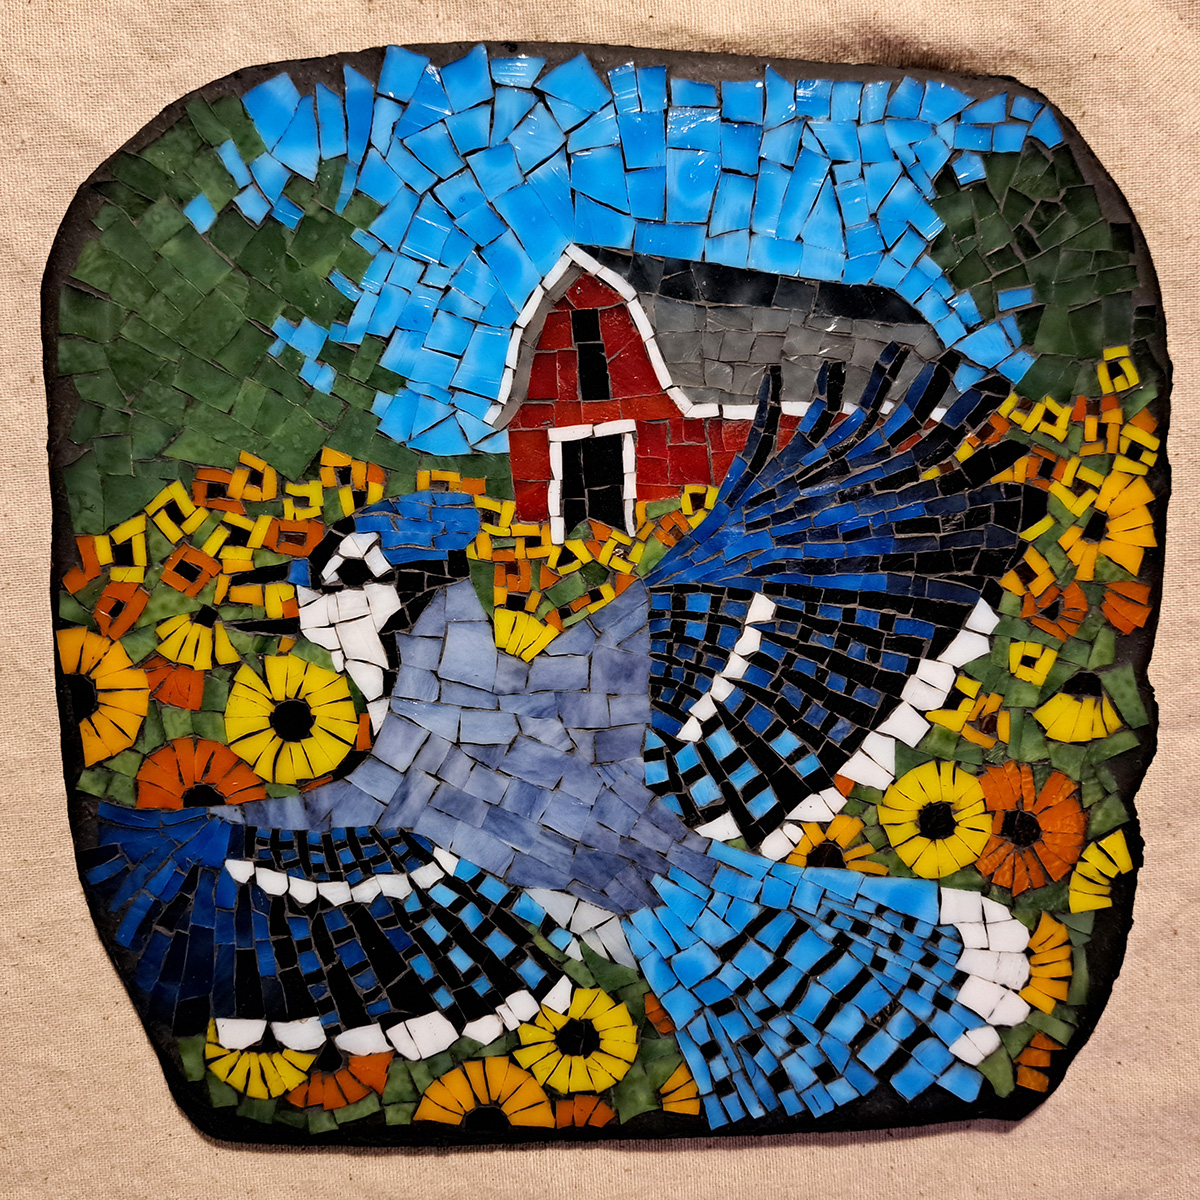
My most recent mosaic Blue Jay is 10 x 10 inches and made from our American-made stained glass on a mortar stone.
This mosaic was made by improvising over a pattern.
Improvising
Notice how the sunflowers in the background do not remotely follow the lines of the pattern. Instead, I improvised loosely based on the general idea suggested by the pattern. I made the flowers larger and placed them for best impact.
Now that might seem an obvious way of making a background, but what isn’t is obvious is that the same method of ignoring or improving the model was also needed for the central figure.
I found several images of flying blue jays that were more or less in the correct pose I needed.
Nevertheless, the coloring or patterning of each of these birds was problematic in some way, and not merely due to problems in lighting or motion.
The pattern on plants and animals varies slightly by individual. Keep this in mind when selecting and using models.
In translating an image into the mosaic medium, it is possible to work at a high resolution and reproduce the image in a photorealistic way.
But that’s not how most mosaics are made.
Most mosaics are at a smaller resolution and have a more limited color palette available.
That means the image is simplified in way to make it possible to render in tile.
In that case, you never have to worry about reproducing the likeness of a particular photo and licensing issues, artistic ethics, etc.
In all probability, the particular photo you select for a model based on its pose will be merely one of many you look at in the process of turning that model into a mosaic.
The results will be all your own, and you will be painfully aware of how many different design decisions you had to make on your own without much help from the model.
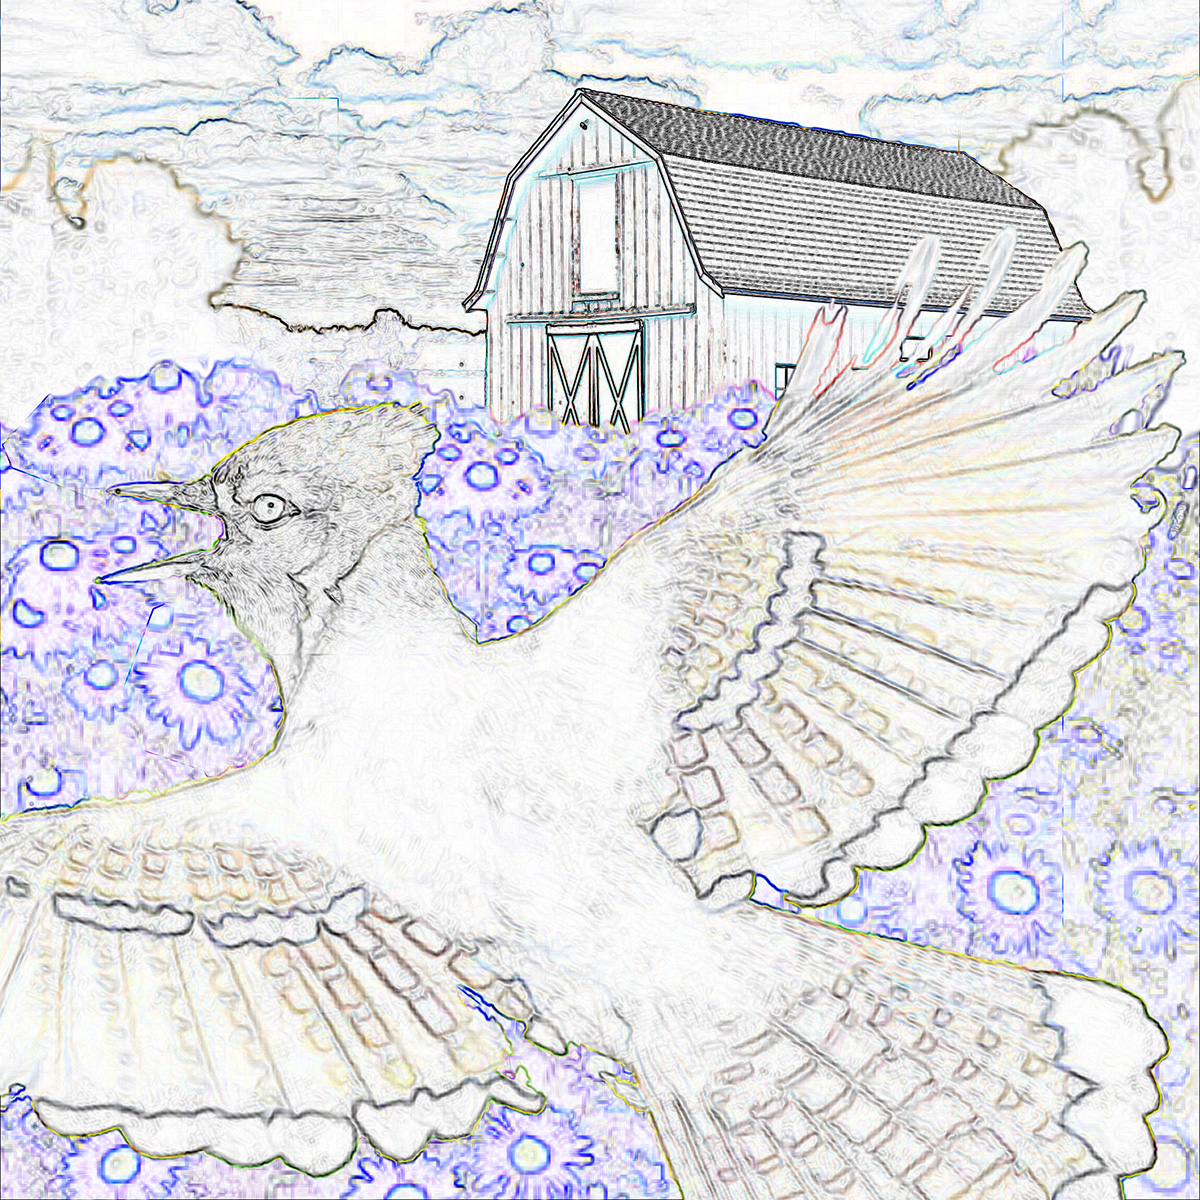
Here is how you make mosaic patterns using one click in Photoshop. You can do this with any photo or photo collage.
The Mosaic Backer
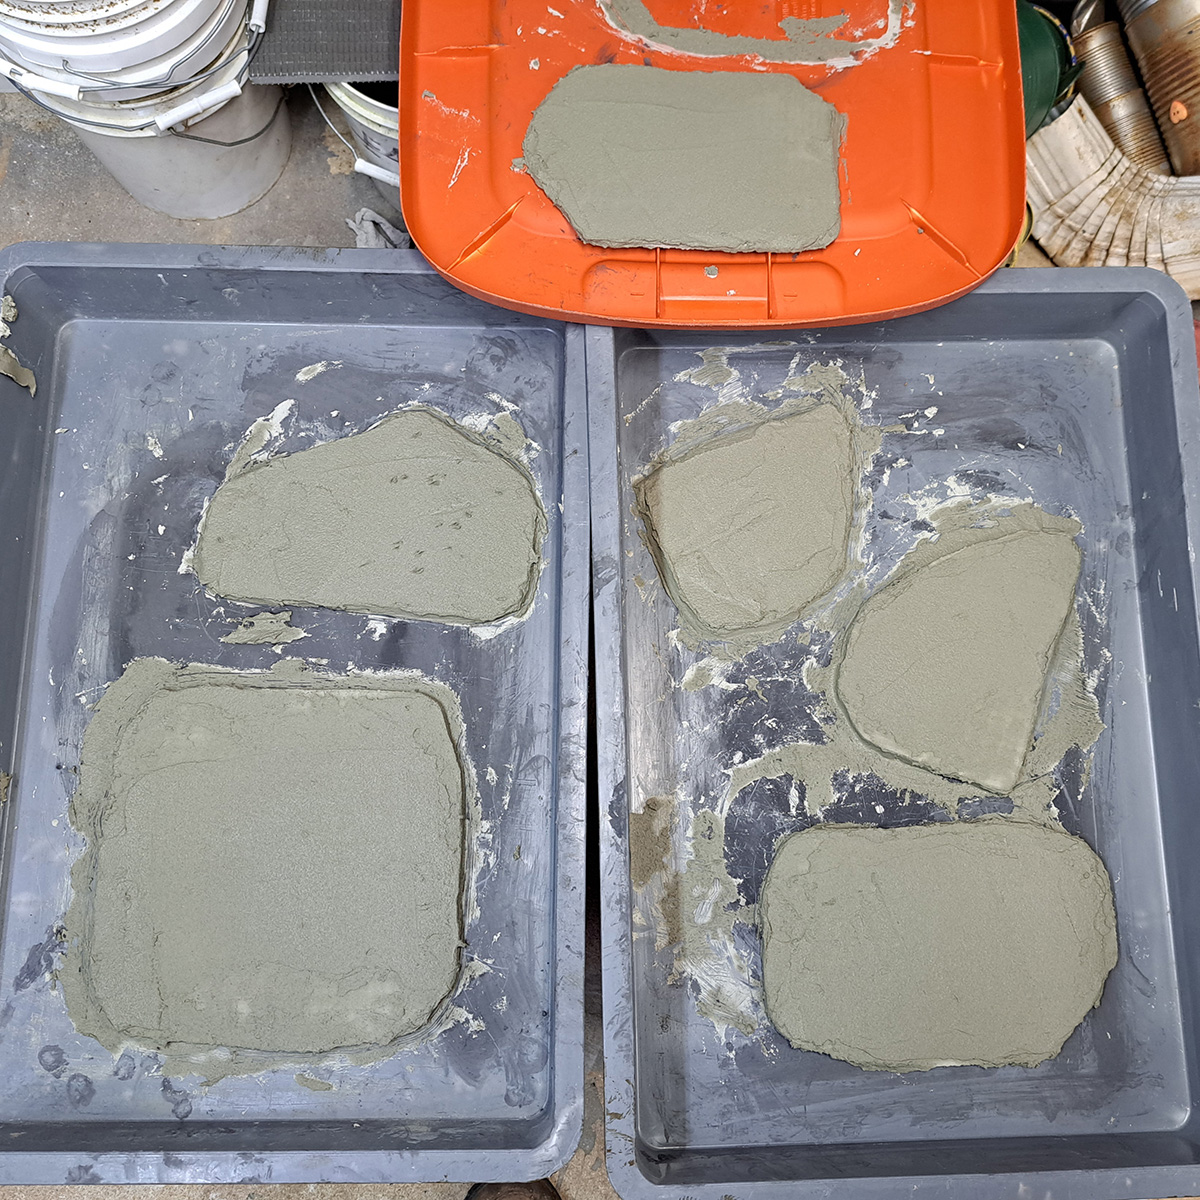
The backer for this mosaic is a mortar stone, which was made using hardware cloth (steel mesh) and thinset mortar.
The Video
I made a video of the design process and posted it on our Youtube channel:
The Captions
Here are the captions of the video:
This mosaic was made by improvising over a pattern.
The temporary surface is clear contact paper with sticky side up.
After the mosaic design is laid out, Mosaic Mounting Tape is pressed to the face, and the mosaic is picked up and flipped over.
Additional changes can still be made now but only from the backside.
The backer used for this mosaic was a reinforced mortar stone.
This mosaic was mounted using Weldbond Adhesive because I didn’t trust the mortar with so many tiny pieces of glass.
Excess glue was used unintentionally, and so after 3 or 4 hours, the mounting tape was carefully peeled back from the edges.
The edges were dry enough, but the tiles in the middle were still sitting in wet glue. A damp rag was used to carefully pick up the excess glue by patting.
After the mosaic was cleaned up and allowed to harden for 12+ hours, it was grouted with black non-sanded grout.
I didn’t follow the pattern very closely for the sunflowers but improvised them loosely.
I spent as much time looking at various photographs of flying blue jays as I did looking at the photo used for the model.
The model in the correct pose might not have the best coloring or patterning.
High-Resolution
Here is a high-resolution photo of the finished mosaic:

Leave a Reply