Natalija reminded me that she used her cordless drill with a mesh disc to remove the hardened mortar, and that cordless rechargeable tools exist.
Either we didn’t have cordless rechargeable tools on my home planet, or I was having a stress-induced boomer episode yesterday.
One of those two things is true, maybe both.
We are committed to promoting standard/archival materials and methods, but that’s not the case for many craft retailers and craft content creators.
Many online How-To videos are more like How-I-Did-This videos because they do not show recommended methods but instead show improvised methods that produce short-lived stuff: cyanoacrylate glues, hot-glue guns, you name it.
We also have a problem with our own instructions and illustrations being taken out of context or not read in full.
For this reason, I should state in bold type:
The nonstandard method below is an improvised rework and is labor intensive. You shouldn’t plan to do this.
Nonstandard Methods
Standard materials and methods make the work easier and more efficient, and they make the results more durable.
BUT there are times when you can find yourself using non-standard methods even if you are committed to producing durable results:
- Creation of a prototype.
- Schedule: Must use tool at hand instead of delaying project to find best tool.
- Learning curve: correcting mistakes on a previous step.
- An early experiment evolves into something much larger.
- When you work on old houses as you live in them and can’t always rip out whole structural elements.
- Nonstandard project: the nature of what you are doing is different.
- Budget constraints.
- Material or tool unavailable.
- When you are the type of person who learns by doing and working by trial and error and are used to fixing missteps.
Art and innovation often involves nonstandard methods.
Nonstandard methods are fine as long as they are at least as strong and durable as the recommended methods.
PRO TIP: It’s quicker to look up the correct method than it is to evaluate whether an improvised method will work and be durable.
And then there’s the hard truth about nonstandard methods:
They often require a lot more work in one way or another: more time, more tedium, more strength, or all of the above.
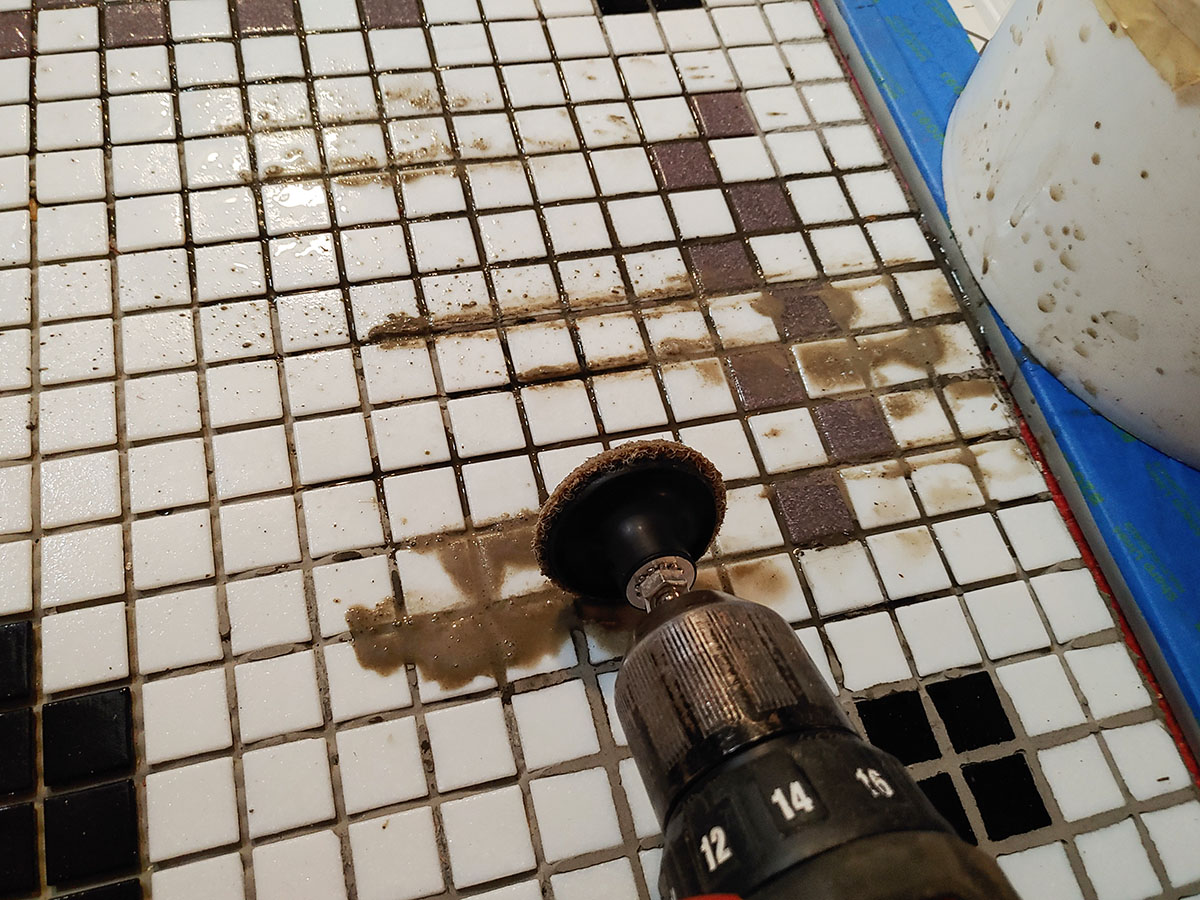
Natalija says she spent 3 hours and used up 11 mesh polishing discs to remove the hardened mortar in the grout gap.
Removing Mortar from the Grout Gap
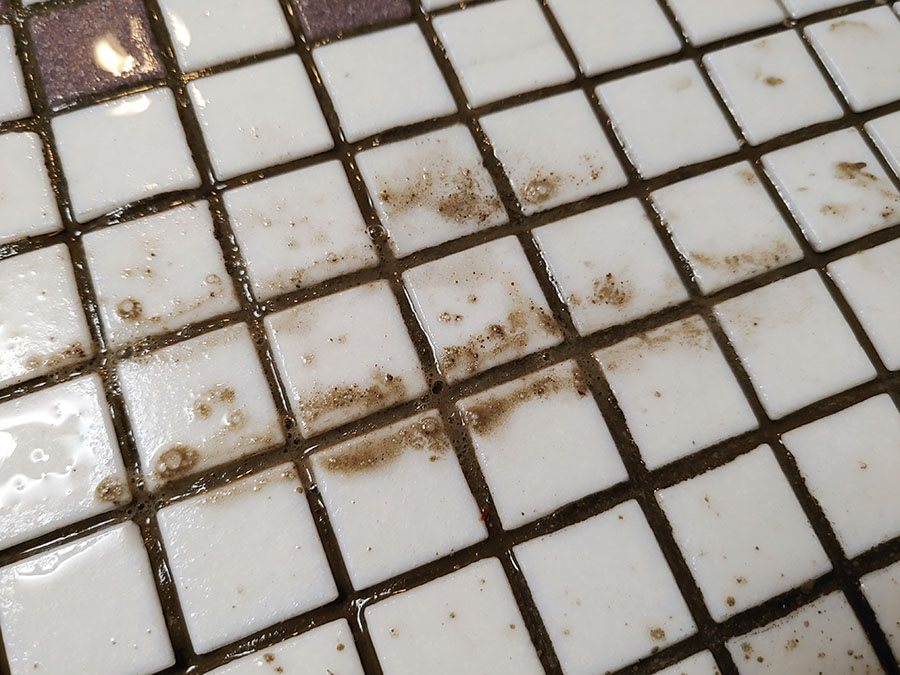
Normally thinset mortar is quickly removed from the grout gaps when it is soft using a plastic Thinset Removal Tool, but sometimes excess mortar will be spread and allowed to harden in the gap.
You cannot peel the Mounting Tape off the face of a mosaic when there is excess mortar in the grout gaps because the excess prevents the mortar underneath the tile from hardening until the mortar in the gaps hardens.
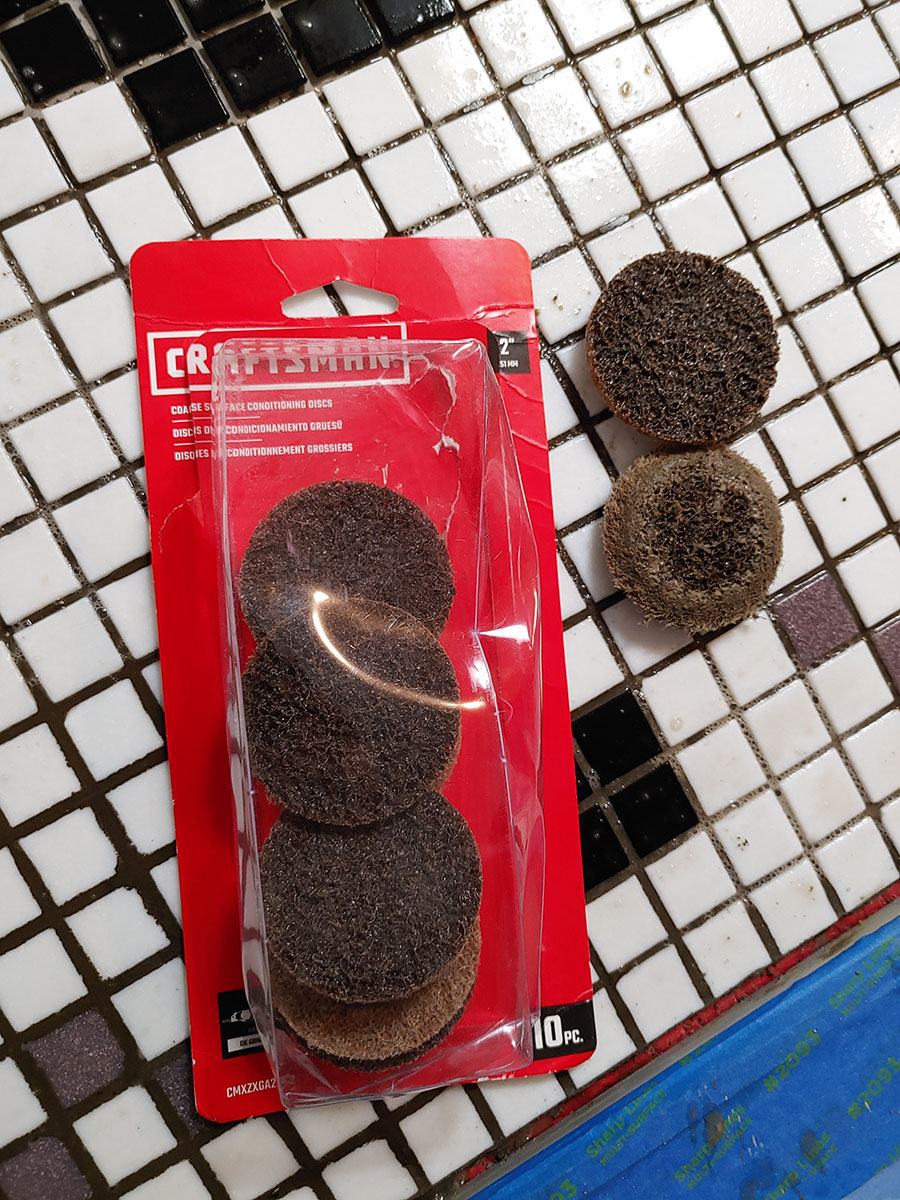
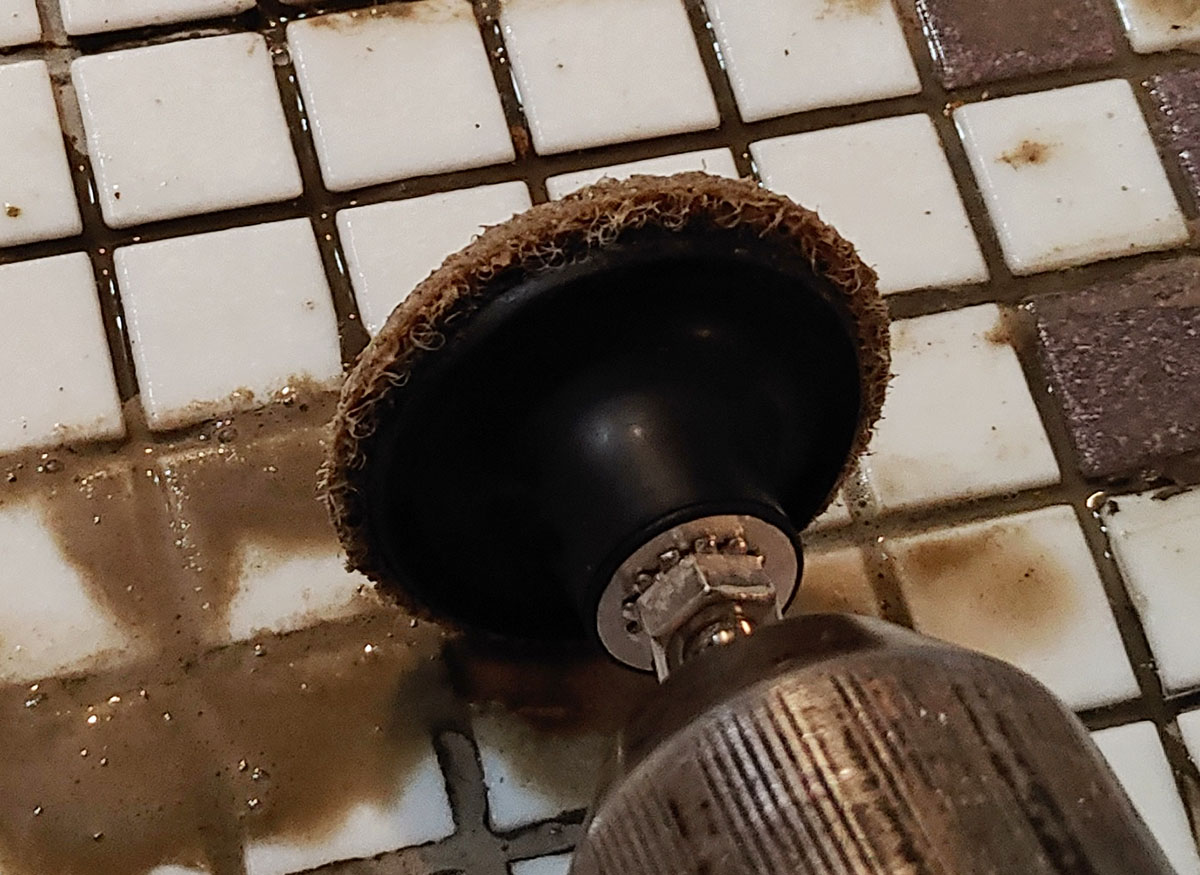
Natalija allowed the thinset to harden in the gaps and then used Craftsman brand 2-inch surface conditioning discs with her cordless rechargeable drill to remove it.
IMPORTANT NOTE:
The discs Natalija used are the “coarse” version. They left some micro-scratches on the black tiles that can be seen when viewed up-close from an angle if the lighting conditions cause glare. She suggests if anyone ever finds themselves grinding out mortar like this, to try the “medium” grit version instead.
The discs did not scratch the white or purple tiles. The black tiles she used have a smooth glossy appearance that was softer and was able to be scratched by the discs. Tiles from the same manufacturer can exhibit different characteristics depending on color or even batch, so always test work methods on a small inconspicuous area. In her case the micro-scratching wasn’t visible under most lighting conditions or when standing up, so it didn’t affect the overall quality of the finished mosaic.
The work was done wet to control dust via misting.
Last Resort
This method is a last resort or workaround.
Remember, if you use the correct trowel to spread the thinset mortar in the correct amount for small tile, then there shouldn’t be much mortar in the grout gaps. There should only be some in a few places and not much of it, unless you back-buttered the sheets.
Normally you peel the Mounting Tape or Mounting Paper off after the mortar has set for a while and remove any traces in the gaps before they are rock hard.
Leave a Reply