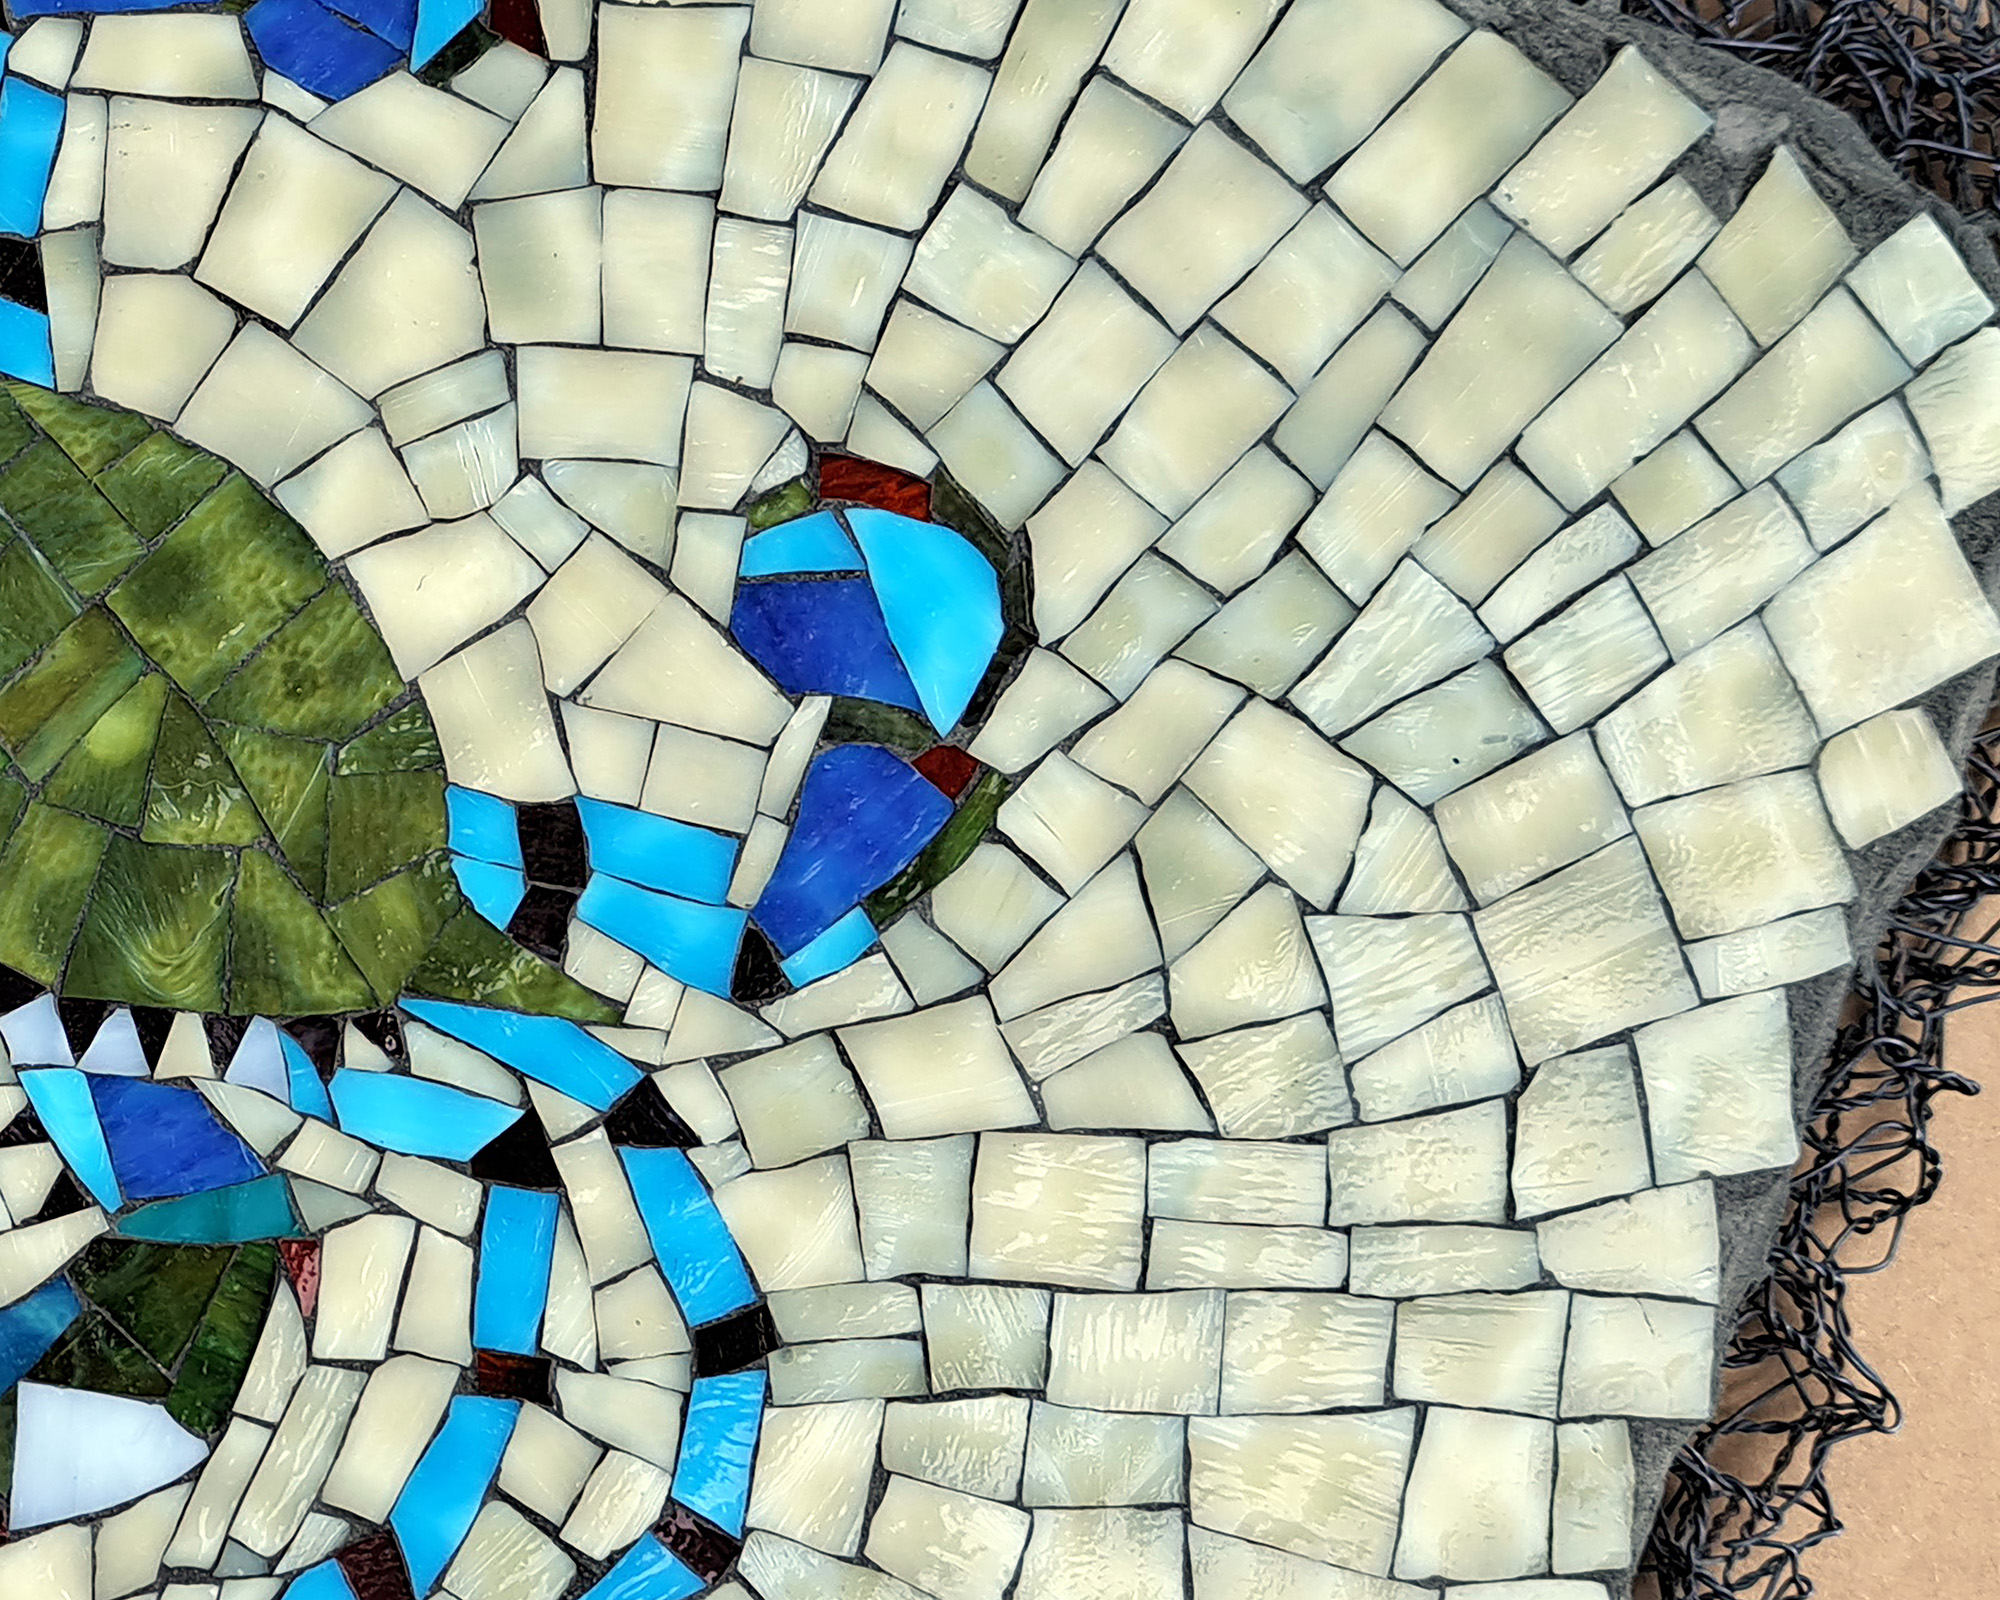
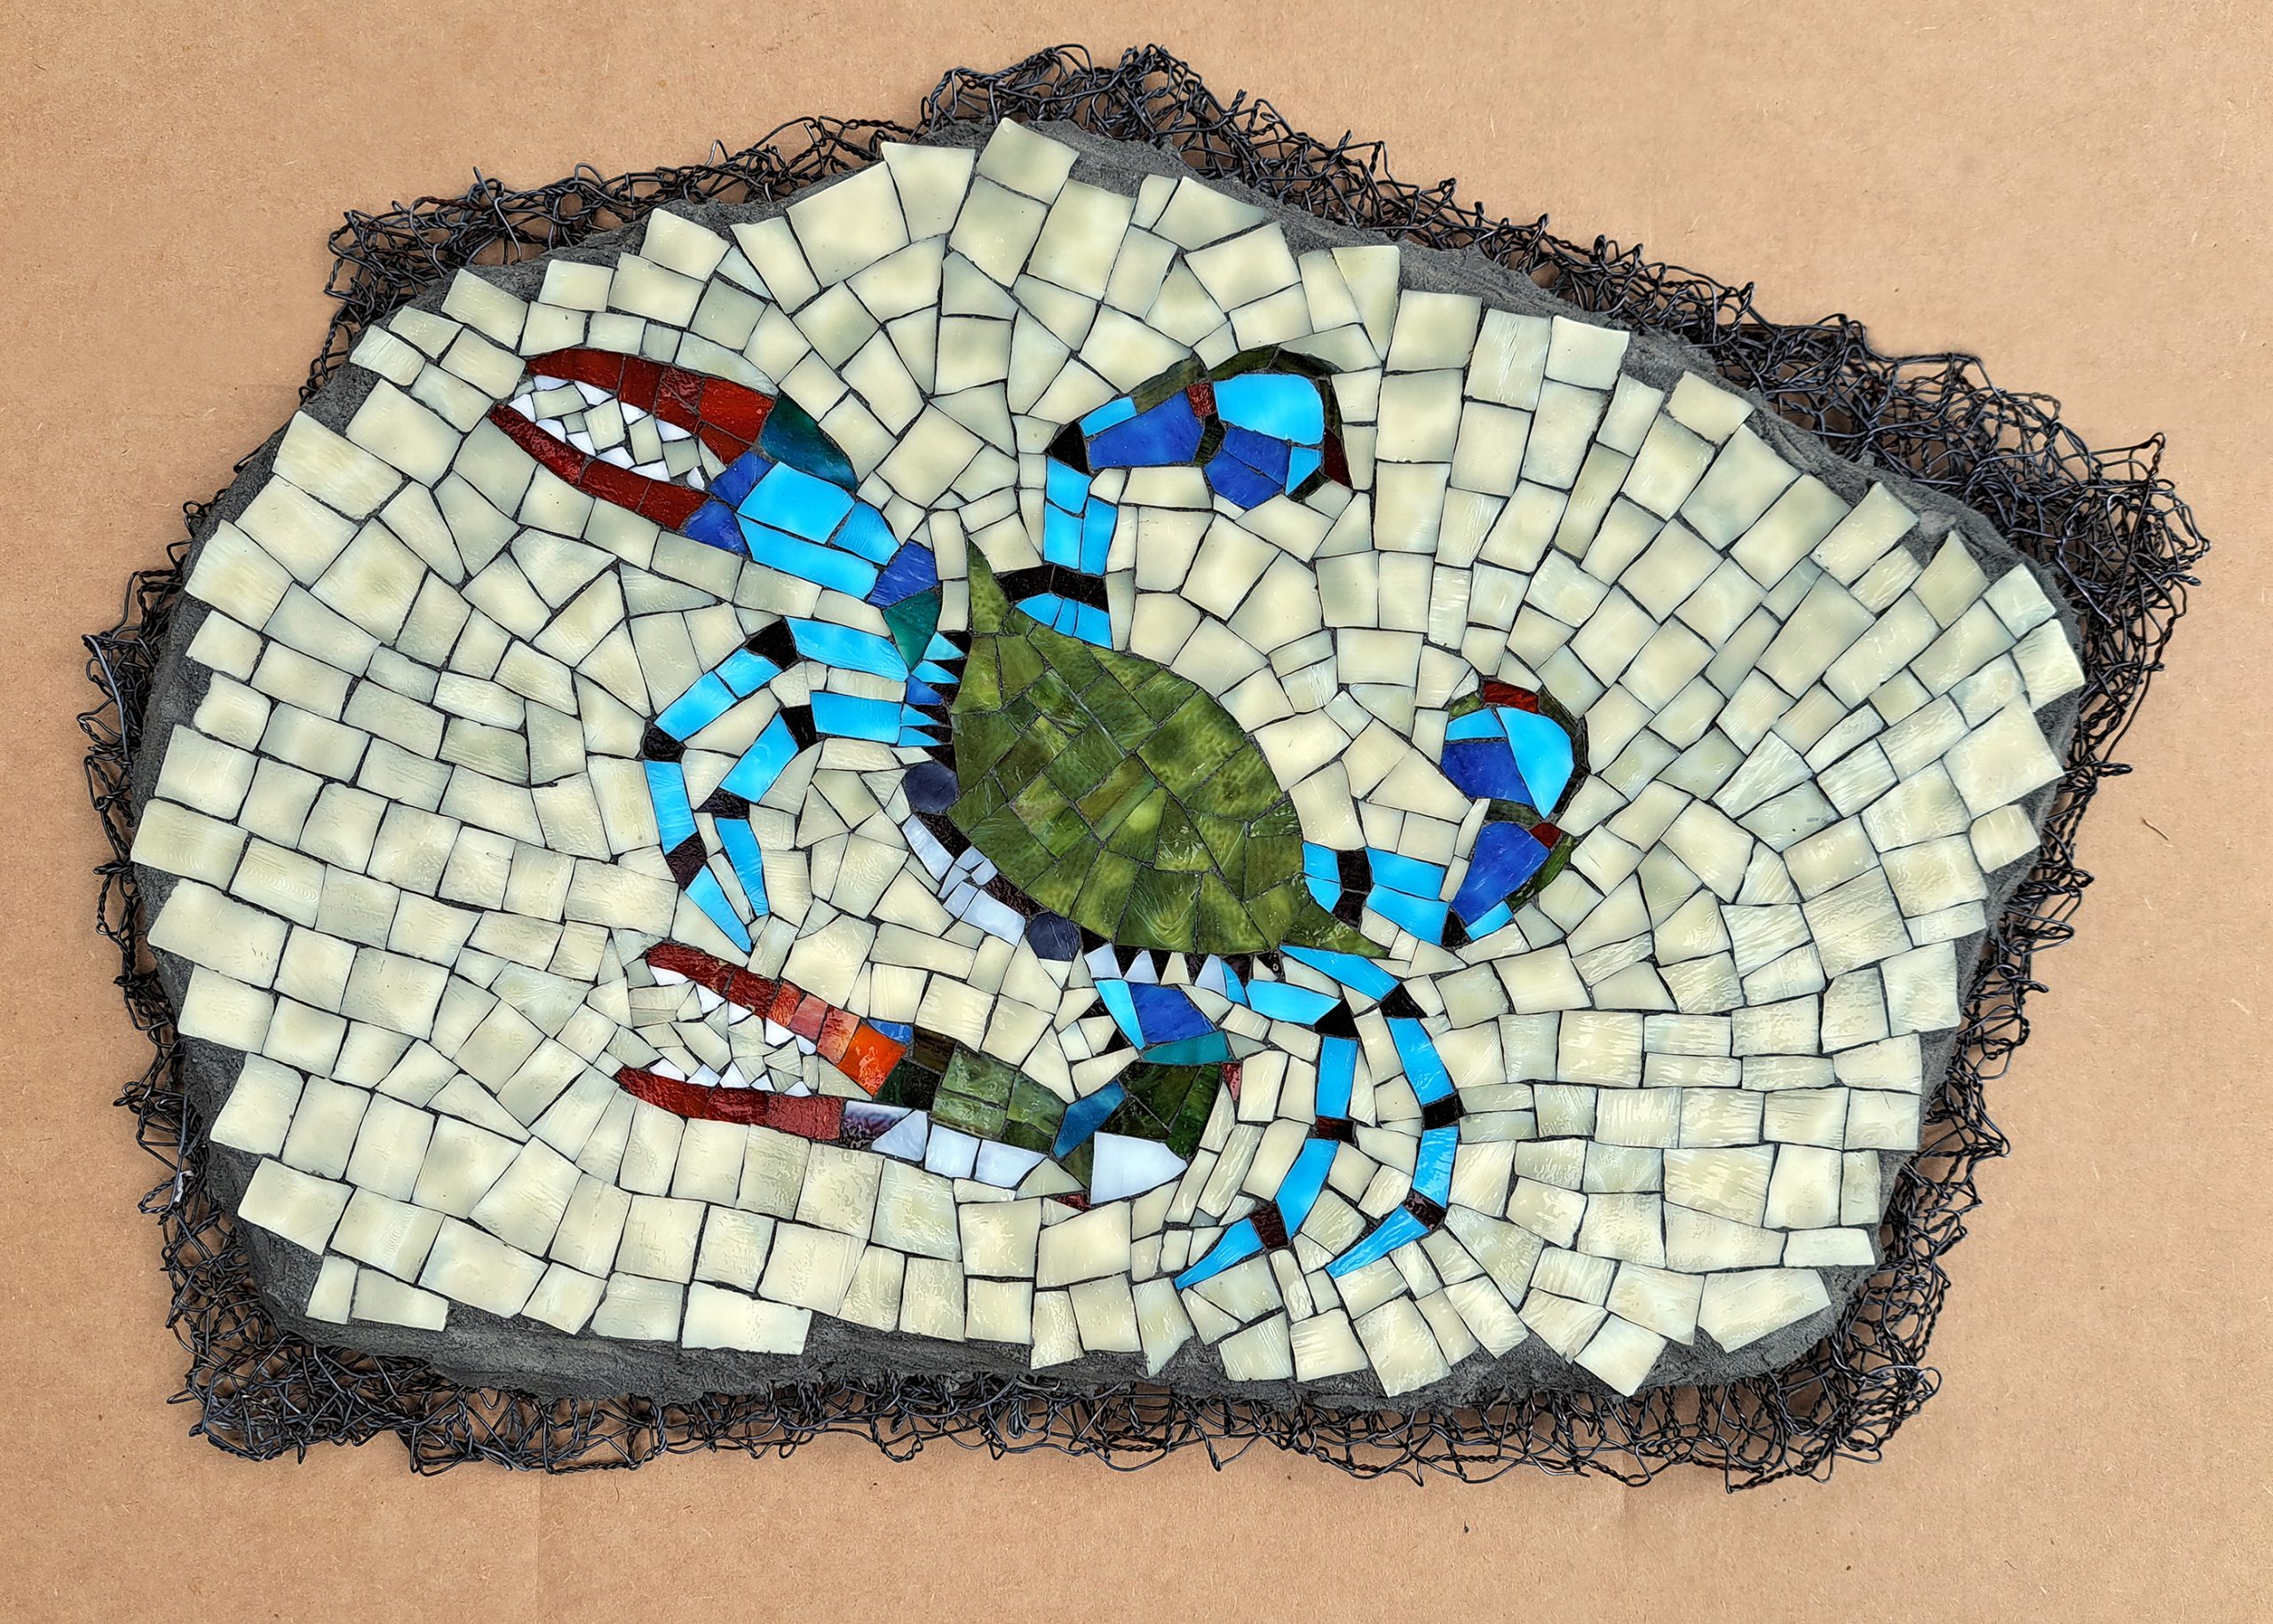
The Blue Crab mosaic I recently completed is a good example of how to create a grout gap by making use of imperfect cuts instead of spacing the tiles intentionally.
The “imperfect cut” method makes the process of creating a mosaic faster, easier, and less tedious -first in the cutting and placing of tiles but also in the grouting process.
Instead of cutting precise shapes with a stained glass scoring tool, cut your glass with a Mosaic Glass Cutter and embrace the slight imperfections in the cuts it makes.
That “error” will create the grout gap for you.
Method
Try to cut the shapes as precisely and smoothly as you can, but make peace with a certain small amount of error.
Fit these imperfect pieces together as best you can, try to make them touch.
You can make them touch, but only in places, certain points, usually at the corners.
In the Blue Crab mosaic, all of the tiles touch each other -but at certain points only.
Some of these points of contact aren’t even visible because they occur at the bottoms of the tiles and not the top surface.
The tiles physically can’t be pressed any closer together because of these points of contact. This leaves a tiny gap along most the length of the adjacent edges of two pieces of tile.
There aren’t any perfect edge-to-edge fits because there aren’t any perfect edges.
This method makes cutting and placing tiles much faster because you don’t have to put any extra thought into leaving a grout gap.
It’s quicker and easier to position a tile if you can press it against what is already laid.
Temporary Surfaces Save Time
Using the “extra step” of a temporary sticky surface to create a mosaic saves time because it makes test fitting each piece easier.
On the other hand, gluing down each piece individually as you cut them makes test fitting a piece messy and difficult.
Gluing one tile at a time also keeps you moving back and forth between gluing and cutting, which are different processes with different tools and rhythms.
With a temporary surface like sticky contact paper, you can get the entire design laid out before glue is even involved.
You can also spend a few days looking at the mosaic before you mount it in glue or cement.
That period of reflection allows you to make small revisions and create your best possible work. I highly recommend working this way.
More Help
You can also cut glass tile more easily and quickly if you use the methods explained in our illustrated Guide to Cutting Glass Mosaic Tile.
TIP: A tiny incidental grout gap minimizes the color impact of grouting. Also, the process of grouting is infinitely easier with a tiny grout gap.
Better Photo
Here is a higher-resolution image of the Blue Crab mosaic:
Leave a Reply