Artist Susan Watson created a stained glass and stone mosaic for her studio exterior wall and chose the background color and material using a process of trial and elimination.
Mixed-media mosaic artists often choose backgrounds by laying tile on the pattern or backer after the figures have been tiled, as I explained in my recent article How To Choose Mosaic Background Colors and Patterns.
A Process of Elimination
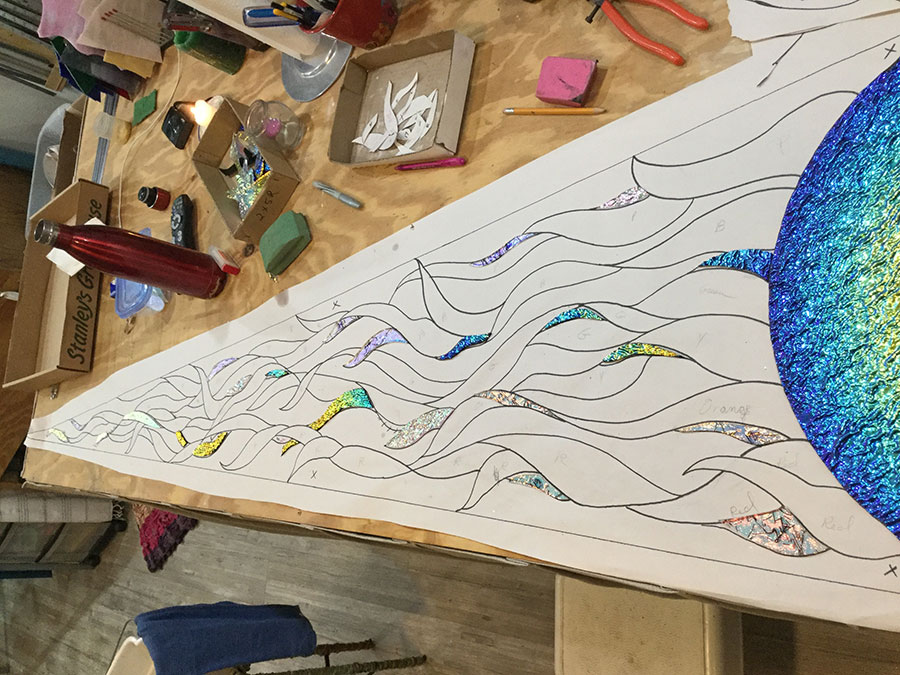
Consider different options for backgrounds in mixed-media mosaic art, and then rule them out one by one through a process of elimination. Lay things on the pattern or temporary surface and see how they look. Don’t be in rush to mount the mosaic just because you have filled up the pattern. Look at it with fresh eyes for a few days. Try different materials and arrangements.
Susan considered a grid of tiles for the background but ruled it out because it didn’t flow with the swirls of color that made up her design.
Susan considered several different light grays for the grout, but these would make the mosaic look washed out and less colorful.
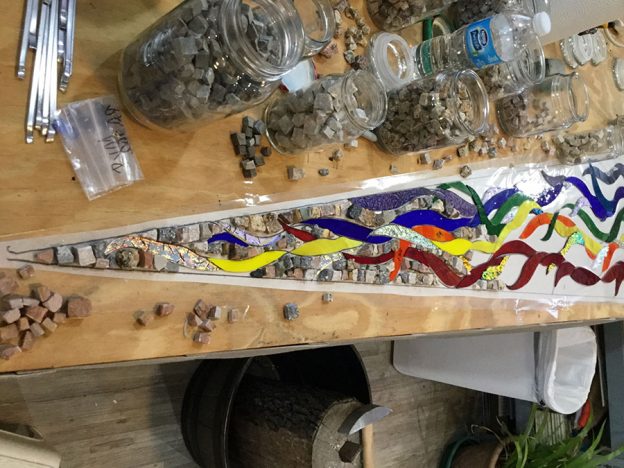
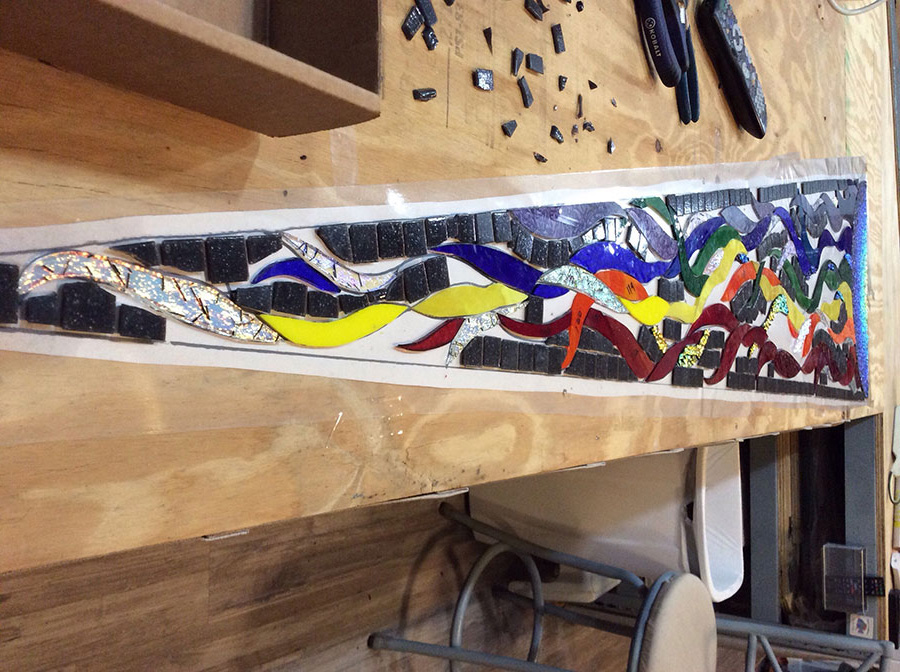
Susan considered black for the background, but once she laid it on the pattern, she could tell it was too dark. Also, it didn’t contrast in a texture like natural hand cut stone, which was her original idea.
Other Design Considerations
A black background also didn’t make the mosaic look right for where it would be installed. Since this mosaic was being custom built as an architectural element, harmony with the colors of the building was critical. It wouldn’t matter how well the mosaic looked by itself if it didn’t look right where it was installed.
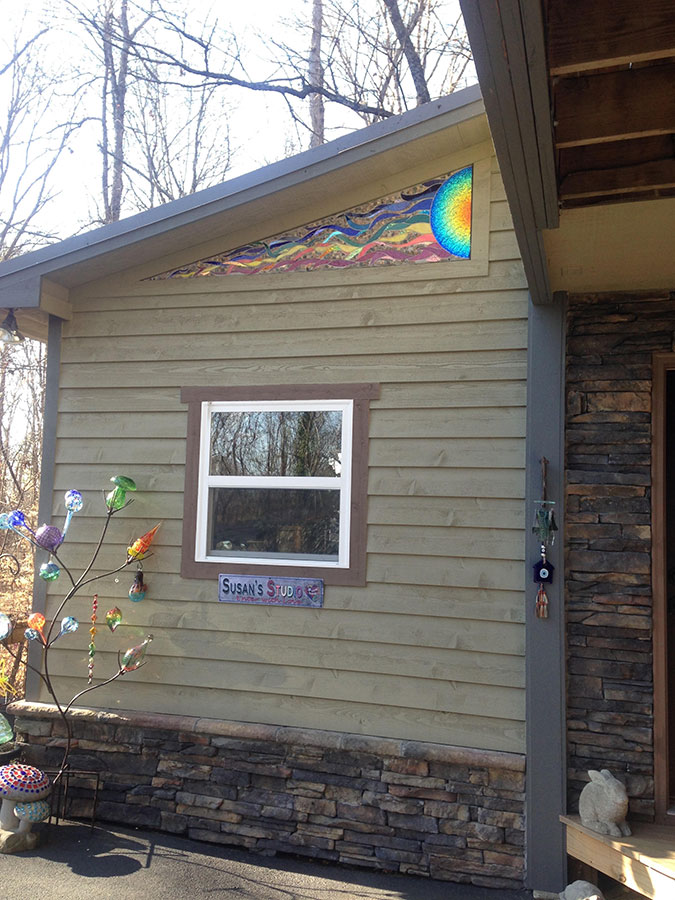
Susan chose hand-cut field stone for the background tiles because they were harmonious with the materials and colors of the exterior studio wall where the mosaic was to be installed. This was a good choice that integrated the mosaic visually with the house. I like how it turned out.
Materials and Methods
Susan used stained glass, which can be cut into curved shapes using a Pistol Grip Cutter.
Susan laid her tiles on a paper pattern with sticky contact paper on top to hold the tiles still as she worked. Then she picked up the design with Mosaic Mounting Tape. I explain how to use contact paper and Mounting Tape in my blog article Mounting A Mosaic On Clear Adhesive Film.
Like all exterior and wet mosaics, this mosaic was mounted using thinset mortar. In this case, the mosaic was pressed into the thinset mortar, and once the mortar hardened, the Mounting Tape was peeled off, and the mosaic was grouted and sealed.
Leave a Reply