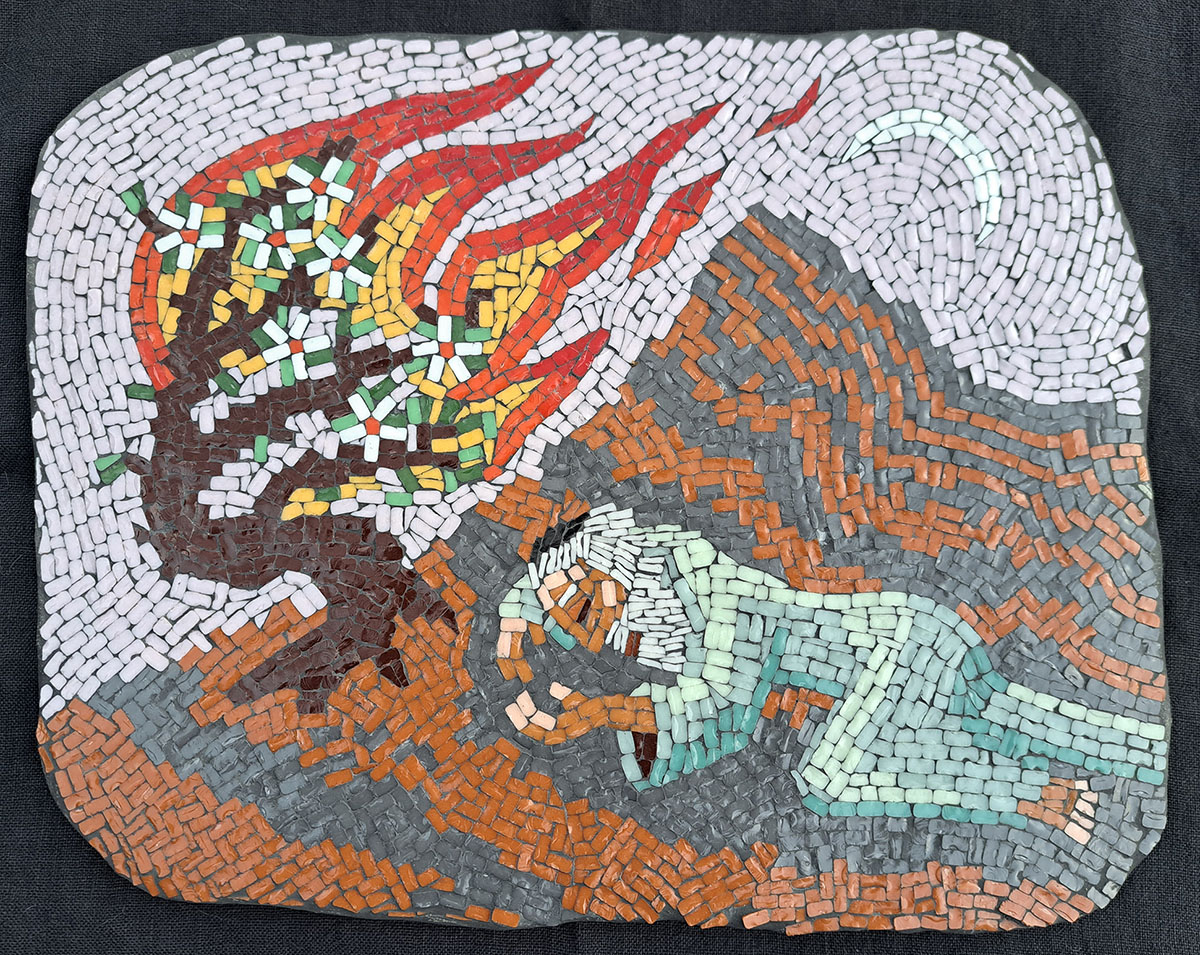
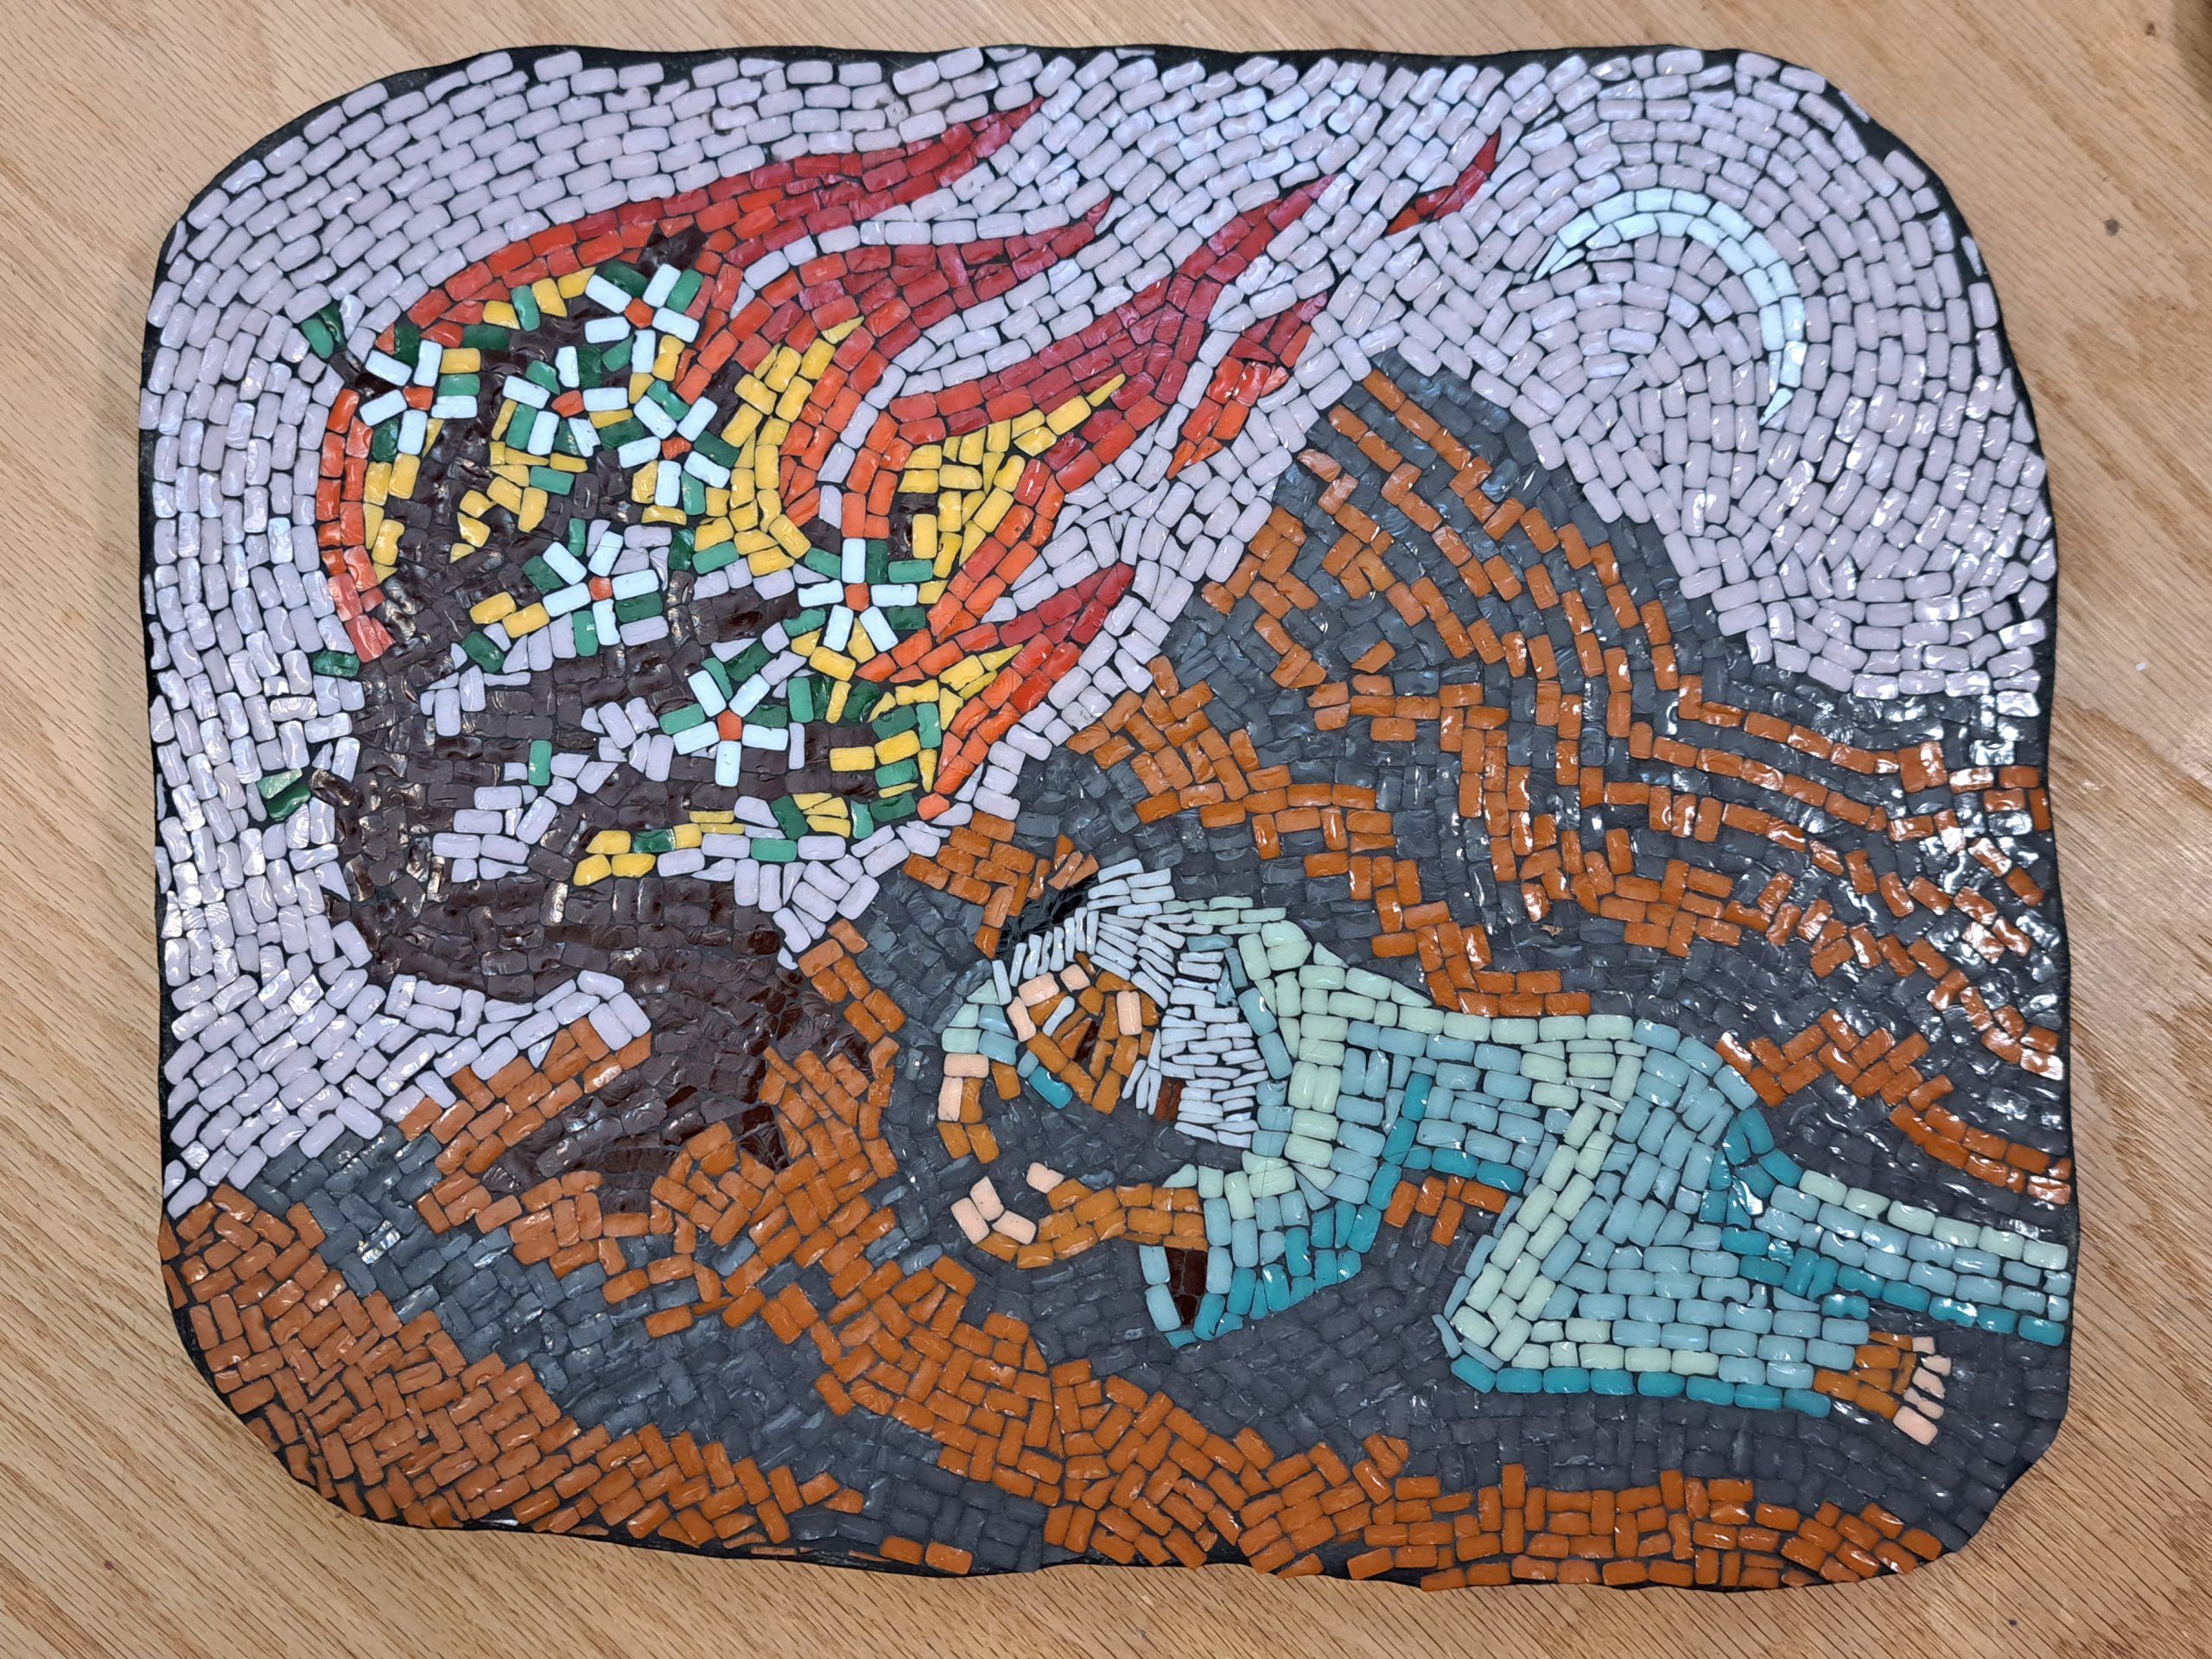
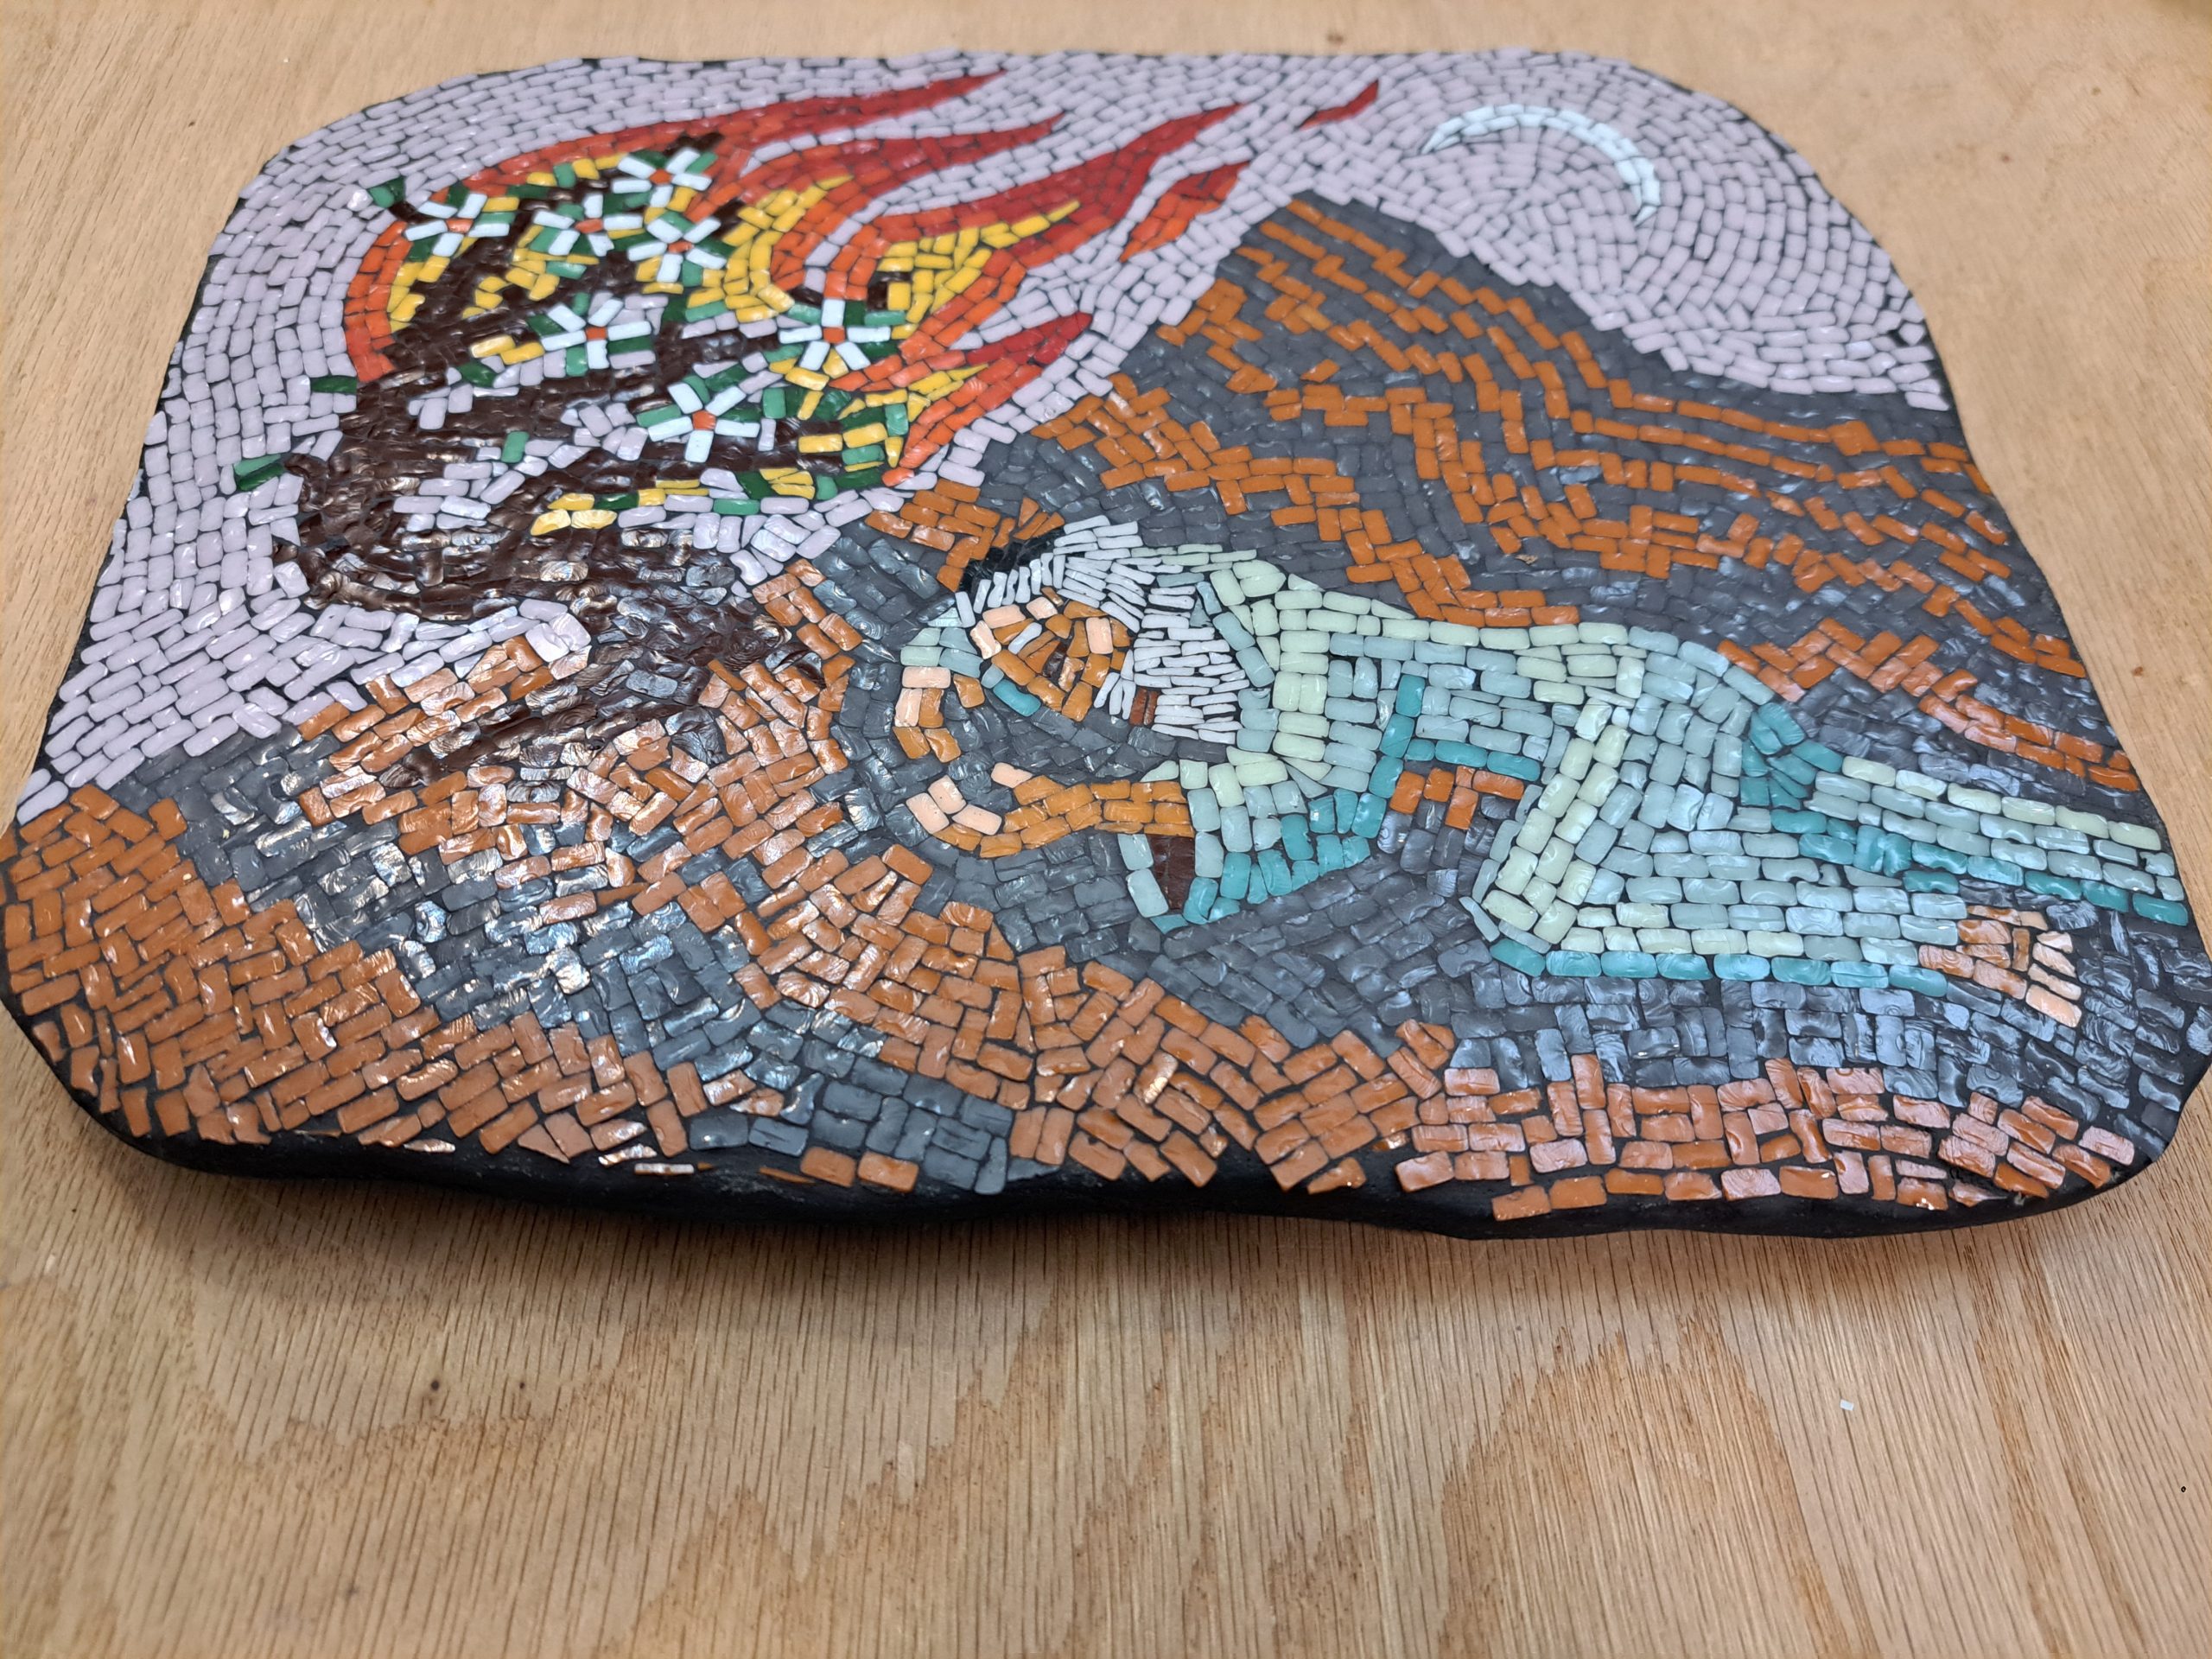
I have mounted my mosaic Moses Dreaming on Sinai on an irregularly-shaped backer and grouted the mosaic.
I have made videos of the mounting and grouting processes.
Mounting the Mosaic
This mosaic was mounted indoors so that I could more easily film the process, but normally mounting with thinset is a garage, patio, or shop process, some place where floors aren’t a concern.
Thinset mortar is sticky and messy, but it isn’t difficult to handle using a PAIR of spreading tools. Spreading tools are used in pairs so that one tool can be used to scrape off the other.
Wearing an N95 mask, I mixed the powdered thinset mortar outside in a disposable plastic container.
The container was the bottom of a plastic milk jug placed inside a carboard box to make it rigid enough to withstand stirring the thinset, which is thicker and heavier than concrete.
I used a Margin Trowel and a Paint Scraper, which is an effective combination for this size mosaic.
For smaller mosaics, I use a pair of palette knives of the type used in painting studios.
The video below doesn’t adequately show the several minutes I spent scraping the mortar back and forth to make certain that the mortar was making intimate contact with the backer, especially near the edges.
You’ve got to make sure the backer is effectively “wetted” with mortar, including any pits, pores, or micro cracks in the backer.
Normally I use a needle to probe the depth of the mortar all over the surface to get it to an ideal thickness of 1/8 to 3/16 inch.
The last spreading step is to scrape excess mortar off the edges.
Then the mortar-covered backer is lifted and lowered CAREFULLY unto the underside of the mosaic.
The position must be EXACT because the backer CANNOT be slid or adjusted after making contact with the mosaic.
LOWER THE BACKER SLOWLY AND EVENLY.
My video doesn’t show the next step:
Once the backer has been seated evenly onto the mosaic, flip the mosaic and inspect.
Gently press around the face of the mosaic, paying extra attention to the edges.
Make sure the tiles are IN the mortar not ON TOP OF it.
That being said, the goal is NOT to press all the thinset from beneath the tiles or so hard that thinset squeezes up through the cracks and over the face of the tile.
After 24 hours, the plastic Mounting Tape is removed, and the mosaic is cleaned up at the edges and grouted.
Thinset Mortar
I use Versabond brand thinset for mounting my glass mosaics, but the manufacturer of Versabond ( CBP Custom Building Products) recommends their specialty glass tile thinset.
The CBP glass tile thinset has increased bond strength, but it is white, and I don’t think it is as hard as the Versabond, which is made from ferrous blast furnace slag.
I try to make the mortar squeeze up between the tiles so that it almost reaches the surface of the mosaic.
I also run a steam humidifier when I work with thinset and grout to make sure they don’t dry out prematurely. This ensures that they cure as hard as possible.

Grouting the Mosaic
Two days after mounting the mosaic to the backer, I cleaned and brushed the mosaic thoroughly. This cleaning helped check for loose tiles.
If a tile is going to come loose, you want it to come loose BEFORE you grout the mosaic, which requires a lot of rubbing.
They few tiles that came loose during the cleaning and brushing sessions were reattached using Weldbond mosaic adhesive.
I used NON-sanded grout because my grout gaps were hairline thin and incidental with no effort to actually leave a gap.
The video doesn’t adequately show how much rubbing is required to pack the gaps with grout.
TIP: If you fail to rub the grout back and forth sufficiently, then some gaps won’t actually be filled with grout but only topped with a thin crust of grout that will crumble when the mosaic is cleaned.
Once the ENTIRE surface has been rubbed and packed with grout for several minutes, the mosaic can be wiped clean.
Use a damp sponge or rag remove the grout. Make sure the sponge or rag is wrung free of excess water with NO drips
I should be wearing the rubber grouting gloves in the video because grout is mildly caustic, and the rag must be rinsed clean periodically.
The powdered grout was mixed up with water outside to prevent spreading dust inside.
Normally I grout outside or in a shop/studio with a concrete floor because a lot of material is shed as you buff the mosaic clean. These “grout crumbs” will damage floors.
The goal of hazing is too remove all residue (haze) on the faces of the tiles.
I run a steam humidifier while the grout is hardening.
About 24 hours after grouting, I buff the mosaic with a dry cloth to remove the last of the haze.
After 48 hours, I wash and dry the mosaic.
This is the finished mosaic, grouted, cleaned, and ready to be sealed with a wipe-on/wipe-off silicone grout sealer (if desired).
Leave a Reply